Wednesday, 31 July 2019

Altered Dome

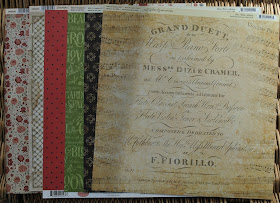
This is created using the stunning Prima spring farmhouse papers and a dome picked up from a local craft shop (which I'm sure will be stocked a papermaze)
The dome comes with a base that the plastic cover fits on to and a removable circular board that you can cover.
I decided to draw around the removable base from grey board cut out and adhered patterned paper so if i wanted i could change the papers and the creation inside if i so wished. 
The main structure is created using some Wendy Vecchi art parts in particular the cake stand, which has been in my stash for a long time
The circular pieces and the tube are covered in the patterned papers


The A playing card is from an old playing card set, the frame again some old stash, the metal plaque is from a Tim Holtz collection with the quote "possibility begins with imagination". Twine frayed adds detail, rolled up flowers, a small glass vile, and the sleeping hare is from a santoro gorjuss stamp set, coloured in with colouring pencils.


The top is a small Tim Holtz movers and shapers pocket watch die. Cut several times in grey board and covered again in the patterned paper. Prima watch face and some clock parts, rolled flowers die cut from the patterned paper. Drink me tag stamped from the same gorjuss stamp set. Small butterflies cut from the patterned paper and a grunge board key hole adhered to the side of the pocket watch


As you can see distress ink was used  and my photo was resized and turned to black and white to fit into the frame. And the hot glue gun came in handy to adhere some of the pieces together.
With the scope of changing it, it could make a great Christmas decoration but at the mment im please with my Alice in Wonderland inspired dome


Here is a side view.

Monday, 29 July 2019

Belle Fleur by Photoplay - Smile

Hello, Karen C here again with my final layout using the Belle Fleur collection from Photoplay.

My previous two layouts used lots of patterned papers. By contrast today's layout uses very little paper and was inspired by German scrapbooker Jana McCarthy. I love the white space in her layouts and, having very little paper left in my DT kit to create another layout, I thought I would take inspiration from Jana's layouts.

.
Because I wanted to add some inks and texture paste to my layout I started by coating my white cardstock with clear Gesso. Despite using the Gesso, my layout did still warp a little.


Some watered down Tim Holtz Distress Oxide in Worn Lipstick was smooshed and splattered onto the cardstock to add some colour and once this was dry I used a script stencil from my stash and some white texture paste to add some words on top of the ink patches.

I printed two 2" x 3" photos of my daughter and when the texture paste was dry I stuck the photos onto the layout with a pale pink doilie underneath.


Some  pink photo corners from my stash were put on two corners of the photos.


I fussy cut some roses from a scrap of the Hello Gorgeous patterned paper and tucked them either side of my photos. A Mini Plaquette with my daughters age on it was fixed to the corner of one of the photos with brads and I and poked two pink heart shaped pins behind.


I glued some white lace to the bottom of my photos and for my title I die cut the word 'Smile' from a scrap of pink cardstock. The title was put across the bottom of one of the photos.


I twirled some pink bakers twine across the layout and added some word strips printed on my computer.


Where I had added ink and texture paste to the edges of the layout I cut a section of the cardstock away, tore and roughed up the edges and added the remaining scraps of the Hello Gorgeous paper behind. Using white thread I also machine stitched round the edges of the cardstock.

To finish the layout I added some in different sizes hearts punched from a scrap of the Pretty Peonies (B side) paper, a scattering of pink Dew Drops and some splatters of gold ink.

I love how the layout turned out and the impact the tiny pieces of the Hello Gorgeous paper make.

I hope I've inspired you to create something using the the Belle Fleur collection which is available from Papermaze as well as many of the embelishments used in this layout.

Take Care
Karen x x

Friday, 26 July 2019

Simple Stories ~ Oh Happy Day #2

Happy Friday everyone, it's Anna back with you today for my second post using the 'oh happy day' collection from Simple Stories.
Take a look at the whole collection here.
For this layout, I've gone back to the 90's to scrapbook some childhood photos.


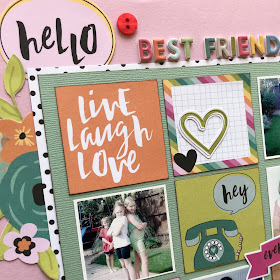
I used the 2x2 elements to create a grid and printed the photos as small squares.


I used some of the 'bits and pieces', along with some fussy cutting from the 'well said' patterned paper and some buttons to embellish some of the squares and around the grid.


Thanks for looking, have a great weekend.
Anna
X

Wednesday, 24 July 2019

Simple Stories - Heart - Mini Book


Hello, Lisa here with another mini book. I do love a mini book, you may have noticed : )

I'm using the Simple Stories collection Heart, which you can view/buy here.

I do also have a process video of this book being made which you can watch here.

I started by choosing which papers I wanted to use from this collecting and folding them over and cutting down to create my pages.
I also cut up the elements pages to add to the mini book pages.


I like to layer up the pages. I love how these papers work together.
I also used the 12x12 sticker sheet. These are so much fun to add to pages.


The thing with this book that was slightly challenging is that the 'Heart' collection is a sympathy/memory range. But I wanted to make it work for me. I loved it and I knew I could do this.
Some of the items were really easy but some needed tweaking.

  
Here for example, there's a small 'memory' card at the bottom of the photo on the right. It wasn't suitable for this project, so I tucked the first word under my photo, but I could still see a little of the word, so I placed a sticker over the rest of the word peeping through.

It was really fun facing these challenges and seeing how I could make this all work. I was determined to turn this in to a Disney collection : )


Something else I wanted to do was to break up the colours. I love all the blues and greens but I needed a contrast. I had some pink Crate Paper left from my previous mini book. I took a Micky punch and punched loads out to add throughout the book.


I think the pops of pink really make a big difference.


Never be afraid to leave some blank space on your page!


And I love printing off my journaling on to white A4 paper and cutting it down in to strips.


I'm so happy with how this book turned out.

I really hope you enjoy the video and I hope it inspires you to create a mini book too.

Have a lovely day.

Lisa x

Monday, 22 July 2019

July Papermaze Kit

Hello and welcome to the romantic July Papermaze kit. A very pretty collection of papers and embellishments which is currently available in the Papermaze Shop. I have been busy creating and here are the first two layouts I have made:


Here is what comes in the kit:


Patterned papers:
Stamperia - Spring Botanic collection - Poppy & Herbarium
Graphic 45 - Love Notes collection - Floral Symphony & Lovely Lyrics
Graphic 45 - Bloom collection - Plant Happiness
Carta Bella -Botanical Garden - Poppy Petals

Bazzill cardstock - Guacamole & Walnut Cream


reverse side of papers


Embellishments:
2 Graphic 45 Journalling cards, 2 Heidi Swapp Acetate words, strip of gems, 2 chalkboard label stickers, 12" washi tape, Tim Holts Quote Token, 18" Red jute twine, 12" ribbon, 3 red flowers, chipboard exclusive to Papermaze.


Extra Bazzill Pack - Maraschino, Coral Cream, Aloe Vera & Black Prismatic

Together Forever - A photo from my nephew's wedding last year. 


I gutted the
Maraschino Bazzill to make a frame of 4cm, setting aside the rest for later. 

I tore around the edges of the Floral Symphony paper so that it measured approx. 29cm x 29cm. I made some tears and folds in the paper.

My photo was mounted onto some of the spare
Maraschino cardstock and then arranged onto the layout using the two Graphic 45 journalling cards. I cut away some areas of the cards that would not show, and used the pieces to tuck behind the tears and folds in the paper. I also used the strips I trimmed from the paper for this purpose too (flipped to the other side).

With a Scrapinic chipboard shape and some black and gold embossing powder, I heat embossed the shape and tucked it between the layers - under the photo and on top of the journalling cards.

From my stash I took some deep cream lace, and laid this across the layout. Then I added a length of black organza ribbon and another of red seam binding ribbon. I tied a bow in each of the ribbons before securing them in place. I used some cream paper roses in various sizes to decorate the page. 


Finally I die cut a title using the remainder of the Maraschino Bazzill and the Sizzix Thinlits set - Handwritten Love.

Happiness - Still on the theme of weddings, this photo was from my daughter's wedding two years ago and shows Emily and Jack running through the orchard at their wedding venue - The Night Yard. It was inspired by the art work of Emma Williams.


This time I gutted the Guacamole Bazzill, to leave a frame of 2.5cm. Onto this I attached a piece of Graphic 45 Bloom paper, after cutting it to measure 28cm x 28cm. I distressed and inked the edges of this paper with Peeled Paint Distress Ink. I gutted the Bloom paper leaving a frame 4cm wide, and giving me some spare paper to cut words and images from later. 

I gutted the Aloe Vera Bazzill to leave a frame of 2.5cm and set this aside for my next layout. Then from the rest I trimmed a piece to 23cm x 23cm, again I distressed and inked the edges. I used a Tim Holtz Layering Stencil - Burlap, and mixed some Forest Moss Distress Oxide Ink together with Texture Paste to create a few areas of texture on the cardstock.

With a little Distress Oxide Spray - Peeled Paint I sprayed and flicked ink over the cardstock too. Once dry, I mounted this over the Bloom paper with a trimming of loosely woven Burlap around all four sides.

I used a large Kraft Distress Tag to tuck under the photo for my journalling. The edges of this were distressed and inked. With some strands pulled from the burlap, I tied the
Quote Token to the tag.

With some of the Guacamole Bazzill I die cut some lace using the Sizzix Thinlits set - Crochet. Then with some scrap watercolour paper, I die cut three daisies and some grasses using the Sizzix Thinlits set - Wildflower Stems #1. I used Distress Oxide inks to colour these flowers - Peeled Paint for the stems and Fossilized Amber and Mustard Seed for the flower centres. Then I added some detail with a Distress Marker in Brushed Corduroy. I flicked water over the flowers and stems and left them to dry. With Spun Sugar Distress Ink, I tinted the petal ends. The bunch was tried together with more threads from the burlap and mounted to the right of the photo.


From the remains of the Bloom paper. I cut the title words some butterflies and a postage stamp. I inked them all with Peeled Paint Distress Ink and added them to the page.

Finally I added some flat-backed pearls in different sizes, randomly over the page.


That's all for today, I will be back with more from this kit in two weeks.
Thanks for looking
Lynn x

Friday, 19 July 2019

July cropping...

We are back cropping again at Otley Village Hall tomorrow, and our beautiful kit has been designed by Janina.  It uses pretty Stamperia papers... 


There will be the usual delicious array of homebaked cakes, tea & coffee on tap, punches & dies to use and a discount in the shop!  Drop us an email if you'd like to come and join us :)

Wednesday, 17 July 2019

Bella Blvd 'Splash Zone' Layout - Splish Splash

Hello, Rebecca here with you today with another layout using the 'Splash Zone' Collection from Bella Blvd.


I've had these photos in my pile waiting to scrap since last summer, so I'm thrilled to finally have the perfect papers to use them!

I knew I wanted to use the 'Swim like a Fish' paper because the colour matched perfectly to the trim on my little boy's outfit. I started by gutting the sheet, leaving a border of about 1 inch all around. I trimmed down a sheet of white cardstock and stuck it to the border.

I used my trusty Distress Inks to create my background. I picked 'Mustard Seed' and 'Barn Door' as again, they matched my little boy's clothes. I used the packaging technique to get some large red and yellow inked areas, and then added some splatters around the edge.

I wanted to create some layers behind my photos to help them pop and to add dimension, but I wanted to make sure the 'Swim like a Fish' patterned paper really ran throughout my layout and wasn't just used as the border. I matted the photos on white cardstock first, then added them to a layer of the 'Swim like a Fish' paper. I then added two further layers of yellow and red cardstock. I popped these layers up on foam sheets but decided I still wanted more of the turquoise paper. I cut a small rectangle in half and snipped the edges and placed one either side to make it look like a banner running behind my layers.


I knew I didn't want to embellish this layout too heavily as I wanted the patterned paper to really stand out. I cut a section out of the Daily Details cut-apart sheet which looked like a record card with a space for the date and tucked this behind my layers (and apparently forgot to add the date before taking my photos!!). I also placed a Doily by Doodlebug behind this and another at the bottom to add some different textures to the page. I then added a few pieces from the Ephemera Pack - The flamingo, the sun, the leaf and the orange tab at the top.


I finished the page by adding a chipboard piece by Dusty Attic which says 'Great Day', a white clip by Freckled Fawn and finally my title 'Splish Splash' which is from a Doodlebug Design Ephemera/Die Cut Pack.


I hope you've enjoyed this layout. I'm finding this collection great for summer photos and can't wait to create more!

Take Care,

Rebecca
x


Monday, 15 July 2019

Friends Make The Good Times Better ... Kaisercraft Morning Dew

Hello again, it's Anita here with you today.

This month I am working with the gorgeous Morning Dew Collection from Kaisercraft, full of calm and relaxing colours, natural elements and general good feeling.

We recently spent a few lovely days away with some very dear friends of ours and had some great days out walking and exploring local beauty spots and just enjoying each others company. One of the sheets in the collection, Refresh , has some really lovely quote panels on it about friendship....so I knew it would be perfect to use to scrap a memory of our time away together.

I based the layout on a sheet of Rejuvenate that I cut down to 11" x 11" and then placed it onto the reverse side of a sheet of Serene this created a lovely polka dot frame around the edge.


Using some bubble wrap I sponged on some white acrylic paint and stamped it onto the background and I also used some 49 and Market Gabi's Line Stitch stamps with paint around the edges.
When the paint had dried I picked at the entire edge of the inner layer to distress the edges and create some texture.


 I gently sponged white paint onto the edges of my photo and then matted it on a piece of Exhale before fussy cutting some clusters of flowers from a sheet of Serene 


Using Stickles in Unicorn I added a few highlights to the flower centres for a little sparkle and also onto the wings of a couple of butterflies that I cut from the sheet of Refresh
I added some tiny word stickers from Pretty Little Studio


 I also cut some quotes and panels from the Refresh sheet and sponged the edges gently with paint before adding them to the page.
In my stash I found some metallic craft sand in colours that complimented the papers, so added this in a few areas for some more texture on the page.


Some crystal swirls were added beneath the butterflies to leave pretty, sparkly trails and to just finish the page off.


 I have really enjoyed creating this page , not only was it in my favourite colourway, but it also has such lovely sayings, patterns and elements in it. You can find the entire range here .


Thank you for looking today x

Warmest wishes
Anita xx

Friday, 12 July 2019

Belle Fleur by Photoplay - Happiness is ....

Hello, Karen C here again. Today I have another layout using the beautiful  Belle Fleur collection from Photoplay. The photo I used on my layout is far from perfect but it makes me smile. 😊


I started with a sheet of white Bazzill cardstock and onto this I stuck horizontal strips of the Belle Fleur patterned papers measuring roughly 2" wide. Using black thread I machine stitched along the bottom edges of the paper strips and using my finger nails I lifted up the edges to give them some dimension.


Using three different paper punches I punched strips of white cardstock which I tucked under the edges of the papers and some washi tape was also added.


I used a very old pre-made string tied pocket as a template to make a pocket from white cardstock - templates for tied pockets can also be found on the internet. I tied the pocket with some black bakers twine and then attached this and my 4x6 photo to the middle of the layout.


I made a rosette from a piece of the You're Just my Type (B side) paper and attached this to my layout. A 'Choose Happy' sticker was attached to the middle and a very old brad from my stash was placed next to it.

I also made a couple of flags using scraps of paper and cocktail sticks and poked these behind the rosette.


I die cut my title from some black Bazzill cardstock and glued this on top of the paper strips.


The layout was completed with journalling strips printed on the computer, a scattering of sequins and a doodled pen border round the outside edge of the layout.

Thank you for looking at my layout and I'll be again soon with another layout. In the meantime you can find Belle Fleur and many other new collection in the Papermaze shop.

Take Care
Karen x x