Monday, 28 December 2020

Dear Santa - Simple Stories - Jingle All The Way Collection

Hello everyone, Rebecca with you today. I hope you all had a lovely Christmas! It was a very different one for us, spending it as just the three of us, but I'm grateful that we were safe and healthy. It just means that it will be extra special next year when (hopefully!) we can spend it with family again.

I'm stopping by today to share my third layout using Simple Stories 'Jingle All The Way'. I've chosen to document my little boy posting his letter to Santa on this layout. He's at an age now where he understands more, and so we can do more and this was the first year he'd written a letter to Santa! 


There was so much I wanted to try and get onto this layout, so I had to get a bit creative and add a couple of interactive elements - a first for me!

I used my Silhouette to cut two envelopes from the 'Happy Ho Ho Ho' and 'My Christmas Wish' patterned papers. I then hand-stitched around the edges of the envelopes using a gold metallic thread by WRMK, before constructing them. 

The next element I was desperate to get onto my layout was a postbox cutfile from Peartree Cutfiles. I backed it with red and black Bazzill Basics cardtocks, used white cardstock for the snow, and added white glitter to it for a bit of shimmer. I finished my postbox with a bit of doodling on the front, and I love how it turned out.


Once I'd decided where I wanted my envelopes and postbox to sit on my background, I worked on my interactive elements. There is a section on the '3x4 Elements' patterned paper which resembles a letter to Santa, so it was perfect for this layout. I strategically folded my son's letter to Santa so that it was slightly smaller than the cut-apart element, and stuck it to the back in such a way that it was still possible to fully open it up to read it. (I kept his original letter for this layout and he posted a photocopy to Santa...Sssshhhhh!) I then folded over a tab from the Journal Bits & Pieces pack to create a 'handle' to pull the letter in and out of the envelope. 


I've used my other envelope to hold several photos of my son posting his letter to Santa. I had four photos I really loved and wanted to get onto this layout so I decided to make a little fold out mini-book style element to hold them. I cut a strip of white cardstock and scored it in several places so that it could be folded up to be slightly bigger than 3x4 inches. I made sure that it had 3 sections so that it could hold 6 elements in total. I've used my 4 photos, and also 2 of the 3x4 cut-apart elements, all mounted on either cardstock or patterned papers from the collection. 


Once the interactive elements were complete, and slotted into the envelopes, I added my title. I've used the word 'Santa' from the Foam Stickers and selected the letters to spell out 'Dear' from thickers in my stash. 


Once my title was in place, I moved on to embellishing my layout. I've used several stickers from the Combo Cardstock Stickers and some die-cuts from the Bits & Pieces pack to create some clusters either side of my envelopes, with some gold thread tangles worked in to add some texture.


I also managed to work in one of the '2x2 Elements' which had been on my list of things to include on this layout! I had an empty space at the top of my layout, in between the two envelopes that didn't look right so I fussy cut some presents from the '3x4 Elements' patterned paper, and slotted them in the gap with a round cardstock die-cut from the Journal Bits & Pieces in front.

As is quite usual for my 'style', I decided my layout needed framing - so I created a border using a Simple Stories patterned paper from a previous collection. 

I then finished my layout with a couple of Puffy Stickers underneath my title.


If you'd like to watch how the layout came together, and see the interactive elements in use, there is a process video on my Youtube channel which you can find here

Thanks very much for reading, I hope you've enjoyed this layout. I've thoroughly enjoyed working with Jingle All The Way - it is quite possibly my favourite ever Christmas collection! There have been some re-stocks in the shop recently so please head over and have a look.

I'm working with Carta Bella - Winter Market Collection next so I'll be back in the new year to share my creations.

Until then, stay safe and have a great New Year!

Rebecca x


Wednesday, 23 December 2020

Cocoa Vanilla Studio ~ Merry and Bright #2

Hello and Merry Christmas to all! It’s Anna back with my final post of the year. It’s certainly been a challenging year, but I hope like me, you have found fun and enjoyment in the crafty world. 

Today I’m sharing a scrapbook layout using Cocoa Vanilla Studio’s beautiful Merry and Bright collection, I just love it! You can find the collection in the shop - here

I used the Seasons Greetings patterned paper as my base and began by getting my cameo to work to cut out the light strand cut file by Paige Evans. I backed each lightbulb with a piece of patterned paper from the collection as well as adding in some glitter cardstock to add a bit of sparkle. 

I backed my photos with leftover scraps from the collection as well as some glitter cardstock. 

I cut out some elements from the Oh What Fun cut apart patterned paper, including the Christmas tree, which I then added some nuvo drops  to add some extra sparkle! I also cut out the bauble and some jounalling tabs.

I also used one of the elements as part of my title - I then used some thickers to finish it off. I also added some of the stickers and mini word phrases from the Accessory Stickers.

Thank you so much for looking and I hope despite the circumstances that you have a wonderful Christmas with your families.

See you in 2021! 

Anna

X

Monday, 21 December 2020

Echo Park - Winter Magic - Snow Day

Hi everyone,

Claire here with you today and I'm back with the beautiful Winter Magic collection by Echo Park.

The collection captures the spirit of winter perfectly with lots of beautiful blue and aqua tones. Todays page features another photo from my Iceland trip from a few years back.  It really is one of the most scenic and magical places I have ever visited - so different to my usual holiday destinations.


I was excited to use the 4x4 Journaling paper. The B side of this paper is absolutely stunning!  It's almost as if the paper is glistening!

I decided to tear the paper and layer it against a strip of the Magic Snowflake paper. Both of these were placed on a sheet of blue Jetstream Bazzill cardstock. I just love these pale blue shades - match made in heaven for cold, snowy photographs.

To add a little extra texture, I was super brave, and stitched a fancy pattern down the edge of the paper. I also created a small cluster using a banner and circular snowflake from the ephemera pack. I added a small wood veneer star, thread and cut a silver banner from glitter cardstock I had to hand.


Because the paper is so striking, I really didn't want to cover very much of it up so I decided to opt for a minimalistic design. I layered my photo onto a piece of Rain Bazzill cardstock, and added a layer of tissue paper and glittered silver card from my stash.


Behind the photo I made a small cluster, using a tag, banner and small frame from the ephemera pack and a snowflake from the sticker sheet.

I positioned the photo onto a strip of B side of the 3x4 Journaling Cards paper, which was raised on foam pads for extra definition.


I also added some Cosmic Shimmer Sparkle Paste to the top left and bottom right behind the photo using a snowflake stencil.

To the left of the paper strip I created another cluster, using embellishments from the Sticker sheet and some thread.


I used the Snow sticker to form my title, and used some Pinkfresh Studio So Cool Puffy Alpha Stickers to spell out 'Day'.

As a final touch, I scattered some wood veneer stars across the torn papers and around the photo and it was finished!

I hope you've enjoyed this layout and are all geared up ready for the festivities in just a few days time! 

In the meantime, stay safe and warm and have a very Happy Christmas!

Claire
xxx

Friday, 18 December 2020

Pinkfresh Studio Oh What Fun - Christmas Traditions

Hello again! Karen C here with another scrapbook layout using the very festive 'Oh What Fun' collection from Pinkfresh Studio. I'm really enjoying using this collection and scrapbooking memories of Christmas past is really getting me in the Christmas mood. 

I started with a 12 x 12 sheet of red Lava Bazzill Cardstock and on this I layered a sheet of of the Good Tidings patterned paper (B Side) which I had trimmed about ¼" off of each edge and using my sewing machine I stitched round the edges with white thread.

In the centre of the layout I placed my three 4x6 photos which I had double matted as a block with the red cardstock and some gold mirror card. The photos were placed at an angle with foam underneath to add some dimension. 


Using my Silhouette I die cut my title from some more of the gold mirror card and backed this with smooth white cardstock.


I used some images from the Snow Globes patterned paper to back the letters D & O of the title and  glued it to the layout, slightly overlapping the bottom edges of the photos, with foam underneath so it was the same height as the photos.


I made tags from the Good Tidings patterned paper and mirror card, threaded these with bakers twine and tucked these behind the photos. I always add a little wet glue behind the loose ends of the bakers twine to keep them in place.


I embellished with some of the puffy stickers and chipboard stickers from the collection and various wood veneer stars from my stash.


I finished the layout by typing my journalling and date onto white cardstock, outlined the words in black gel pen and added them to the bottom of the layout.

Thank you for visiting today. I think this will be my last post before Christmas so I wish you all a very Merry Christmas and a Happy & Healthy New Year and I hope you get some time over the holidays to be creative.

Take Care,
Karen x x


Wednesday, 16 December 2020

A Jar full of Winter Magic......Stamperia

 Hello Everyone


Anita here with you today and I have something a little different to share in my post. I have used some beautifully magical and wintery papers from the Winter Tales Collection by Stamperia. It has a very delicate blue palette and you can almost feel the chill when you look at the beautiful designs on these double sided papers.


I recycled a couple of jam jars for this project, much better than just throwing them out in the bottle bank!


The sheet of Winter Tales Cards has some gorgeous panels on it, so I decided on my favourite 2 and cut them out. By pasting them with PVA  to the back of the jars, face side down, it then enabled the image to be seen from the front of the jar ( this is known as reverse decoupage).  
 Once the glue was dry I also then brushed across the back of the image with  PVA to seal it in.


I left an open *window* on the front of the jar and covered the rest of the jar using some fine mulberry paper, also known as rice paper. This gives a nice softness to the glass and a softer glow when lit from inside.

I cut a couple of complimenting tags from the Winter Tales Frames sheet,  which I then decorated with Liquid Pearls and Stickles before adding ribbon and silver snowflake charms to.


The gorgeous sheet of  Winter Tales Poinsettia 

is covered with lots of gorgeous blooms, so I cut several out and layered them up, curling the petals to give some dimension. I added some sparkle with some Stickles and Liquid Pearls and then popped the blooms at the top and the bottom of the jars

#


Dots of Liquid Pearls and beautiful Stickles were placed all round the edge of the window and created a delicate, pretty frame.


Pale blue organza ribbon was wrapped around the top of the jars and double bows were tied, I also added a silver jingle bell to one jar.


I popped some foam, glittery snowballs in the bottom of the jars and then added a glittery LED sparkly night light into each jar....and voila!!  All done.... and they really do look rather pretty when they are lit up!


I hope you have enjoyed my post even though it wasn't a scrapping one.
Don't forget to pop over to the SHOP and see all the amazing products on offer and New Products being uploaded all the time.

Merry Christmas and Happy Creating to you all!
Warmest Wishes
Anita xx

Monday, 14 December 2020

Oh What Fun - Simple Stories - Jingle All The Way Collection

Hello, Rebecca back with you today with another festive layout using the 'Jingle All The Way' collection by Simple Stories. I'm really enjoying the build-up to Christmas this year - and we've certainly started our festivities a lot earlier than in previous years so I'm making the most of it and documenting the fun we've been getting up to!


This layout documents my little boy receiving his very own felt Christmas Tree from his Nanny. He opened it straight up and stuck all the decorations on and was so proud of it. 

I started with a selection of the patterned papers - I've used the 3x4 Elements (B Side), both sides of  Happy Ho Ho Ho, both sides of My Christmas WishSanta Squad (B Side), and Tree Trimming and cut them into 1 inch squares. I distressed all the edges and arranged them into the shape of a Christmas tree onto a sheet of Premium White Cardstock. I put a tiny dot of glue on the back of each square to hold them in position, and then added a line of stitching through each row using a metallic gold thread. I attempted to do this on my sewing machine, but it really didn't like the thread so I had to resort to stitching by hand! It took a while but I really think it was worth it as I love the finished look. I've given my tree a stump using some brown textured bazzill cardstock to ground it on the page and make it look less like my tree was floating.


I've only used one 3x4 inch photo on this layout, and I positioned it to the right of the christmas tree. I matted it onto white cardstock, with a layer of red Bazzill cardstock behind it. I then added another layer of the Santa Squad (B side) patterned paper underneath and distressed all the edges. 


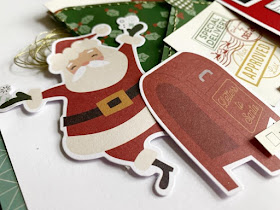
One of the 3x4 element cards had caught my eye when I was flicking through the papers prior to starting this layout - it had the words 'Oh What Fun' written on it and I knew that would make a great title for this layout. I fussy cut the words out, leaving a thin border all the way around each word to help it pop of the page against the busy patterns of my squares. I also fussy cut a Christmas tree from the 'Tags' patterned paper, and a banner which said 'FaLaLa' from the Journal Bits & Pieces pack. 


I built up the area around my photo by adding a large Santa and a banner from the Bits & Pieces ephemera pack, and a journal piece which also reads 'oh what fun'. From the Cardstock Combo Stickers I added a candy cane, a couple of word stickers and a small sticker which says 'holiday cheer', 


I added in a couple of gold thread tangles and two Puffy Stickers as they matched the christmas tree decorations in the photo really well!

I used the 'My Christmas Wish' patterned paper to add a border to my page to frame the layout, and I also added a line of hand-stitching around the edge to add just a little bit more gold! 


I finished my layout by adding a gold glitter acrylic star to the top of my tree (from my stash) and some gold Heidi Swapp color shine.


This layout came together really quickly - I think if I forget the time I spent hand-stitching, this layout only took about 30-40 minutes to create which is probably a record for me! I'm absolutely loving this collection and I think I'll be quite upset when I've used it all!!

If you'd like to watch how the layout came together, there is a process video on my YouTube channel which you can find here.

Thanks so much for taking the time to read about my layout - I know everybody is probably really busy in the lead up to Christmas but I hope you all manage to get some scrappy down-time over the festive period!

I'll be back later in the month with a final layout (or two) with this collection, but in the meantime I'd like to wish you all a very Merry Christmas. 

Take care, and stay safe.

Rebecca x

Sunday, 13 December 2020

Nuts About You - Simple Stories - Cozy Days

Hello, Rebecca here with you today. I had a small amount of the  Cozy Days Collection by Simple Stories left, so thought I'd pop by to share another layout with you. 


I've used a cutfile from Peartree Cutfiles as the basis of my layout and I've cut it on the B side of the '2x2 Elements' patterned paper. This paper is quite 'busy', and certainly more busy than I am usually comfortable working with, so using it to cut a cutfile was a great way to make it work for me. I've used a number of different coloured Bazzill cardstocks from the Matchmaker Pack to back the leaves and acorns in the file. 


I wanted to add some colour to my layout behind the cutfile, and had initially planned to add some mixed media, but instead opted to use a torn strip of the 'Happy Falliday' patterned paper (B side), with smaller strips of the 'Harvest Wishes' patterned paper behind both above and below.

I've adhered the outline of the cutfile flat to my layout, and used foam pads to replace the letters to add some dimension. I've also added foam pads behind the acorns and leaves.

I matted my photos onto white cardstock, with a layer of green bazzill cardstock behind to bring in more of the green colour I'd used to back the leaves of the cutfile. Behind my photos, I slotted some of the tags from the 'Tags' patterned paper. I distressed the edges with my scissors and threaded some Metallic Gold Thread through the holes several times to add interest and introduce some texture to the layout.


I've kept the embellishing to a minimum on this layout - mainly because I don't have a lot left! However, a lot of the patterned papers in this collection lend themselves perfectly to fussy-cutting so I was able to create my own embellishments very easily. I fussy-cut some elements from the 'Sweaters & Boots' patterned paper including the mustard sweater, the wellies and the take-away style hot drinks cup. 


I continued with the fussy-cutting and cut some elements from what I had left of the '2x2 elements' patterned paper, and arranged all these pieces into clusters around my photos. I also cut some leaves from the 'busy' B Side of the 2x2 elements paper to co-ordinate with my cutfile. I nestled those in among my clusters and added some more of the metallic gold thread in the form of clusters. I added a tab/label element from the Journal Bits & Pieces pack and have used this to detail the date and location of the photos.

I wanted to bring some colour to the top and bottom sections of the layout as I felt there was too much white, so I cut out a section from both, distressed the edges and used a Simple Stories Washi Tape to backfill the area. The finishing touch was to add a few gold jewels around the layout, and that was my layout complete. 


Thank you for reading, I hope you've enjoyed this layout. This collection is great for making a little go a long way - and fussy-cutting is your friend!

If you'd like to watch how the layout came together, there is a process video on my YouTube channel which you can find here.

I hope you are all staying safe and looking forward to Christmas. We are in full Christmas-swing in my house - the tree and decorations are already up and so it's only apt that my next few layouts will be 'Christmassy' ones using the Simple Stories 'Jingle All The Way' collection.

Until then, take care.

Rebecca x

Friday, 11 December 2020

December Papermaze Kit

Hello, Lynn here today with the Christmasy December Kit. Although the papers are all from winter or Christmas collections, at least one side of most of them can be used to create non-Christmas layouts.

Here are the first two layouts I have made with a Christmas flavour.


 This is what you will find in the kit.

Patterned Papers:
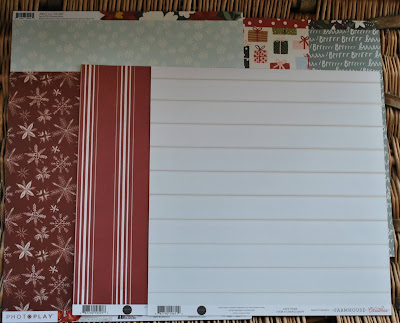
Carta Bella - Farmhouse Christmas collection - Gift Tags & Poinsettia Floral
Simple Stories - Winter Cottage collection - Season of Wonder & Let it Snow
Simple Stories - Jingle All The Way collection  - December Details
Photo Play - Christmas Cheer collection - Silent Night
Bazzill - White OP & Ruby Slipper

Reverse sides of papers

Embellishments
12" Washi tape, wooden star, 3 heart heart brads, Prima holly, tree stamp, 2 paper roses,
exclusive acrylic shape & Crate paper pine branches.


Extra Bazzill Cardstock Pack - Aspen, Fig Swirl, Jetstream & Walnut


Merry & Bright - I found this colour slide picture of my sister by the Christmas tree with new Pinky and Perky toys - Christmas 1964. Brought back memories of our childhood home and Christmases.


I chose the Ruby Slipper Bazzill as a border for the layout and gutted it making a frame of 2.5cm. Then I trimmed the 'Silent Night Paper to measure 28cm x 28cm (I cut the two edges away from the baubles). I hand stitched over the bauble strings with some silver embroidery thread. Then I inked the edges of the paper before mounting it over the red frame.

The washi tape was applied across the page, about 7cm up from the bottom. I mounted my photo onto some of the Ruby Slipper Bazzill.

I found an MDF bauble and with some acrylic paints, I made it look like the baubles on the paper. Then added a coat of Glossy Accents. Once dry I attached a length of silver ric-rac, a silver ribbon bow and two tiny silver bells. This was stuck into position with 3D foam tape, the ric-rac is taken to the top and it held in place on the back with some tape.


I wanted to use the Fig Swirl Bazzill for my title and journalling, but I needed most of this for the next layout so I cut a piece 23cm x 23cm and set this aside for later. I also used scraps of Ruby Slipper for title and journalling. I cut the Words 'Merry & Bright' using Sizzix Thinlits - Shadow Script Christmas die set. The date was cut using my Cricut and the journalling strips were hand written.

Before cutting three tiny parcels from the 'Season of Wonder' paper, I gutted it to make a frame 4cm deep, and set this aside for the next layout too. Then I fussy cut the parcels and added them to the bottom right of the photo. 


Nutcracker Lego - Last year we purchased and made this Christmas Lego to add to our collection. 


For this page I have already trimmed the Fig Swirl Bazzill and the wide, red and white spotty border form the 'Season of Wonder' paper. Next I trimmed the Aspen Bazzill to 24cm x 24cm, and gutted this to make a 2cm frame. Then all three were mounted onto one another.

My photo was mounted onto some Walnut Bazzill, but again most of this was required for another layout, so first I gutted the whole sheet to give me a 2cm frame, then with a piece trimmed to 26cm x 26cm I gutted it to make another 2cm frame. I set both these frames aside for later.

I cut two fir trees using the Sizzix Thinlits Woodlands die set, and set these to the left of the photo.

By placing all the embellishments onto the papers and re-arranging them until I was happy, I added a few light pencil marks where they would be glued in place later. Then I removed them and using the tree stamp from the kit (upside down) I stamped fronds in green so they would hang down from under the embellishments. 

To embellish I used a some bits from the kit - the wooden star, and the two paper flowers. I added a few more red and white flowers, some fabric holly leaves and a twig wreath from my own stash. I fussy cut two poinsettia blooms from the 'December Details' paper and added a few dots of Nuvo Crystal Drops (Dandelion Yellow) to the flower centres.

I wanted to use some of the tags from the 'Gift Tags' paper, but again needed the wooden plank side for another layout, so I cut a 25cm x 25cm piece and set this aside. From what was left I cut four tags and punched holes in the top of each one. These were threaded onto narrow red ribbon and placed along the layout weaving them in among the other embellishments.


Finally I used some of my Basic Grey letter stickers to create the title and the year. 

That's all for part one. I will be back with two more layouts in a few weeks.
Have a good Christmas
Thanks for looking
Lynn x