Wednesday 29 April 2020

'My Sun, My Moon, My Stars' - 12x12 Layout using Cocoa Vanilla Studio - 'Legendary' Collection

Hello, Rebecca back with you again with my final 12x12 layout created using the 'Legendary Collection' by Cocoa Vanilla Studio. I've really enjoyed working with this collection. It's full of bright colours and is so versatile.


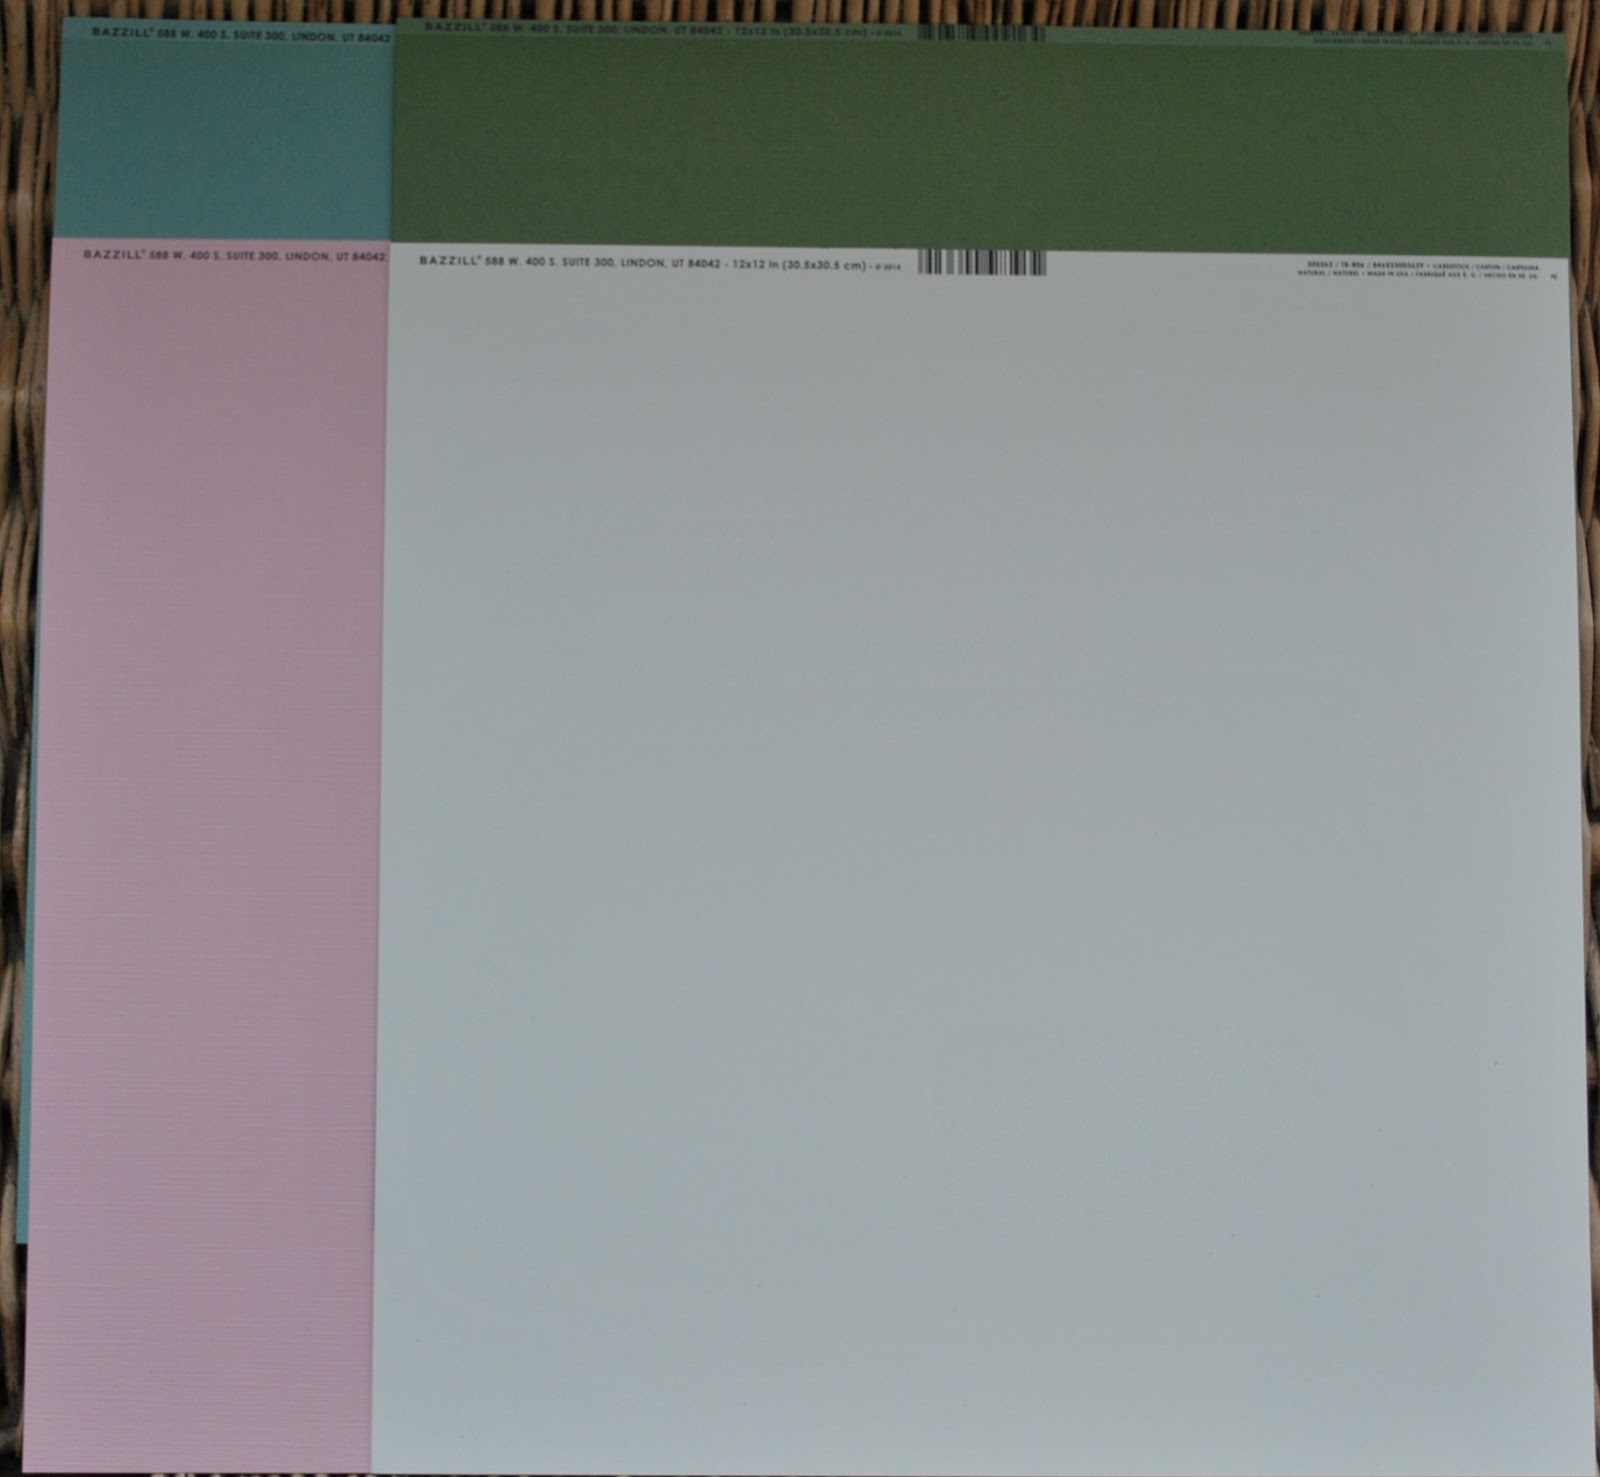
I started by trimming down a piece of 12x12 white cardstock and distressing the edges with a scissor blade. I made four 'notches', (two on each side) at the top and wrapped two different embroidery threads around the page. Where the threads met, I stuck a Flair Button and adhered it using glossy accents to make sure it stayed in place and held the threads where I wanted them.


I then mounted the white cardstock onto the 'Offbeat' patterned paper. I mounted my two photos onto white card, and then along with the card from the 'Epic Tales' paper which reads 'You are my Sun, My Moon and all of my Stars', I mounted them onto the Offbeat paper.

I marked where I wanted the photos and the card to go onto my background and then added some mixed media using a distress ink pad in 'Stormy Sky' mixed with water and applied it using the packaging technique. I also added some splatters in blue and orange. Once this was dry I adhered my photos to the layout using foam to add dimension.

I added a second Flair Button with some thread behind it, and a few pieces from the Die-cut ephemera pack to different sections of the layout. I had to add some foam dots behind certain areas of the ephemera to raise them up to the same level as the photos.


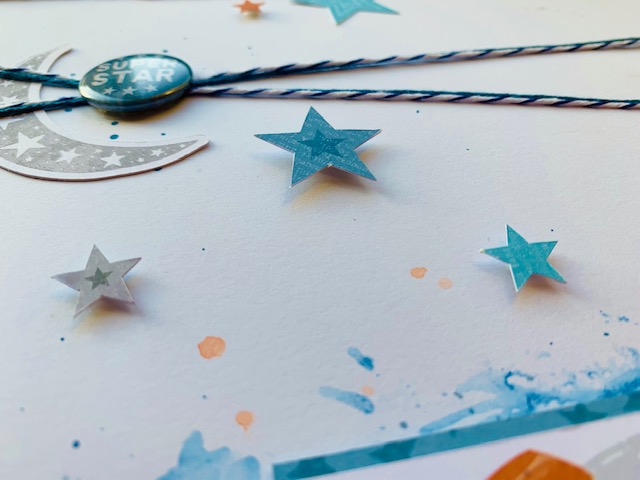
I felt like the layout needed more orange seeing as the word 'Sun' was written in orange on the cut-apart card. I looked through what I have left from this collection and found a small section of the 'All Star' patterned paper. I used a craft knife to carefully cut some of the orange stars out and decided I may as well add some blue stars as well. You can never have too many stars, right?!

I stuck some of the stars flat and raised some up on foam dots to balance the layout out. And that was me done. It's unlike me to bring a layout together so quickly but I'm really happy with the way it turned out.


I hope you've enjoyed this layout. Be sure to check out the collection in the Shop before it sells out. I'll be back next month sharing layouts created with a brand new collection.

Take care,

Rebecca x

Friday 24 April 2020

Simple Stories ~ Hip Hop Hooray #2


Hi, it's Anna back with you today! Hope you are all well and keeping safe.
So this month I have been working with the Simple Stories, hip hop hooray collection. You can find the whole collection in the shop here.
For my last post, I made some Easter Baskets and for my second project, I have a scrapbook layout to show you.  


I used the 'hello peeps' patterned paper as my base. I printed out four square pictures and decided to go with a grid style layout. I cut out nine squares measuring 8x8cm out of  cardstock and various patterned paper from the collection.


I decided not to cover the blossoms paper with any other patterns or embelishments, so I just added on some enamel dots and Nuvo drops to the flowers.


I added a selection of element stickers on and surrounding the grid squares.


I trimmed down a journaling card to fit in one of my squares to add in a space for journaling.


Thanks for looking and I'll see you soon.
Anna
X

Wednesday 22 April 2020

Simple Stories Simple Vintage Garden District

Hello, Karen C here again. I really hope you are all well and staying safe during this difficult time. I'm here today to share another layout using the Simple Vintage Garden District collection from Simple Stories.


I used just one sheet of patterned paper for the layout plus various embelishments.

I took a sheet of the 2x2 elements and cut this into the 36 individual squares. The page was then reassembled on a sheet of white cardstock and every other square was raised up on some 3D foam to give them dimension. I replaced six of the squares with my 6x4 photograph which was raised up on two layers of foam for even more dimension.


I cut around the wings of the majority of the butterflies and added extra foam beneath the wings.


 Some squares were embelished with pieces of white cotton ribbon.


Squares that included faux word strips were cut out and also raised with foam.


A small pink satin ribbon bow was added to one of the squares.


 A few sequins were dotted about the layout and the whole layout was given a glittery finish with some Diamond Stickles. Unfortunately the photos don't show just how glittery and sparkly this layout is.

I hope you agree that this collection from Simple Stories is stunning and the full collection is available in the shop.

Thank you for stopping by today. I'll be back again soon with another project and in the meantime please take care.

Karen x x


Monday 20 April 2020

April Papermaze Kit

Hello Crafters, It's Lynn here today with the first post using the very pretty April Papermaze Kit. There is a rose theme this month, with pretty pinks and greens.

For the first two pages I have a heritage and a wedding layout to share with you.


Let's see what you will find in the kit.


April Papermaze Kit
 Patterned Papers -
Carta Bella - Farm House Market collection - Cubbies and Wreaths
Simple Stories - So Happy Together collection - My Squad
Simple Stories - My Valentine collection - My Sweetheart
Photo Play - Be Mine Collection - Dozen Roses

Stamperia - House of Roses collection - Clock SBB674
Bazzill Cardstock - Flamingo and Walnut


Reverse side of papers
Embellishments - Tando Clock, 30cm washi tape, 10 gems, 3 cork butterflies,1 resin rose, 1 Maya Road envelope, 50cm jute twine, 30cm lace, 3 Prima flowers and 4 wooden leaves.


The April Matchmaker Bazzill Kit contains - Natural, Guacamole, Quartz and Lagoon

Adelaide 1831 - 1911 - for this heritage layout I have used this portrait photo of one of my father's ancestors. I have typed up all I know about her and how we are related. This was printed out and stuck to the back of the page for future generations to understand where she fits in. I was lucky to make contact with someone on Ancestry who had a lot of photos to share from this branch of the family. 


The beautiful sheet of paper
from Simple Stories - My Valentine collection, called My Sweetheart is very detailed and so does most of the work for you. I trimmed it down by 1cm all the way around the edges so as not to lose too much detail. I distressed and inked the edges. I mounted it onto the sheet called My Squad. I gutted the latter to leave a frame of 2.5cm.

I applied some wide white lace and pleated blue ribbon across the middle of the page. With My Cricut, I cut the pieces for a oval shaped frame from Flamingo and Quartz Bazzill. The top layer was cut from some scrap thick card and embossed with Stampendous Frantage Embossing Enamel - Shabby Pink. I glued the layers together with my photo in-between. I mounted this to the right of the page with 3D foam tape.

I arranged paper roses near to and overlapping the frame. I punched some flowers with a Martha Stewart leaf frond Punch. I added a little Crystal Stickles to these leaves.

With more of the Flamingo Bazzill I cut the title using the Cricut. I glued this to the page and used some Glossy Accents to make this shine.

With the 3 in 1 Butterfly punch from Martha Stewart I cut a selection of butterflies from the strips of Sweetheart paper cut off earlier. These I scattered over the top of the page, adding a little more Stickles.

I placed gems from the kit onto the lace.


With These Rings - Another layout created for my daughter Catherine and her husband George's wedding album. The official photo of their hands with the wedding bands.


This is another page where the background paper did most of the work for me. This time it was a sheet of
Carta Bella - Farm House Market collection Wreaths.

I trimmed my photo and matted it with some Quartz Bazzill, then made two mats the same size as the Bazzill, one from each side of
Photo Play - Be Mine Collection - Dozen Roses.
I trimmed the left side of both mats with the lace from the kit.

With a craft knife I cut into the top of the roses and leaves at the centre of the bottom of the page. I tucked the mats and photo into these cut away pockets.

I decorated the photo with the wooden leaves and the gem centered flowers from the kit.


My title was spelt out with Pinkfresh Studio Office Hours Puffy Alpha Stickers.

Finally with Crystal Stickles, I highlighted the darker areas of all the roses.

I will be back soon with two more layouts, thanks for looking.
Lynn x

Friday 17 April 2020

Some Bunny Loves You....and the Lockdown Bunny!

Hello Again

 I hope you had a lovely Easter, even though I am sure it was very different to any others you can remember! It's Anita here again with you and I thought I would veer away from doing a layout for my post today.
 Originally I had planned these as Easter bunnies, but got my dates all muddled up and realised they would be a little late! I have decorated them with some more of the remnants I have left from my Farmhouse Market by Carta Bella DT kit.


The bunnies started life looking like this....chunky wood with a drybrushed white paint coating. I have only decorated one side so that I can still turn them back to front if I wish and go for the orginal simple style.
    They were super cheap and I only paid less than £2.00 per bunny which i thought was a real bargain!


I drew round the rabbit onto a sheet of Vintage Floral and then cut the shape slightly smaller so that the edges of the wood still showed. When the adhesive had dried, I gently swiped all round the edges of the bunny with an almost dried out, dark brown ink pad.

I cut a couple of teeny tags from the sheet of Timeless Floral , inked the edges and added some raffia to hang them from. A raffia collar was tied round the bunny's neck and the tags hung from that.
 A little blossom from the Prima Apricot Honey Grapefruit Tart range was popped on to finish it off.

It was at this point that I noticed something really rather bizarre about this bunny ( as seen further down this post).... and decided I needed to cover it....so I stamped a couple of strips of paper with the words Be Happy and added them to his face.


The sitting bunny was covered with a piece of the reverse side of 4 x 6 Journalling cards and then inked the same was as the standing bunny and another raffia collar and blossom added. I stamped on some strips of paper to say Some Bunny Loves You.

.


So....this is the reason I had to add the words on the 1st bunny......just look at his face.....those crazy eyes!!! Except they were not meant to be and it happened as a complete fluke! The floral pattern is repetetive on this sheet and I didnt even think about the placement when I cut the shape out! However once I papered him, inked him and prettified him my Hubby was quick to point out his *wonky, crazy looking eyes*!! So I quickly covered them with the words. Rebecca from the DT aptly named him Lockdown Bunny LOL!


At the moment the words are only stuck on with blutac so I can still remove them if wanted.....he does have a sort of unhinged look about him doesn't he....but at the same time cute??

I hope you have enjoyed seeing my post with my Funny Bunnies....... I now have only got some teeny scraps left of my papers.....but who knows, maybe I make a little something with them too.

Happy Crafting and Stay Safe xx

Warmest wishes
Anita xx

Wednesday 15 April 2020

'Super Star' - 12x12 Layout - Cocoa Vanilla Studio 'Legendary' Collection

Hello, Rebecca back with you today with a colourful mixed media layout using the Cocoa Vanilla Studio 'Legendary' collection and a cut-file.


I decided to back the cut-file using the beautiful rainbow coloured 'Wild One' patterned paper. I think this is my favourite patterned paper from the collection because it's so colourful and bright. I left the star empty and backed it with my photo.

I have used the 'Epic Tales' patterned paper for my background, and seeing as I knew I wanted to add lots of colour to it, I prepped it with gesso first. (I've used clear gesso as I didn't want to lose the pattern on the paper.)

I've used watercolour paints to create the background - trying to colour-match each area to the cut-file. I finished the background off with some large ink splatters created by squeezing a saturated paintbrush from height and letting it drop onto the page.


When I went to sit the cut-file onto the layout, I felt like the edges of the background looked a bit unfinished and bare so I trimmed the page down and mounted it onto a black border, adding a couple of torn areas to the edge to create added interest.

At this point I decided that the cut-file needed some black adding to it somehow to balance out the page. And this is where the butchering of the cut-file began!! I originally had my photo printed in colour, but decided to replace it with a black and white version. I'd stuck the cut-file down using foam and really strong double-sided tape. I had to carefully remove the cut-file from the background to replace the photo. I decided it still needed some more black, so I distressed the edges using a distress ink pad in 'Black Soot'. Next, I replaced all the double sided tape and stuck the cut-file back onto the background.

It still needed more black to balance the layout out. So I removed the cut-file again(!). I poked holes all around the edges of the letters and used black embroidery thread to hand-stitch all around them. In hindsight it would have been much easier to do this before backing the cut-file as I had to punch holes and stitch through two layers of card instead of just the one! As you can see from the photos, the cut-file has seen better days but from a distance you can't tell at all!


I finished the layout by adding a Flair Button with some tangled thread underneath, and some pieces from the die cut ephemera pack. I didn't want to overdo the embellishing as there was already a lot of colour on the page, and I was actually really happy with how the layout looked so I stopped.

I hope you've enjoyed this layout, I'll be back later in the month with another, which I'm pleased to say came together without any butchering!

Take care,

Rebecca x

Friday 10 April 2020

Happy Easter with Simple Stories Hip Hop Hooray

Hi there, it's Anna back with you today. Since my last post a lot has changed, but I hope you are all staying safe and well and making the most of this time. Scrapbooking and crafting is a great hobby to have at the moment isn't it?
This month I'm going to be working with the Simple Stories Hip Hop Hooray collection, which is a combined Easter and Spring themed collection.
As its Easter weekend, I decided to make some Easter baskets. I've made three different sized baskets and to start, all you need is a square piece of cardstock or patterned paper. My square sizes were 30x30cm for the large basket, 21x21cm for the medium basket and 15x15cm for the small basket.


The next step is to score the card creating nine equal squares...


...and now cut along the lines as shown in the picture, up to the middle lines.


Now you are able to fold the card into the basket shapes. I have used two styles as shown below. Once you have the shape you like, secure it with adhesive.


Now to decorate! I have used a combination of the Simple Stories Hip Hop Hooray patterned papers, chipboard stickers, element stickers as well as cardstock. I made handles for the basket using strips of cardstock and/or patterned paper.


And finally, here are the finished baskets filled with eggs ready for Easter Sunday!


Wishing you all a very Happy Easter, have a lovely weekend!
Take care, stay safe and enjoy your crafting time!
See you soon.
Anna
X

Wednesday 8 April 2020

Simple Stories Simple Vintage Garden District - Fly

Hello. Hope you are all well and staying safe. Karen C here with a layout using the very pretty new collection 'Simple Vintage Garden District' from Simple Stories. It is described by Simple Stories as a collection full of ".... the scent and sounds of nature with fluttering butterflies, twittering birds, buzzing bees and bouquets of blooms." It's perfect for spring, mothers day and easter projects and I am loving working with it.


For my layout I started with a sheet of the You Can Fly paper and a sheet of Blossom Bazzill cardstock.

I trimmed a quarter of an inch off of each side of the You Can Fly paper and matted this onto the Blossom cardstock which I had gutted. I then machine stitched round the edges of the paper using gold thread and a zig-zag stitch.


I carefully cut around part of the butterfly and one of the flowers printed on the paper and after matting my photo on some pink tissue paper I tucked it underneath the images.


The wings of the butterfly were raised up slightly with some foam squares.


I die cut the word Fly from some gold mirror card and stuck this on top of the photo.


I made two tags from two of the 3x4 elements paper. I added some brown Bakers Twine and some gold foil to the tags before attaching them to the layout with foam squares underneath for added dimension.


I embellished the bottom left corner of the layout with Prima Flowers and Butterfly.


The layout was completed with a scattering of gold sequins and the date was added using mini letter stickers from Pinkfresh Studio.


I hope you like the layout and that I have inspired you to try using the Simple Vintage Garden District collection which can be found in the shop.

Take Care and Stay Safe.

Karen x x