Hello, Lynn here, I can't quite believe it's time for the December Papermaze kit
already, this year has gone by so fast. A lovely selection of papers,
cardstock and embellishments with a red and pink colour scheme.
Here
are my first two layouts. The first with my children at the age of two,
Christmas 1994 and the second featuring Christmas Lego. Both were
created with the use of Tim Holtz - Sizzix Thinlits die sets (also available from Papermaze).
American Crafts - Vicki Boutin - Evergreen & Holly collection - Making Spirits Bright & Holiday Cheer
Mintay Papers - Merry Little Christmas collection - #04 & #05
Crate Paper - Mittens & Mistletoe - Dear Santa
Prima Marketing - Candy Cane Lane collection - Sparkling Christmas
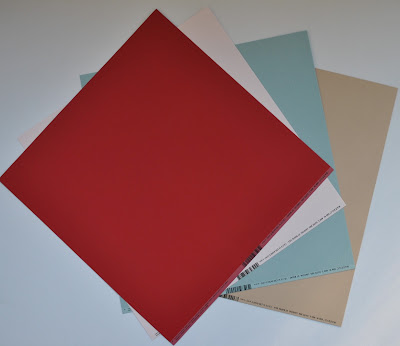
Bazzill Basics cardstock - Bazzill White & Lagoon
 |
| Reverse side of papers |
Embellishments
4" x 12" Prima Candy Cane Lane Poinsettia Vellum, 3 sparkly buttons, 3 Vicki Boutin chipboard stickers, 3 Rosie's Studio chipboard frames, 50cm Holiday Divine Twine, Prima poinsettia, strip red pearls, Crate Paper epoxy charm, 8 printed label phrases
Extra Bazzill Pack
Cherry Splash, Pink Cloud, Coastal & Toasted Nut
Merry Christmas 1994 - My three children when they were two years old, all dressed up for Christmas Day.
First
of all, I gutted the 'Making Spirits Bright' paper to make a border of
4cm deep. Next, I trimmed the 'Holiday Cheer' paper to measure 26cm x
26cm. This was spritzed with Distress Mica Spray Stain (Holiday) and the
edges inked with Lumberjack Plaid Distress Oxide Ink. The paper was mounted over the frame paper at an angle.
I
mounted my photos onto three spare pieces from the 'Making Spirits
Bright' paper. These were inked and attached across the middle of the
page.
With
the Tim Holtz Sizzix Thinlits Colourize Bowtie set, I cut the bow from
three shades of red Bazzill cardstock. I also cut a ribbon from the same
card to stretch across the page, just below the photos. The ribbon was
applied to the page and then the bow (raised up on 3D foam tape).
From the Candy Cane Lane Vellum, I cut five poinsettia flowers and four baubles. I placed the baubles under the ribbon and drew in strings to make them hang down. The flowers were arranged at the top of the photos.
I cut two sprigs of fir using Tim Holtz Sizzix Thinlits Holiday Greens die set and the Lagoon Bazzill. These were added to the bow.
My title was created with some Thickers Cecily Glitter letter stickers and Rosie's Studio, Hearth & Home puffy letter stickers.
Finally, I added some sparkle to the fir and flowers with Stickles glitter glue.
Santa Lego - Part of our growing collection of Christmas Lego.
I started this layout with the White Bazzill, and some Lumberjack Plaid Distress Oxide Ink. The ink was slightly diluted on the craft mat before applying to the card. I also flicked some of this ink over the page.
I tore strips from the sides of 'Sparkling Christmas' paper and attached to the very top and bottom of the Bazzill. I tore the scrap of 'Holiday Cheer' paper into two strips and ticked these just under the 'Sparkling Christmas' paper strips.
I mounted my photo onto scraps of 'Making Spirits Bright' paper, using both sides. With the photo in place on the page, but not stuck down, I placed two of the chipboard frame stickers under two opposite corners of the layout, again without sticking down.
Using the Holiday Divine Twine, I wound the ends around the frames and trailed the rest over the page, under the photo, making a few loops. The photo, frames and twine were then glued in place.
From the remains of 'Sparkling Christmas' paper, I fussy cut seven stockings and an additional seven bows, to match. I inked the edges of bows and stockings, the with 3D foam pads I applied the bows to the stockings. The stockings were then hung from the twine with more 3D foam pads.
I made my title and date with Pinkfresh Studio Some Days - Mini Puffy Alpha Stickers.
I
used some of the phrase stickers from the kit, to add detail inside the
frames. Finally, I scattered the read pearls to the Bazzill.
That's all for today, I will be back with more from this kit after Christmas. Have fun celebrating!!
Thanks for looking.
Lynn x


.jpg)
.jpg)
.jpg)
.jpg)
.jpg)
.jpg)

.jpg)
.jpg)
.jpg)
.jpg)
No comments:
Post a Comment