Easter is not far away now, and so it must be time for our annual Easter Egg hunt, which we know you enjoy doing! Every day from now until Easter Monday we'll hide an egg in our online store, and all you have to do is find it!
Each day I will give you a clue on the blog. Your job is to work out the answer and find the egg on the website :)
Make a note of the manufacturer and product, then once you have all
seven answers you can email them to me (details on Monday). And, of
course, there is a prize to be had! This year we'll be giving away a £30 gift voucher to one lucky person
(whose name will be drawn at random!) - and we'll also be giving away three 6x6 pads to three runners up (one pad each!) .
So, are you ready? Then let's begin with the first clue:
This song was a hit for Level 42 in 1986.
Work out the answer, and jump over to the website to find the egg! Keep
a note of the answer, and remember to drop by tomorrow for the next
clue!

Tuesday, 31 March 2015

Friday, 27 March 2015
A Perfect Autumn...
Hi there,
It's Anna here and this month I have been catching up on some Autumnal photographs using the lovely 'A Perfect Autumn' collection by Carta Bella.
Here is the first of my layouts using this collection...

I used a sheet of white bazzill for my base but then just left about 1/3 of it showing at the top of my layout. I used some of the patterned paper to layer together along with a few stickers from the element sheet.


Thanks for stopping by!
Anna xx
Wednesday, 25 March 2015
catch your dreams
This layout was created using the Bo Bunny star crossed papers. I used one of the patterned papers as my background and cut the wood grained patterned paper to mount my photo on.
I made the dream catcher but cutting a hoop shape from spare cared stock and then wrapped in tissue tape ( I tore the tape down the middle, it made it easier to wrap ) The next stage took ages to do, and with the help of instructions from the net and some thick cream thread, I went about making my dream catcher.

Monday, 23 March 2015
Are you planning a trip?
For me, part of the pleasure of a trip, is the whole planning.
I love keeping a notebook and making lists.
I love saving money and I love the whole research of a trip.
We are planning a big family holiday to Florida in 2017.
This weekend we had our first family meeting to discuss dates and the essentials.
Half of the family have never been to the US, so it's totally new to them.
I thought it would be fun to put some holiday planning packs together.
The 'Say Cheese' collections from Simples Stories were perfect for my fun projects.
'Say Cheese' was released last year. And 'Say Cheese 11' is the new release.
These are probably my favourite scrapbooking collections ever!!
Anyway, back to my holiday packs.
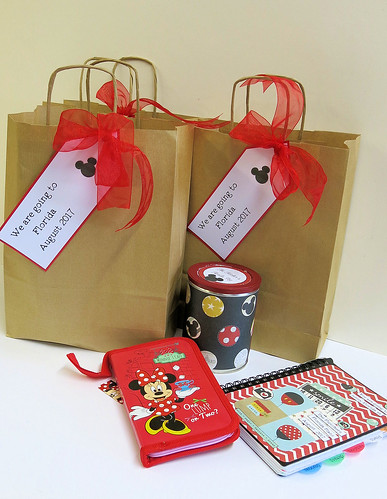
I added a tag to a large kraft bag and inside I added a Minnie Mouse Pencil Case full of stationery, a money saving pot, a planner journal along with the Virgin Holiday brochure and an info pack that I put together myself of everything you need to know going to Orlando as I get asked so often by people now. I was really pleased with these packs.
I made the money saving pots first. We like to save all our loose change. It's surprising how it amounts up. They started off as Costa Coffee pots.

I used the Say Cheese papers to wrap around the tins and stuck in place with double sided sticky.
I then decorated with a personalised sticker on the lid and some glitter.


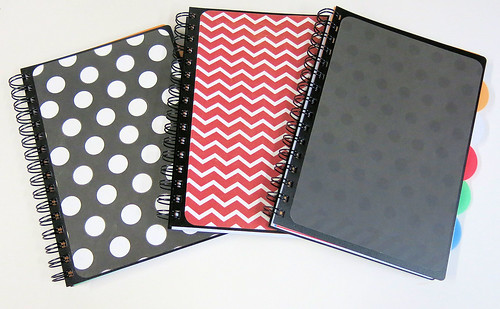
Now the journals started off as cheap note books.
 I measured up the 'Say Cheese' papers, cut to size, rounded off the corners and stuck in place with double sided sticky.
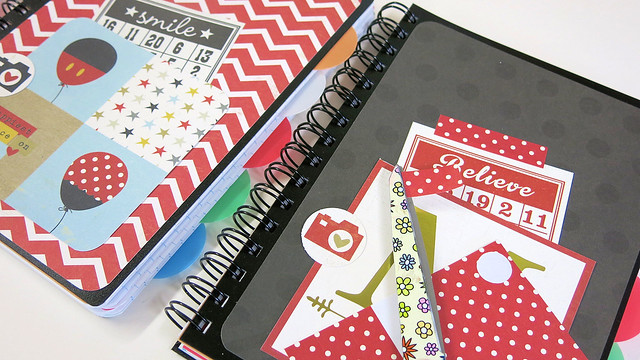
I used this piece of 'Say Cheese 11' paper for the design on the front.

Simple Stories have the coolest packs of Washi Tape to match. I love that it comes in packs so that you get a variety of designs. Such a great idea.
And this paper here works great with a circle punch. It makes the perfect embellishments.
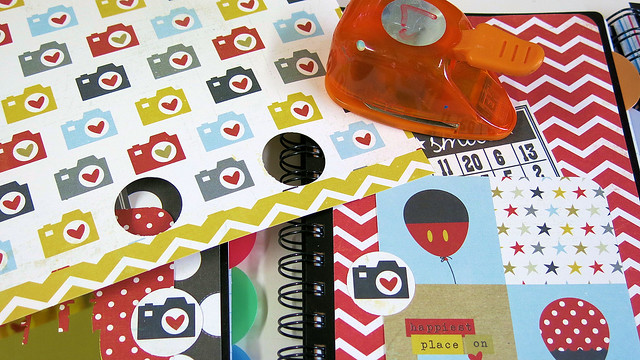
I printed off strips of words on my printer.

And I find that outlining everything with a black pen makes such a difference.

My finished books.


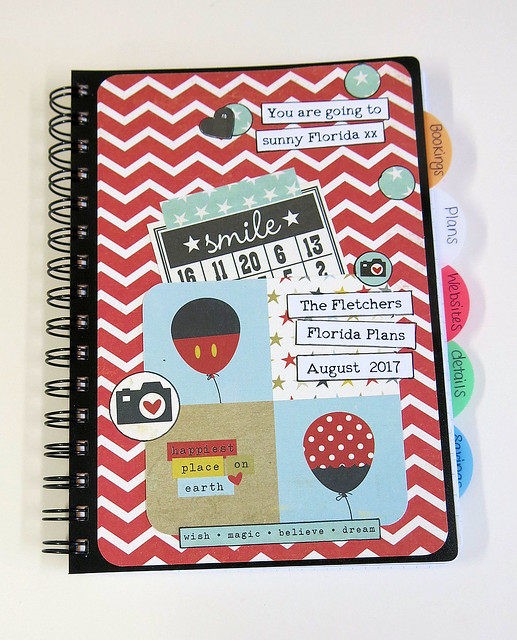
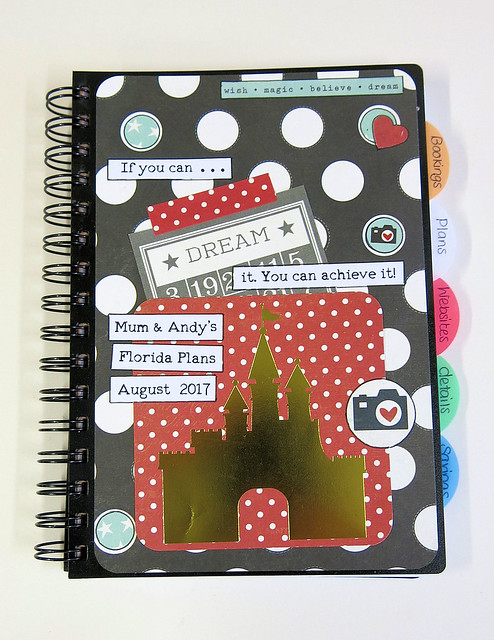
I'm really pleased with how they turned out.
These papers and matching bits and pieces are so much fun.
Thanks for joining me today.
Lisa x
I love keeping a notebook and making lists.
I love saving money and I love the whole research of a trip.
We are planning a big family holiday to Florida in 2017.
This weekend we had our first family meeting to discuss dates and the essentials.
Half of the family have never been to the US, so it's totally new to them.
I thought it would be fun to put some holiday planning packs together.
The 'Say Cheese' collections from Simples Stories were perfect for my fun projects.
'Say Cheese' was released last year. And 'Say Cheese 11' is the new release.
These are probably my favourite scrapbooking collections ever!!
Anyway, back to my holiday packs.
I added a tag to a large kraft bag and inside I added a Minnie Mouse Pencil Case full of stationery, a money saving pot, a planner journal along with the Virgin Holiday brochure and an info pack that I put together myself of everything you need to know going to Orlando as I get asked so often by people now. I was really pleased with these packs.
I made the money saving pots first. We like to save all our loose change. It's surprising how it amounts up. They started off as Costa Coffee pots.
I used the Say Cheese papers to wrap around the tins and stuck in place with double sided sticky.
I then decorated with a personalised sticker on the lid and some glitter.
Now the journals started off as cheap note books.
I used this piece of 'Say Cheese 11' paper for the design on the front.
Simple Stories have the coolest packs of Washi Tape to match. I love that it comes in packs so that you get a variety of designs. Such a great idea.
And this paper here works great with a circle punch. It makes the perfect embellishments.
I printed off strips of words on my printer.
And I find that outlining everything with a black pen makes such a difference.
My finished books.
I'm really pleased with how they turned out.
These papers and matching bits and pieces are so much fun.
Thanks for joining me today.
Lisa x
Wednesday, 18 March 2015
lets play gelatos…..
Hi Carol with you today…. last month at crop, Vanessa asked me to do a post on gelatos and their uses…. so, here we go…everything on this post is done with gelatos (apart from the card to stamp and ink of course!!)
So, what are gelatos? Gelatos are made by Faber Castell and are creamy/waxy sticks of colour encased in a plastic tube. There are a whole host of colours available coming in packs of 4 with blenders, paintbrushes or stamps, there are several mixed media kits and a very large selection box of colours too - you can find them in the shop here.
So, lets begin….
I started off by taking a 5" x 7" white canvas board and my box of gelatos…...

and swirled on bubblegum, peach, pale turquoise and pistachio…

As gelatos are so soft and creamy they are very easy to blend - so in one corner I used my finger (or you can use a blending tool) and blended the colours together… this is the result

you can see how the colours have blended together really well, see the comparison with the swirled product?
In the other corner I used a paintbrush and water - I find it easier to soak my brush but not so much that I flood my canvas but wet enough for the colour to blend well…

Can you see the difference? the water side seems much brighter whilst the blended side seems a lot lighter and the texture is much greater on the blended side…
Taking a rubber stamp (I used a text stamp here) , rub the gelato (I used squid ink here) over the stamp, spritz with water and then stamp over the canvas…

Taking a stencil, place on the canvas and then rub over with gelato…. I found that I had a lot of product left on the stencil, so I repositioned it on my board and taking a stencil brush brushed over dragging the left over product into the cut out… I also run the gelatos along the edges of my canvas and blended with a damp baby wipe...

scribble some gelato onto your mat, spritz with water and mix you then have paint…

I used this grey to add lines to my background...
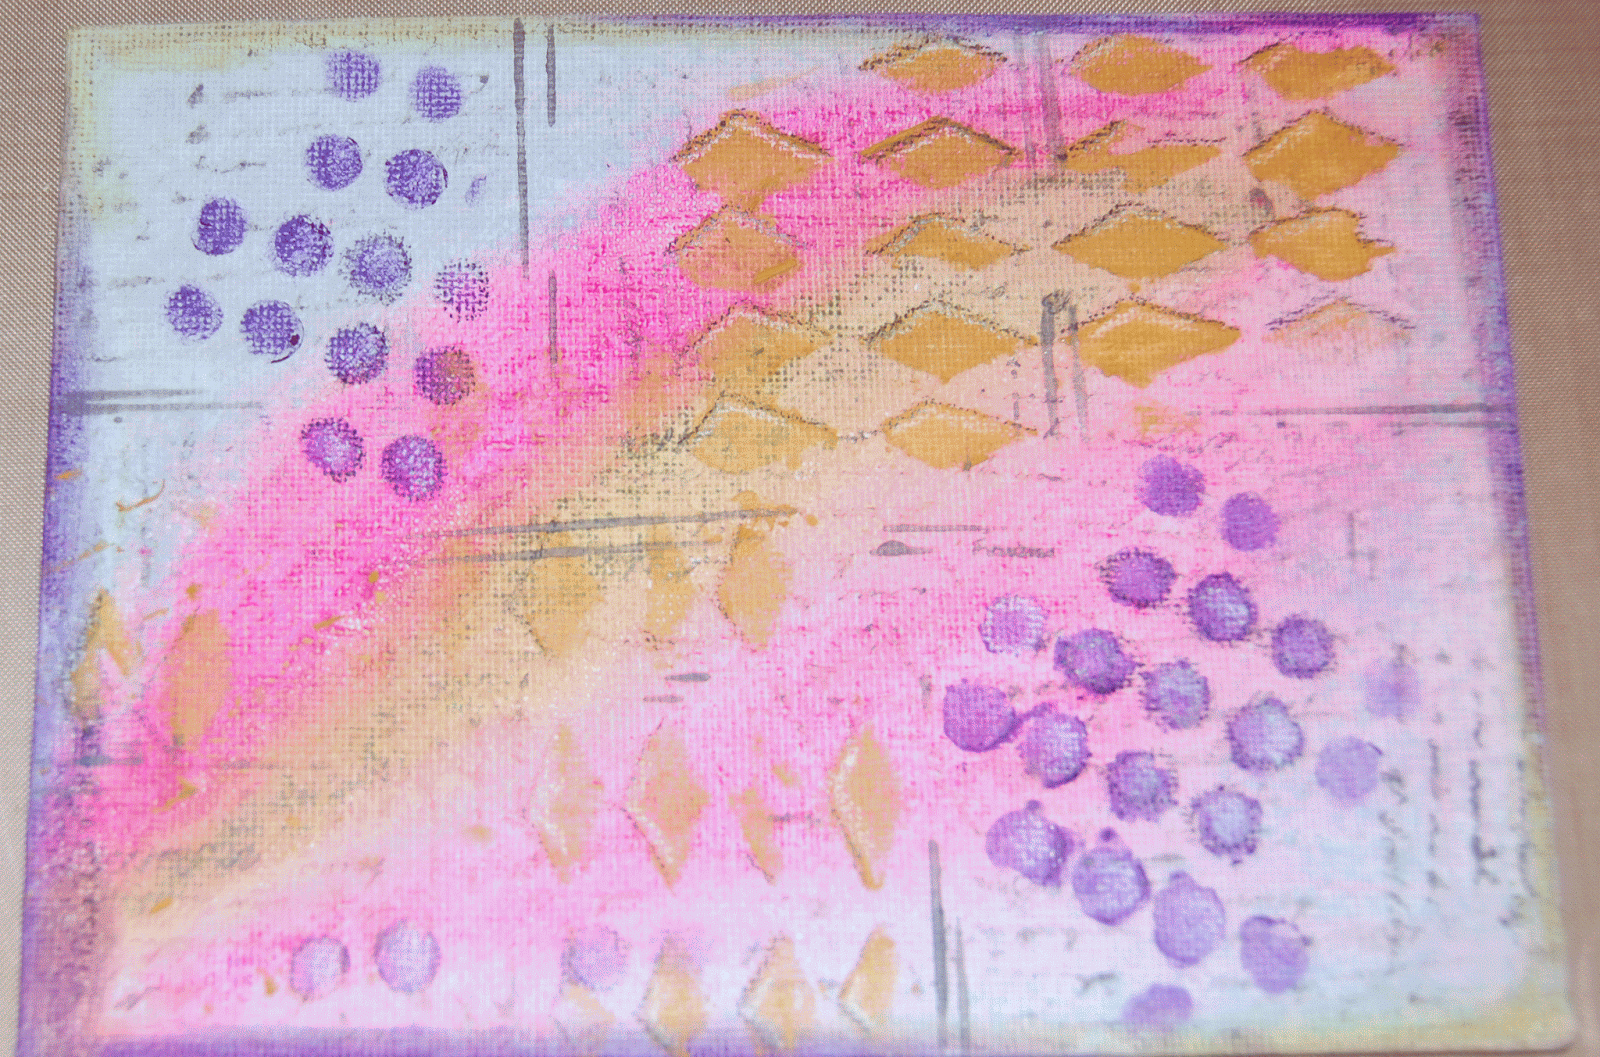
using black and white pens I added definition to my stencilling and et voila my background is finished…
Taking some white cardstock I stamped EM14 one of Darcy's new stamps and painted using the technique above… I added some liquid pearls, washi tape and a stamped sentiment and here is my finished piece.

Monday, 16 March 2015
Let's go to Euro Disney with the March Kit
Hi Tracee with you today, I am here to share with my first project using the March Kit that will be on sale later this month.
My Grandaughter recently went to Euro Disney and whilst the papers in the kit aren't typical "Disney" colours they went really well with this pic of the 3 of them stood in the park.

My Grandaughter recently went to Euro Disney and whilst the papers in the kit aren't typical "Disney" colours they went really well with this pic of the 3 of them stood in the park.
Unfortunately the weather is beyond awful and my photo doesn't truly reflect the gorgeous colours in the mixture of papers in the kit.
I used a Cameo file to cut the plus signs from the background paper and then I added the Kaisercraft Rustic Harmony sheet to the back.
I added a cluster of flowers and a frame to the bottom right corner and my title is made up of a mix of alphas and some of the word stickers from the sheet.
I hope the weather is better where you are. Have a Happy Scrappy week and don't forget to pop over to the shop where you can find all your crafting supplies.
Thursday, 12 March 2015
Hello Happiness - Project Life
Hello, it's Lisa with Project Life here today.
Doesn't this Bella BLVD range 'Molly' scream happiness to you!!
I used these papers to make up one of my PL pages.


Doesn't this Bella BLVD range 'Molly' scream happiness to you!!
I used these papers to make up one of my PL pages.
I really enjoy making these happy and colourful pages.
All you need are some pretty papers, a corner punch and a journal pen.
It's as easy as that!!
Enjoy!
Subscribe to:
Posts (Atom)