Monday, 9 April 2018

Sketch time...

I spent far to long thinking about what my first blog post could be and in the end I chose a sketch. I actually find them really hard. I always get stuck in making it look exactly the same, do you do that? Anyway, I decided that it was time for me to move out of my comfort zone and see what I could do.

After searching around the internet for far too long I came across this sketch from Scrapourstash and just went with it.


I chose the new Paige Evans line for this page...I always love her lines but this one was just perfect! I really thought about what to make before hand...turned the sketch round and round, sketched out ideas myself and this is what I came up with.

 ( also...please excuse the spelling mistake of your!!!! You're that should have been. I tried to go back and change it but it ripped the paper...so your it is! lol.


And here are some close ups.


Those little black letters are from Tim Holtz...you can find them here. They are like the October Afternoon ones but tiny!!!! So cute. And I added some little stickers from Turn the page collection here.


Don't have a die cutting machine and want to make outline hearts...heres how. Remember back to when you were in primary school?
Okay...so Grab a piece of white card and fold it over in half. Draw a heart so the centre of along the edge of the folded edge of the card. Now cut it out

You will get a heart and it will be identical on both sides.


Again fold this in half and then cut out an inside line, start your cutting along the folded edge and when you open it, it will look like this.


Now back it with the pattern paper that you want.


See..really easy..you remember this now huh...I remember doing this in primary school. 
Anyway..thanks for popping in and I will see you later this month with an altered item from the kitchen.


Saturday, 7 April 2018

Easter Egg Hunt answers & winners!

Thanks to everyone for joining us in our Easter Egg Hunt again this year, we always have some lovely comments from people who enjoy taking part - and we certainly enjoy hiding the eggs!
So, onto the answers:

1)  According to the song, the mouse who lived in old Amsterdam lived in what sort of building?  Windmill.

2)  What was the name of the American TV sitcom that featured the character The FonzHappy Days.

3)  What is the nut of an oak tree called?  Acorn.

4)  Josh Gad provided the voice for which 2013 Disney character?  Olaf.

5)  Name this fruit.  Avocado.

6)  What is the Christian name of the actress who played DS Ellie Miller in Broadchurch?  Olivia

7)  Which Clean Bandit song features Swedish singer Zara Larsson?   Symphony.

So, onto the winners.  The first name drawn at random, who wins a £40 gift voucher is LORRAINE CHESHIRE!!  Then we have 3 runners-up prizes who all win a £10 gift voucher, and they are Anna White-Sharman, Lynda Ham and Sarah Stokes.  Congratulations ladies :)  Drop me an email and we can sort out your prize!  

Friday, 6 April 2018

Amelia Rose from Prima .....Now she is 18!

Hi There,

 It's Anita with you today and I have been creating with the dazzling new Amelia Rose Collection from Prima. Once again they have released another stunning range of papers and co-ordinating goodies. There are beautiful vintage papers, floral mixes and the luxurious swathes and detailing of foiled copper and rose gold accent.....truly gorgeous!

Our youngest daughter has just turned 18 in the last couple of weeks and some of her balloon banners were a coppery rose gold in colour and I thought these papers would be great for popping her onto!


I de-saturated most of the photo back to black and white, leaving only the copper and browns still showing before printing it out. The Lovely Scribbles sheet is gorgeous and heavily foiled, so I chose to just use part of this and placed it as a backing to create a thin frame around the page ( I gutted the centre out first to save for another page)
I took the sheet of Texture Lover, cut it down slightly and used a Black Soot Distress Stain to just swipe around the edges....and also added a few splats here and there. The page is already beautifully detailed with some vintagey paint effects, distressing and some lovely foiled scriptwork.
In my DT kit along with the gorgeous papers and cardstock I also had some lovely antique looking book plates. I used one of these and popped in the number 18, taken from my own stash of alphabets.


I also took a sheet of Dark Florals and Ticket Collector (both foiled) and cut out various sections of flowers, scrolls, foliage and tickets, these were then scattered around the photo to create a semi frame (some were raised on foam pads for dimesion) and I also slipped a small black doily slightly behind the photo too.


Using some Stickles in Rose I gently highlighted some of the black ink splats to co-ordinate with the pink blossoms in the paper sheet and also added more letters to say Chloe from the same pack as the number 18.


Some black blossoms were also in my kit and I glammed these up with some Copper Stickles.


In various places around the outer edge of the layout I tore little sections and turned them back slightly, leaving a tiny blossom on the edges.


I finished off the page with sprinklings of copper and rose gold sequins in various shapes and sizes and also a cherub button, which I removed the shank from the back.


If you pop over to the shop you will find lots and lots of wonderful goodies....including the latest new 5 releases from Prima
Amelia Rose
Lavendar
Cherry Blossom
Love Story
Vintage Floral

Right, thats it from me for now ....I will be back later in the month again with another project with Amelia Rose

Happy Scrapping
Anita xx

Wednesday, 4 April 2018

Creating a Scrapbook Layout with Distress Oxide Inks

Hello - Lynn here today, I'm pleased to share with you the latest set of Distress Oxide Ink pads to be released by Ranger. I have created a background for a layout using several shades. 


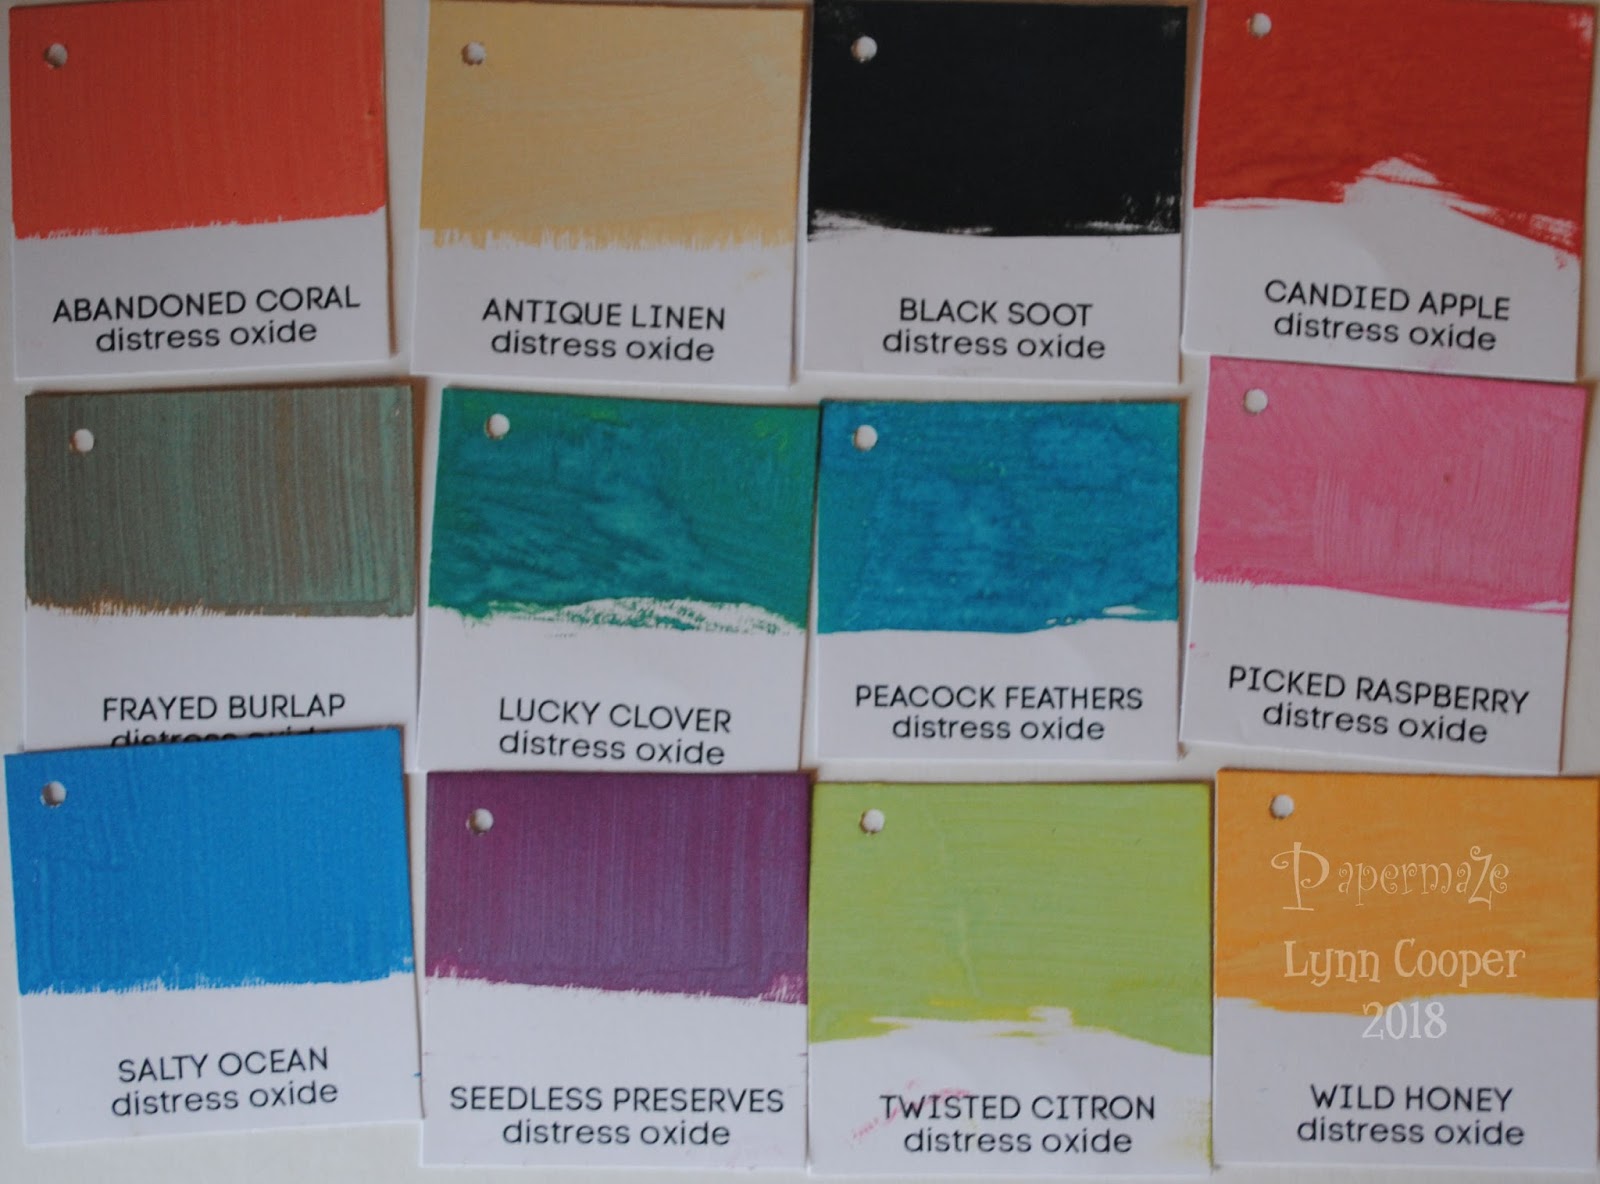
For details of the properties of these inks which are a mix of ink and pigment, please see the review I wrote last year, when the first set of 12 colours was released. All 36 colours can be found in the shop HERE.


This time it's lovely to have some of the more pastel shades to add to the previous 24 colours, with the addition of TATTERED ROSE, SQUEEZED LEMONADE, SHADED LILAC and BUNDLED SAGE. In addition to the latter there are more lovely blues and greens in the form of EVERGREEN BOUGH, BLUEPRINT SKETCH, MERMAID LAGOON and FOREST MOSS. Then the bright orange that is CARVED PUMPKIN and some neutral colours AGED MAHOGONY, HICKORY SMOKE and GATHERED TWIGS. I have made some more swatches for the shop so if you visit you can see what the colours look like when used on white, kraft and black cardstock. Some of the lighter shades need a couple of coats on the black card.  The idea for the swatches came from Jennifer Mcguire's blog, she has some great storage and organisation posts, with downloadable swatches. However the swatches for the latest collection are not available yet so I set about making some myself. 


To make the background for my layout I selected colours that worked well with my photo.  Choosing 3 colours from the new range and 2 colours from previous collections.
I decided to try using Distress Micro Glaze as a smudge resistant, waterproof mask. Micro Glaze works when using a variety of inks, markers, stains, paints and more, it also works well as a sealant to protect projects. 


I used a blending tool to rub the glaze through a Layering Stencil onto the smooth white Bazzill cardstock. 

TIP: Dedicate a blending foam pad to this product, it can be stored inside the jar for future use. If a light coat of Micro Glaze is used, it will dry quickly and be very effective.


Then with the coloured Oxide Inks, and blending tools apply colour to the page blending the colours well where they overlap. This will give a seamless graduation of colour. 


My photo was cropped and added to the page, then I stamped around it with the brush and pencil stamps from the Tim Holtz, Stampers Anonymous Crazy Things Stamps. These were coloured in directly onto the layout using the Distress Oxide Inks. The beauty is that as long as the background layer of ink is dry you can layer the ink and you will get the intended colour, they will not mix with the underlying ink. 


For my title I used some PaperArtsy stamps by JOFY to stamp out the words onto the layout in Archival black ink. Then I stamped them onto white card. To add colour to the letters, I added some oxide ink to the craft mat and with a little water I painted each letter. These were cut out and stuck over the letters on the layout. 

To finish off I added a few drops of Nuvo Crystal Drops here and there.

I wrote the original review when the first 12 colours were released, and today's post is about the most recent, so not to be left out here are the 12 colours which were released later on last year. They included: PEACOCK FEATHERS, SEEDED PRESERVES, ANTIQUE LINEN, FRAYED BURLAP, BLACK SOOT, PICKED RASPBERRY, CANDED APPLE, WILD HONEY, TWISTED CITRON and LUCKY CLOVER. 


This experiment prompted me to make a layout that is very different to my normal style, it was great fun to create by playing with these great inks and so much wonderfu colour!
Back with more projects using these inks later in the month.
Thanks for looking
Lynn x

Monday, 2 April 2018

Simple Stories - I Am ... Part 2

Hello, Karen here with another layout using the gorgeous Simple Stories I Am ... collection.

I decided to create a layout with photos taken of the gardens at a local English Heritage property. With the weather hopefully becoming more springlike, its the ideal opportunity to get out and enjoy the outdoor and take lots of photos.

This layout uses a grid and five photos. A grid is a good way to include multiple photos without the layout looking cluttered.


Using my sewing machine I stitched with black thread a grid of nine squares on the yellow floral side of the sheet of  the 4x4 elements paper. I printed five 3" square photos , matted them onto white Bazzill cardstock and stuck them into the grid.


In other sections I used some of the 3x4 foiled elements and pieces of patterned paper which I also trimmed to 3" square and matted onto white cardstock.


The squares were then embellished with butterflies cut from the Choosing Happiness paper, enamel dots and stickers from the 4x6 sticker sheets.


My title was cut using the Silhouette and added to the layout as well as journaling strips printed on the computer.


Thanks for looking. Supplies used in this layout can all be found at Papermaze as well as lots more so hop on over to the shop.

Sunday, 1 April 2018

Happy Easter!

It's time for the final clue in this year's Easter Egg hunt :)  Hopefully after finding today's hidden egg, you will have 7 answers, which you then need to email me - vanessa@papermaze.co.uk.  All I need is the product name and manufacturer of each egg. Closing date for entries is 5pm Thursday 5th April.  A winner plus runners up will be drawn at random then :)

So, onto the final clue:

Which Clean Bandit song features Swedish singer Zara Larsson?

Happy hunting - and good luck!

Saturday, 31 March 2018

Today's Clue...

The rain is continuing here over Easter, but no time for crafting today, as we've been busy stocktaking!  Still, I've found time to hide today's egg on the website, so here's your clue:

What is the Christian name of the actress who played DS Ellie Miller in Broadchurch?

Don't forget to come back tomorrow for the final clue and the details of how you can enter!

Happy hunting :)