
Hi everyone, it's Rebecca here with you again sharing my second layout using Photoplay's 'Sweet as Honey' collection.

I was really inspired by one of Claire's recent layouts (you can find it here) and her use of rosettes on the page, so I decided I wanted to make a giant rosette for my layout.
I selected the 'Sweet Pollen' patterned paper as it is my favourite paper from the collection. The yellow and white florals just 'pop' against the black background and just makes my heart sing. I'd used some of it on my previous layout, so I didn't have a full 12x12 sheet left.... so I was dubious about whether I'd have enough paper to make a full circle or not... but decided to give it a go anyway!
I cut what I had left of the 'Sweet Pollen' paper into two strips - approx 4.5x12 inches. I used my paper trimmer with a scoring blade and scored along the 12 inch side of the strips, at every 1/4 of an inch. I then folded the strips back and forward to create 'mountains and valleys' and stuck them together to create one long strip.

It was at this point that I knew it wasn't going to be long enough to make a complete rosette so I had to get a bit creative in my page design (by 'creative' I mean 'sneaky'!). My strip was long enough to make about 80% of a full rosette, so I punched a circle from some scrap cardstock, and stuck the rosette (with what looked like a pizza slice missing!) onto the circle to help it hold the shape.
I then had to figure out a way to cover the missing section of the rosette! I printed my photo in black and white and cut it into a circle and used this to cover a lot of the gap. I wanted to add some flowers, and remembered that I had a sheet of yellow and black flowers left over from my Vicki Boutin Color Study kit, so I took some time to fussy-cut some of them as they matched the Photoplay collection perfectly - and they also covered a lot of the gap!!

Because this collection is full of really cute bees, I wanted to add a couple of bees to the page, so I've used a cutfile by Peartree Cutfiles and backed two bees using the B side of the 'Buzzing By' patterned paper. I've placed the bees onto my white background, to the edge of the rosette, to help extend the design out a bit.

I've selected an acrylic perspextive title from Bramble Fox which says 'Bee Awesome' and comes with a really cute little bee. This perspextive set is perfect for this collection - you get a black set and a mustard yellow set so the colours match the collection too! A match made in heaven.

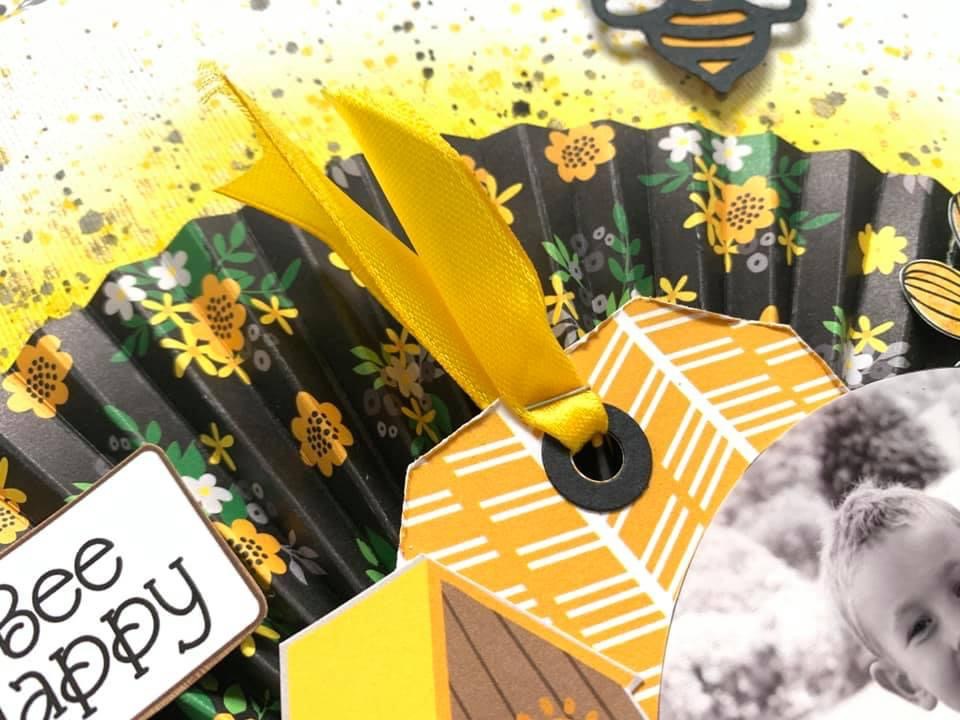
I selected the XXX patterned paper and cut a tag from it, which I placed above my photo with some yellow satin ribbon threaded through the top.
The layout was coming together nicely, but I wanted to add a cluster to the left of my photo. I fussy-cut some really beautiful bird houses and a Bee from the 'You're a Keeper' patterned paper, and added these to the left of my photo.

I was in the mood for some mixed media, so I decided to add some colour to the white background, behind my rosette. I used a Distress Ink in Mustard Seed and brushed some colour on using a blending brush, and then added splatters in yellow, metallic gold and black.

Once my background was dry, I began getting everything stuck down. I've used quick drying tacky glue and foam pads to bring a bit of dimension to the page. I placed my title and flowers strategically to fill the gap in the rosette and now you can't tell there was ever a section of the rosette missing.
I finished my layout by adding a banner from the Cardstock Ephemera pack which reads 'You are my sugar pie honey bunch' and a fussy-cut bee from one of the circular ephemera pieces.

I'm really pleased with how this layout turned out. In fact, I love both of the layouts I've created with 'Sweet as Honey'. The colours in the collection really appeal to me (even if the gnomes don't!!) and I've really enjoyed working with it.
If you'd like to see how this layout came together, there's a process video up on my YouTube channel which you can find here.

Thanks for reading, I'll see you next month!
Take care
Rebecca x
No comments:
Post a Comment