Friday, 13 August 2021

Bungalow Lane - American Crafts Paige Evans - 'Make Happiness' by Meg

Hello there - I am SO excited today to be showing my first layout using the gorgeous American Crafts 'Bungalow Lane' collection by Paige Evans! 

This collection is so beautifully warm - it feels like the perfect blend between Summer and Autumn (which I'm really embracing now, with the blustery windy wet weather and with the nights feeling like they're getting longer already)! But this collection is also bright and cheerful so I can absolutely see it being used for scrapping Spring photos too. I absolutely adore it! 

In my Design Team pack I received a few of the geometric patterned papers and Paper #18 caught my eye - I'm a sucker for pink and those triangles just looked so interesting, I really wanted to use some of it as a background. I flicked through some of the other papers to decide which would 'go' best with #18 and I loved the effect of it against the leafy red Paper #15. I loved the bold red and decided I wanted to go a little crazy with it (since I very rarely use red), so I pulled out some plain red Bazzill cardstock to match Paper #15 and to contrast with all the patterns. 

The dark leaf from the pack of Ephemera Icons with Copper Foil caught my eye and I decided to use it as a template to trace around and cut out some red leaves from the plain Bazzill cardstock and a few leaves using the pretty red patterned Paper #15. I distressed and curled the edges of the leaves to add some dimension to my page and began arranging on my background paper to decide how I wanted the layout to look. 

I thought about having the red leaves look as though they were falling across the page diagonally but I changed my mind and decided to have them 'falling' straight down the centre. I really liked the plain red leaves against the patterned background but thought it needed breaking up a little, so I used a strip of pink Blossom Bazzill cardstock in the centre, which I then splattered with some red paint. 

I layered my autumn photo up with some more pink Blossom Bazzill cardstock and one of the blue cut-apart journalling elements from Paper #24. I used copper photo corners that I had in my stash already, but they ended up not really being visible in the end due to me layering the leaves over them! 

I began assembling my page and arranging my leaves and photo together in the centre, before adhering everything down and adding a few more pieces of Ephemera (the phrase strips and the copper 'Make Happiness' banner) from the Copper Foil Ephemera pack. I finished my page with some Bright Gold Nuvo Drops, flat back gems from my stash and journalling. 

I'm thrilled with how bold the page ended up looking and I really like the combination of colours - but if red isn't your colour, you could experiment with leaves in any other colour, as Paige Evans' Bungalow Lane is just jam-packed with colour and the combinations are so flexible! You really can just pick a colour and go for it. 

I hope you enjoyed my page today as much as I enjoyed creating it and thank you for looking! 

Take care and I'll be back with another Bungalow Lane page soon, 

Meg x 


Wednesday, 11 August 2021

Smile Often - Echo Park - Under Sea Adventures

Hello, Rebecca with you today sharing my first layout using Echo Park’s ‘Under Sea Adventures’. It’s a fun collection full of sea creatures such as sharks, fish and whales and I’ve had a great time using it to create some layouts for my little boy’s album. You can find the collection in the store here


I had the idea of creating a layout with an underwater scene so started with the ‘Whale Hello’ patterned paper - the B side of which is a blue scale pattern so I thought it would work well as a backdrop. I get a bit nervous using patterned papers as backgrounds though so needed to create some white space! I tore the patterned paper to use a section on the bottom half of my layout and tore a second thin strip to place at the top. This gave me some white space in the centre of the page, phew!!

I matted my photo using two of the coloured cardstocks from the Matchmaker Pack and placed it to the left of my layout, half on the patterned paper and half on the white background. I fussy cut a banner from the 4x4 Journaling Cards paper which reads 'Let's make some waves' and added it to the left of my photo as an embellishment. To the right, I added my title - I've used a sticker from an older Vicki Boutin collection, and matted it on yellow cardstock to help it stand out, and also because I knew I was going to add a yellow sun to the top of the page.


I used one of the border strip stickers from the Element Stickers sheet to add some detail to the bottom of the page, and to create an ‘ocean floor’ for my scene. To this, I added some hand-drawn seaweed, cut from a green Bazzill Cardstock, and a couple more stickers from the Elements Stickers sheet. I then fussy cut some sharks from the Sneaky Sharks patterned paper, and some submarines from the Swimming Submarines patterned paper and added these to the bottom half of my layout. 


I've raised the sharks and submarines up on foam pads to give them a 3D appearance, and I've weaved some in amongst the seaweed to give them a more realistic look. I love these sharks because they are a perfect match to my little boy's swimming shorts in my photo - and that's what originally drew me to this collection!


I also fussy cut some whales from the A side of the Whale Hello patterned paper and added these either side of my photo. I used a glitter Nuvo Drops to add air bubbles to all of the sea creatures. I love using Nuvo Drops in this way - it's not the first time I've done it and it definitely won't be the last!


To the top right of my layout, I've added an acrylic cloud and sun (both from Bramble Fox) to the blue strip of torn paper to give the appearance of a sky. I've also added an acrylic seagull above my title.

I've finished the layout off with a couple of tiny word stickers to the top left of my layout, purely because it was looking a bit bare!

I hope you've enjoyed this fun layout - it's a bit different for me but I was in the mood to create something fun and childish (if that's the right word!). If you'd like to watch the layout come together, there is a process video up on my YouTube channel, which you can find here.

I'll be back later in the month with another layout, but until then,

Take care

Rebecca x


Monday, 9 August 2021

Cocoa Vanilla Studio ~ These Days #1

 Hi everyone, it’s Anna here today and this month I’m working with the latest collection by Cocoa Vanilla Studio - These Days. This collection is absolutely stunning and is available to by in the shop here

To create this layout I used the daybreak patterned paper as my base. I then added a few sprays of shimmerz vibez glorious day to the centre of the page and left to dry. 
Meanwhile, I fussy cut 8 of the frames from the wall of fame patterned paper. I also cut out the centre, leaving just the frames themselves. 
I chose three of the frames to use for my photos and backed the remaining frames with cardstock from the matchmaker pack and the b side of the family ties patterned paper. I used a journaling square from the good life paper to back one of the frames to create somewhere to journal. 


I then set about decorating my remaining frames, I used two butterflies and a mug from the die cut ephemera pack for three of the frames and fussy cut four small houses from the good life cut apart paper for another. 


I used one of the foam title stickers and a word from the ephemera pack for my title.


I added some more pieces from the ephemera pack around the frames, raising some pieces on 3D foam pads to add some extra dimension. 


I finished by adding a few jewels from the Pinkfresh Studio jewel essentials in peach fuzz pack. There’s several other colours to choose from too - see them here


Thanks so much for looking! I’ll see you soon with another layout using this gorgeous collection! 

Anna


Saturday, 7 August 2021

Echo Park - Farmers Market - 'Ciao' for Now!

Hi Everyone and a warm welcome back to the blog!

I'm here sharing my first layout with the fabulous Farmers Market collection from Echo Park, and boy it's a fun one!

There are so many awesome papers, colours, patterns and ephemera pieces - you can really let your creativity run wild!

I grabbed the opportunity to use this collection with both hands - I thought it would be perfect to document the story of our first ever visit to the New Forest and Hampshire County Show back in 2019.


I decided to start with this layout, using a photo that I actually took on our way out of the show, where we discovered this HUGE cow - a perfect opportunity for a photo, right?! I couldn't resist a play on words for my title, replacing Ciao for now, with 'Cow for now!'

I started with a piece of white premium cardstock and cut a circle from the Gather Floral paper, to look like a sun. I distressed the edge of the circle for a bit of extra texture.

Using it as the anchor for my page, I built the design around it. I loved the large barn on the 4x6 Journaling Cards so fussy cut this, layering it on foam pads on top of the sun and and strip of the Multi Journaling Cards paper. I love these two gingham papers - they scream countryside and farming to me so I thought they were perfect for this layout.

Next, I got my 3"x4" photo and mounted it on to a bit more gingham patterned paper, this time in blue from the b side of the Produce Scale paper. I slipped the photo just under the barn, raised on some smaller foam pads for a bit of definition. This also allowed me to tuck in some extra embellishments around my picture.


Around my photo, I layered some stickers from the Element Stickers sheet, fussy cut a floral tag from the Multi Journaling Cards paper and a jar from the 4x6 Journaling Cards paper.


Underneath my photo, I added a small red tag saying 'So Lovely' from the Frames and Tags pack.

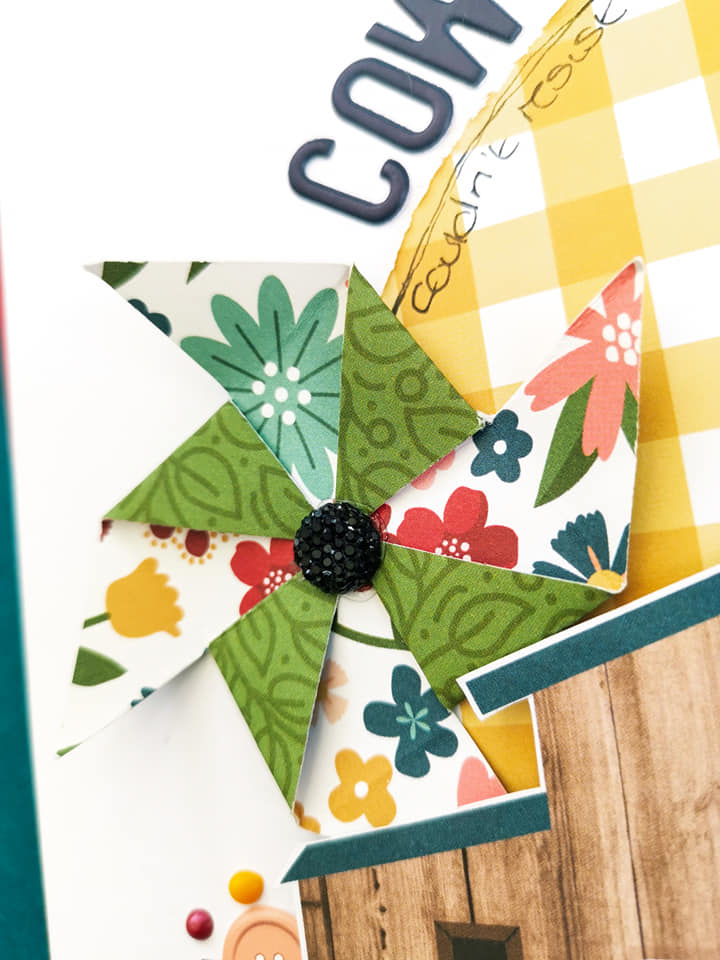
To balance the page, I made a small pinwheel from the Farmer Floral paper, secured with a glittered gem from my stash.


I also added some floral stickers from the sticker sheet around the edges of the barn, and a few Nuvo Drops around all the clusters in yellow, red and black.


Finally, the fun title! I followed the curve of the sun, using navy blue puffy alphas from the Reaching Out collection. Once the title was in place, I added my journaling underneath in black pen.


I absolutely love how this layout turned out. It came together really quickly as there were so many statement pieces available for fussy cutting, which the stickers complemented perfectly.  By also using different depths of sticky foam the layout also has lots of dimension.  I've tried to capture on the image below:


I hope you've enjoyed this one as I've some more layouts to share with you using this fun collection throughout August.


Until then, take care.

Claire

xx

Friday, 6 August 2021

Echo Park Under Sea Adventures - Under the Sea

Hello, Karen C here today to share a layout using the cute new collection from Echo Park called Under Sea Adventures. Turtles, submarines, sharks, dolphins and friendly fish are all part of this new bright primary coloured under water themed collection. It is perfect for scrapbook layouts about trips to the aquarium or sea life centre, swimming trips and nautical adventures. It would also be great for cards and journals. 

The layout I'm sharing today is a monochromatic layout featuring photos from trips to a couple of aquariums.


I started by matting the B side of the sheet of 3x4 journalling cards onto a sheet of black Bazzill cardstock so that about a quarter of an inch of the black cardstock was visible round the edges.


Using my Silhouette Cameo I die cut, from smooth black cardstock, some coral cut files and attached these to the bottom of the layout.

I then matted six 3x4 photos onto two strips of white cardstock and added these to the layout. 

I only put glue on the sides of the strips so that I could tuck a hidden  journaling card behind one of them.


I typed journaling strips on the computer onto white paper and stuck these to one of the 3x4 journaling cards. I attached a shark, cut from more black cardstock, to the top of the card before tucking it behind the photo so that only the shark can be seen.


I then cut more sharks, a sea horse and seaweed and used these to embellish the layout.


Fish were fussy cut from the Fish are Friends paper and used to embellish the coral reef.


The title was created with foam letter and a few black sequins were scattered over the layout.


Finally I added some stickers from the Sticker Sheet on top of some of the photos..


Thanks for stopping by today and I'll be back soon with another underwater layout. In the meantime stay safe.

Take Care, Karen x x 

Thursday, 5 August 2021

July Kit - Extra

Lynn here today, I'm back with an extra layout using some left over patterned papers and embellishments from the Papermaze July kit. I simply added a 12" x 12" sheet of Watercolour paper from a pad I purchased at Papermaze.


Before looking at how the layout was made, here is a reminder of the kit:


I started with the water colour paper and made a mixed media background using a selection of Distress Oxide Inks, picked to match the colours on the
P13 -When We First Met - # 06 paper. I used Black Soot, Antique Linen, Brushed Corduroy, Dusty Concord, Stormy Sky and Old Paper, diluted with water and flicked, dripped and dropped onto the watercolour paper, then spritzed with more water.

When the paper was dry, I used the remains of the #06 paper from an earlier layout, I tore this down the left side. My piece was about 10cm wide. this was stuck to the right side of the layout.

My photo was mounted onto scraps of 'In the Water Garden' paper, with the lilac side up. The photo was put in place without glueing down. This allowed me to position the embellishments. I used thin strips of paper, the washi tape and the 49 & Market Rub-ons from the kit; arranging pieces of these around three sides of the photo. The matted photo was then attached. 


From the remaining scraps of P13, I fussy cut two circles and placed them on top of one another to make a journalling spot. This was positioned top left of the photo. Then I fussy cut some rose clusters and arranged them around the photo, using 3D foam tape.

I tied some Baker's Twine around the journalling spot and tied the star embellishment to this. 

I scattered the wooden hearts over the layout.

Finally I added title, date and place using American Crafts Thickers - Happy Life alpha stickers. 

Thanks for looking.
Lynn x

Wednesday, 4 August 2021

My Candy Girl - 'Sugar and Spice' by Meg

Hello everyone, it's Meg here sharing my latest layout using the delicious My Candy Girl collection by Bella Blvd!


My previous page with this collection was super pink and girly, so I knew this time I wanted to use a photo of my baby boy and I picked out my photo of him in his baby blue dressing gown. I thought it went really well with the bright colours! 

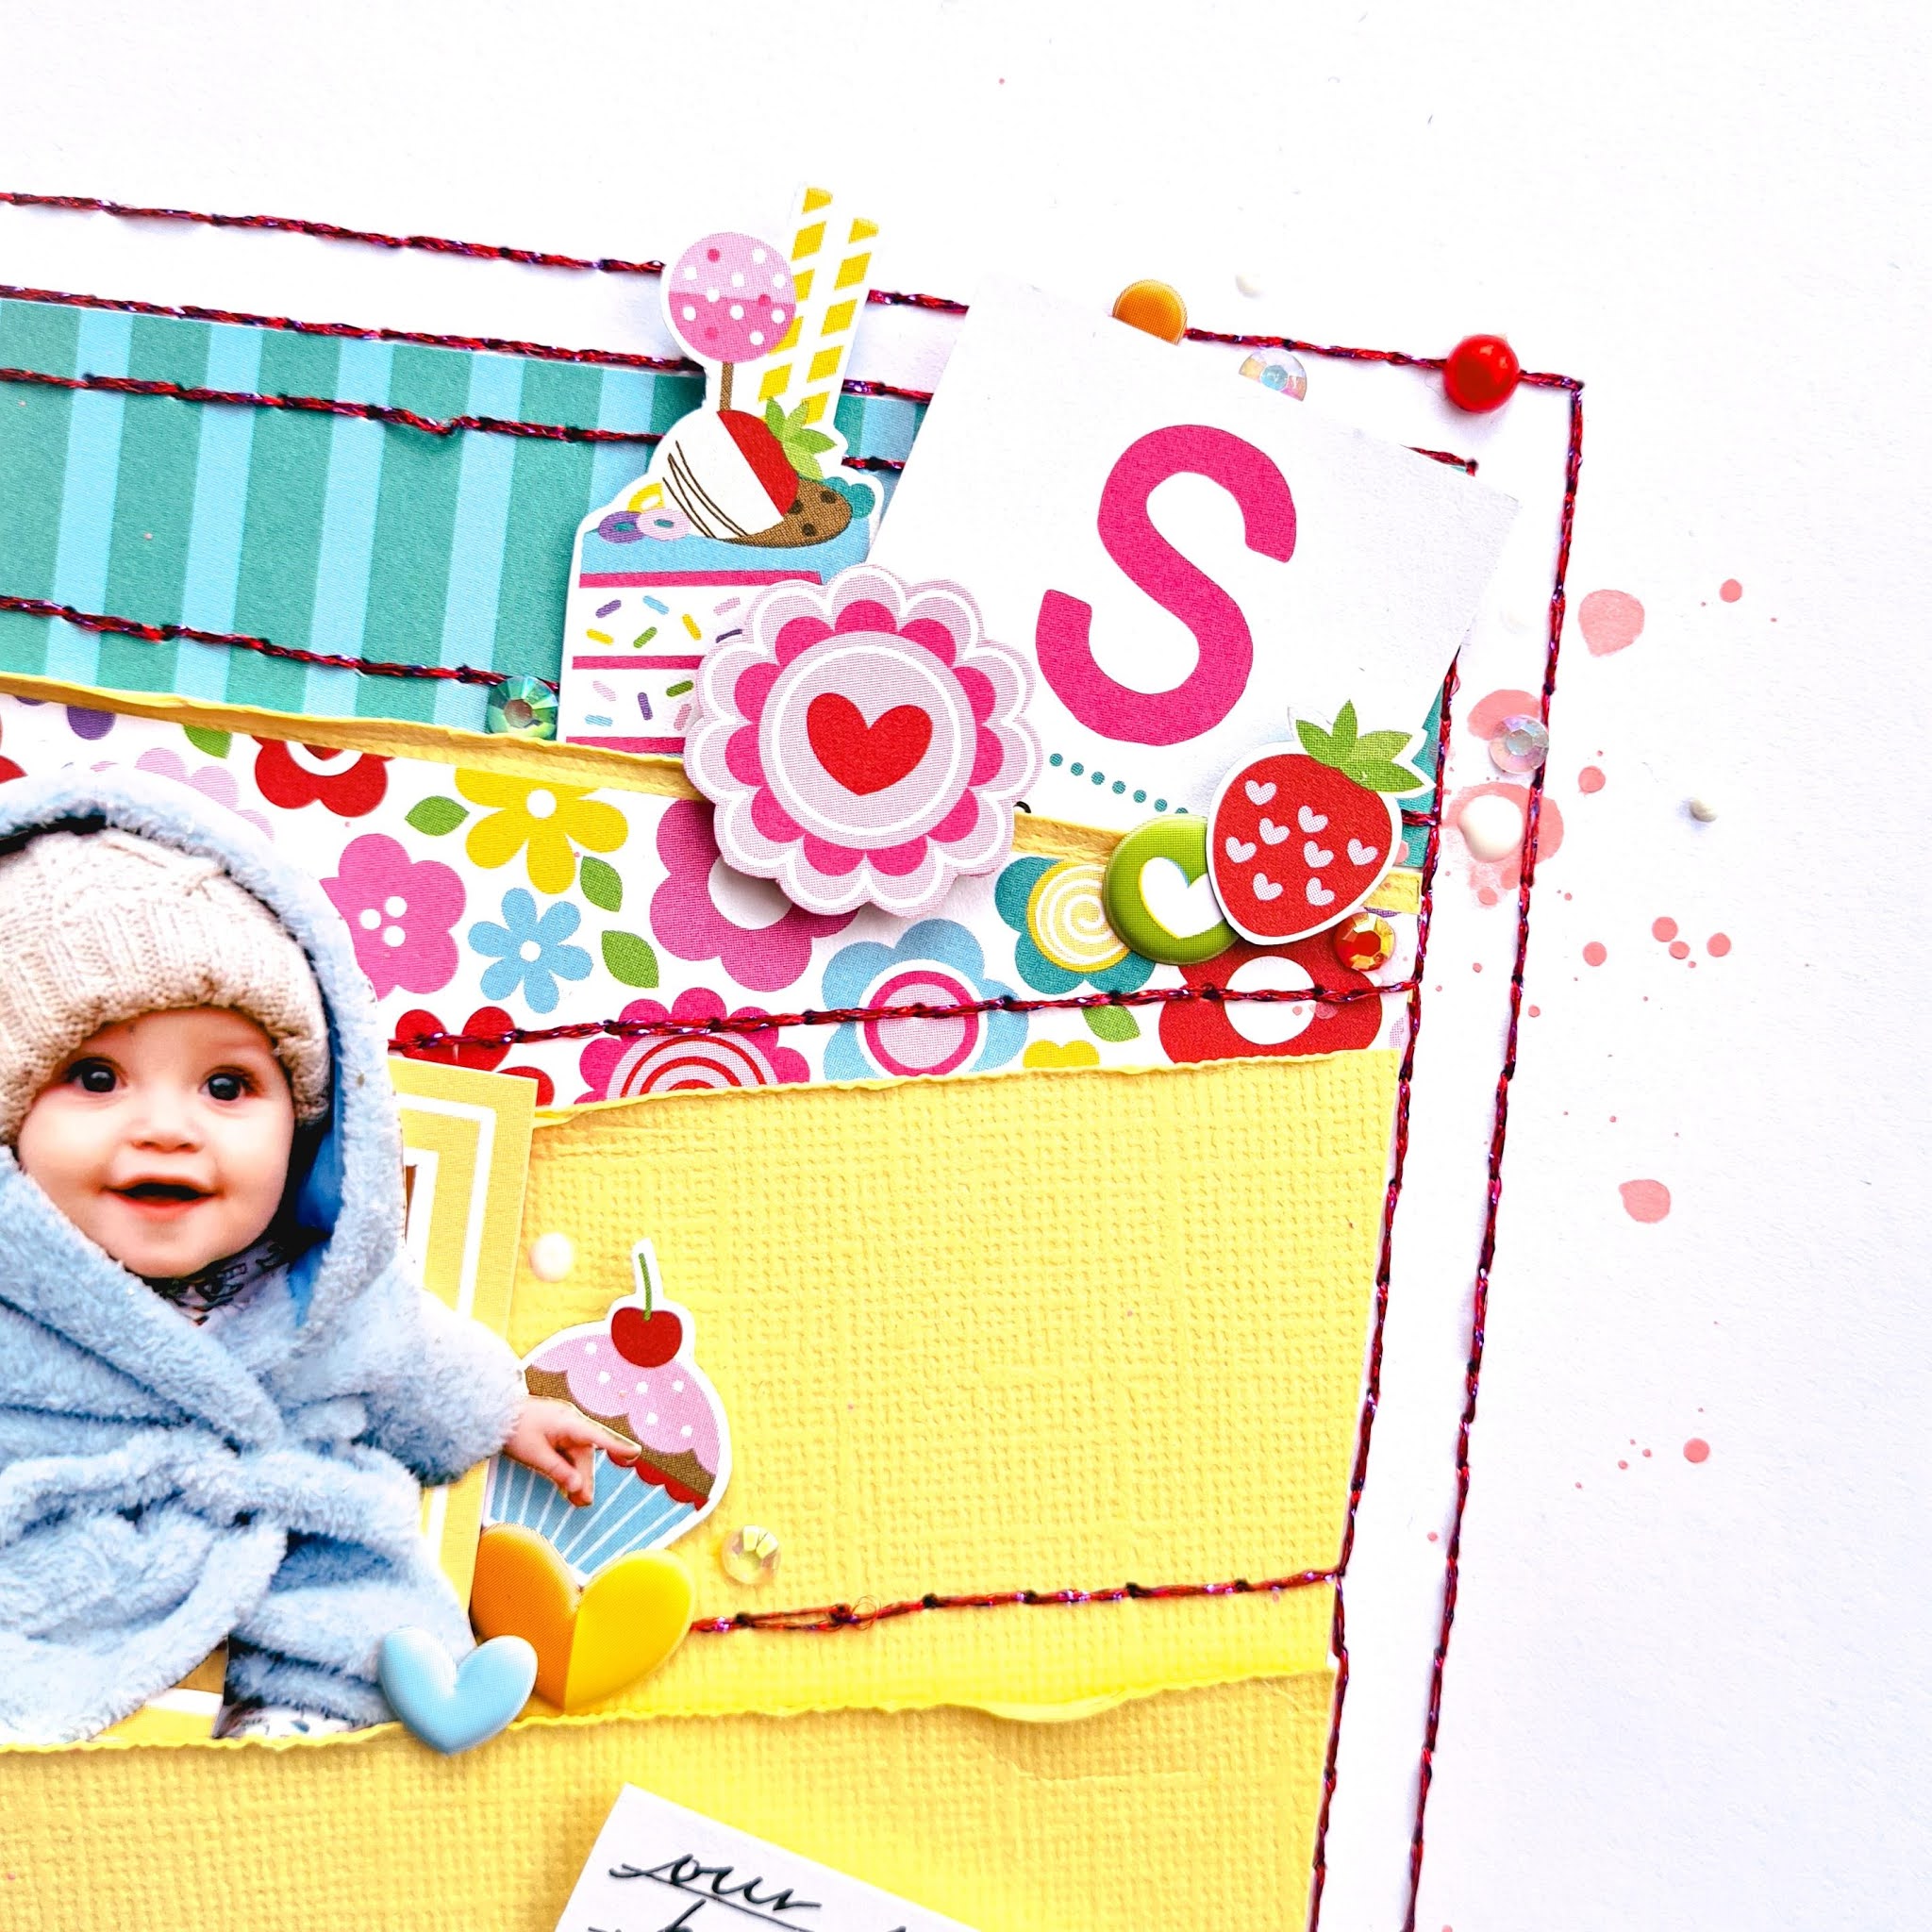
I knew I wanted to make the page full of colour so I decided I would layer paper in a central square with a wide white border around the page to really frame the colour and balance it out. I measured and drew a 6x6 square on white
Marshmallow Bazzill cardstock in pencil and cut strips from yellow Lemonade Bazzill cardstock. I then cut the striped turquoise border from the My Candy Girl Borders paper, cut it in half, arranged my strips in the square and trimmed them to fit. 

I glued in place, distressed the edges and handstitched across the strips and around the 6x6 square using a ruler and a pokey tool to poke holes in the paper every quarter inch, then I stitched in a dark pink glittery thread I had in my stash already. I fussy cut elements from the Borders paper, Sweet as Sugar paper and I cut out the 'Sugar and Spice' journaling element, 'S is for Sweet' plus a turquoise frame from the Daily Details paper. 

I splattered some pink acrylic around the edges of my 6x6 square and began tucking in my fussy-cut photo and the other fussy-cut elements in between the paper layers, in a triangle shape around my photo to draw attention to it. I finished with the Sugar Coating Puffy Stickers, flat back gems and a diamond shaped charm from my stash. 


And thats it! A colour-packed, sweet layout that came together quickly using My Candy Girl. I really loved how this turned out as I find bold colours a challenge sometimes, but these pieces are so cute and fun they feel like they don't need to be put together 'perfectly' to look good! 
Hope you enjoyed this page today and take care, 

Meg x