
For this first post I have created two layouts to share, one with my daughter and her fiance when they became engaged last year on Christmas eve and the second with George choosing a Christmas tree the year before.

Before telling you how I made these layouts, here are the details of the kit.
 |
| The December Kit |
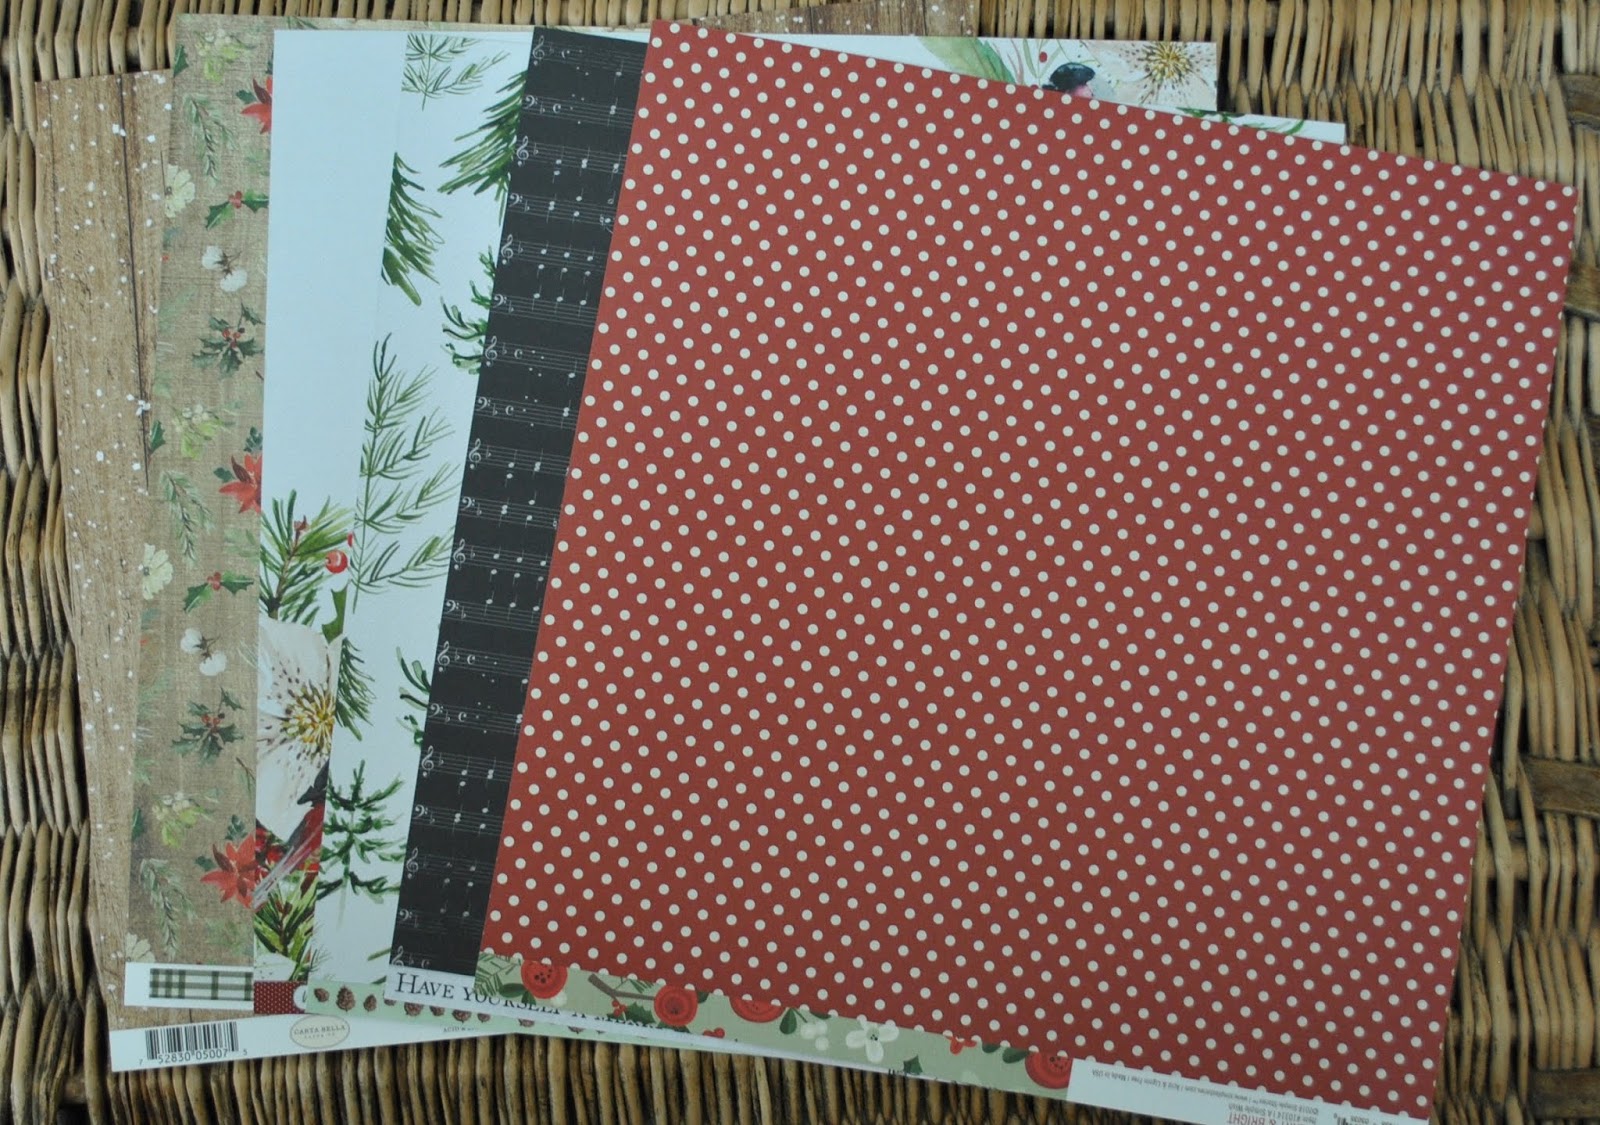
Double-sided Patterned Papers:
Carta Bella - Christmas collection - Merry Snowflakes & Winter Floral
Kaisercraft - Peace & Joy collection - Rejoicing & Elation
Kaisercraft - Christmas Edition collection - Snowcapped
Simple Stories - Merry & Bright collection - A Simple Wish
Bazzill Basics - Kraft & Natural
Carta Bella - Christmas collection - Merry Snowflakes & Winter Floral
Kaisercraft - Peace & Joy collection - Rejoicing & Elation
Kaisercraft - Christmas Edition collection - Snowcapped
Simple Stories - Merry & Bright collection - A Simple Wish
Bazzill Basics - Kraft & Natural
The reverse side of the papers
Extra Bazzill Basics Pack - Rain Forest, Watermelon, Cajun & Raven

Embellishments:

2 Jolee's Boutique word stickers, 5 heart buttons, 3 Tim Holtz beaded berries, 4 Tim Holtz Christmas Quote Chips, 1 frame, 18" black lace, A5 sheet corrugated card, strip of pearls, 6 strips of word stickers, 2 red flowers, 2 exclusive chipboard stems.
Christmas Eve Engagement

For this layout I wanted to create a wreath to 'hang' on the wooden panels. So I worked with two sheets of patterned paper - Merry Snowflakes and Rejoicing.
Cut the photo into a circle (mine was about 19cm in diameter), then cut a circle from the centre of the Merry Snowflakes paper, a little smaller than the photo. With the wooden panel side up mount the photo over the hole. Keep the circle cut from the paper for the next layout.
Take the Rejoicing paper and fussy cut the bird, the bird house and white flower from one side then turn and cut lots of red poinsettia and the leaves from the other side. (Also cut out the holly and set this aside for another layout - to come on the next post). Arrange these paper elements all around the photo, curl the leaves and petals with the blade of your scissors. Use double-sided 3D foam pads to give dimension to the wreath. Add a gem to the centre of each flower - I found some golden ones in my stash.
Add the Papermaze exclusive chipboard stems, I broke a piece off one of the stems then tucked them all in among the leaves and flowers. I added a dot of Glossy Accents to each bud. Add quote chips and word sticker strips to the bottom of the photo.
I cut my title from Gold miri card using an alphabet die set from Die-namics. The date was added with some old sticker dies from my stash.
Oh Christmas Tree

My first job was to gut the Rainforest Bazzill, making a frame of 1". I stuck this to a sheet of scrap cardstock to make a stronger base for the layout.
All the edges were inked with either Gathered Twigs and Forest Moss Distress Ink.
Then checking to make sure the trees are running in the right direction, I cut two pieces from the Elation paper, they were both 11" wide and one measured 2" deep and the other 5" deep. After rounding the corners at the top of the 2" piece and the bottom of the 5" piece, I added them to the top and bottom of the layout leaving a dark green border of 0.5" showing.
To fill the gap and make a contrasting band across the page - I cut a piece of Cajun Bazzill 11" x 4.5", and a piece of the plaid side of Winter Floral paper 10.7" x 4.3". I stuck the paper centrally over the card, then put it into place between the strips of Elation paper.
I mounted my photo onto some white paper and then positioned to the right of the layout (The white surround helps to lift the photo from the surrounding papers). From the Rainforest Bazzill I cut six trees (two of each) using the Tim Holtz Sizzix Woodlands Thinlits die set. I used the sheet of corrugated card in the kit to die cut three deer using the Sizzix Woodland Deer Thinlits die set. I mounted these onto the layout with double-sided 3D foam pads.
Selecting one of the quote chips I stuck it to the bottom right of the page, I added a date with some stickers from my stash. For my title I die cut letters from the circular scrap of wood panel paper from the first layout. I also used some old glitter Thicker alphabet stickers from my stash.
I have more layouts to share with you very soon.
Thanks for looking.
Lynn x
1 comment:
Lovely layouts Lynn and I love the colours in the kit.
Post a Comment