Showing posts with label Maggie Holmes. Show all posts

Wednesday, 2 August 2023

July Papermaze Kit - Part 2

Lynn here today, with the second pair of layouts from the bright and bold kit from Papermaze. The July kit is available from the shop or online.


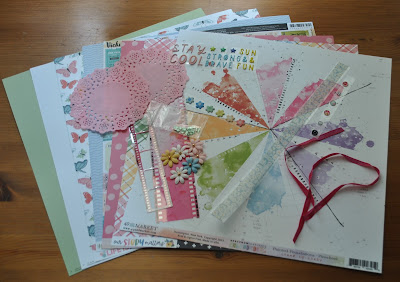
Before looking at how each layout was made, here are full details of what you will find in the kit.


Patterned Papers:
49 & Market - Spectrum Gardenia - Painted Foundations - Pinwheel
Echo Park - Our Story Matters - Happy Plaid
Echo Park - Here Comes the Sun - Brighten your Day Dots
Echo Park - Life is Beautiful - Beautiful Butterflies
Maggie Holmes - Woodland & Grove - Field Notes
Vicki Boutin - Where to Next - One Way Ticket
Bazzill Basics Cardstock - CS White & Pear

Embellishments:
2 Doodlebug doilies, 12" Carta Bella washi tape, 2 - 49 & Market Filmstrip Frames, 6 Prima paper flowers, 50cm ribbon, 6 Jen Hadfield puffy flower stickers,
selection of Rosie's Studio puffy sentiments, pinch of Pinkfresh Glitter Drops, 6 Prima Say It In crystals.


Matching Bazzill Basics Cardstock Pack - Mauve Ice, Grenadine, Peach Creme & Blue Star


Fuchsia Fairy - A photo of my daughter in the costume I made for her to wear to school for Book Week.

I started with the sheet of White Bazzill from the kit and created a multimedia backdrop. I used a selection of stamps from my stash and stamped random shapes in Black archival ink. I flicked some ink over the page with Distress Oxide Inks in Kitsch Flamingo, Picked Raspberry and Wilted Violet.


I cut two pieces from 'Field Notes' paper, these were both about an inch wider and taller than my photo. I placed the paper pieces (showing both sides), and the photo, fanned out across the centre of the page. Together with one of the doilies (cut in half), I stuck them all in place. 


I decorated the page with one of the pink filmstrips from the kit and several different black and white washi tapes from my stash. I wrote my journalling alongside the photo on the patterned paper.


My title was added using 'Be Kind' Thickers, and I embellished with sequins from my stash and the Prima Crystals from the kit. Finally, I tucked in three tiny images of the Fuchsia Fairy from the web.


Race for Life - I wanted to record my experience of running for Cancer Research, and this also gave me a way of storing and displaying my medal.


For this layout I chose the 'One Way Ticket' paper as the background, with the pink grid side up. I inked around the edges of the paper, using Peacock Feathers Distress Oxide Ink.


I prepared two photos, one for the start and one for the finish. I placed these in the centre, but only stuck them in the centre of each photo, allowing me to tuck elements under later. 


I cut the second doily from the kit in half and placed one half on the edge of the page to the bottom left side. I popped the other half of the doily at the top of the photos. I cut the film strip in to and placed these pieces above and below the photos.


I used the pink ribbon from the kit and together with a few others from my stash I applied them radiating from the photos. Then I trimmed the ribbon for the medal and attached it so it would hang from the photos. 


I made a small tag with a scrap of white cardstock, inked the edges and made a bow with the kit ribbon. Then I added my journalling and placed the tag over the doily on the left of the layout.


The title of my layout was created with some turquoise glittery foam letters, from my stash, and Doodlebug Designs Alphabet Soup letter stickers in Bubblegum and Swimming Pool.


That's all for today, I'll be back with one extra layout from this kit later.
Thanks for looking
Lynn x

Friday, 2 June 2023

May Papermaze Kit - Part 2


Lynn here today with two more layouts made using the Papermaze Kit for May. A collection of pretty pastel papers, embellishments and cardstock. There is stitching on both layouts, hand stitching and machine stitching. Here are my layouts followed by what's in the kit and how I made them.


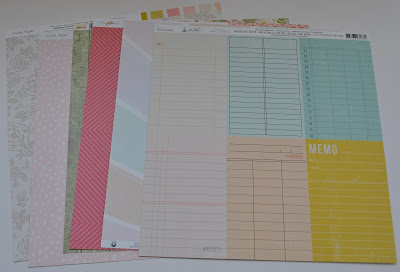
 This is what you will find in the kit:

Patterned papers:

Crate Paper - Gingham Garden collection - Alight & In The Shade
Stamperia - Welcome Home collection - Clocks
P13 - Have Fun collection - #03
American Crafts - Maggie Holmes - Woodland Grove collection - Fresh Blossoms
Heidi Swapp - Set Sail collection - Small Ledgers
Bazzill Basics Cardstock - Coconut Swirl & Coastal

Reverse side of papers


Embellishments:
strip of pearls, P13 chipboard embellishments, 2 diecut pieces, 2 Rosie's Studio  butterfly embellishments, 1/3rd sheet Crate Paper Gingham Garden - Happy Life Phrase Thickers, 9 chipboard pieces, green twine, 2 P13 Decorative Tags,strip puffy heart stickers.


Extra Bazzill Basics Pack - Pinkini, Aloe Vera, Peach Creme & Twill


Tea Cups - This photo of the children enjoying a spin in the teacups on the seafront at Lowestoft.

For this layout I flicked watered down, Distress Paint over some white Bazzill. Then, I tried something new, a Paige Evans Cutfile for Stitching. It cuts tiny stitch holes in the shape of the design, ready to stitch. I then stitched all the circles in chain stitch, using different shades of pink DMC thread, using all 6 strands. I trimmed this piece of card to measure 11 1/4" x 11 1/4". The edges were inked with Distress Ink in Kitsch Flamingo.


I made a frame from the floral side of 'Fresh Blossom' paper, I cut this 1" deep, and mounted the prepared stitched card over the frame.


The photo, together with two Doodlebug Designs Cupcake paper doilies and two mats cut from scraps of the 'Alight' paper, were arranged onto the layout.


I added the date and title using Doodlebug Designs Alphabet Soup stickers in Bubblegum and Cupcake.


Further embellishment was created with the Rosie's Studio butterfly embellishments and the puffy heart stickers from the kit.


Finally, I used Nuvo Glitter Drops - Sherbet Shimmer to add a little pink sparkle to the page.


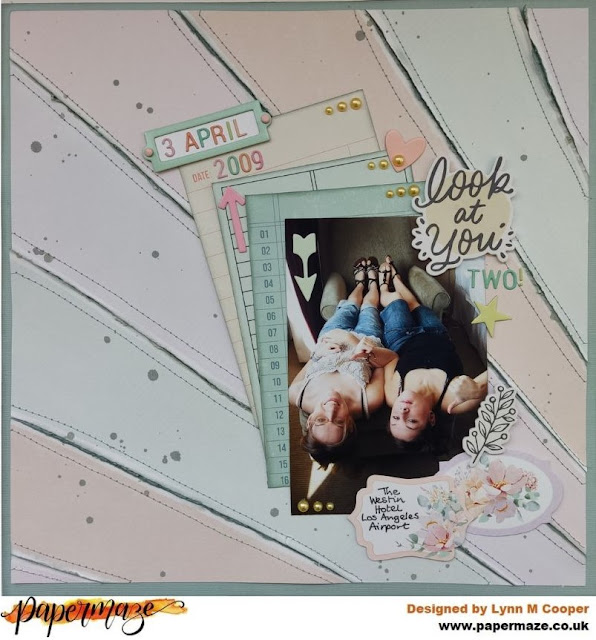
Look At You Two - A photo from a trip to Los Angeles for a dance competition with my girls.


My base for this layout was the sheet of Coastal Bazzill. I used the paper called 'Have Fun' from P13. I cut through the white spaces between the radiating stripes of colour, Distressed and inked the edges (using Iced Spruce Distress Ink). Then I stitched them in position on the Bazzill with the sewing machine. I sprayed a little Iced Spruce Distress Oxide Spray over the finished background.


From the 'Small Ledgers' Heidi Swapp paper, I selected and cut three of the document style prints, I printed my photo to the same size as these pieces and arranged them in a fan across the layout.


I used several embellishments from the kit to decorate. The strip of pearls, the diecut pieces, Crate Paper Gingham Garden - Happy Life Phrase Thickers, some of the chipboard pieces, and the P13 Decorative Tags. I applied the little label plate with a couple of brads from my stash. I added journalling to one of the decorative tags. With Rosie's Studio Simply Charming Puffy Letter stickers, I placed the date and added to the title.


That's all from the May kit, I'll be back with the June kit soon.
Thanks for looking.
Lynn x

Sunday, 28 May 2023

American Crafts - Maggie Holmes ~ Woodland Grove 🌿

Hello! It’s Anna back with you today and I’m sharing my second layout using Woodland Grove by Maggie Holmes and American Crafts. 

I recently went to visit some Bluebell woods and wanted to use this collection to scrapbook one of my photos. 


I used a sheet of white 12x12 bazzill as my base. I then trimmed down ‘Day Dreamer’ (roughly 2 inches horizontally) and adhered it centrally to the cardstock. 


I then used my silhouette cameo to cut a floral wreath cutfile by Paige Evans onto some green bazzill cardstock. I wanted to incorporate some of the green from my photo, so I chose to use green rather than white, which I would normally use for cutfiles. 


I mounted my photograph on to the b side of Wildflower


I then selected lots of die cut flowers from the Rosie’s Studio Simply Charming Die Cut Ephemera creating a frame with them behind my photo.


To complete my layout I added some enamel dots to the centre of some of the flowers on my cutfile. 
I also added a title from Simple Stories Vintage Fields Foam Stickers. These stickers are sold out but Papermaze have lots of other foam word sticker packs by Simple Stories available here


Thanks for looking! 
I’ll be back again next month when I’ll be working with Cocoa Vanilla Studio - Happy Days.
Se you then! 

Anna 

@acraftylifewithanna

Friday, 26 May 2023

Maggie Holmes Woodland Grove Gift Bags

Hello, it's Julie here with a quick project using the beautiful Woodland Grove by Maggie Holmes.

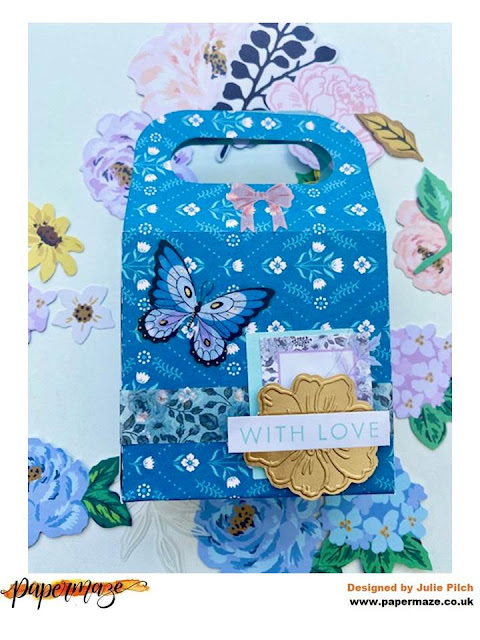
I created two small gift bags using Walk In The Woods  and Garden Grove.  The bags are approximately 3 1/2" square bags with a small handle that can be decorated with ribbon or washi tape.  They are a lovely personal touch when giving a small gift.

I found a cut file on Silhouette Studio for a gift bag and cut two from the Woodland Grove papers. 

For the first bag I added a simple shaker pocket as a base.  There are a few different ways to make shakers but I find the simplest is to use a small plastic pocket (I use something similar to these).  Using these plastic pockets it means that you only have to seal one side, I stitched mine up with a sewing machine but you could use glue or a Fuse tool.  I then used some washi tape and layered stickers from the Woodland Grove sticker book and a beautiful flower on top of the shaker pocket. 


Finally for the handle I layered some leaves and flowers from the floral ephemera and added it as an accent to the black and white background paper.

For the second bag I kept it super simple and layered some washi tape from the sticker book and some stickers to create a cluster at the bottom of the bag.  I actually used a sticker with a leopard on it but knew I just wanted the background colour and covered it with another label sticker.  I used to be worried about hiding part of stickers, or couldn't see another use for some brighter stickers but I have found layering is a great way of using what you have in another way.  I then put a gold flower from the floral ephemera on some foam tape and added a "with love" sticker on top of it.  It came together so quickly and simply but it looks so effective.


Thank you so much for joining me in using Woodland Grove, please come back next month when I am using Retro Summer to make an ice cream truck!

Friday, 19 May 2023

American Crafts - Maggie Holmes ~ Woodland Grove 🍃

 Hi all, it’s Anna back with you today. 

I’m working with the latest collaboration between American Crafts and Maggie Holmes - Woodland Grove. You can find the collection in the shop here

My first layout…

To create this layout I began by using the ‘b’ side of Field Notes as my base. 

I used my silhouette cameo to cut a large 2023 cutfile from white cardstock


I backed the 2023 numbers with the b side of Explorer


I added some florals and various other bits and pieces from the pack. Rosie’s Studio Die Cuts are great value for money, in this particular pack you get 182 pieces and two of each design. I’ll link all the Rosie’s Studio Die Cut Ephemera packs here
I love Rosie’s Studio, there are so many great products that are great for adding extra touches to your projects, I’ll link everything else here!


I mounted my photo with the b side of Uniquely You and cut out one of the tags to use as well. 


I tucked the tag behind the photo, punched a hole and added some twine. I also cut out the butterflies from ‘Uniquely You’ and placed them alongside my embellishment clusters. 
I used the Rosie’s Studio Simply Charming Puffy Alphabet to add a subtitle. 


Thanks so much for looking! I’ll be back soon with another layout using this collection. See you then 😊

Anna

@acraftylifewithanna