Showing posts with label jewels. Show all posts

Monday, 1 September 2025

August Papermaze Kit - Part 2

Lynn here today with the bright, summery August kit, which has been great fun to work with. Here are the first two layouts I have created with this kit. The kit is now available in store and online. Two more layouts featuring my granddaughter, one with all four generations and the other from a few weeks ago, washing her favourite soft toy. 

Before looking at how the layouts were made, this is what you will find inside the kit:


Patterned Papers:
Doodlebug Designs - Butterfly Kisses collection - Happy Thoughts & Garden Party
Echo Park - Have a Great Summer collection - Best Life Butterflies
Lawn Fawn - Bitsy Blooms collection - Begonia
Photoplay - This Happy Life collection - Sweet Hello
Simple Stories - Crafty Babe collection - Live. Love,.Scrap


The photo above shows both sides of the papers.


2 Doodlebug Designs cupcake doilies, Pretty Little Studio Berry Sweet Word Stickers, flair button, strip of jewels, 6 SS Simple Vintage Flower Shoppe Sentiment Bits & Pieces, Pretty Little Studio Word Cut Aparts You Are My Sunshine, Rosie's Studio 2 chipboard pieces Born to Bloom and 6 Doodlebug Designs All Aflutter stickers


Bazzill Basics Cardstock - Fussy, Aqua (included in kit), Granny Smith, Tangelo, Pollen and Coconut Swirl (in extra pack).

It's a Girl Thing! - This layout is for my sister's album and shows her with Florence, with all four generations. 


I started this layout with the Coconut Swirl Bazzill, then built up the design with several other papers from the kit.


The edges of all cut papers were inked with Distress Inks. I cut a 3" x 11" strip of Best Life Butterflies paper, and placed this to the left of the page. Then layered an 8.5" circle of Garden Party paper on top. 


I gutted the Begonia paper and saved the 1" frame for the next layout. The photos were then mounted onto the grid side of the remaining paper. I placed the photos onto the layout. One of the cupcake doilies from the kit was positioned under the left side photo. I cut a 2" white card circle to place over the centre of the doily, and wrote my journalling onto it. 


For the title I used a set of Doodlebug Designs Foam Stamps 'Simply Sweet' and some black acrylic paint to stamp the word 'Girl' onto the green side of the Garden Party paper. I cut these letters out and placed them onto the layout. Then with Doodlebug Designs Rub-ons 'All Mixed Up' Large Beetle Black, I added the rest of the title. 


Using more Doodlebug Designs Rub-ons 'All Mixed Up', this time small and Medium in Beetle Black, I spelt out the date and the subtitle. Also, from Doodlebug Designs I used some Sew-Easy Rub-on Stitches.


I created a large and small cluster of flowers to reflect the flowers on the papers. I used Bazzill cardstock from the kit and a few other shades from my own stash, and some old leaf and flower dies from my stash.


Bathing Bea Bee - My daughter decided Florence's soft toy bee needed a wash, so decided rather than take it away from her to do this, she involved her in the process of washing and drying the bee. She had a lovely time!


I made a frame for the layout using Begonia, before starting the first layout, and I'm using it here, daisy side up. I trimmed some Coconut Swirl Bazzill to 10.5" x 10.5" and heavily inked the edges with Distress Oxide Ink in Speckled Egg, as this is a great match for the paper.


I used the second doily from the kit over where my smaller photos will go on the right of the layout, and inked through and around it, to create a lacy pattern. With more ink mixed with a little water, I flicked more ink over the page.


Using various patterned paper scraps from the kit (
Live. Love,.ScrapGarden Party and Begonia), I cut some strips and placed them, overlapping one another to the left side of the page. My large photo was placed in the centre of the layout, with two smaller photos to each side.


The title was cut from Black and 
Pollen Bazzill, using the Spellbinders - Simple Stories - Say Cheese Classic Mouse Alphabet Die Set. These were mounted over one another, to create a shadow, and then arranged on the layout using 3D foam pads of alternate letters to add some texture.

I embellished the layout with items from the kit -  Pretty Little Studio Berry Sweet Word Stickers, flair button, strip of jewels, 6 SS Simple Vintage Flower Shoppe Sentiment Bits & Pieces and Rosie's Studio 2 chipboard pieces Born to Bloom.


This concludes the August kit, although there is still plenty of papers card and embellishments to create another layout.

I'll be back with the September kit very soon.
Thanks for looking.
Lynn x

Monday, 16 August 2021

August Papermaze Kit

The bright and colourful kit for the month of August, is now available from Papermaze and I'm sharing my first two layouts with you today.


Before looking at how they were made, here are the details of what you will find in the August kit:
 

Patterned Papers:
American Crafts - Vicki Boutin's Color Study collection - Palette & Color Wheel
American Crafts - Paige Evans' Wonders collection - #8
Cocoa Vanilla - Sunkissed collection - Good Vibrations
Pinkfresh Studio - Happy Blooms collection - Embroidered
Simple Stories - Sunkissed collection - Sunny Days
Bazzill Basics cardstock - White & Kachina

Reverse side of papers:


Embellishments: 

12" washi tape, 2 foam glitter words, 2 CVS wood buttons, strip of puffy star stickers, 6 CVS Sunkissed floral ephemera pieces, strip multi-coloured jewels, shaped clip & Bella Blvd acrylic heart & 5 puffy star stickers

Bazzill Basics Cardstock Pack 


Grenadine, Wild Pansy, Classic Yellow & Admiral

My Commute - This layout shows my daughter walking from Royal Crescent to the Theatre in Bath - in the rain!

I started with the white Bazzill from the kit and with some inks, I dripped some of each colour from about 1/3 of the way up the page, allowing it to run down the the bottom of the page.  I also flicked some ink of each colour over the rest of the Bazzill.


While this was drying, I set about cutting out and dividing up the colour wheel on the Color Study paper. I inked the edges of these wedges, with a corresponding Distress Ink colour. Then I arranged them on the page.

A placed my photo in the centre of the layout, and then set about embellishing the page, matching my embellishments to each wedge of coloured paper. From the kit I used the coloured jewels and some of the glitter foam stars. From my own stash I found sequins, gems and pearls.

For the main title I used a Sizzix - Tim Holtz BIGZ XL Die - Society. I cut the letters twice, once from some scrap black Bazzill and a second time, from scraps of the patterned paper (the pink side). I placed the letters offsetting them to create a shadow.


With the Sizzix - Tim Holtz Thinlits die set - Alphanumeric Tiny Type Upper and more black Bazzill, I cut out the lettering for the date and place name. 


I finished off with dots of Nuvo Crystal and Glitter Drops around the page.

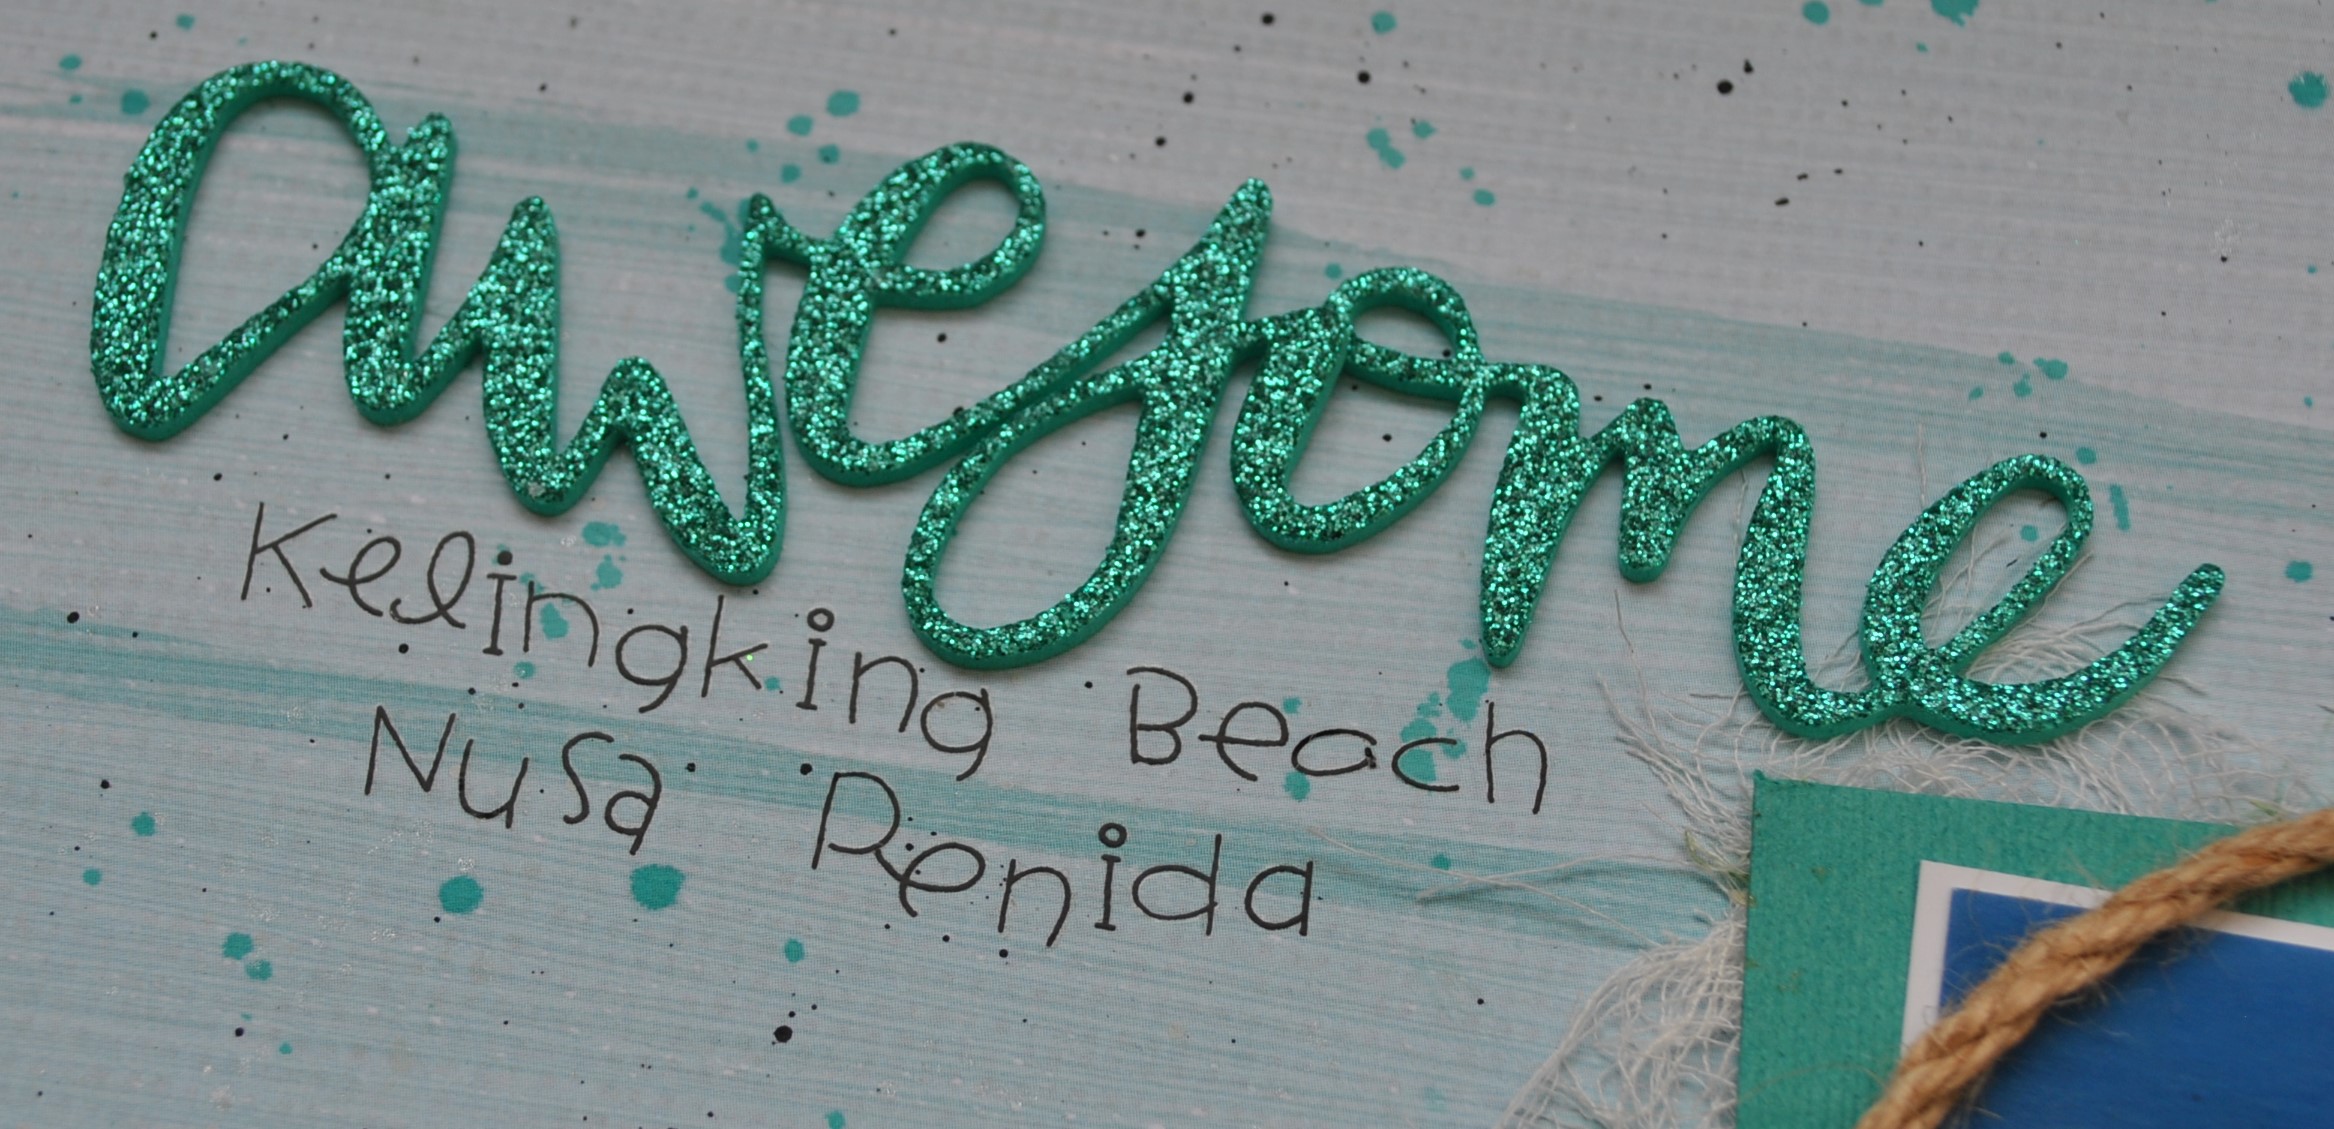
Awesome - This photo was taken of my daughter and her husband on their honeymoon in Bali, The beautiful scenery was ideal for this Vicki Boutin Color Study collection.

.


The 'Palette' paper was ideal and needed very little work to make a background for the layout. I flicked a little colour over the page. I used Distress Stain (Brushed Pewter and Peacock Feathers), and Distress Paint (Black Soot and Picket Fence).

I offset my photo onto a piece of the Kachina Bazzill and placed the photo and cardstock to the bottom right of the page. Before sticking these in place, I tucked a little cheesecloth underneath, so a little shows all the way around the arrangement.

With three short lengths of jute twine, I tied reef knots to rejoin them together and created a rough circle to place around the picture.


Then with a cake decorating mould and some Lite Fimo clay, I made a selection of shells and starfish. Once these were dry I painted them with Distress Inks. To highlight the detail I rubbed in metallic gilding wax


I placed the shells around the base of the photo, and added some prills into the crevices. 

My title is a glitter foam word from the kit, I added more detail using Doodlebug Designs - All Mixed Up - Beetle Black - Tiny Alpha Rubons. 

That's all for today, I will be back with more from this kit soon
Thanks for looking
Lynn x

Thursday, 15 July 2021

Pinkfresh Studio - Happy Blooms - Tea for Two

Hello everyone,

Claire here with you again sharing my second layout with the Pinkfresh Studio Happy Blooms collection.  You can find this gorgeous collection in the shop here.

Now, for this layout, I wanted to make some paper straws, and base my design around them - here's how it turned out:


I started with a piece of Premium White Cardstock, and begun to make the straws with that stunning striped paper called Handkerchief (it's the B side of the bold green patterned paper). 

I cut strips of about 2.5 inches wide in various lengths and rolled them around a paintbrush to create the straw, securing in place with red tape.

Now, I will say that the quality of Pinkfresh Studio papers is second to none - the papers are a little bit thicker than standard patterned paper which did make rolling the paper trickier than I expected, but I took my time and they worked perfectly.

I tried various designs, but in the end settled on a circular layout (I'm loving circles at the moment), and cut a circular mat from the Daydream paper to use as the anchor of my page, distressing the edges before placing centrally on my page.


I laid my straws in a staggered design to the left hand side of the circle, securing in pace with Glossy Accents. Next, I matted my photographs, using the green side of the Handkerchief paper and Heirloom paper.  I placed one on the circle base with foam pads, and the second laid flat on top of the straws. The overlapping of the pictures on different levels of the page created fabulous volume and dimension.

With the design now complete, I began to embellish.

I made a tag from the Homegrown cut apart paper and added an eyelet and string from my stash, tucking it under my photo.


Next, I took some flowers from the Floral cardstock Ephemera pack, curling the flowers and placing them around the outer edge of the circle and around the straws.

I also took some strawberries from the Cardstock Ephemera Pack and placed these on top of my straws, along with some of the flowers to create a cluster around my photograph.


Opposite, I created another cluster, using some of the food and drink elements from the cardstock ephemera pack, to sit alongside my photos of our cream tea.


For my title, I used those beautiful bold green Puffy Alpha Stickers - these are fabulous! They're one of my favourite alpha sets. They create such striking titles.


To finish the page off, I placed a banner from the Journaling Bits pack across the straws, distressing and curling this at the edges to create movement. 


Finally, I added some die cut leaves from my stash and some of those unbelievably amazing New Pinkfresh Jewels in Ballet Slipper - Trust me, you need these!! :) 

So, that was the page complete. I think this collection is my new favourite. The colours, paper patterns, alphas, journaling bits, ephemera and stickers provide so many options. I think it's all just stunning.

I hope this has given you some inspiration. I will be back with one more layout later this month with this collection and I have set myself a challenge - no white cardstock! 

See you soon.


Claire.

Sunday, 13 December 2020

Nuts About You - Simple Stories - Cozy Days

Hello, Rebecca here with you today. I had a small amount of the  Cozy Days Collection by Simple Stories left, so thought I'd pop by to share another layout with you. 


I've used a cutfile from Peartree Cutfiles as the basis of my layout and I've cut it on the B side of the '2x2 Elements' patterned paper. This paper is quite 'busy', and certainly more busy than I am usually comfortable working with, so using it to cut a cutfile was a great way to make it work for me. I've used a number of different coloured Bazzill cardstocks from the Matchmaker Pack to back the leaves and acorns in the file. 


I wanted to add some colour to my layout behind the cutfile, and had initially planned to add some mixed media, but instead opted to use a torn strip of the 'Happy Falliday' patterned paper (B side), with smaller strips of the 'Harvest Wishes' patterned paper behind both above and below.

I've adhered the outline of the cutfile flat to my layout, and used foam pads to replace the letters to add some dimension. I've also added foam pads behind the acorns and leaves.

I matted my photos onto white cardstock, with a layer of green bazzill cardstock behind to bring in more of the green colour I'd used to back the leaves of the cutfile. Behind my photos, I slotted some of the tags from the 'Tags' patterned paper. I distressed the edges with my scissors and threaded some Metallic Gold Thread through the holes several times to add interest and introduce some texture to the layout.


I've kept the embellishing to a minimum on this layout - mainly because I don't have a lot left! However, a lot of the patterned papers in this collection lend themselves perfectly to fussy-cutting so I was able to create my own embellishments very easily. I fussy-cut some elements from the 'Sweaters & Boots' patterned paper including the mustard sweater, the wellies and the take-away style hot drinks cup. 


I continued with the fussy-cutting and cut some elements from what I had left of the '2x2 elements' patterned paper, and arranged all these pieces into clusters around my photos. I also cut some leaves from the 'busy' B Side of the 2x2 elements paper to co-ordinate with my cutfile. I nestled those in among my clusters and added some more of the metallic gold thread in the form of clusters. I added a tab/label element from the Journal Bits & Pieces pack and have used this to detail the date and location of the photos.

I wanted to bring some colour to the top and bottom sections of the layout as I felt there was too much white, so I cut out a section from both, distressed the edges and used a Simple Stories Washi Tape to backfill the area. The finishing touch was to add a few gold jewels around the layout, and that was my layout complete. 


Thank you for reading, I hope you've enjoyed this layout. This collection is great for making a little go a long way - and fussy-cutting is your friend!

If you'd like to watch how the layout came together, there is a process video on my YouTube channel which you can find here.

I hope you are all staying safe and looking forward to Christmas. We are in full Christmas-swing in my house - the tree and decorations are already up and so it's only apt that my next few layouts will be 'Christmassy' ones using the Simple Stories 'Jingle All The Way' collection.

Until then, take care.

Rebecca x