Hi everyone,
Happy Friday! Claire back with you today, sharing my second layout using the Bow Wow collection from Photoplay.
This collection is a lot of fun! So many vibrant colours and playful patterns, its perfect for a whole range of topics, but especially for capturing the antics of our furbabies as I have done here.
As always, I started with my favourite premium white cardstock and this cute dog house cutfile from Peartree Cutfiles. I cut the file in Premium Black Cardstock (another staple of my craft room!) and backed the file using the b side of the Dog-O-Mania paper which features a colourful polka dot design, and used the blue plaid pattern from the b side of the I Love My Dog paper to create the blue trim.
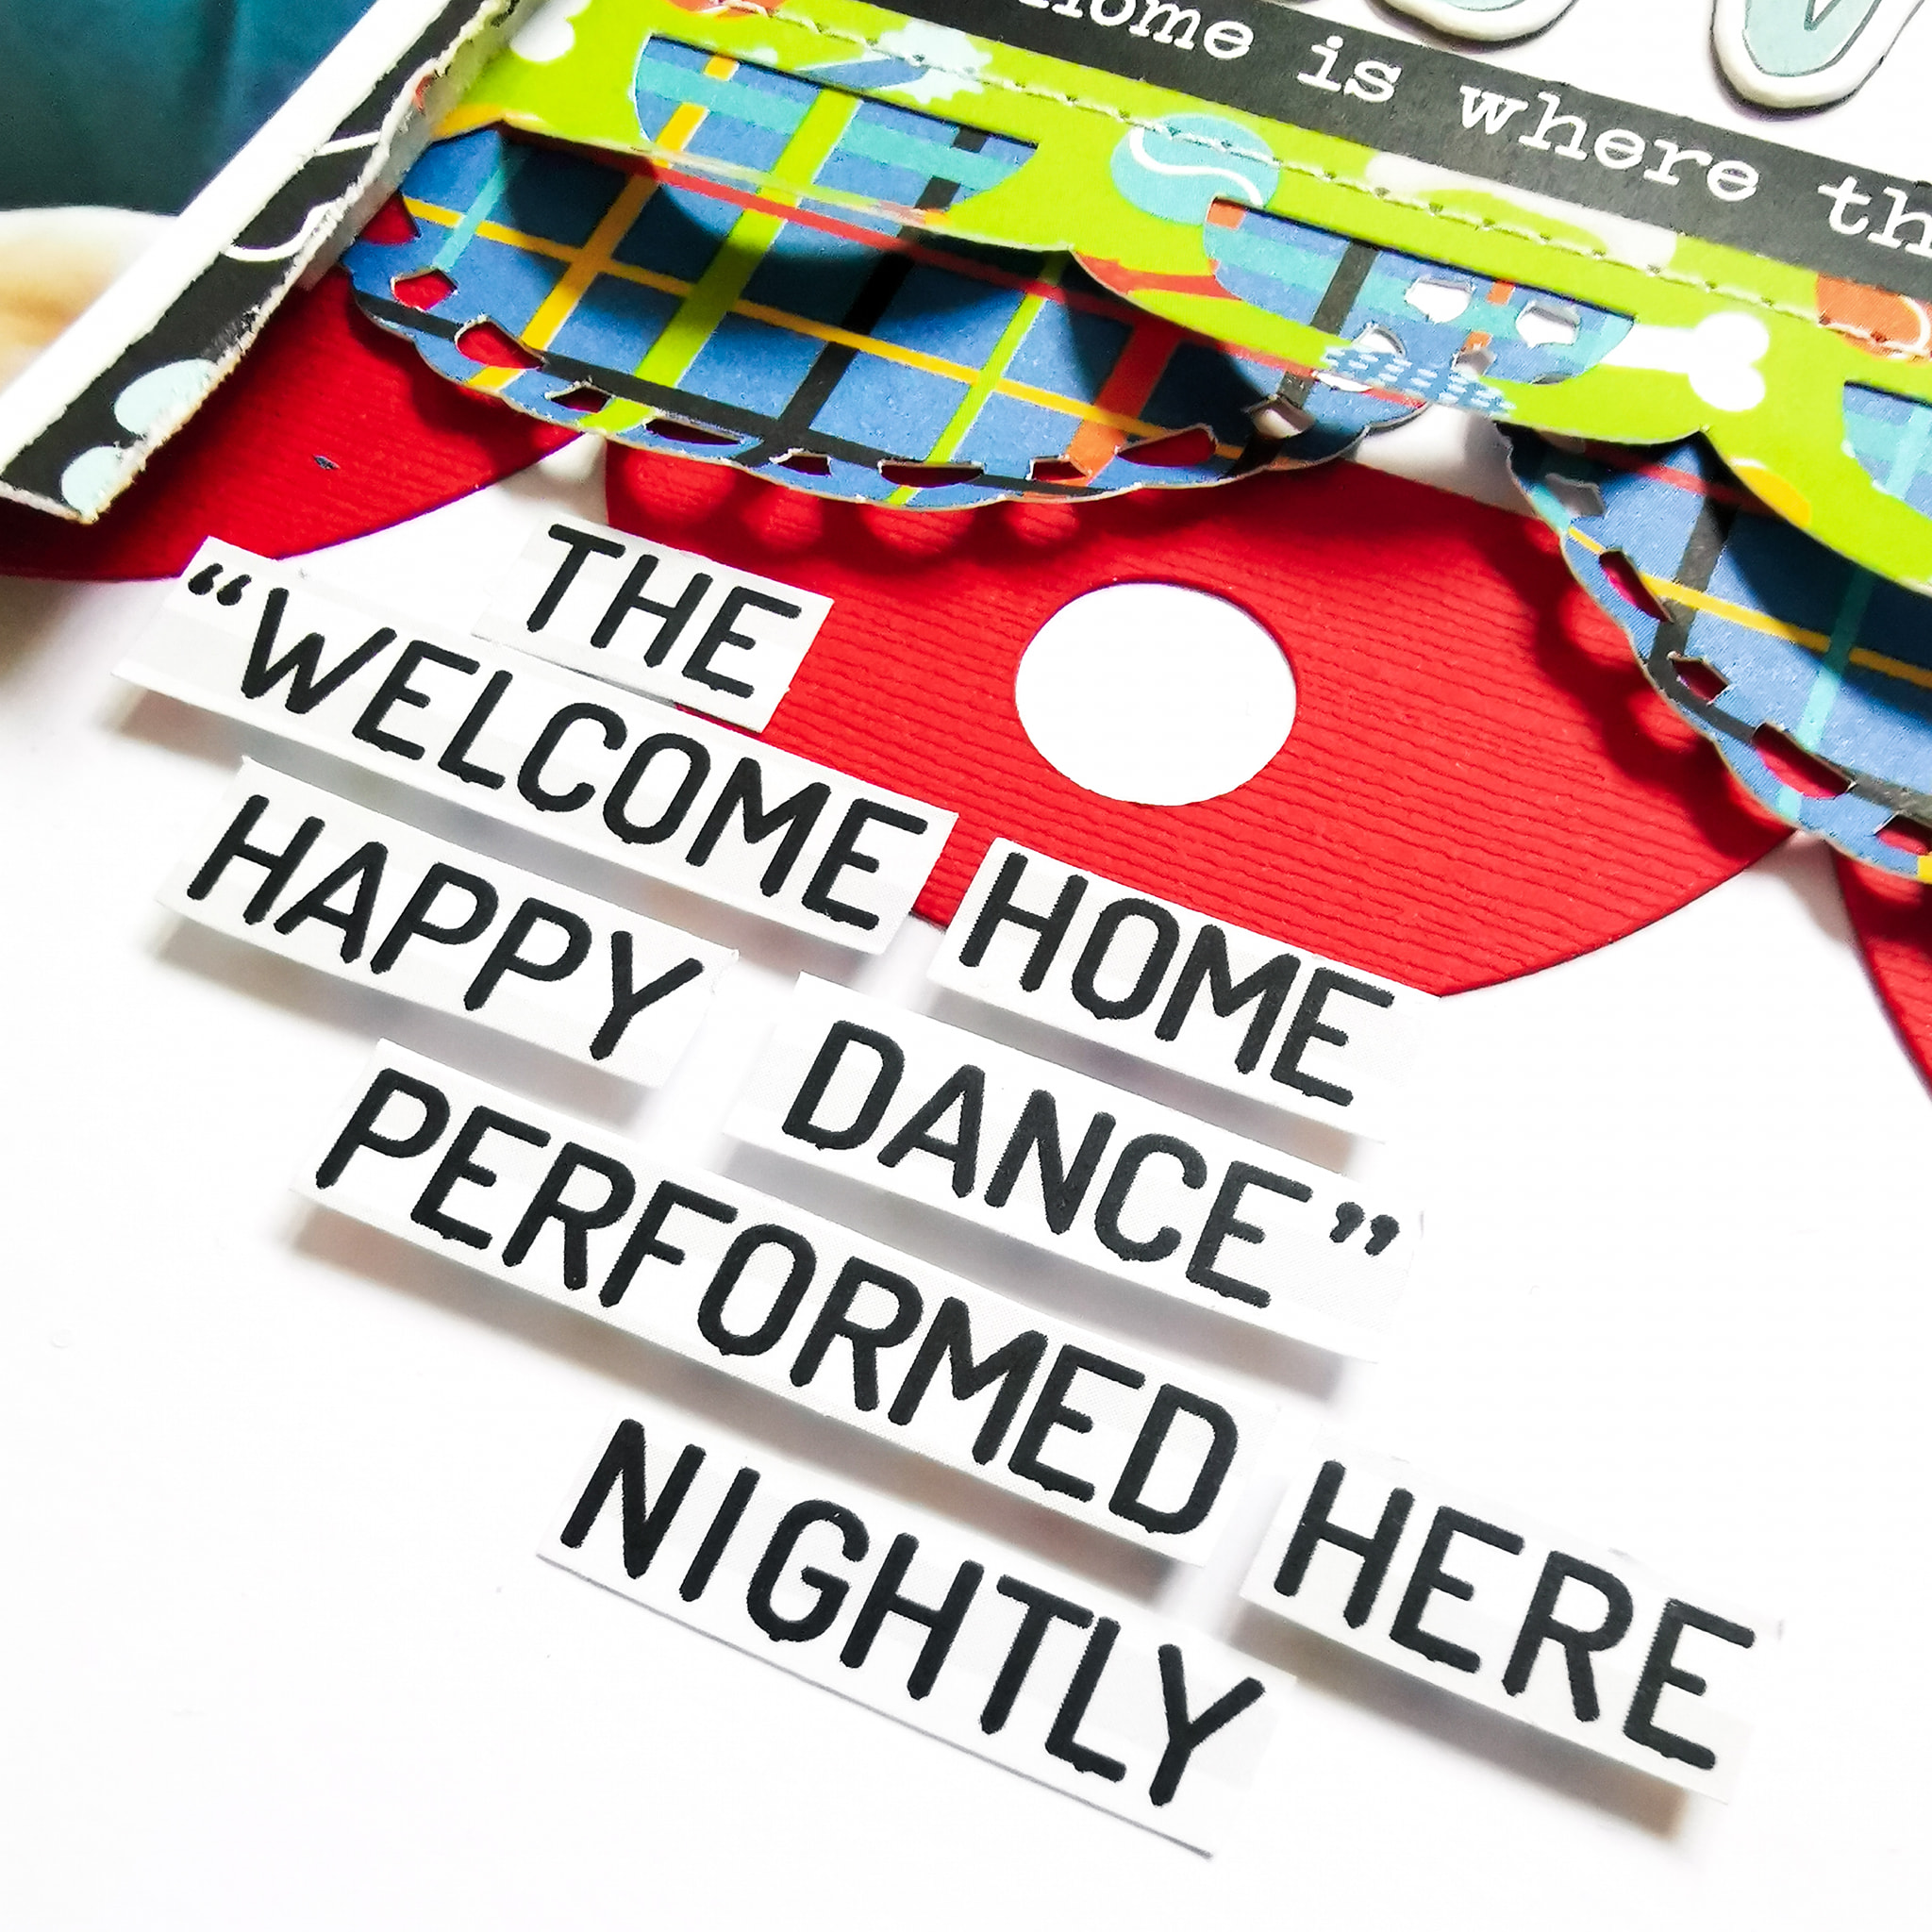
For extra dimension, I drew around the bone onto the coordinating red Bazzill cardstock from the Matchmaker Pack, raising it on foam pads for extra height. I also drew a squiggly border around the outside for a bit more depth.
I worked out where the file would sit, and brushed some dry Distress Oxide ink in Tumbled Glass onto my card, creating an anchor for the base of my main element.
Next, I created multiple mats for my photo. I used both sides of the Dog Treat paper, lightly distressing the edges for a ruffled, slightly 'dog chewed' feel. I cut each mat in the same size of my photo (roughly 3" square), offsetting them to create a stacked effect.
For an extra pop of colour, I went back to the Matchmaker Pack and created a mat on my Cricut using a scalloped frame. Once the elements were all layered together, I added the cute #Rescued tab from the ephemera pack.
I really loved the look of the scalloped edge ,so set about finding scalloped designs in my Cricut library. You could create the same effect using punches or drawing round something circular like a small pot to create a similar look.
I chose three designs and cut them in different papers from the collection; The red Bazzill cardstock from the Matchmaker Pack, the I Love My Dog paper and the Chow Time paper.
I only stuck the top of each strip down so that I could ruffle the edges for extra texture. Once in place, I added machine stitching to the top row and positioned my photo cluster on top.
To create my title, I used some Thickers from my stash and some small alpha stickers from the Simple Stories Color Vibe Sticker Book.
To add a bit more drama, and to echo the black of the cutfile, I added a sticker from the Ephemera Pack which brings both sides of the layout together.
Underneath my photo cluster, I wanted to create some movement, so added these gorgeous 'WOOF' flags, again from the Ephemera Pack, stitching through each letter to create a banner and curling the edges off the page slightly.
I also added a heart from the ephemera pack and a small fussy cut dog from the Dog-O-Mania paper.
As a final touch, I fussy cut this awesome statement from the Lucky Dog paper. It's so appropriate, although in my house it's performed much more regularly throughout the day and is very typical of my furbaby!! It captures her love of life perfectly :)
I love how this turned out. Those bold colours and shapes against the crisp white cardstock really pop and look very striking in real life.
This collection has been so much fun to create with. I hope my designs have inspired you to create and enjoy some scrappy time this summer.
Until next time,
Claire xx
@scrappysoulmate