Showing posts with label stars. Show all posts

Wednesday, 24 June 2026

Simple Stories Rustic Legend - Good Times

Hello!

Today on the blog I have a layout full of fun using the Simple Stories Rustic Legend collection.

Inspired by the stars in the ephemera and icons in this range, I decided to go whole hog and grab some dies to create a page bursting with colourful stars!


On top of my Premium White Cardstock, I first created an anchor for my design, cutting the ruler strips from the Level Up paper, tore them roughly in half and layered them across the centre of the page.

I also took a tyre track from the Bits & Pieces pack because these photos were taken during a recent US road trip.

My photo is made up of several images so is quite busy. I kept it simple by matting in plain black cardstock, helping lift it from the bold background. 


The the fun part! The stars!! Using nested star dies I cut different sized stars from the Low Key Awesome, Journal Elements (B side), Instant Classic (B side) and Be Bold papers (B side).

I scattered these at the top and bottom of my photo, layered and overlapping with adhesive foam to create a dimensional effect.


For extra interest, I also added star stickers from the Cardstock Stickers and punched some tiny stars from black cardstock to help the layout pop.

To fill the white space around my photo, I added a tag and a ticket from the Bits & Pieces. 


Along the top of the photo, I also added a small divider sticker from the Cardstock Sticker Basics.


For my title, I opted for the Good Times sticker from the Cardstock Sticker Basics, adding this alongside the rulers to blend it with the design.


Thank you for joining me on the blog today. I hope you've enjoyed seeing the layout. I'd highly recommend this collection and look forward to creating more soon! 

Happy scrapping! 

Claire xx
@scrappysoulmate 

Friday, 26 December 2025

Echo Park ~ Christmas Express #2

Hello everyone and Happy Christmas! Hope you’ve all been enjoying the festive period and making memories to document!
I’ve been enjoying some crafty time in amongst all the Christmas fun. So I went back to using Echo Park Christmas Express to create another page. 


I began with a sheet of white bazzill as my base. I then created a star template in various sizes on my silhouette cameo. I used the template to draw around North Pole Plaid and then a slightly smaller star from Holly Jolly Stockings, so that I could layer them on top of each other. I then cut out some smaller stars from the b side of Red Snowflakes


After distressing the edges, I adhered my large stars off centre to the left and trimmed off the excess. I then layered my photo on to some red coordinating bazzill cardstock and Red Snowflakes


I placed my mounted photo in the centre of the star and alongside it I added a 3x4 journal card


I added the smaller stars randomly around the rest of the layout and also added in a few Element stickers


I used some stars, snowflakes and sentiments from the Vicki Boutin Peppermint Kisses, Ho Ho Ho Phrase Thickers


Thanks so much for looking! 
I’ll see you again in January when I’ll be working with Simple Stories Take Note.

Happy New Year! 
Anna 
@acraftylifewithanna

Friday, 20 September 2024

Pretty Little Studio - You Are My Sunshine - Happy Dog

Hello,

It's Claire here today sharing a new layout with the You Are My Sunshine collection from Pretty Little Studio. Check out the collection in full here


For this layout, I'm focusing on those gorgeous scallops from the Be Cheerful paper.

I fussy cut each strip in varying lengths and then chose 8 to use on my page, focusing on the solid colours rather than the bold patterned strips.

I layered these vertically, laying the scallops back to back. I only adhered the straight edge of each strip with glue, meaning I could lightly ruffle the edges to lift the scalloped edge off the page, creating dimension. 

Next I mounted my photos on a piece of green card from the Matchmaker Pack. I raised the photos on foam, offsetting them against the scallops. 

To embellish, I reached for the stars from the Under the Stars die cuts and scattered these around my photo. 

Then, to turn this from a bright summery layout into a warm autumnal layout, I grabbed some leaf dies and cut some leaves from the cardstock in the Matchmaker pack, which matches the colours in the collection perfectly. 


I inked the edges of the leaves for extra interest and mixed this in amongst the stars. 

To create the title, I grabbed some alphas from my stash and positioned the title along the vertical edge of the scallop. 


As a final touch, I added some phrases from the Pet Lovers Word Stickers. 

I hope you've enjoyed this blog and have been inspired to create. 

Until next month, happy scrapping! 

Claire xx

@scrappysoulmate 


Friday, 8 March 2024

Adventure - Cocoa Vanilla Studio - Great Escape

Hi everyone!

It's Rebecca with you today sharing my first layout for March. It feels like forever since I created a proper 'boyish' layout, so this month I've chosen to work with the new Great Escape collection from Cocoa Vanilla Studio. You can always count on CVS to release a cracking 'boy' collection! You can find it in the shop here.


As soon as I saw the grey woodgrain paper (the B side of 'Starry Night'), I was in love! It's a really lovely paper, and it's not too busy so it's perfect for a background! I cut small sections out of two of the edges and after distressing them, backed them with patterned papers from the collection.

Next, I die cut 2 large stars from the same 2 patterned papers (Happy Camper and Journey) and placed them central on the page. On top of these, I added my circular photo. I knew I wanted this layout to be quite minimalistic, so I kept everything clustered tightly in the centre of the page. 

Underneath the photo, I added 2 strips of patterned papers with fishtails cut into each end. I offset these slightly so that they weren't too 'blocky' and on top of these I added one of the Puffy Title Stickers.


Either side of my photo I added elements from the Die-Cut Ephemera. My photo is of my little boy playing in the village park on holiday, and so I've used the 'Fun Times' signpost, a compass and the words 'wild' and 'roam'. 


Underneath my title, I placed one of the Chipboard Stickers. I love this piece because the shape matches the banners I've created under my photo.

Wanting to extend the design down slightly, I've staggered some phrase stickers.


To finish off the layout, I've arranged lots of the star Puffy Stickers around the central cluster, trying to get an even spread of colours, and doodled a black border around the edge of the background.


Thanks for reading! I hope my layout inspires you to create with this fabulous collection.

Take care,

Rebecca x

@preciouspagespapercraft


Friday, 25 February 2022

Pebbles ~ Kid at Heart ❤️ #2

 Hi all! 

We’re nearly at the end of February already!? This means it’s time for my second blog post with the Pebbles Kid at Heart collection. I have loved using this collection, it’s so bright, cheerful and great for any theme of layout!

Take a look at the whole range in the shop here

Here is my second layout…


So, to create this page I started by using a sheet of blue bazzill cardstock from the matchmaker pack. I then used my cameo to cut out a ‘my boy’ title cutfile by Paige Evans.

I backed the cutfile using patterned papers from the collection - ‘party time’, ‘chasing rainbows‘playful’and ‘scatter happiness

I then printed my photograph and double mounted it, using Bazzill whirlpool cardstock and ‘party time

I then had a look at my packet of phrase ephemera and chose a few pieces that worked with my layout. I adhered these pieces either side of my photo. The ephemera in this collection are gorgeous, some pieces have a lovely shimmer to them too, there’s also lots in a pack and they are great quality too!

 I fussy cut a few of the florals from the ‘scatter happiness’ paper and punched out some stars from my scraps of patterned paper and cardstock. To finish I added two strips of scalloped boarder from the ‘playful’ paper.

Thanks so much for looking, I’ll see you in March with some more layouts!

x Anna x

Monday, 11 January 2021

Cocoa Vanilla Studio ~ Merry and Bright #3

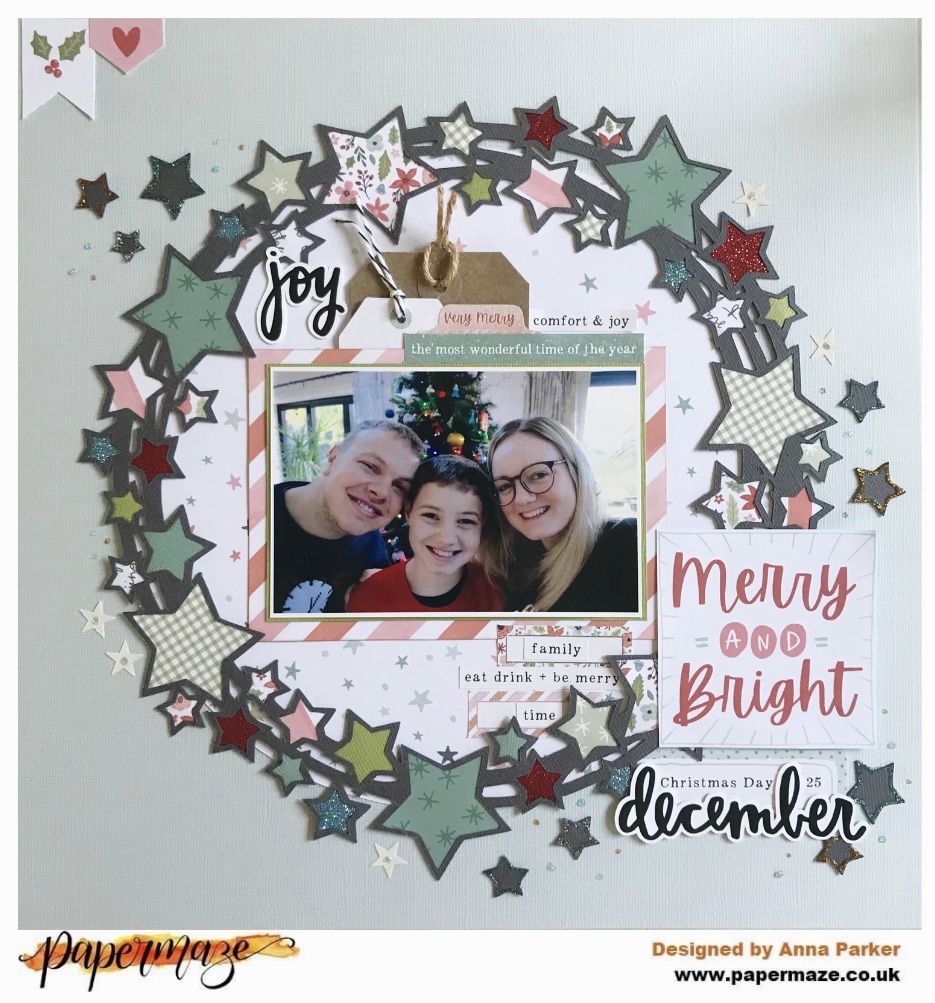
Happy New Year everyone and welcome back to the Papermaze blog! It’s Anna back with you sharing my third project with Cocoa Vanilla Studio’s Merry and Bright collection. You can find the collection in the shop here
I have made a Christmas Day scrapbook layout to share with you today...


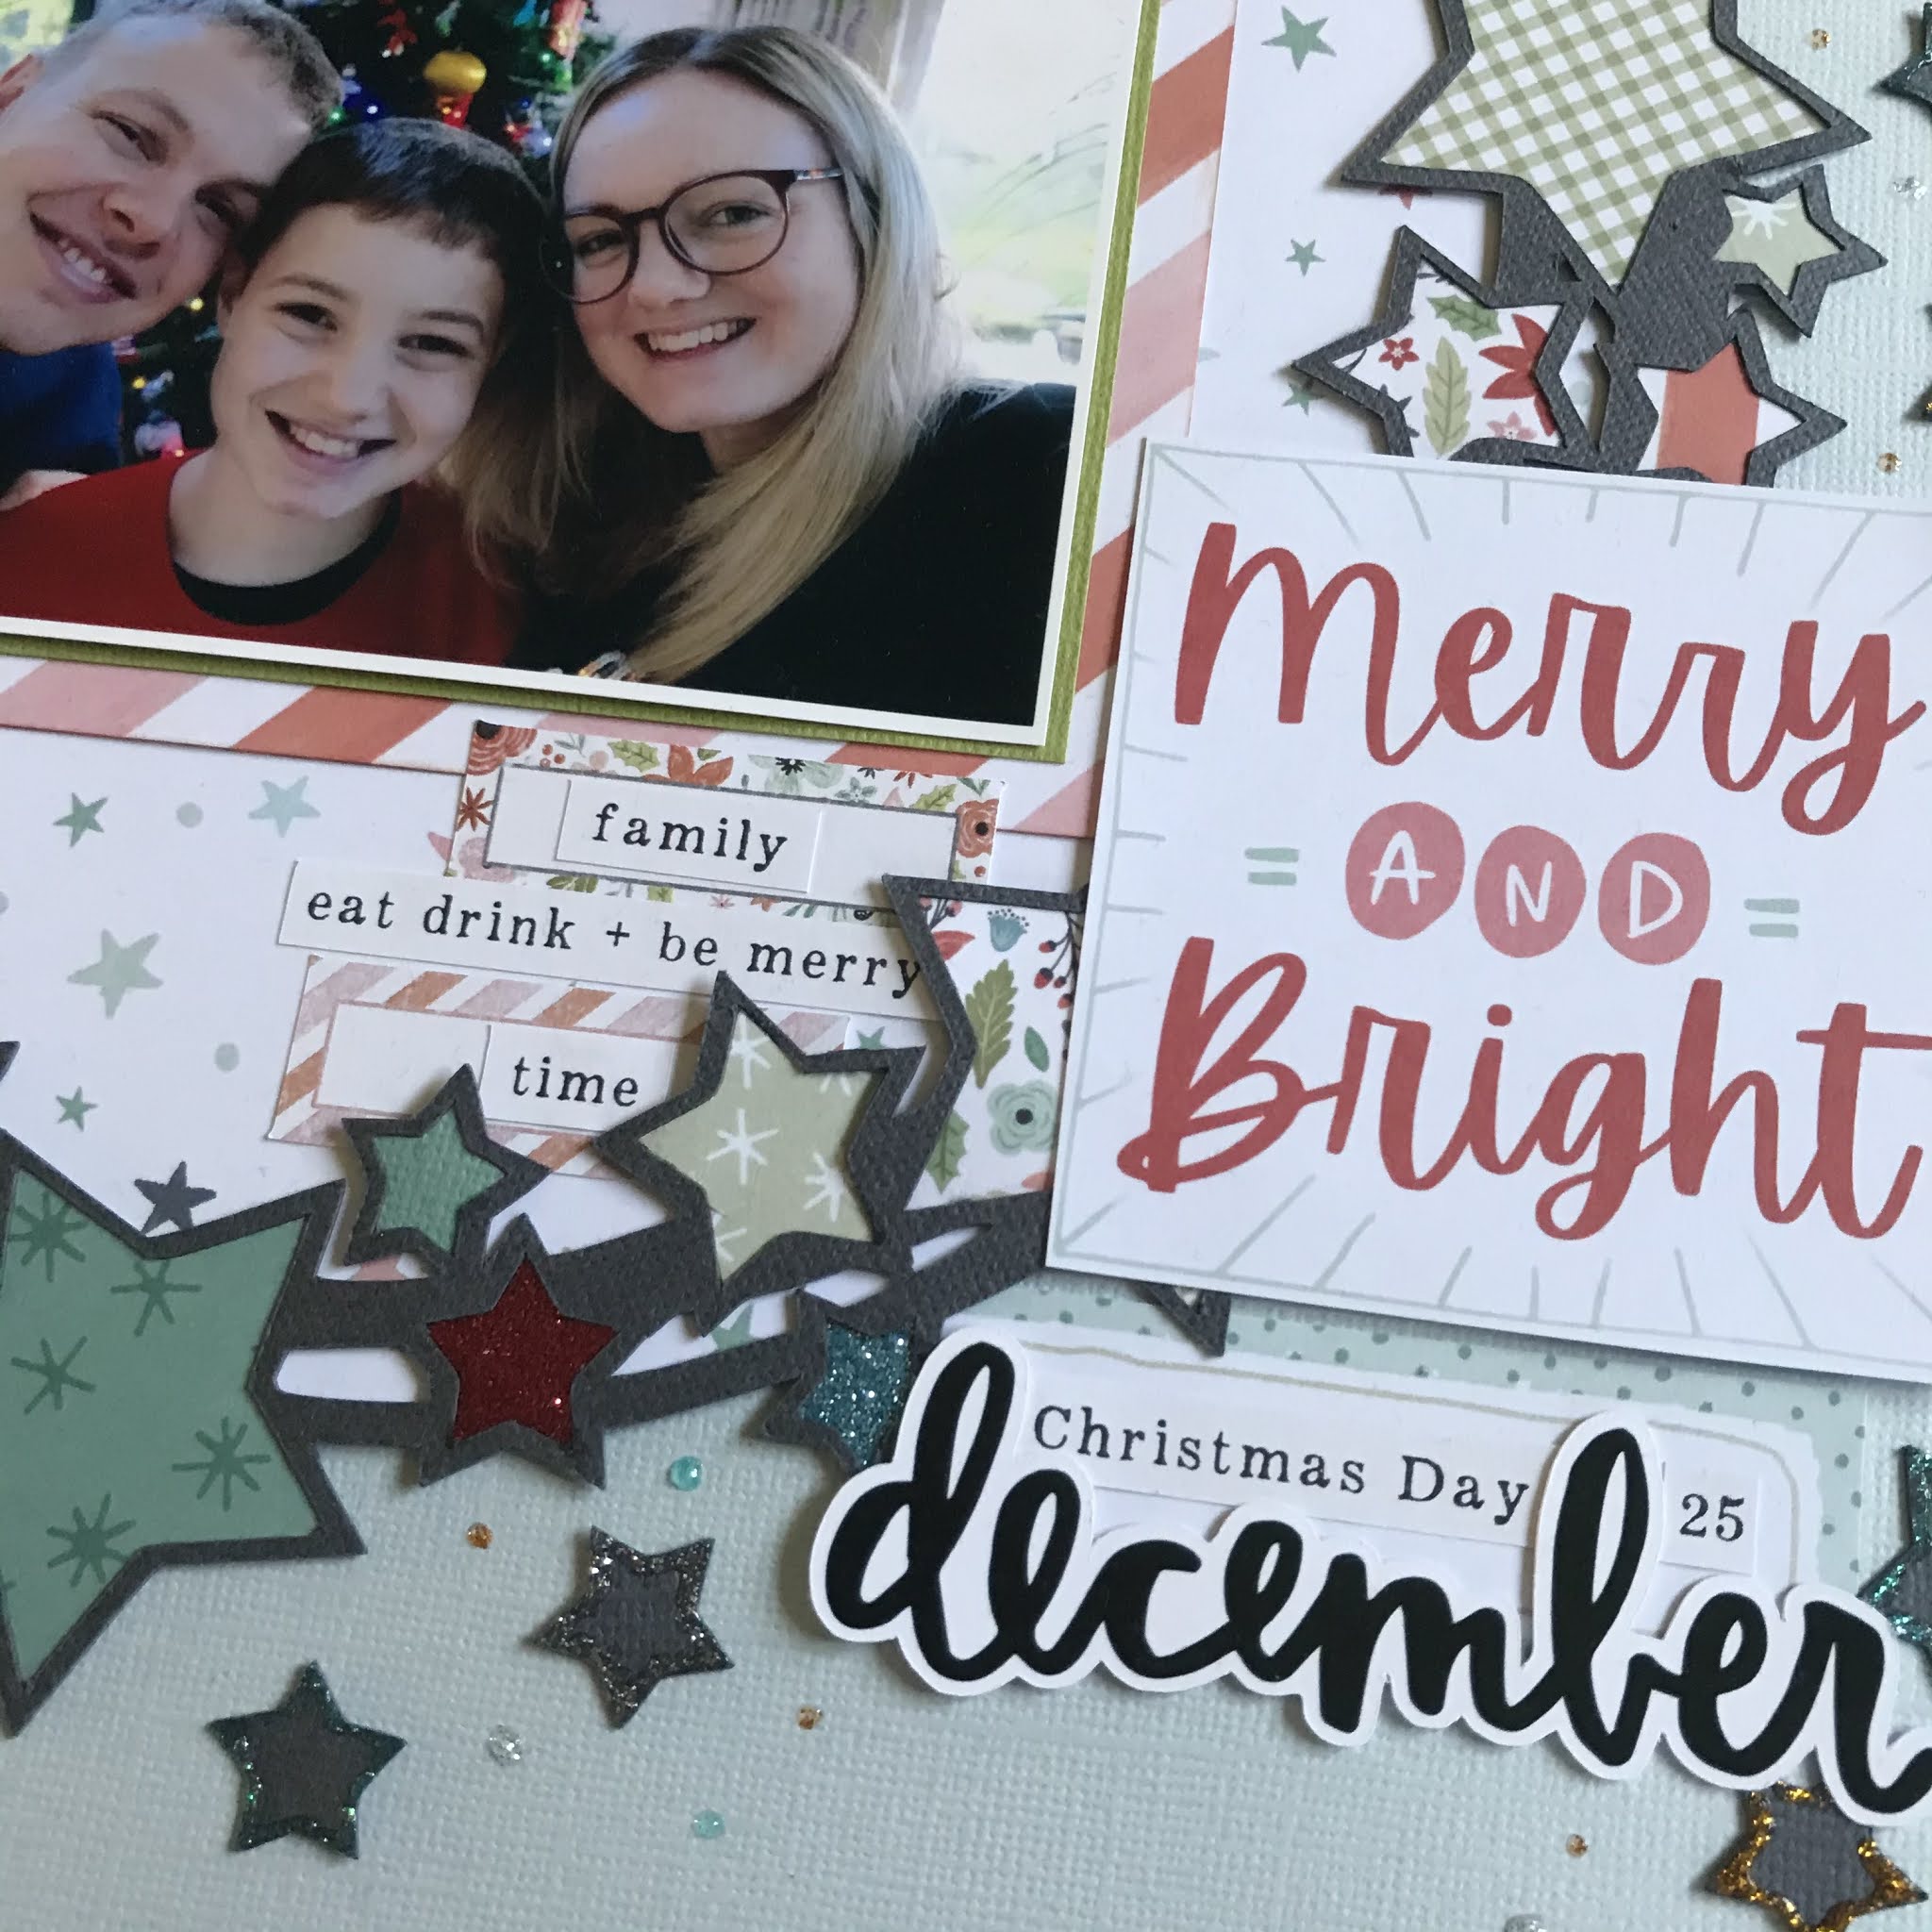
I began with a sheet of 12x12 bazzill as my base. I used this star wreath cut file from paper issues and backed all of the stars with patterned paper from the collection as well as some cardstock from the matchmaker pack and some glittered cardstock. I really wanted to incorporate the star bright patterned paper, so I cut out a large circle and adhered it behind my cut file.


I added a few elements from the accessory stickers and cut out ‘Merry and Bright’ from the cut apart patterned paper sheet 'oh what fun'. I used the tag sticker from the accessory stickers too and layered it alongside a kraft tag along with some of the word phrases, which were also on the accessory stickers sheet.


I also used some of these sequin stars by Pink Paislee as well as some old pretty little studio Christmas words.


I used some of the leftover stars from the cut file and edged the outside with different coloured Nuvo drops and well as some random drops around the layout. 


Don't forgot to check out the January sale in the shop, you can save 20% off everything *excluding newly released products during the sale, gift vouchers and kits.* This link will take you right there - Shop!

Thanks so much for looking! See you later in the month!
Anna


Friday, 18 September 2020

Two layouts using Simple Stories 'Bro & Co' Collection

 Hello, Rebecca joining you today! What a turn-around - last week I was wearing my winter coat and this week the flip flops have been back out! 

I'm popping by today to share two final layouts which I've created using the 'Bro & Co' collection by Simple Stories. Both of these layouts would be great for busting those final scraps we all have leftover from various collections as I've used really small pieces on both of them. I definitely feel like less is more with both of these layouts!

'Epic'


I took the '2x2 Elements' patterned paper and cut all the squares out. I knew I wanted to create a 3x3  grid design, using 5 small photos so I selected 4 of the squares to use and arranged them onto a sheet of 'Natural' Bazzill cardstock from the Bazzill Plain Matchmater Pack


I trimmed my photos ever so slightly and backed them onto some of the leftover 2x2 elements. I marked up where I wanted them to sit on the layout and then used my sewing machine and black thread to stitch vertical and horizontal grid lines.

I adhered the 9 squares with craft foam behind them to add some dimension to the page. I then trimmed the edges of my layout by 1/4 inch and added a border using the B side of the 'It's All Good' patterned paper and stitched around the entire layout. I had major arguments with my sewing machine over this as it insisted on eating my layout!! My straight stitch wasn't very neat, so I went over it again with a zig-zag stitch to try and disguise it!

I then concentrated on embellishing the layout.


I used the word 'Epic' from the Foam Stickers for my title. I really like these foam stickers - they make for perfect titles and also have lots of other smaller bits on the sheet. I've used the word 'cool' from the same sheet on the opposite side of the layout.


I added a couple of tabs and stickers from the Combo Stickers sheet and finished the layout with some fussy cut stars from the 'It's All Good' paper and the phrase 'killing it' from the 'Totally Legit' patterned paper.


'My Boy My Dude'

I focused on squares for my first layout, so for the second I decided to use circles.


I used a selection of different sized punches to create circles and stars from both the A and B sides of the  'It's All Good''Level Up!' and 'So Rad!' patterned papers. I also used some of the leftover squares from the '2x2 Elements' paper and punched the stars out with a circle punch.

I arranged my circles and stars on the page, raising some up with foam dots, and sat my photo on top. I created my title by using some of the foam stickers and just a couple of thickers from my stash.


I then added some raw chipboard chevrons by Dusty Attic which I painted using black acrylic paint, and a scattering of Doodlebug 'Star-Fetti' shapes.


I finished the layout by trimming the edges of the layout by 1/4 inch, distressing the edges with my scissor blade, and adding a border using the B side of the '4x6 Elements' patterned paper. This layout came together really quickly and was really simple to create. I love how the colours of the patterned papers pop against the crisp white cardstock I've used for the background.

I hope you've enjoyed these layouts and they've inspired you to try and bust some of your scraps! You really can make a little go a long way.

I'll be back later in the month with another layout created using the new 'Daydream Collection' by Cocoa Vanilla Studio.

Until then, let's hope this hot weather continues!

Stay safe and take care,

Rebecca

x