Showing posts with label vellum. Show all posts

Wednesday, 1 April 2026

March Papermaze Kit - Part 2

Lynn here today, with more layouts from the March Papermaze Kit. Using papers, cardstock and embellishments from the kit, together with items from my own stash, I have two more pages to share with you. 

Before looking at how the layouts were made, here is what you will find in the kit:


Patterned Papers:
49 and Market - Whispering Way collection - Farm Fresh & Sunshine Days
Carta Bella - Pressed Floral collection - 3 x 4 Journalling Cards
Carta Bella - Feels Like Home collection - Floral Frame & Cottage Floral
Simple Stories - Simple Vintage Junk Drawer collection - Willow

The photo below shows both sides of the papers


Embellishments: Mintay Chippies Titles - 1 line, 3 Prima Cherry Sweet flowers, 6 Uniquely Creative Bohemian Escape Vellum, 2 Kaisercraft Frames, Kaisercraft Rhinestone Flower, Bo Bunny - Beautiful Things - Candy Dots, Hero Arts Clay Hearts, 12" Lace.


Bazzill Basics Cardstock - Twig, Rosewood (included in kit), Classic Smooth White, Quartz, Guacamole and  Yukon Gold.


Outdoor Girl - Having seen many layouts created with tags as a main element, I wanted to try this idea. My granddaughter loves to be outside, whatever the weather. Here she is in one of her favourite places to explore - Abbey Wood Ruins.


I started with the sheet of Cottage Floral from the kit, I created a 1" frame by gutting this paper. Then I Trimmed the Willow paper to 11" x 11" and distressed the edges. I inked these edges of this paper and other items used on this layout with Gathered Twigs Distressed Ink. The Willow paper was them mounted over the Cottage Floral frame.


With the Classic Smooth White Bazzill I cut 6 tags, using the Tim Holtz Sizzix Tag Collection Die Set. I arranged these on the layout as shown and stuck them in place leaving the tops free so I could add the ribbon later. 


I arranged the photos onto three of the tags. printing a mini photo to pop behind one of the wooden frames. For the other frame I placed a scrap of the white card behind it and wrote the date in the centre. 


I used the top central tag for my title. This was cut using the Tim Holtz - Sizzix Alphanumeric Bold die set and three colours of Bazzill from a selection of scraps. I layered these up and added them to my tag.  


I embellished the tags with the Prima Cherry Sweet flowers and the Uniquely Creative Bohemian Escape Vellum flowers from the kit. Then I added the prepared wooden frames to two of the tags.  


From a sheet of Carta Bella - Feels Like Home - Element Stickers, I selected a few of the phrases to add to some tags and photos. I scattered some green gems over the page and finally, I tied narrow ribbons between each pair of tags, and tied them into a bow.


Pony Trekking Adventure - Here I am in the 1970's riding on the Isle of Wight, through the woods and along the beach at Seaview.


I started with the Twig Bazzill, a Tim Holtz Layering Stencil THS002, and some Gathered Twigs Distress Oxide Ink. I created some bubbles in two parallel lines, across the page, so they will peep out from the patterned papers.


I tore a strip from the 3 x 4 Journalling Cards paper (floral side up), about 4" x 12", and mounted this over a deeper piece of Floral Frame paper (gingham side up), with about 0.5" showing above and below the floral paper. This was placed across the paper over the stencilling.


My square 70's photo was mounted onto cream card, and then onto mustard card scraps - both from my stash. This was stuck to the layout to the left of centre.


For the title I used a Mintay Chippies Title from the kit. This was coated with some Walnut Stain Embossing Glaze. I placed this to the right of centre at the bottom of the layout. 


I added subtitle details using two Sizzix die sets by Tim Holtz - Alphanumeric Tiny Type - Upper and Lower case. I cut the numbers and letters from more scrap cardstock.


Finally, I used a pack of 49 and Market - Whispering Way - Laser Cut Elements to add farmyard items, animals and for flower pots.


That's all from the March kit. I'll be back with the April kit soon.
Thanks for looking
Lynn x

Wednesday, 6 March 2024

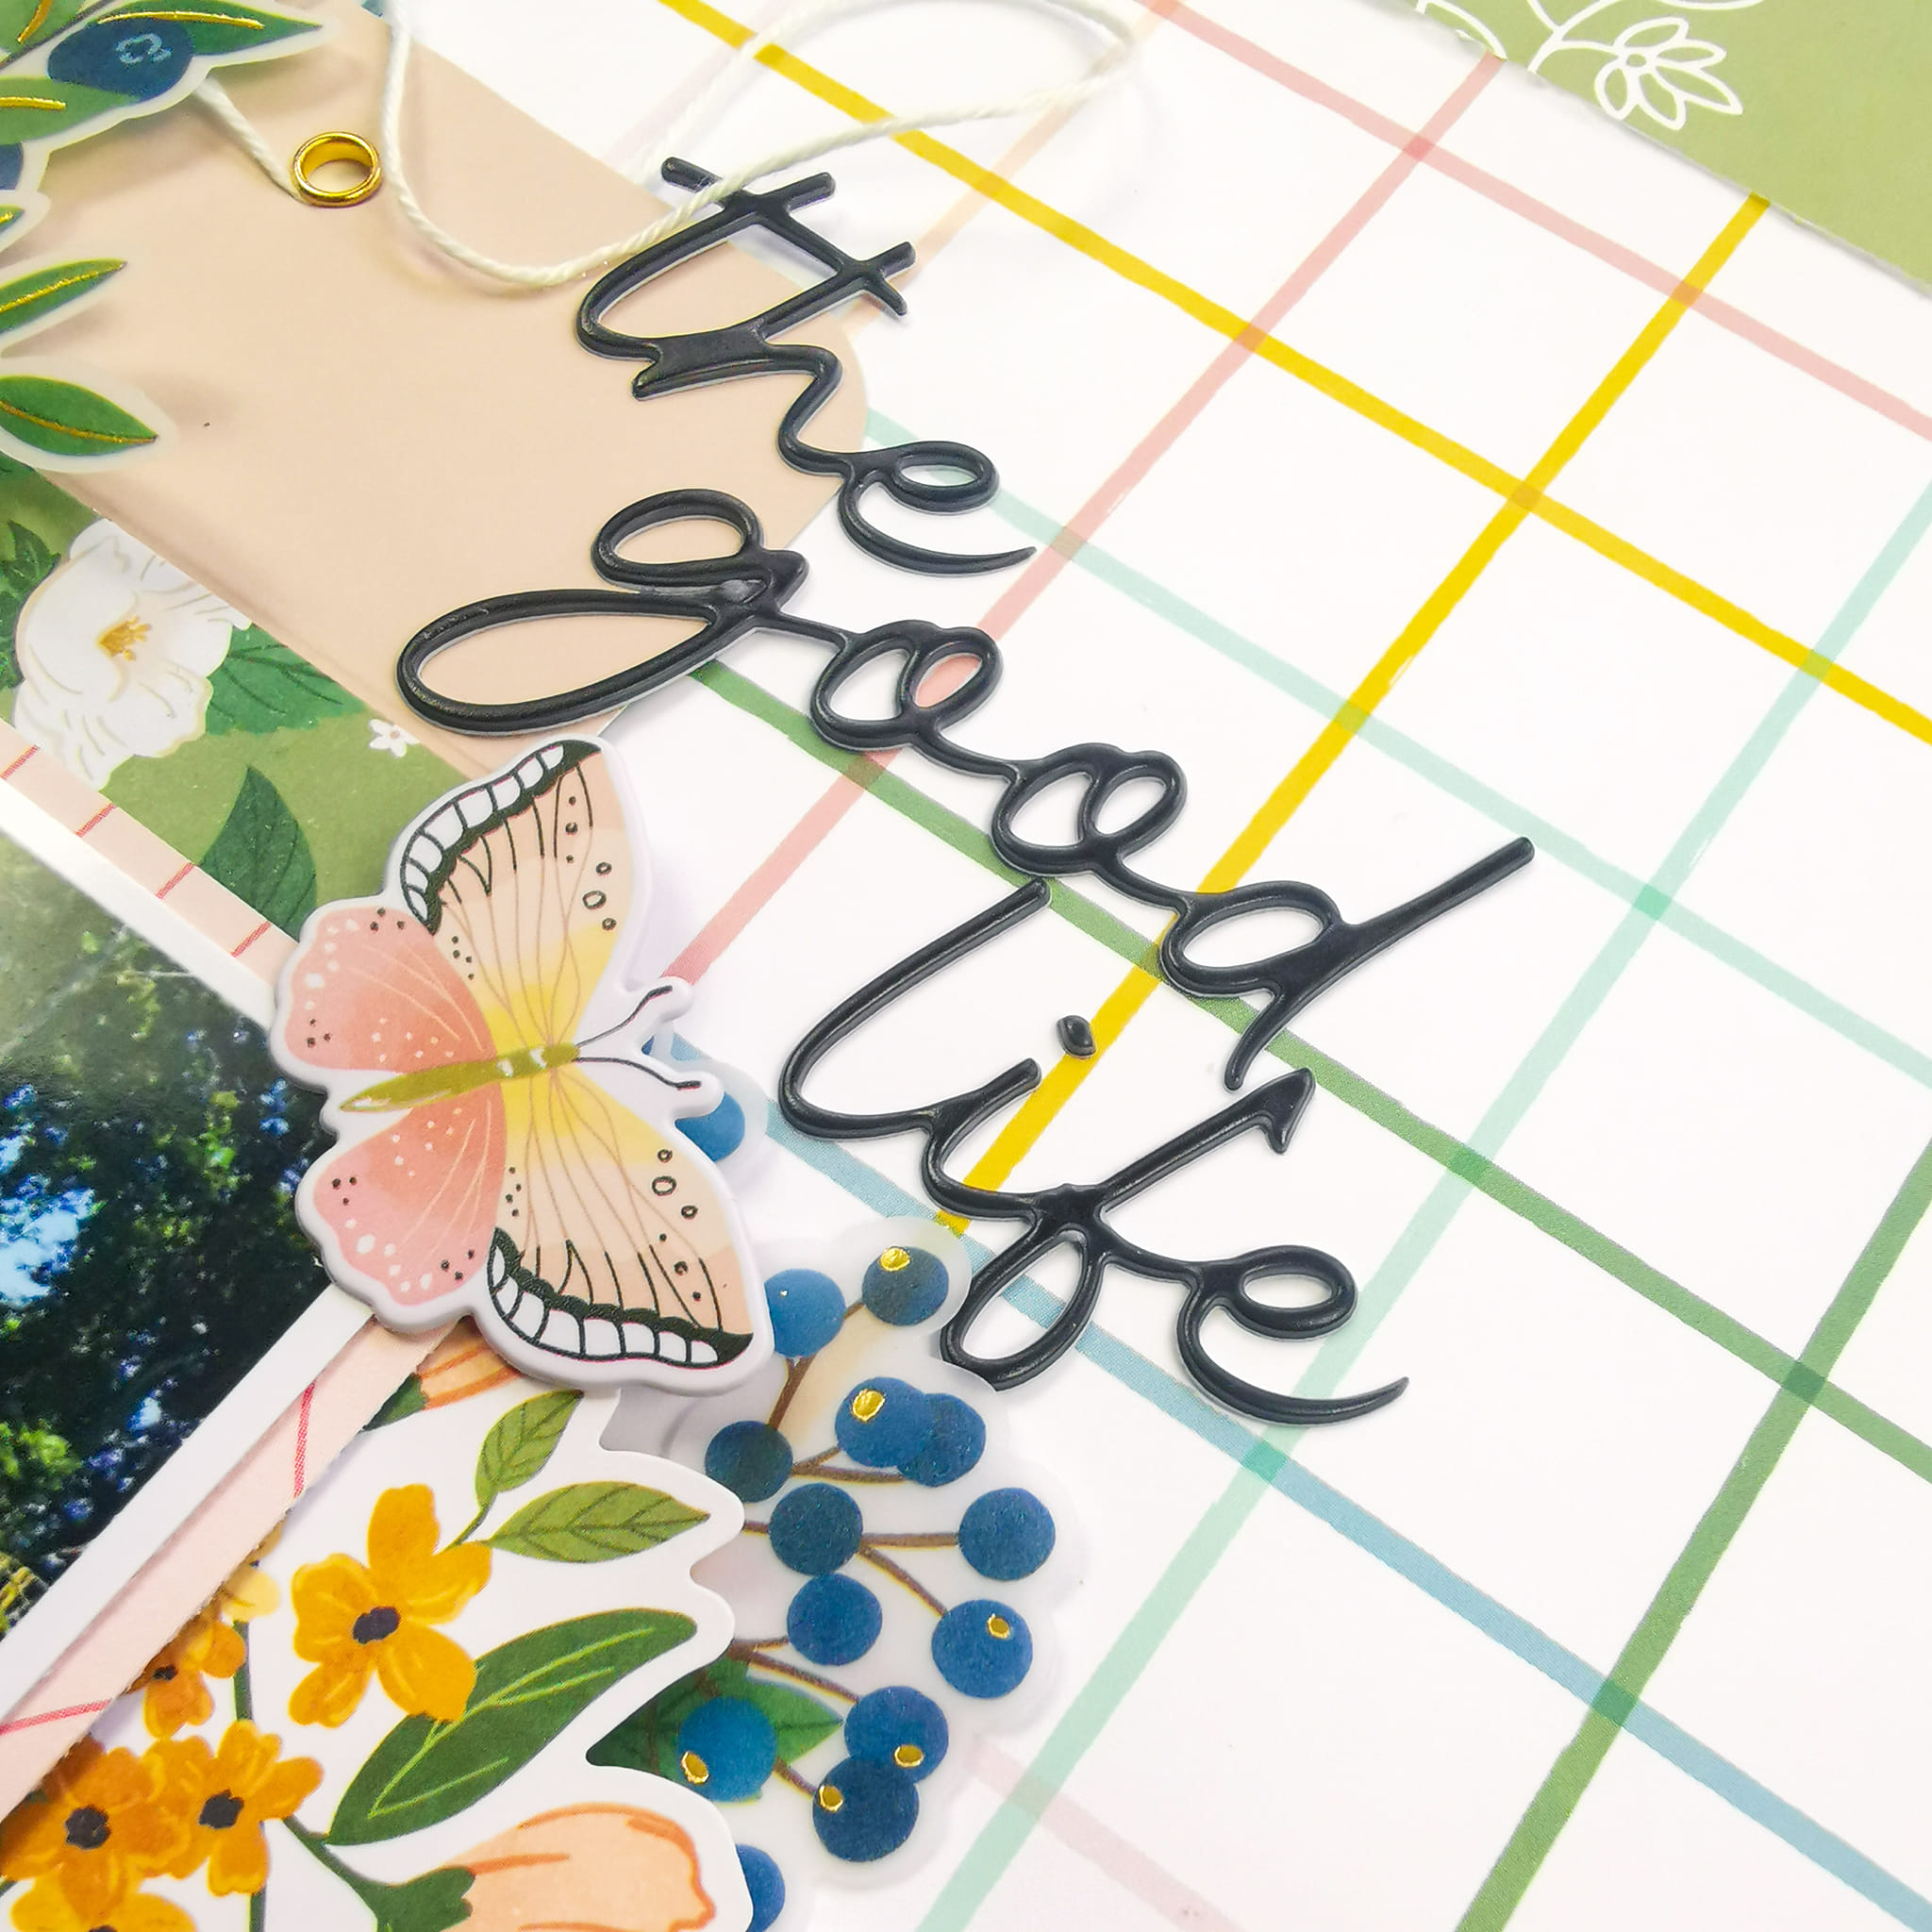
Pinkfresh Studio - Making the Best of It - The Good Life

Hi everyone!

Claire here and this month I am back sharing a Spring layout, created with the new Making the Best of It collection from Pinkfresh Studio.

It's been a minute since I've created with Pinkfresh Studio collections and I've really missed it. This new collection definitely doesn't disappoint. It has a beautiful colour palette, and is filled with gorgeous florals and a mixture of materials with vellum floral embellishments, cardstock stickers, puffy stickers and more! You can check the collection out in full here.


For a change, I steered away from my usual crisp white cardstock background, opting for the Be the Sunshine paper which has this fun multicoloured grid pattern.

To create my layered design, I started with a large envelope and red scalloped card from the Journaling Bits, and used this as an anchor to build from.


I backed my photo with a piece of the Live for the Hope of It paper as the pink tones echo the pink of the envelope and the journaling card. To create depth, I raised the photo on foam before adhering it to the envelope.

The photograph was taken last year in my garden, and just behind the fence is a small river running through a wooded area, so I wanted to try and depict this in the layout. 

I fussy cut the blue scalloped border from the No Risk, No Magic paper, slotting this under the envelope to mimic the stream.


Next, the embellishing - and there are so many options to choose from!

I was immediately drawn to the Vellum Die Cut Ephemera. The florals and leaves are beautifully designed, and the vellum provides great movement and texture for clusters. They even have gold foiling which adds that little something special!


I mixed the vellum florals with a circular sticker from the Chipboard Stickers and added some Die Cut Ephemera and Puffy Stickers amongst the other clusters to add that extra interest created by mixing materials. For example, I also fussy cut some leaves from the Good Feelings paper, echoing the blue tones and adding movement.


To create my title, I opted for one of the Puffy Title Stickers, adding a butterfly from the Puffy Stickers just underneath.


I made a smaller subtitle to sit along the bottom of the photo, using a banner from the Journaling Bits and another Puffy Sticker.  To create extra dimension, I rolled the banner between my fingers to curl the edges.


At this point, I liked the design but it didn't feel finished. I felt like it needed more green to really reflect the photograph, but I liked the central design all clustered together, 

I decided to offset the page, mounting it on a piece of the Beautiful Story paper and it immediately brought the layout to life! I love how this green reflects the envelope and the outdoorsy feel of the photograph.


I hope you've enjoyed this blog post, and I hope you'll check out this lovely new collection. It's honestly been a joy to create with,

I'll pop back later this month with another layout using this collection and hope to see you then.

Happy Scrapping!

Claire xx

@scrappysoulmate.

Friday, 1 March 2024

February Papermaze Kit - Part 2


Lynn here today with a second pair of layouts using the romantic Papermaze Kit for February.
I have used the red and pink papers this time, and created a bold and a delicate layout with embellishments from the kit and a few from my own stash.


Here are the details of what you will find in the kit:


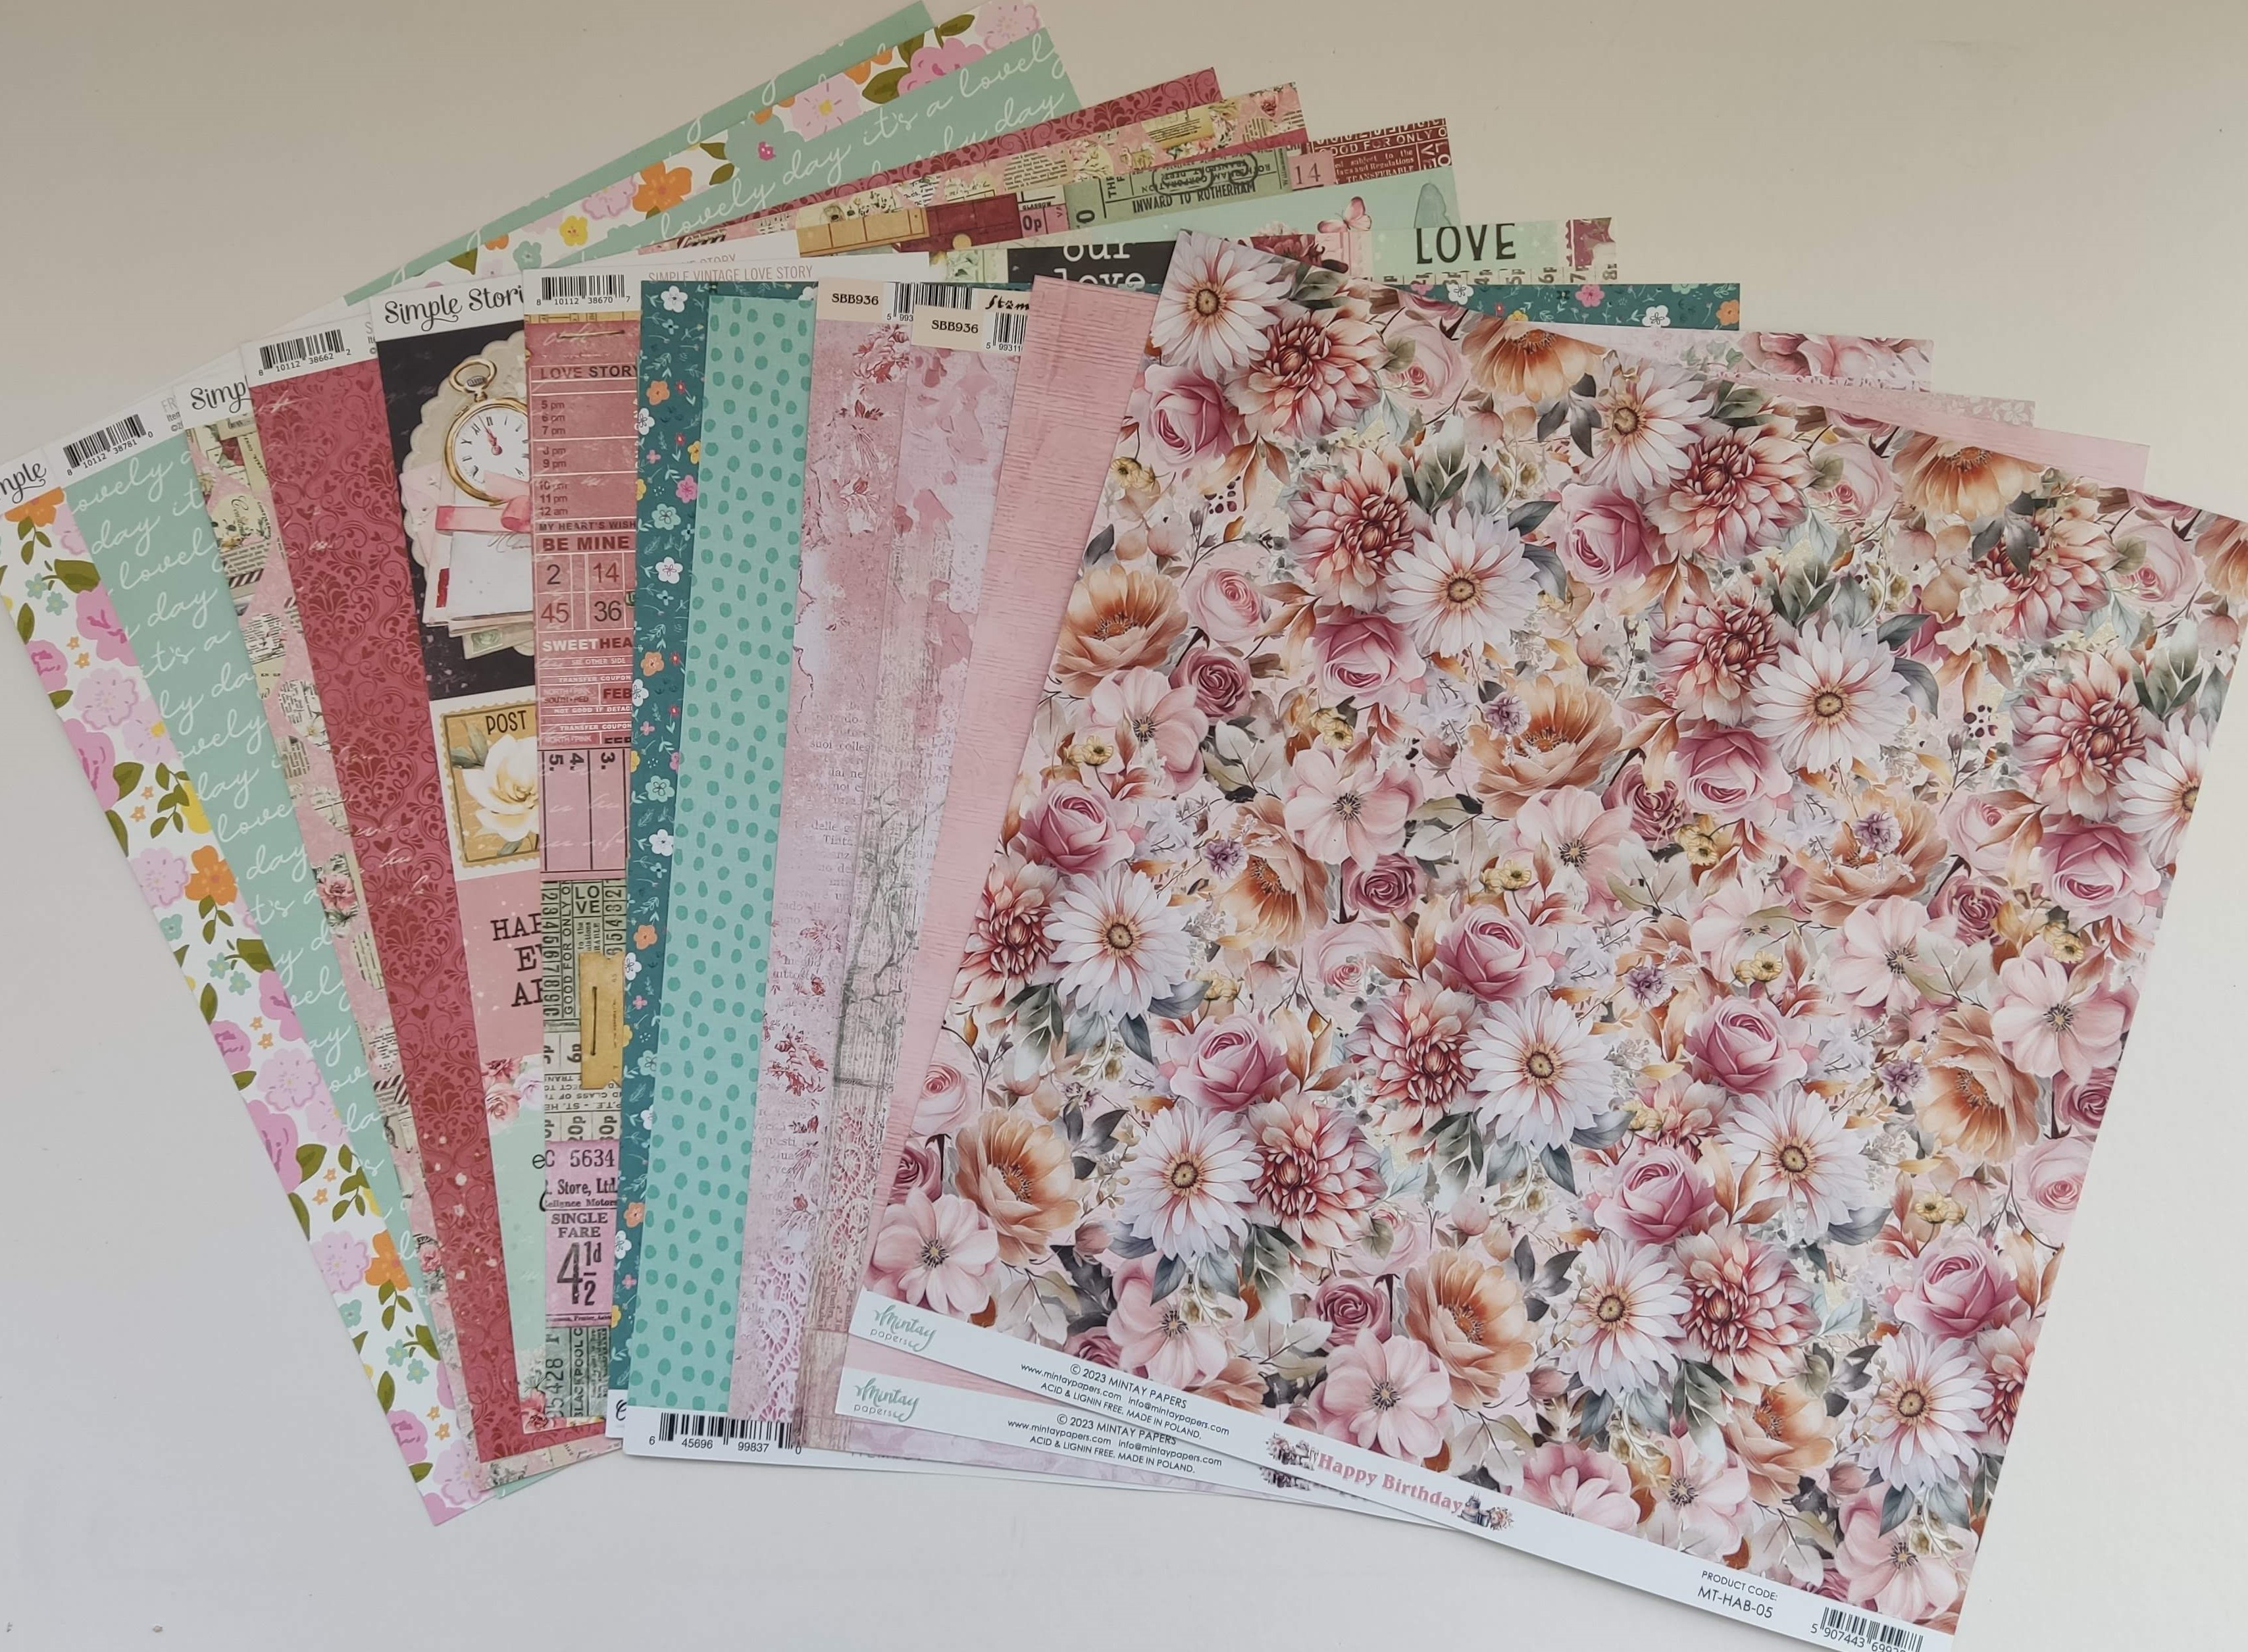
Patterned Papers: (The photo below shows both sides of the six papers)
Mintay Papers - Happy Birthday collection - MT-HAB-05
Stamperia - Roseland collection - Flowers
Simple Stories - Simple Vintage Love Story collection - 2x2/4x4 Elements & My Heart
Simple Stories  - Fresh air collection - Fresh Start
Cocoa Vanilla Studio - Happy Days - Little Blossom


Bazzill Basics Cardstock - Cherry Splash and Walnut Cream (included in the kit). Yukon Gold, Blossom, Flintstone and Sea Glass (extra Bazzill pack).


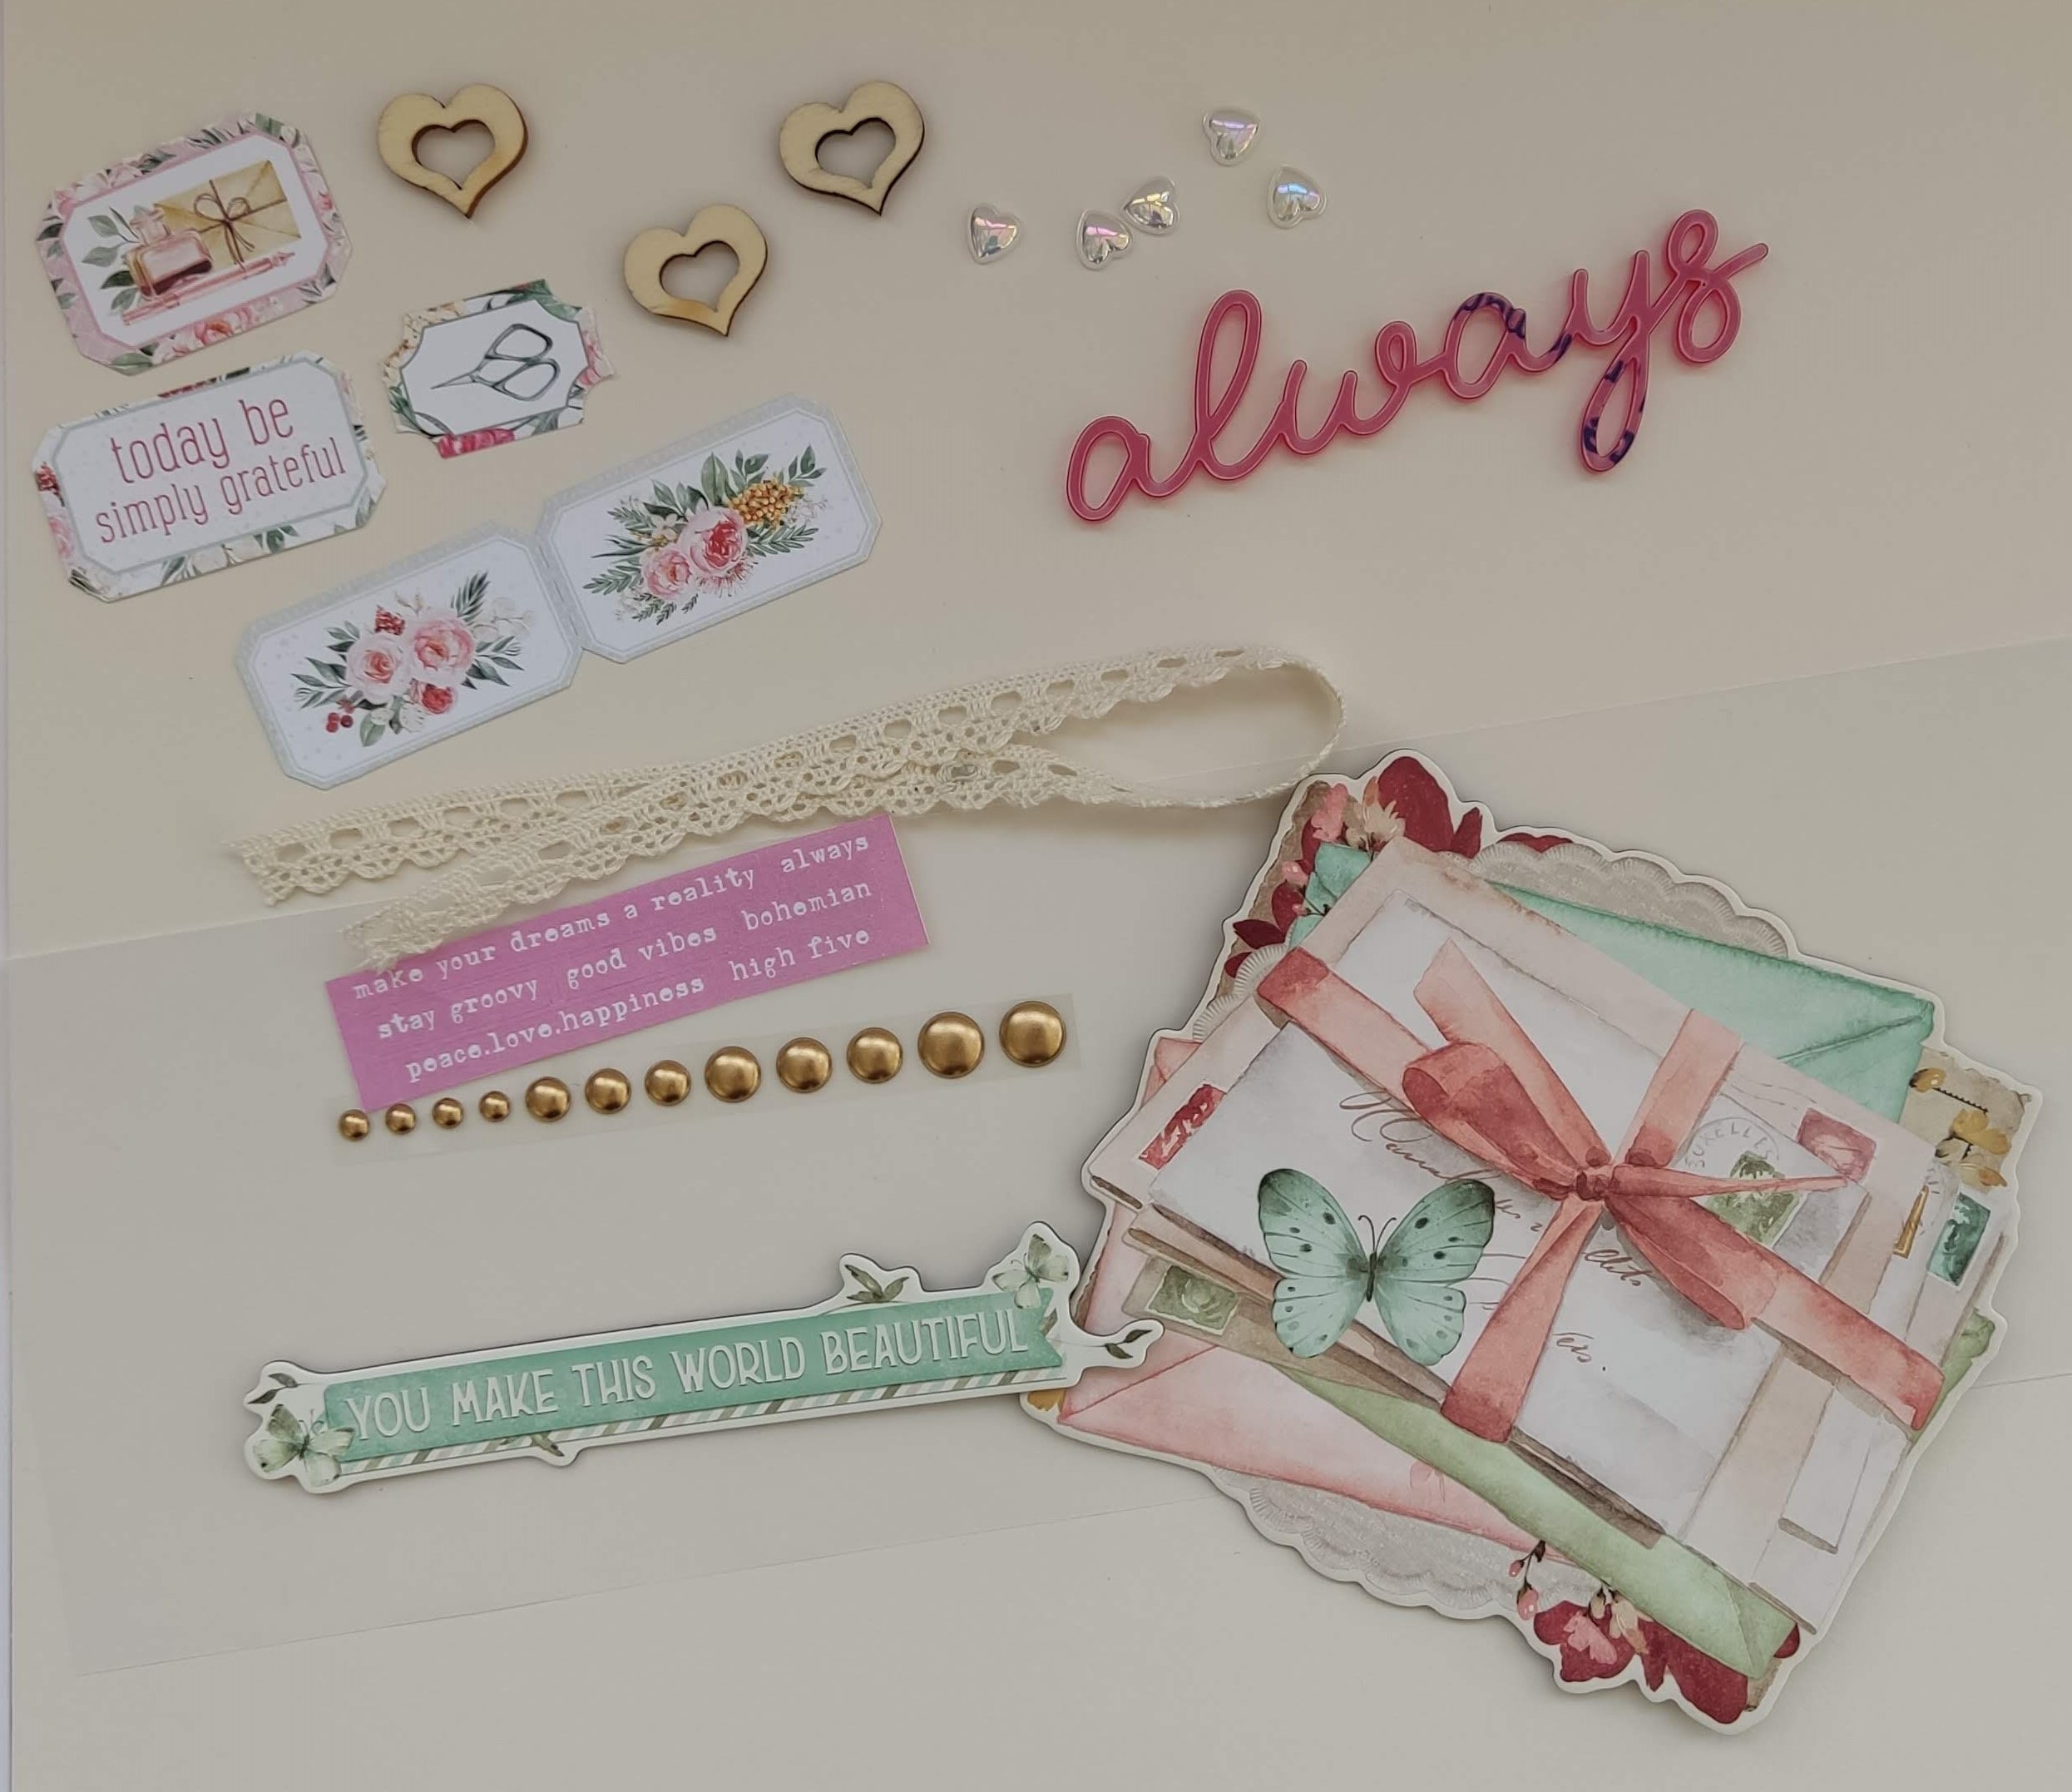
Embellishments:
3 wooden hearts, 12" lace, 5 water droplet unicorn hearts, 1 exclusive acrylic word, vellum, 2 Simple Stories Chipboard Clusters, 1 strip of Pinkfresh enamel dots, 5 P13 tickets and a selection of word stickers.


Cutest Couple - My daughter and her boyfriend at the school prom, declared to be the 'Cutest Couple'.


This layout was made using a Paige Evans cutfile and her inspiration. I chose the bunch of balloons as I wanted to highlight the balloons in this rather poor quality photo (the only one we have of the event). I cut the cutfile from the Cherry Splash Bazzill.


I backed the cutfile with both sides of the 'My Heart' paper. Then I cut four extra balloons from the same paper, scored a fold down the centre of each one, then attached them over the cutfile by adding glue to the fold only. Then I tucked some 3D foam under each side to raise it up from the base layer. 


I placed the balloons onto the 'Happy Birthday' Mintay paper. I tied Divine Twine to each balloon then gathered them into a bunch and tied them with a ribbon. The bow was then glued to the page.


My photo was placed to the bottom left of the layout. My title was created with Thickers 'Be Kind' foam letter stickers. 


I cut images from the elements paper (butterflies and phrases) and attached them to the page and balloons.


I wrote my journalling on one of the balloons.


The Marriage - This layout shows a photo from my parents wedding in 1957.


Both sides of this Stamperia paper are really beautiful but I went for the less busy side, with all it's pretty lacy patterns. I placed the lace from the kit across the paper, about 3" up from the bottom.


I place the photo in the centre of the paper. Then set about fussy cutting, birds, letters and books from the 'Elements' paper. I inked around the edges, and layered them around the photo.


I cut two oval shapes from the vellum in the kit, I wrote the wedding details onto them with a dark pink pen. Then I placed these either side of the photo, above the cut-outs.


I added the P13 tickets, cascading down from the base of the cut-outs. Then I tied three bows in some delicate, pale pink, seam binding ribbon. These were arranged on the page, one to appear as if it was tied around the watch winder.


I found some heart shaped paper clips in my stash, and added these to the photo and the cut-outs.


Finally, I added the gold enamel dots in clusters of three about the page.


That's all from the February kit. Please see back in a few weeks for the first post using the March kit.
Thanks for looking.
Lynn x

Monday, 3 July 2023

June Papermaze Kit - Part 2


Lynn here today, with more of the Papermaze kit for June available in the shop, and online. This beautiful selection of summery papers in a selection of blues and oranges. Plenty of embellishments and Bazzill cardstock. There are two sheets of card stock in the kit, and a pack of four colour matched sheets in the extra pack. Here are the second two of my four layouts made using this kit, both with a very different vibe - one a heritage layout, and the other with a bright rainbow theme.

Before looking at how the layouts were made, here is a reminder of what you will find in the kit.


Patterned Papers:
49 & Market - Vintage Artistry collection - Everywhere - Ticket Montage
49 & Market - Colour Swatch Inkwell collection - Paper 3
Heidi Swapp - Set Sail collection - Ledger Peach & Circles
Jen Hadfield - Flower Child collection- Keeping Tabs
Prima Marketing - The Plant Department collection - Fleur
Bazzill Basics Cardstock - Pigment & Typhoon

Reverse side of papers


Embellishments: 7 Rosie's Studio puffy stickers, 2 49 & market frames, 10 water droplets, 10 Crate Paper enamel dots, 2 Prima tickets, 3 Prima tags, 4 lines of Pretty Little Studio stickers, 50cm peach twine.

 Extra Bazzill Basics pack - Bazzill White, Quartz, Powder Blue & Pear

The Marriage - of my grandparents Ernest and Winifred in 1926.


This beautiful foiled paper from Prima Marketing - The Plant Department collection called Fleur is so detailed, it doesn't need much work to make it into a layout. I felt it would be perfect for recording the wedding photo and details for generations to come.
I printed the main wedding details onto some white vellum, which would be placed in the top left corner of the layout. I lined this up with the straight sides of the paper, then tore the other two sides. This was attached to the page with five large gold eyelets. Blue twine was threaded through the eyelets and tied in a bow to the side.


My photo was mounted onto Powder Blue Bazzill from the kit and placed in the centre of the layout. I found an elegant piece of lace in my stash to hang from under the photo.


I printed more details onto vellum to fit over one of the Prima tags from the kit. I added another gold eyelet and more of the blue twine.  This was placed to the bottom right of the photo. 


Finally, I embellished the tag and the photo with two of the Rosie's Studio puffy phrase stickers from the kit.

Making Rainbows for Hope - This layout records the making of rainbow badges and magnets for friends and relatives during lockdown in 2020.


It's was difficult to choose which side of this lovely
49 & Market - Colour Swatch Inkwell collection paper to use, but in the end wanted a fairly plain canvas for my rainbow, so chose the 'B' side.


I used a Paige Taylor Evans cutfile for stitching, and tilted the image before cutting the holes for stitching the rainbow. Then an evening's work in front of the TV to stitch the colour bands using DMC threads.


I mounted my photos into the two 49 & Market frames that came in the kit and arranged them on the layout.


I cut cloud shapes from white card and added my journalling. I placed them to the bottom right of the photos, together with a couple of the smaller fimo rainbows I made.


I arranged my long title around the top of the rainbow, using Doodlebug Designs Alphabet Soup puffy letter stickers in various colours.


Embellishments were added with items from the kit - 10 water droplets and the Pretty Little Studio word stickers.

That's all from the June kit, back soon with the July kit.
Thanks for looking.
Lynn x