Wednesday 30 March 2011

I finally did another page for my all about me album...this time i choose the gorgeous Portrait line to do a page about life after having my son....


Here are some close ups!


i do suffer from various aliments in my life since being pregnant with Harry...but never done a page before that documents them and how it affects my life...


a hard things to write but i did it...


Do you write about the hard times as well as the easy times???

Monday 28 March 2011

Some Echo park...

Did any of you buy the new line For the Record ? it is one of the most gorgeous lines that they have yet to come out with...i had some for one of the April Workshops...and had some left over...but i couldnt put it down...so i grabbed some of the left overs and made this....

I made the little notecard so it fitted into a one the Maya Road envelopes...

perfect for a little note to a friend!!!

Friday 25 March 2011

Wall Art

Hello, Lisa with you today : )

I've recently been making more and more items for my home. I make all these lovely layouts and then they get stored away in albums. Such a shame. So I've decided to have more things on display.

I picked up some cheap frames on Ebay and very roughly painted them over using some white acrylic paint.
So I'll show you what I've done with them.


They really are quite diddy, the photos are only 6x6cm.
I removed the glass and carefully used that as a template for cutting my cardstock to size before throwing the glass away.

The edges of the cardstock where then inked along with the edges of my photos.


I've chosen a Prima Marketing Stamp for this project.
If you haven't seen these stamps, take a look here. I highly recommend them. They are bargains! I love that you get a row of diamantes with these stamps too : )

As you can see from the photo below, once I inked my cardstock, I used the same ink for my stamp and pressed it onto the centre of the cardstock. I used a Tattered Angels Glimmer mist next.This one 'Olive Vine' to be precise.
I just did one spray on each piece.


After sticking my photo in place (once the ink and mist have dried)I cut a couple of flowers out of this patterned paper from My Minds Eye. And then added a clear button.


I have doddled in black ink around the edges, so everything stands out better.


And that's it. Two more frames to hang.
Thanks for stopping by.

Lisa x

Wednesday 23 March 2011

something a bit different....

a bit different  for me anyway....the line from Crate Paper called neighbourhood   has the most cutest sheet of paper in it.....i has no idea what i was going to use it for but i couldn't leave it on the shelf....

see what i mean? look at those cute houses and those cute birds.

so i bought it home and still wasn't sure what to do...so i started by just cutting out the houses....and then finally came up with this card...not the type of card i would normally make but none the less i think it is cute!!!

  i had to cut out some of the flowers to put at the edge as well as they were so pretty!


I still have lots of the Crate Paper lines left to use..so come back for more!

Monday 21 March 2011

My 7 Gypsies Tray

Hi, it's Lisa here with my latest project to share.

I bought 
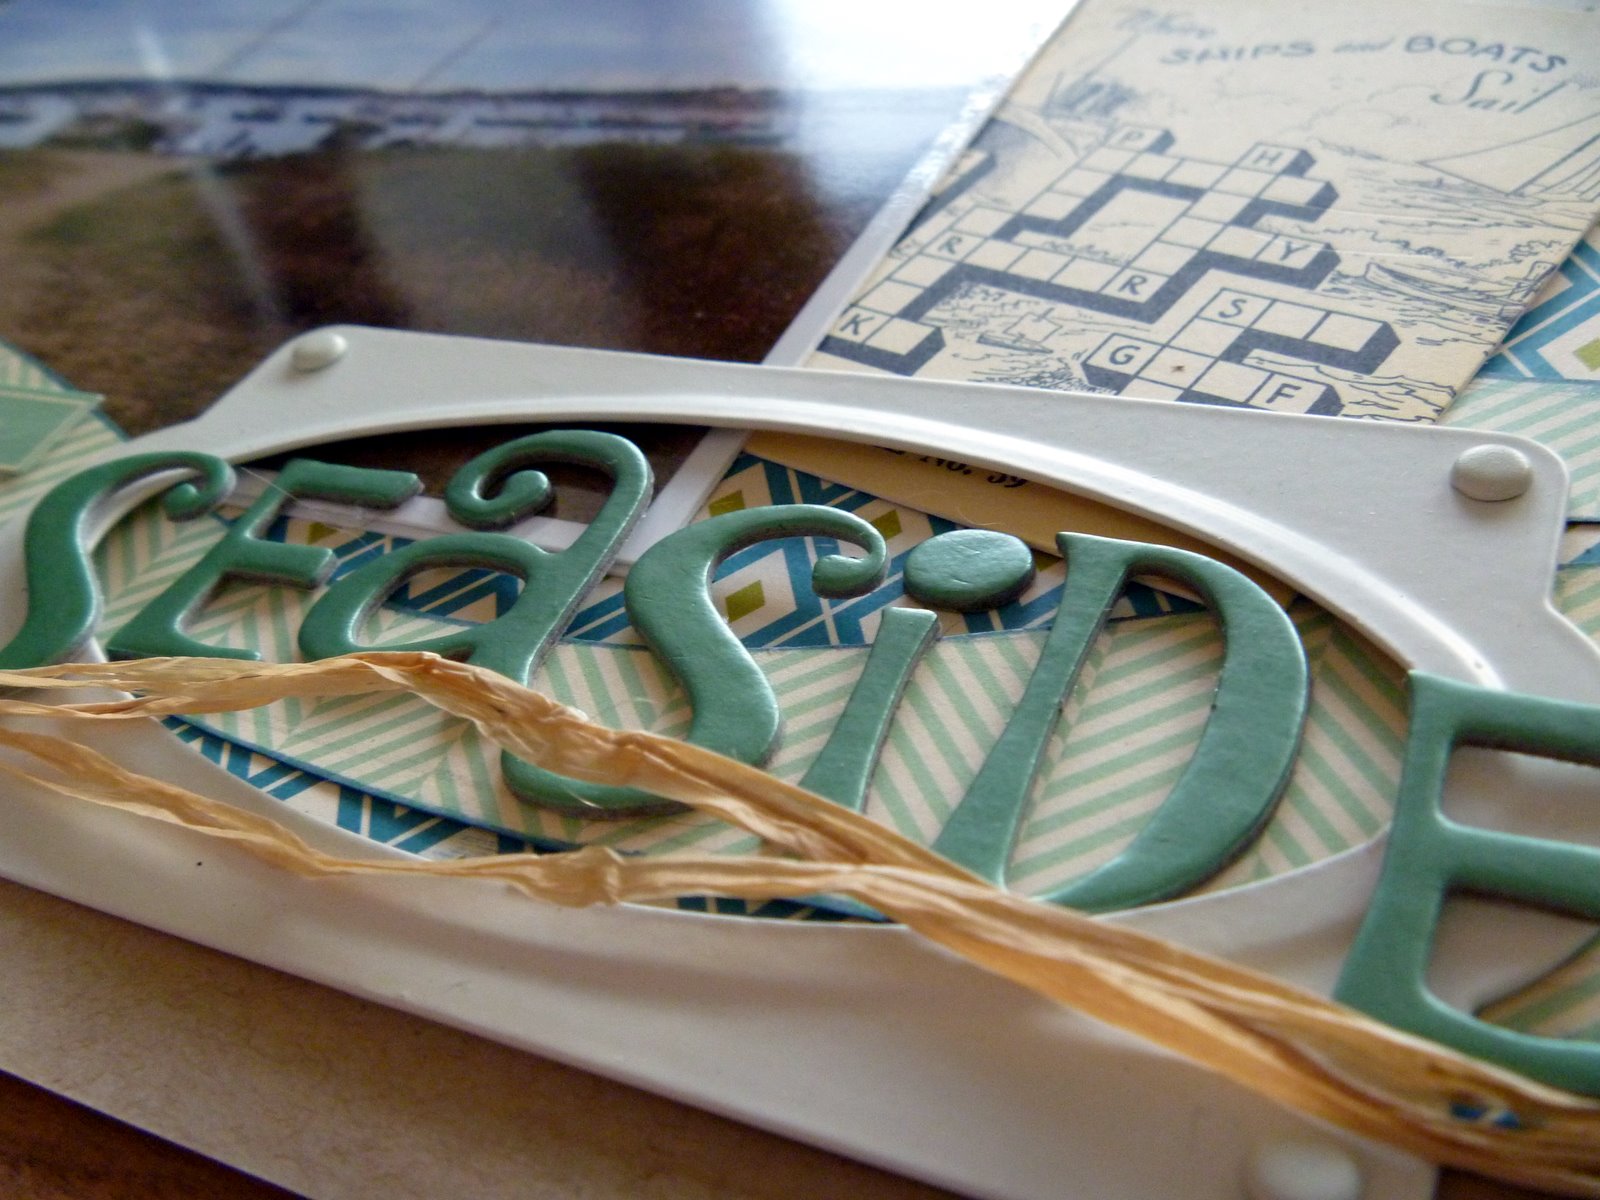
this 7 Gypsies Letterblock Printer Tray last year.
I had so many ideas when it arrived. I covered it in one of my favourite paper collections, Crate, Restoration. It really is a favourite of mine, but then I just felt stumped. It just didn't feel right and wasn't right for my hallway where I wanted it to hang. So sadly, it's been sat on a shelf unfinished and waiting for the inspiration to hit.

So when this little lot arrived, now 4 months since starting the tray, I knew instantly that I had found the right collection for me and my tray.
My Minds Eye - Stella and Rose, I thank you.


After all this time, in one evening, this was made.
(I will list the supplies at the end of this post).
The mixture of blues, greens and yellows in this collection are just beautiful. I love them.
The papers have been cut to size, inked up and stuck down in place. I did leave a tiny amount of the Crate Restoration in (you may have already clocked it), the colours were a good match for this project.


The Happy Label Stickers fitted into the thinner sections so well.
And the flowers on this patterned paper 'Hattie Bouquet' are crying to be cut out. So pretty.


I love the 'Family' title card and at only 60p, you just can't go wrong.


This collection has the prettiest Decorative Brads. Both the key and the little owl tag here come as part of this set. There are lots of various brads that make beautiful flower centres and page accents and compliment the papers so well.


I've used a few of the heart topped pins on this tray. I love using these on my projects. Here you can see that I've added 3 white buttons. I've stuck 3 blue buttons on top which have had embroidery thread added to them. Once stuck in place I've threaded a pin through. This was abit fiddley, but it's a nice touch.

The 'Remember These Moments' card comes from this journal tag here. It's been cut down and inked.


I recently bought these Maya Road Chipboard Butterflies. I love these. So many shapes and sizes and a butterfly is always so nice to add to any project. You just can't go wrong : )
This one has simlpy been lightly inked over with the same ink used throughout this tray and the glossed over with glossy accents.


I really hope you like my tray. I am so happy with it and so pleased that I waited now until I was happy with the collection I had found.

Thanks for stopping by xx

Supplies used:
7 Gypsies - Tray, My Minds Eye Papers - Stella and Rose 'Hattie', Crate Restoration - Heirloom paper, MME - Label Stickers, MME - Family Title Card, MME - Decorative Brads, Heart Pins, MME - Journal Card, Maya Road - Chipboard Butterfly, Tim Holtz - Distress Ink, American Craft - Thickers, Doodlebug - Alpha Stickers, Glossy Accents.

Friday 18 March 2011

New Crate Paper....

and oh! how! gorgeous! it! is!

seriously gorgeous...i had a hard time choosing which papers to work with....but i grabbed all three collections and over the next week i will show you a project made with each of them...

so first up is the new line called Emmas shoppe....

Here is the card that i made with it....

see....so pretty, the colours are just perfect!!!!

I got out my packet of the paper strips...paper frills

i used white...but the pink ones would have looked gorgeous on this card!!! i am a tiny bit addicted to these at the moment so expect lots of projects with these on!!! lol!!!

I still have lots more of this paper left and two other collections to work with........so be prepared for crate overload!!!!!

Wednesday 16 March 2011

New Echo Park...

I grabbed some of the new Echo park the other day....and i spent a bit of time looking at the papers deciding what to use and what to make.....i used Echo Park spring time....so so very pretty....

I knew that i wanted these to pretty and have flowers on them...so i grabbed my packet of these...

I have used white....but have shown you the picture of the pink ones as you can see better what you get in the packet....seriously these things are so cute!!!

Here are the first three...
I decided to base all three of these cards on this sheet of paper...

I cut out three of the square cards ( the second row from the bottom)...

Here is the first card...

I also used some stickers from this sticker set from the same line...
Here is the second card....

I love the little line of flowers across the top!!!! the paper frills are so cute!

and here is the last card of the set of three...


such a cute paper line...and i couldn't leave it here so i made one more card....

I used the classic butterfly Martha steward punch to punch out all the butterflies.....so pretty!!!!!!

Saturday 12 March 2011

April Workshops.....

Here are the details for the April Workshops... *edited for correct dates*

The first one is done using the new Echo Park Papers called For the record

This is being held at the shop on the 6th April at 7.30pm. Bring with you your normal cropping tools.

The next one is a bit different...this is a card making workshop with three cards to make...

This will be held on the 13th April at 7.30pm at the shop....this workshop will go up on the website...this is not a 'turn up ' on the night workshop...as we will need to know numbers so if you want to come either buy your spot on the website or email me on wendy@bbbweb.com and let me know you want to come :)

The last workshop for April is on the 20th April....at 7.30pm at the shop.


Again being your normal cropping tools....Any problems or questions please email me wendy@bbbweb.com and i will try and help!

Friday 11 March 2011

PRIMA PAPERS

Hi all i just love these prima papers they are just the most adorable papers perfect for that special valentines photo. This photo of my daughter and her boyfriend was taken on valentines day they went out for a meal bless them lol....

This layout is so easy to achieve there are so many cut out pieces in these papers to make your layout look fuller by using less embellishments.... Layering your papers is a must why not try rolling the edges of your papers and stitching them for more detail......

Monday 7 March 2011

Seaside

I'm not really into my camping, so to prove that October Afternoon campfire can be used for any type of layout I decided to create this seaside themed page.

I wanted to make the page look natural, so I used kraft coloured cardstock, and cut the papers into wave shapes to echo the movement of the sea. I used some notepad paper to layer behind the photograph, and some raffia as well as neutral coloured paper flowers for embellishment.

The stickers and card are from another October Afternoon seaside themed range and also 7 Gypsies.

The title, made with American Crafts Thickers, is highlighted with the use of this bookplate - they don't only have to be used for book labels!

Posted by Picasa

Thursday 3 March 2011

Pretty with Pink Paislee


I have a soft spot for Pink Paislee right now. I love how feminine the papers are but at the same time aren't all pinks and pastels.
I thought I would share a page with you that I've just made.

I ordered the 6x6 pad from the '365' collection and also this patterened paper from the Bayberry Cottage range.
I've teamed these papers up together and used on the one page.


I've used various punches, creating a scalloped border and my own embellishments to match in the Pink Paislee papers. Even the journal strips are written on the Pink Paislee papers and cut by hand ready to stick onto the page.


The '365' collection has this great collection of 'Punch Outs'. I love these. They give you instant titles or subtitles, like how I've used mine here. They also include some gorgeous journal cards. All of which just push out so easily. No tricky cutting required. The other thing that I really like about these cards is that they are not sticky backed. I prefer this as you can easily place them onto your page and move around until you have decided exactly where you would like to place them.


Once my page was finished, I felt that I needed to highlight certain elements of the page to help them stand out a little. So I've taken my favourite black journal pen and with a relaxed hand, just outlined everything. If you haven't tried this technique before, give it a go. It's simple and so effective. And remember, it's not meant to be perfect, so don't worry if you feel you aren't artistic or can't draw. Anyone can do this : )

I hope you like my page today and share the love for Pink Paislee too.
Thanks for stopping by.

Lisa x

Supplies used:
Bazzill cardstock, Pink Paislee Bayberry Cottage, Pink Paislee 365, EK Sucess Slim Punch, Butterfly Punch, Tattered Angels Glimmer Mist-Fall Breeze, Tattered Angels Glimmer Mist-Sweet Clover, Distress Ink-Chipped Saphire,Pink Paislee Alphabet Stickers,