Friday 23 May 2014

Sketch time with Websters Pages


Hi Tracee with you this morning, I have a layout to share in a slightly different style for me. Usually I use 1 maybe 2 photos per layout, but I found a great sketch at Page Drafts that challenged me to use a whole bunch of pics.

 
This was the sketch I used
 

The Websters Pages Sprinkled With Love I used were such a great fit for this type of layout and I did lots of fussy cutting to use the words and images as embellishments. I even fussy cut the title of the collection and added to my page.

 
I had some of the Pink Paislee alphas left over from last months kit, I just love the tiny geo tag stickers with pictures on and there are lots of them on the sheet along with the letters. The tiny Petaloo flowers added a pretty touch here and there.
 
 
I also used this sticker sheet from the Recorded collection by Websters Pages, the collections all coordinate so well. I hope you enjoyed your time with me today and I hope you have a Happy Scrappy weekend.
 
Supplies for this layout can be found in the SHOP


Thursday 22 May 2014

Summer Workshops

Have you noticed the new workshop dates we have up on the website now? If not then pop over to HERE and sign up for one...we pack new techniques into every one, and each time you attend a workshop, not only do you get to bring home a finished project, but you also get 10% off in the shop while you are here!

So heres a little sneak peek at the first workshop, running on Wednesday June 4th at 10am.

During this two hour class we are going to be exploring:

  • Creating a rust effect with household salt
  • How to achieve a worn leather effect on card stock
  • Making a title and embellishments from Hot Glue
  • Using layered stamping techniques
  • Learning basic distress ink blending
  • Looking at using scrap booking products in alternative ways
For this class you will need to bring with you a square black &white photo around 4" x 4" (or one that can be cut down)

For more information, visit the website HERE
or email enquiries@papermaze.co.uk

Lou x

Monday 19 May 2014

Project Life for Holidays...


Hi, It's Anna here back and refreshed from a lovely holiday in the sunshine! I'm going to continue with the theme of holidays for my blog post today... 'Project Life for Holidays'.
As I'm sure many of you know the initial intention of 'Project Life' was, and still is to quickly and easily scrap day to day life working a week at a time. For me, I just can't quite keep up with this method so I mainly use it for my holiday albums. Today I am going to show you how this works for me.
I start with a postbound album, but a D-Ring album would work fine too if you need more space. A selection of 12x12 albums can be found here. With a postbound album I unscrew the screws at the front and back of the album and while I'm working on it I keep it all unscrewed so that I can play around with the order of the pages if need be - make sure you keep the screws in a safe place if you do this too! I then take away some of the 12x12 pages that you get with the albums and add in some project life pages. Most brands of pocket pages will fit in an album with 3 screws. Have a look here for your pocket pages.
The next job is to sort out the photographs. I do this day by day as I like my albums to be in chronological order. So I make piles of each days photographs and then decide which ones I'm going to put into pocket pages and which ones I will make a layout with.

Now we're ready to start putting the album together! Make sure you have plenty of 
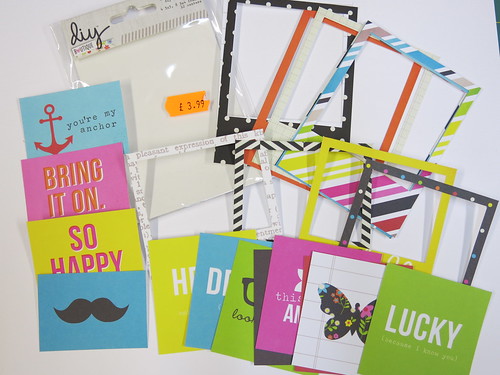
project life cards. Small stickers I also find useful to add extra detail onto pictures in the pocket pages.

I start with a title or diary page.


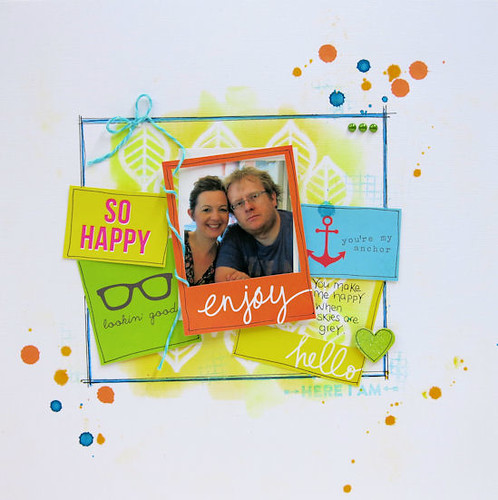
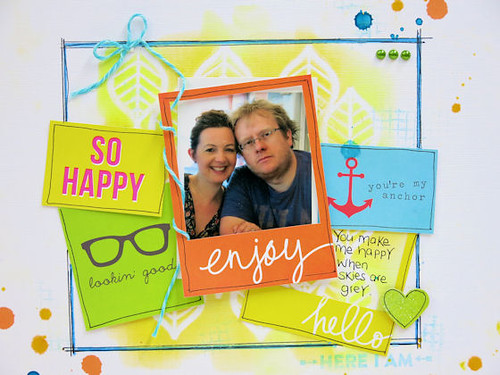
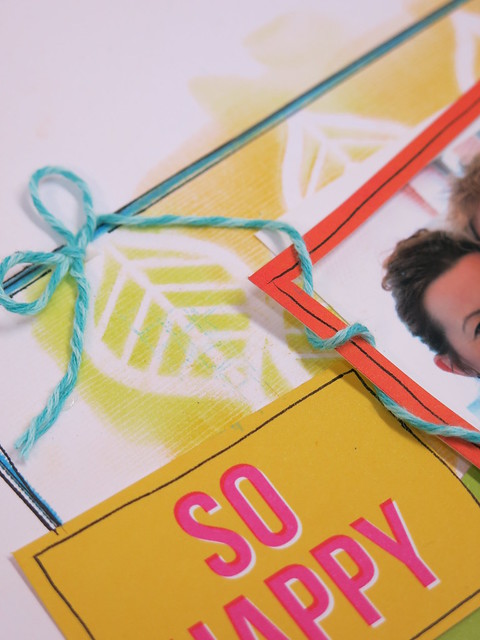
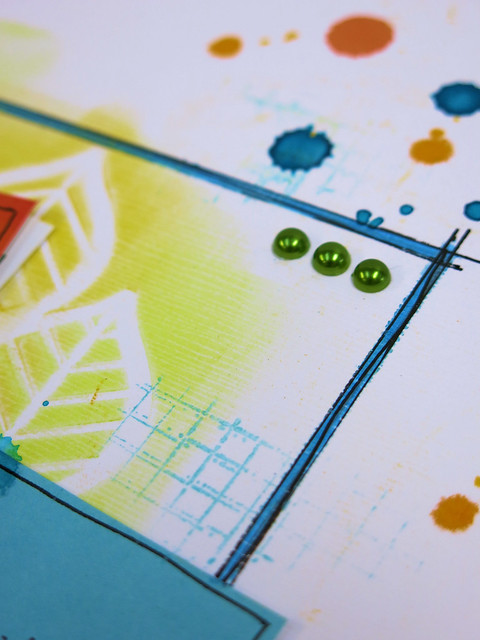
Then I start working my way through the piles of photographs. Some pages I keep simple, with just the odd sticker...

.

...and others I add a little more detail too. Using less pictures and adding in more project life cards. Don't forget that you can use divided paper like this in your pocket pages. Just cut them up and use a corner rounder on the edges and you have made your own project life cards!


I try to keep an even amount of pocket pages to layouts...


Remember to keep your memorabilia safe too as you can easily add this into a pocket page. You can add tickets into pockets or perhaps use some of these SMASH pockets like I have. As shown in the picture below...

Now that's done, it's onto the latest holiday!
Have a great day.

Anna X

Friday 16 May 2014

May Cropping!

Yes, it's that time of the month again - the 3rd Saturday means it's our crop at the local village hall.  This month's kit layout uses Something Blue papers from Prima, which are beautiful!  The torn background of my layout was inspired by one I saw on the Prima blog here


If you'd like to join us, the crop is £4 and is from 10am until 5pm.  The kit is an optional extra and we open the shop for a couple of hours in the middle of the day - there's a 10% discount on anything you buy!  Just drop us an email to let us know you're coming :)

Monday 12 May 2014

Sprinkled With Love

Hi Tracee with you today. Hope you all had a great weekend filled with crafting delights, this weekend I got to play with the Sprinkled With Love collection by Alison Kreft for Websters Pages.

 
These papers were a real delight to work with and I created my page in record time (for me anyway!)
The beautiful Ombre effect on the Follow your Heart sheet made the perfect background for my layout and I simply layered some of the Dear Diary & Love Notes pieces onto the background and it was almost done.
 
 
Also Included in my package of goodies this month were some Zva Creative bling swirls and some tiny Petaloo flowers. The cork arrows are by Studio Calico and are from my stash.
 
The supplies for this layout and all of your scrapping needs can be found in the shop HERE
 
Tracee x
 

Sunday 11 May 2014

DIY - Part #1

Hello and a happy Sunday to you lovely scrappers!!

I have a little post all about DIY for you today.
I'm talking scrapbooking obviously and not housey stuff : )

Now this weekend is a free postage and packing weekend incase you didn't see.
(all orders over £10) I just wanted to mention that before I carry on with my post.

Back to the DIY.
Simple Stories have this really fun collection. DIY BOUTIQUE.
I love it!!
I used these really colourful frames - Insta Frames - that also come with all these cards on my LO.


And whilst we are talking DIY, I also made my own background using plain white cardstock, one of the new Craftersworkshop stencils and some pastels.

 
Layering up a couple of the Simple Stories frames and the little cards, I made this layout.
 
 
I love how fun and bright this collection is. And you get a lot to play with for £3.99.
 
 
I think I look like I was actually enjoying myself a lot more than my lovely hubby, but he promises me that he was supposed to be looking 'loving'. We were having a really nice family lunch out when that photo was taken I promise you and we honestly weren't in the middle of an argument when a camera was suddenly thrust in to our faces. I can assure you : )
 
 Back to the layout.
I doodled with a black pen around the edges of everything to help it stand out.
 
 
I wrapped a little twine around one of the frames.
 
 
And finished off with some flat backed sticky pearls, a little stamping and some blobs of mist. Always a great way to add a little extra colour.
 
 
I hope you are able to squeeze in some scrappy time in this weekend and don't forget to make use of the free shipping this weekend : )
 
I have some more DIY to share with you later this week.
 
Lisa x 


Wednesday 7 May 2014

Journalling with Paperartsy stamps...

Hi Carol with you today, and as promised my post involves the fabulous Paperartsy Eclectica no 8 plate by Darcy.

I use a lot of paint in my projects and, like all crafters, hate waste - so my little journal is always at hand for the left overs…..

I started off with this:-


I built up my background by using acrylic paint thro' a stencil, dripping two colours of dylusion spray inks, and washi tape.  After outlining the dripped shapes and adding shading to the washi tape - I then added a wash of pastel crayons around the outside…..I then stamped direct to the page the three "house" shapes from Darcys eclectic no 8 , I then stamped them again onto patterned paper.  For the first house I added a paper pierced roof (no chimney) and the connecting rod….the colours were added by using a mixture of oil based crayons…. the middle section had the inner door and stem and little flower heads paper pierced.  The far side had all definition added with colour and shading.  The stars where stamped direct to the page and then coloured in with a gold pen.  The phrase was added at the bottom of the page.  Doodling around the edges finished it all off.

Here is the finished page


TFL

Monday 5 May 2014

Scrapbooking workshop

After a short break from the workshops we are now starting to arrange some new slots :-)
The first of these is going to be held on Wednesday 4th June from 10am. This will be a 2 hour class exploring adding distressing techniques to your layouts. Details will be going up online at www.papermaze.co.uk very soon, but in the mean time, here is a sneaky peek at the layout we will be creating on the day...

 
Contact us at enquiries@papermaze.co.uk for any more details. I hope to see you there :-)

Saturday 3 May 2014

Project Life with Dear Lizzy...


Hi all, 
Today I have a project life page to show you with a bit of a twist! I have created the above layout in the style of 'project life' but I haven't used a pocket page. For those of you that are keen to try project life but aren't too sure or do not have the right album etc this could be something to try. 

I started with this Dear Lizzy Polka Dot Party Patterned Paper which is divided already in the style of project life. If you wanted to you could scrap straight onto this sheet. But I chose to cut it up and trimmed down the edges so each section fitted on to my 12x12 sheet of bazzil. I also rounded the corners. 

I then added photos to some of the sections and mixed in some project life cards. 

Check out the links below for products that I have used. 


Thank for looking. 
Anna 
x