Showing posts with label Journaling Cards. Show all posts

Monday, 12 May 2025

Echo Park ~ Born to Travel ✈️ #1

Hi everyone, it’s Anna back with you today and this month I’m working with Echo Park - Born to Travel. 

You can find the whole collection in the shop here


For this layout I began by using ‘Postcard’ as my base. I then trimmed roughly 1/4 of the ‘b’ side of ‘Ready to go Luggage’ down as well as trimming it around the edge to fit inside the boarder of ‘postcard’. 

I placed the boarder sticker from the element stickers down the edge of ‘Ready to go Luggage’ 


I mounted my photo on to the b side of ‘Soaring Hot Air Balloons’ and cut out two journal cards from ‘Travel Journaling Cards’. One of which was to act as my title and the other being my journaling space. 
I adhered these three pieces vertically along the edge of my patterned paper. 


I cut out some strips from ‘Tourist licence Plates’ and adhered a strip under my photograph, with a couple of extras used elsewhere on the layout. 


I then pulled out the element sticker sheet again and added a few to my layout, including the aeroplane and some florals. 


After adding my journaling, that was my layout complete! 


Thanks so much for looking!
 See you again later in the month for a second layout using this collection. 

Anna 

@acraftylifewithanna

Friday, 25 April 2025

Echo Park ~ Blossoms and Bees 🐝 #2

 Hi everyone, it’s Anna back with you today. I’m sharing my second layout using Echo Park Blossoms and Bees, which you can find in the shop here

For this layout I’ve used the 3x4 journaling cards to create a grid style layout, which is one of my go to scrapbook page designs. 


For my background, I used the b side of blossoms and bees. I then selected six of the journaling cards and arranged them in a 3x3 grid. 


I mounted photos on to four of the journaling cards and left the remaining two - one to add some journaling to and one to keep as it was. 


I then added a few element stickers, including ‘welcome spring’ as my title, some florals, and words. 


Thanks so much for looking! 

See you again next month with a brand new collection. 

Anna 

@acraftylifewithanna

Friday, 27 September 2024

Carta Bella ~ Sunflower Summer 🌻

Hi everyone it’s Anna back with you today.
I’m soaking up the last of the summer and sharing one last layout using Sunflower Summer by Carta Bella and I’m documenting another sunflower field visit. 
You can find this collection in the shop here


I started my layout with a white bazzill base. I then adhered the remaining half of ‘busy bees’ horizontally across the centre of my page. 


I wanted to include multiple photos, so I printed eight square pictures and mounted them all together on the b side of  ‘sunflower patch’. 


I then fussy cut sunflowers from the b side of Sunflower Seed Packs and tucked them in a row along the top of my photos. 


I used my silhouette cameo to cut a title using coordinating bazzill cardstock from the matchmaker pack.

To add a space for my journalling I used one of the 6x4 journalling cards


I added a boarder strip as well as some of the element stickers around my journaling card. I also added some bunting to the top of my layout using the bunting stickers and some twine


Thanks so much for looking! 
See you next month with another brand new collection - I’ll be working with Say Cheese Classic Mouse

Anna 
@acraftylifewithanna

Friday, 16 August 2024

Echo Park ~ Sunny Days Ahead #1 🏖️

Hello! 
It’s Anna back with you today and for the month of August I am working with Echo Park - Sunny Days Ahead. You can find the collection in the shop here. 

For this layout I have created one of my favourite style layouts, a grid…


To create this layout, I began with a sheet of white 12x12 bazzill cardstock and the 3x4 journalling cards
I used some Shimmerz Ink Spray to spray onto my white background. 


I trimmed down the 3x4 journaling cards and selected 6 in different colours to use and laid them out in a 3x3 grid. 


I printed four photos and mounted them on to the journalling cards. I left two as they were, one for my journaling and another for a sentiment. 


I added a boarder sticker from the Element Stickers along the bottom of the journalling cards and also dotted several other stickers around my layout.   


I added a title ‘Summer Fun’ from the Pebbles Fun in the Sun Puffy Phrase Thickers


Thanks so much for looking! 
I’ll be back soon with another layout using this collection. 
See you then! 
Anna 


@acraftylifewithanna

Monday, 3 June 2024

American Crafts ~ Rainbow Avenue

Hi all, it’s Anna back with you today and for June I’m working with Rainbow Avenue by American Crafts. 

You can find the collection in the shop here

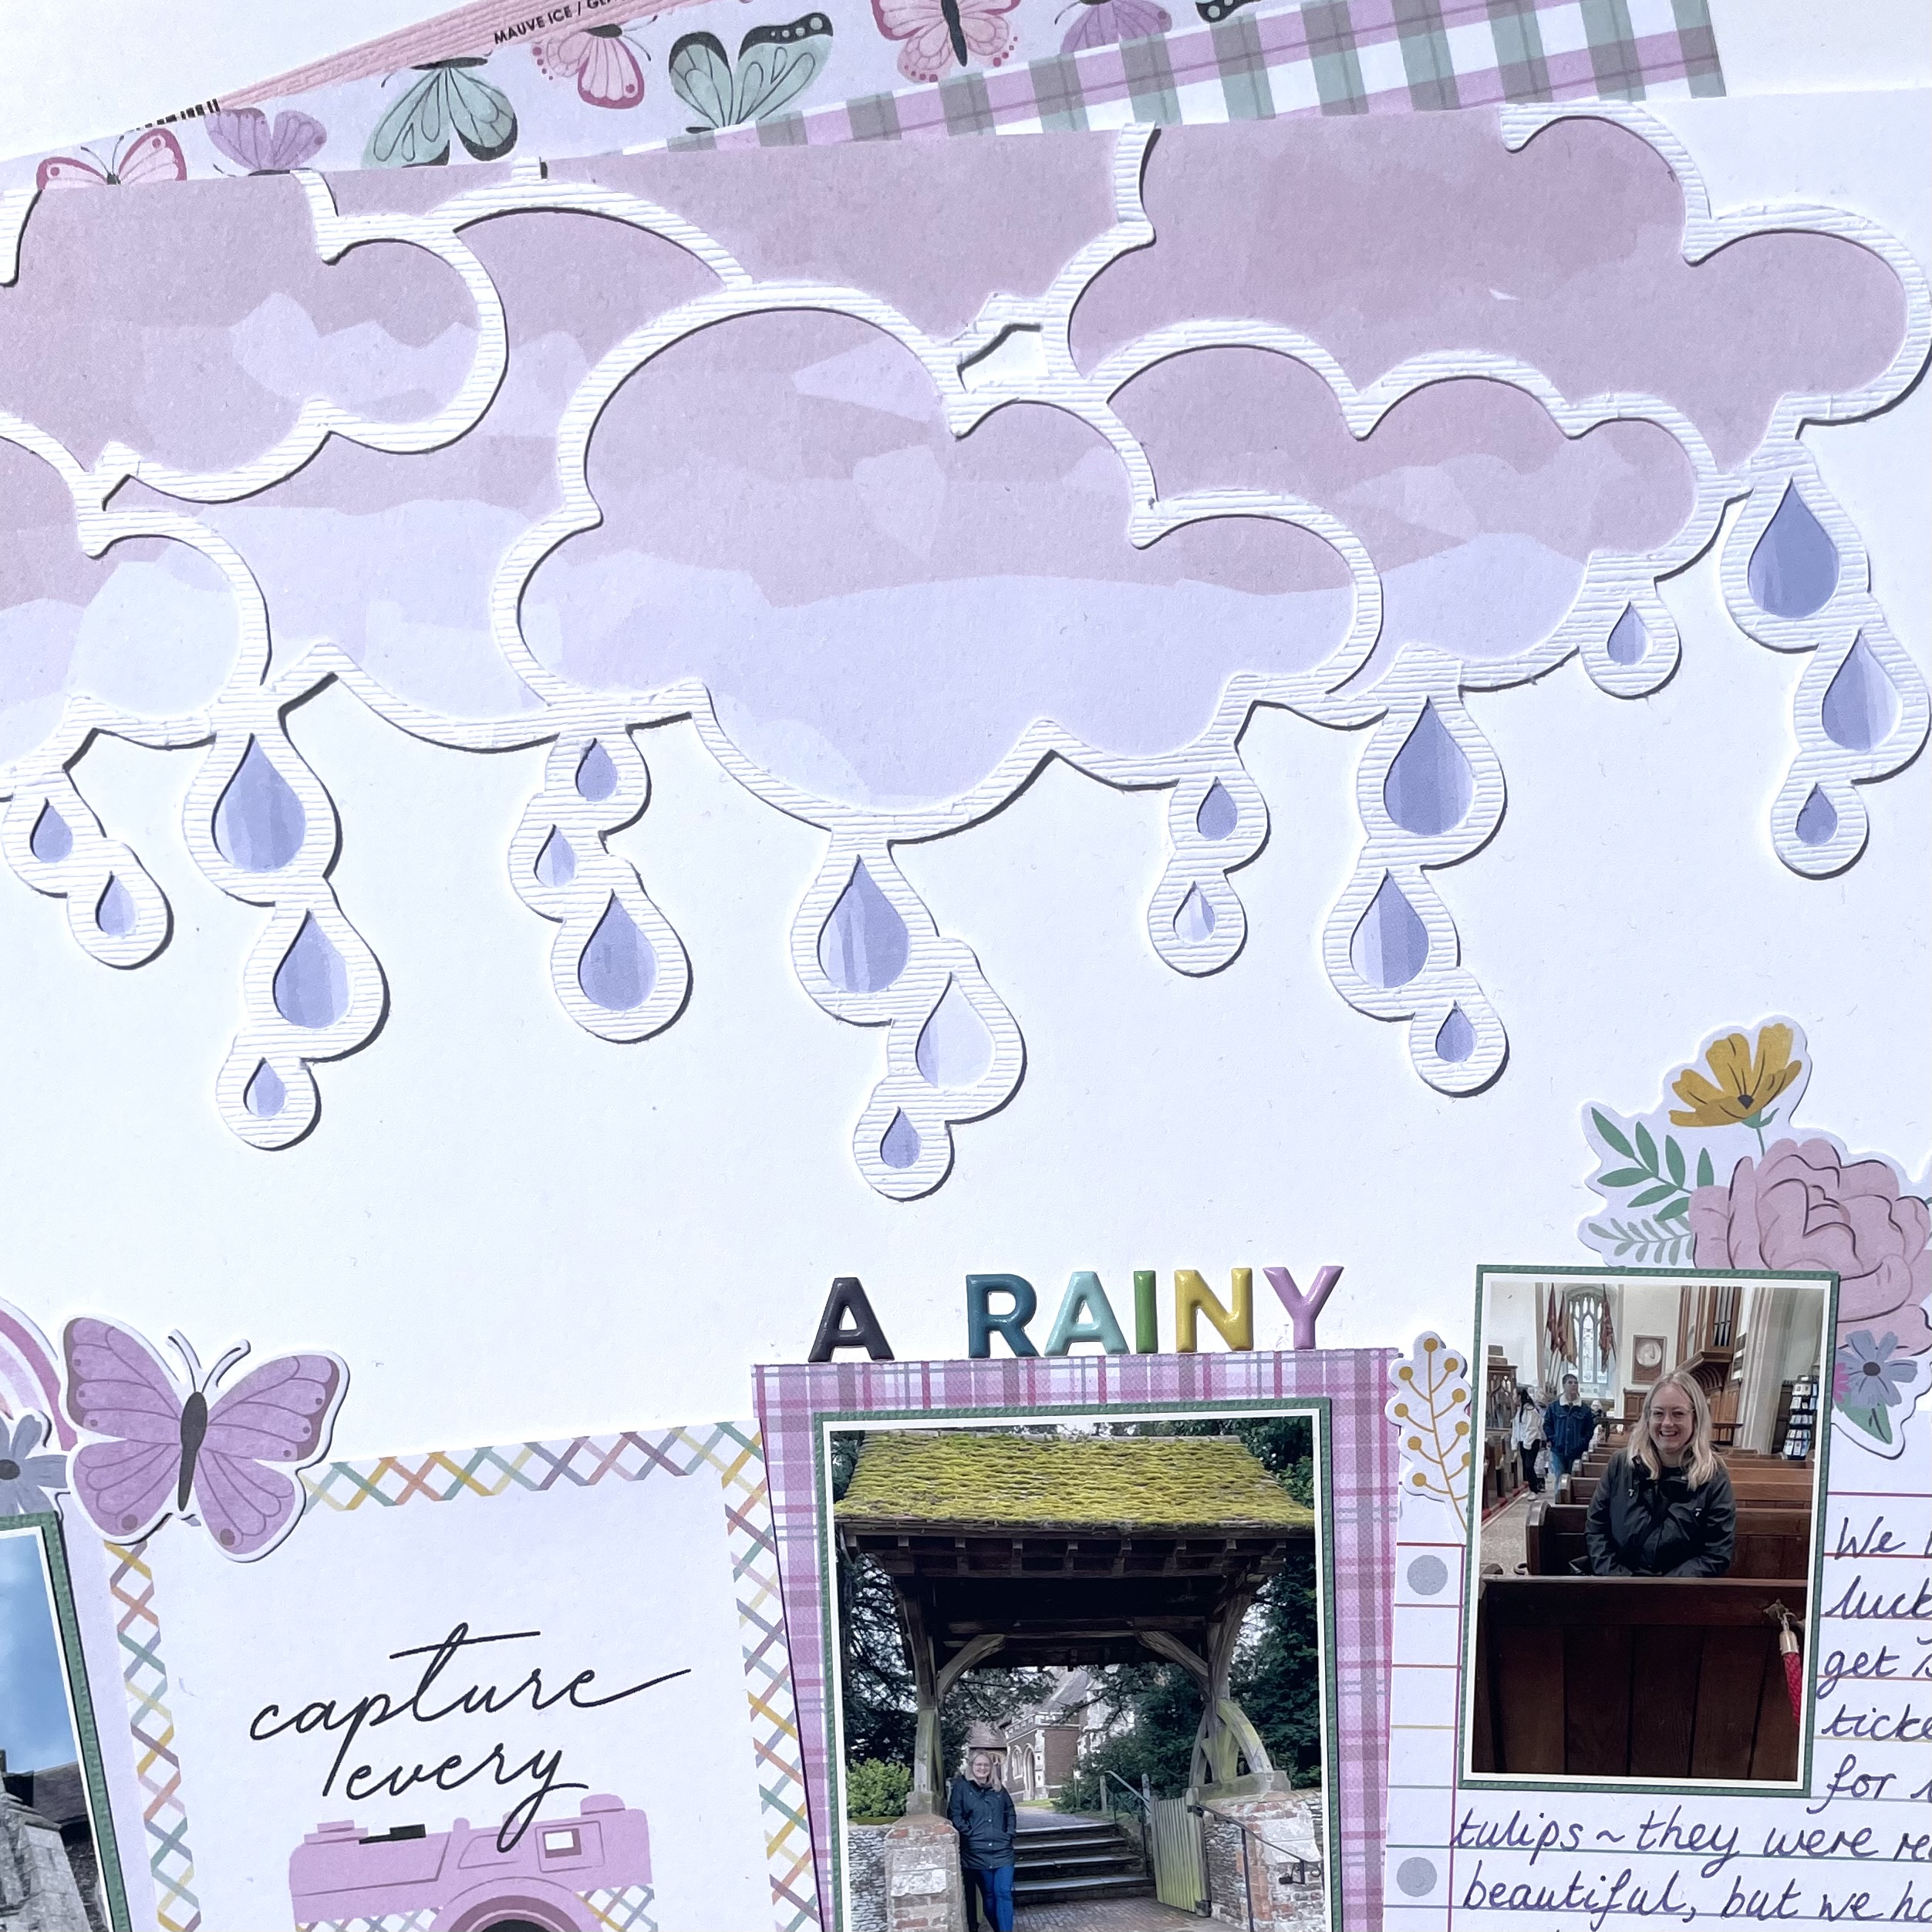
Over the last few weeks we’ve had quite a lot of wet weather here in the UK. So I have some rainy photographs to scrapbook!


So my first layout uses a raincloud cutfile by Peartree cutfiles, which I cut out on white textured bazzill cardstock
I also used a sheet of 12x12 bazzill cardstock as my base

I backed my cut file with ‘Pink Dreams’ I love how the paper naturally created textured cloud shapes.

I trimmed the top of the cutfile off and adhered it to the top of the cardstock.  

I cut some of the 3x4 journaling cards from ‘Dreamy Day’ and adhered them at an angle across the page. 

I mounted my photographs in some coordinating cardstock from the matchmaker pack and adhered them on and around the 3x4 cards.

I added a title and some of the cardstock stickers to finish my layout! 

Thanks so much for looking! 

See you later in the month with another layout using this collection. 

Anna

@acraftylifewithanna

Friday, 4 August 2023

Echo Park ~ Wizards and Company #2 ✨

Hi all, it’s Anna here today. 
I’m sharing another layout with Echo Park’s Wizards and Company which you can find in the shop here


For this layout I began with a sheet of white bazzill cardstock. I then trimmed down the 4 coloured squares from  Magic Pennants and cut them into triangles. I arranged them symmetrically on my cardstock. 


I selected one of the journaling cards from the 4x6 journalling cards which I wanted to place alongside my 7x5 photo. 


I mounted my photo in ‘starmist’ from the bazzill matchmaker pack. I placed my photo just slightly off centre and adhered the journaling card beside it. 


I then chose various stickers from the element stickers and placed them around my layout. 


Thanks so much for looking! 
See you again soon.

Anna 
X


Saturday, 12 March 2022

'One Magical Amazing Day' by Meg, using Echo Parks Its's a Girl

Hey all, it's Meg here today with a layout using the sweet pink It's A Girl collection by Echo Park. I absolutely love the colour pink so I was super excited to see this in my DT pack! 

I looked through and this one paper especially caught my eye - it's the B-Side to the 3x4 Journaling Cards but it's so so pretty! They're like little tiles! So I cut out and distressed 6 of the 'tiles' to use as my background. 

I also loved the look of Rosies Studio 'By Starlight' Gold Puffy Stickers with the beautiful It's A Girl colours, so I wanted to create a title using them. I made a banner using a Paige Taylor Evans banner cutfile, cut from the soft Dreamland paper for the cutfile and backed with Dresses and Jumpers.

I had picked out a few photos of my little girl to go with this collection and decided on this one - I moved it around the page a bit to decide where it would go, and I double matted it with the Dreamland paper to co-ordinate with the title banner and a darker Coral Cream Bazzill cardstock. 

I decided I wanted the photo on the bottom right of my tile column and I wanted to do a sort of diagonal cluster, so I splattered some gold and green watercolour paint to highlight the diagonal shape and then I began building my cluster on top. 

The title 'One Magical Day' is made up of the Rosies Studio Gold Puffy Stickers and the 'Amazing' is a Bramblefox perspective. The tag tucked behind my photo, the mini green banner and the 'It's a Girl' are all Chipboard Phrases; I fussy cut the pink frilly dress, 'You will do amazing things' phrase and the yarn bunting from the 3x4 Journaling Cards and the sweet little deer and flowers came from the Dreamland paper. I finished my large cluster with stars from the pack of Rosies Studio Gold Puffy Stickers and a few gold Nuvo Drops

I popped my journalling on some vellum paper and made a mini cluster behind it on the top left of my page, with a rectangle of Dreamland paper and the 'Beautiful Girl' phrase I cut from the 3x4 Journaling Cards. 

And that's it! My one-month-old little girls pink page finished - perfect! 

Thank you for stopping by and until next time, 

Meg x