Showing posts with label boarder stickers. Show all posts

Wednesday, 8 April 2026

Simple Stories ~ Say Cheese Happiest Place #1 ✨

Hi everyone, it’s Anna back on the blog today. 
For April, I will be working with Simple Stories Say Cheese Happiest Place which you can find in the shop here

For my first layout, I wanted to use a large photo that I’ve been holding on to for a while. It’s a 8x12 photo of a scenic castle view at Walt Disney World, which we are in. 


I used ‘Toon Town’ as my base and adhered the photo above centre. I used a boarder punch to punch a strip of red from ‘Having a Blast’ which I placed above and below the photo. 


From the same paper, I cut a small circle and then cut the centre too, to create a boarded circle. I distressed the edges and I used this to stick on the photo to highlight us in the large photo! 


I added one of the boarder stickers from the Cardstock Sticker Icons to the bottom of the photo, just above the boarder strip. I also added some word stickers and the title - ‘good times’ from the same sheet. 


I fussy cut some flowers from ‘Happy Memories’ and stuck them in clusters in the top left and bottom right of the layout. To finish I added a few more floral stickers from the Cardstock Icon Stickers


Thanks so much for looking! 
See you later in the month with a second layout using this collection! 

Anna 

@acraftylifewithanna


Wednesday, 22 October 2025

Bella Blvd ~ Documented #2 🌈

Hi everyone, it’s Anna back with you today. I’m sharing my second layout this month using Bella Blvd Documented. 
You can find the collection in the shop here


I wanted to document a trip to the Berlin Wall which was full of colourful artwork. I picked a couple of photos and chose the rainbow elements of the collection to use for this layout. 

I used a sheet of white bazzill cardstock as my base and then trimmed ‘Routine’ in half vertically so I had every colour. Before I stuck it down I used Distress Ink on the cardstock in corresponding colours to match the colours on the paper. 
You can find a wide range of Distress Ink here


I added two boarder stickers to my layout from the Doohickey Cardstock Stickers - the black spotted one to the top of the layout and the rainbow boarder strip to the bottom. 
I mounted my two photos on to some bazzill cardstock and adhered them to my page. 


I ended up covering up lots of my rainbow distress ink which my second picture! But I did take a photo of the covered up part - below! 


I used the alpha stickers on the Doohickey Cardstock stickers to create my title and added various other stickers to my layout too. 


I added two tags from ‘Daily Details’ which I tucked behind my top photo. I punched a hole at the top and added some twine


Thanks so much for looking! 
See you next month where I’ll have one more layout to share using this collection - see you then. 

Anna 

@acraftylifewithanna

Monday, 12 May 2025

Echo Park ~ Born to Travel ✈️ #1

Hi everyone, it’s Anna back with you today and this month I’m working with Echo Park - Born to Travel. 

You can find the whole collection in the shop here


For this layout I began by using ‘Postcard’ as my base. I then trimmed roughly 1/4 of the ‘b’ side of ‘Ready to go Luggage’ down as well as trimming it around the edge to fit inside the boarder of ‘postcard’. 

I placed the boarder sticker from the element stickers down the edge of ‘Ready to go Luggage’ 


I mounted my photo on to the b side of ‘Soaring Hot Air Balloons’ and cut out two journal cards from ‘Travel Journaling Cards’. One of which was to act as my title and the other being my journaling space. 
I adhered these three pieces vertically along the edge of my patterned paper. 


I cut out some strips from ‘Tourist licence Plates’ and adhered a strip under my photograph, with a couple of extras used elsewhere on the layout. 


I then pulled out the element sticker sheet again and added a few to my layout, including the aeroplane and some florals. 


After adding my journaling, that was my layout complete! 


Thanks so much for looking!
 See you again later in the month for a second layout using this collection. 

Anna 

@acraftylifewithanna

Friday, 23 February 2024

Carta Bella ~ At Home #2 🏡

Good morning everyone and welcome back to the Papermaze blog. 
It’s Anna back with you today and I’m sharing my second project using Carta Bella’s At Home Collection. You can find it in the shop here


To create this layout, I used the following:
Carta Bella at Home - wonderfully beautiful 
Carta Bella at Home - 3x4 journalling cards
Carta Bella at Home - Good morning moths
Carta Bella at Home - Beautiful chaos flowers
Carta Bella at Home - Bursts of Love
Carta Bella at Home - Simple Things Signs
Carta Bella at Home - Bazzill Matchmaker Cardstock 
Carta Bella at Home - Element Stickers


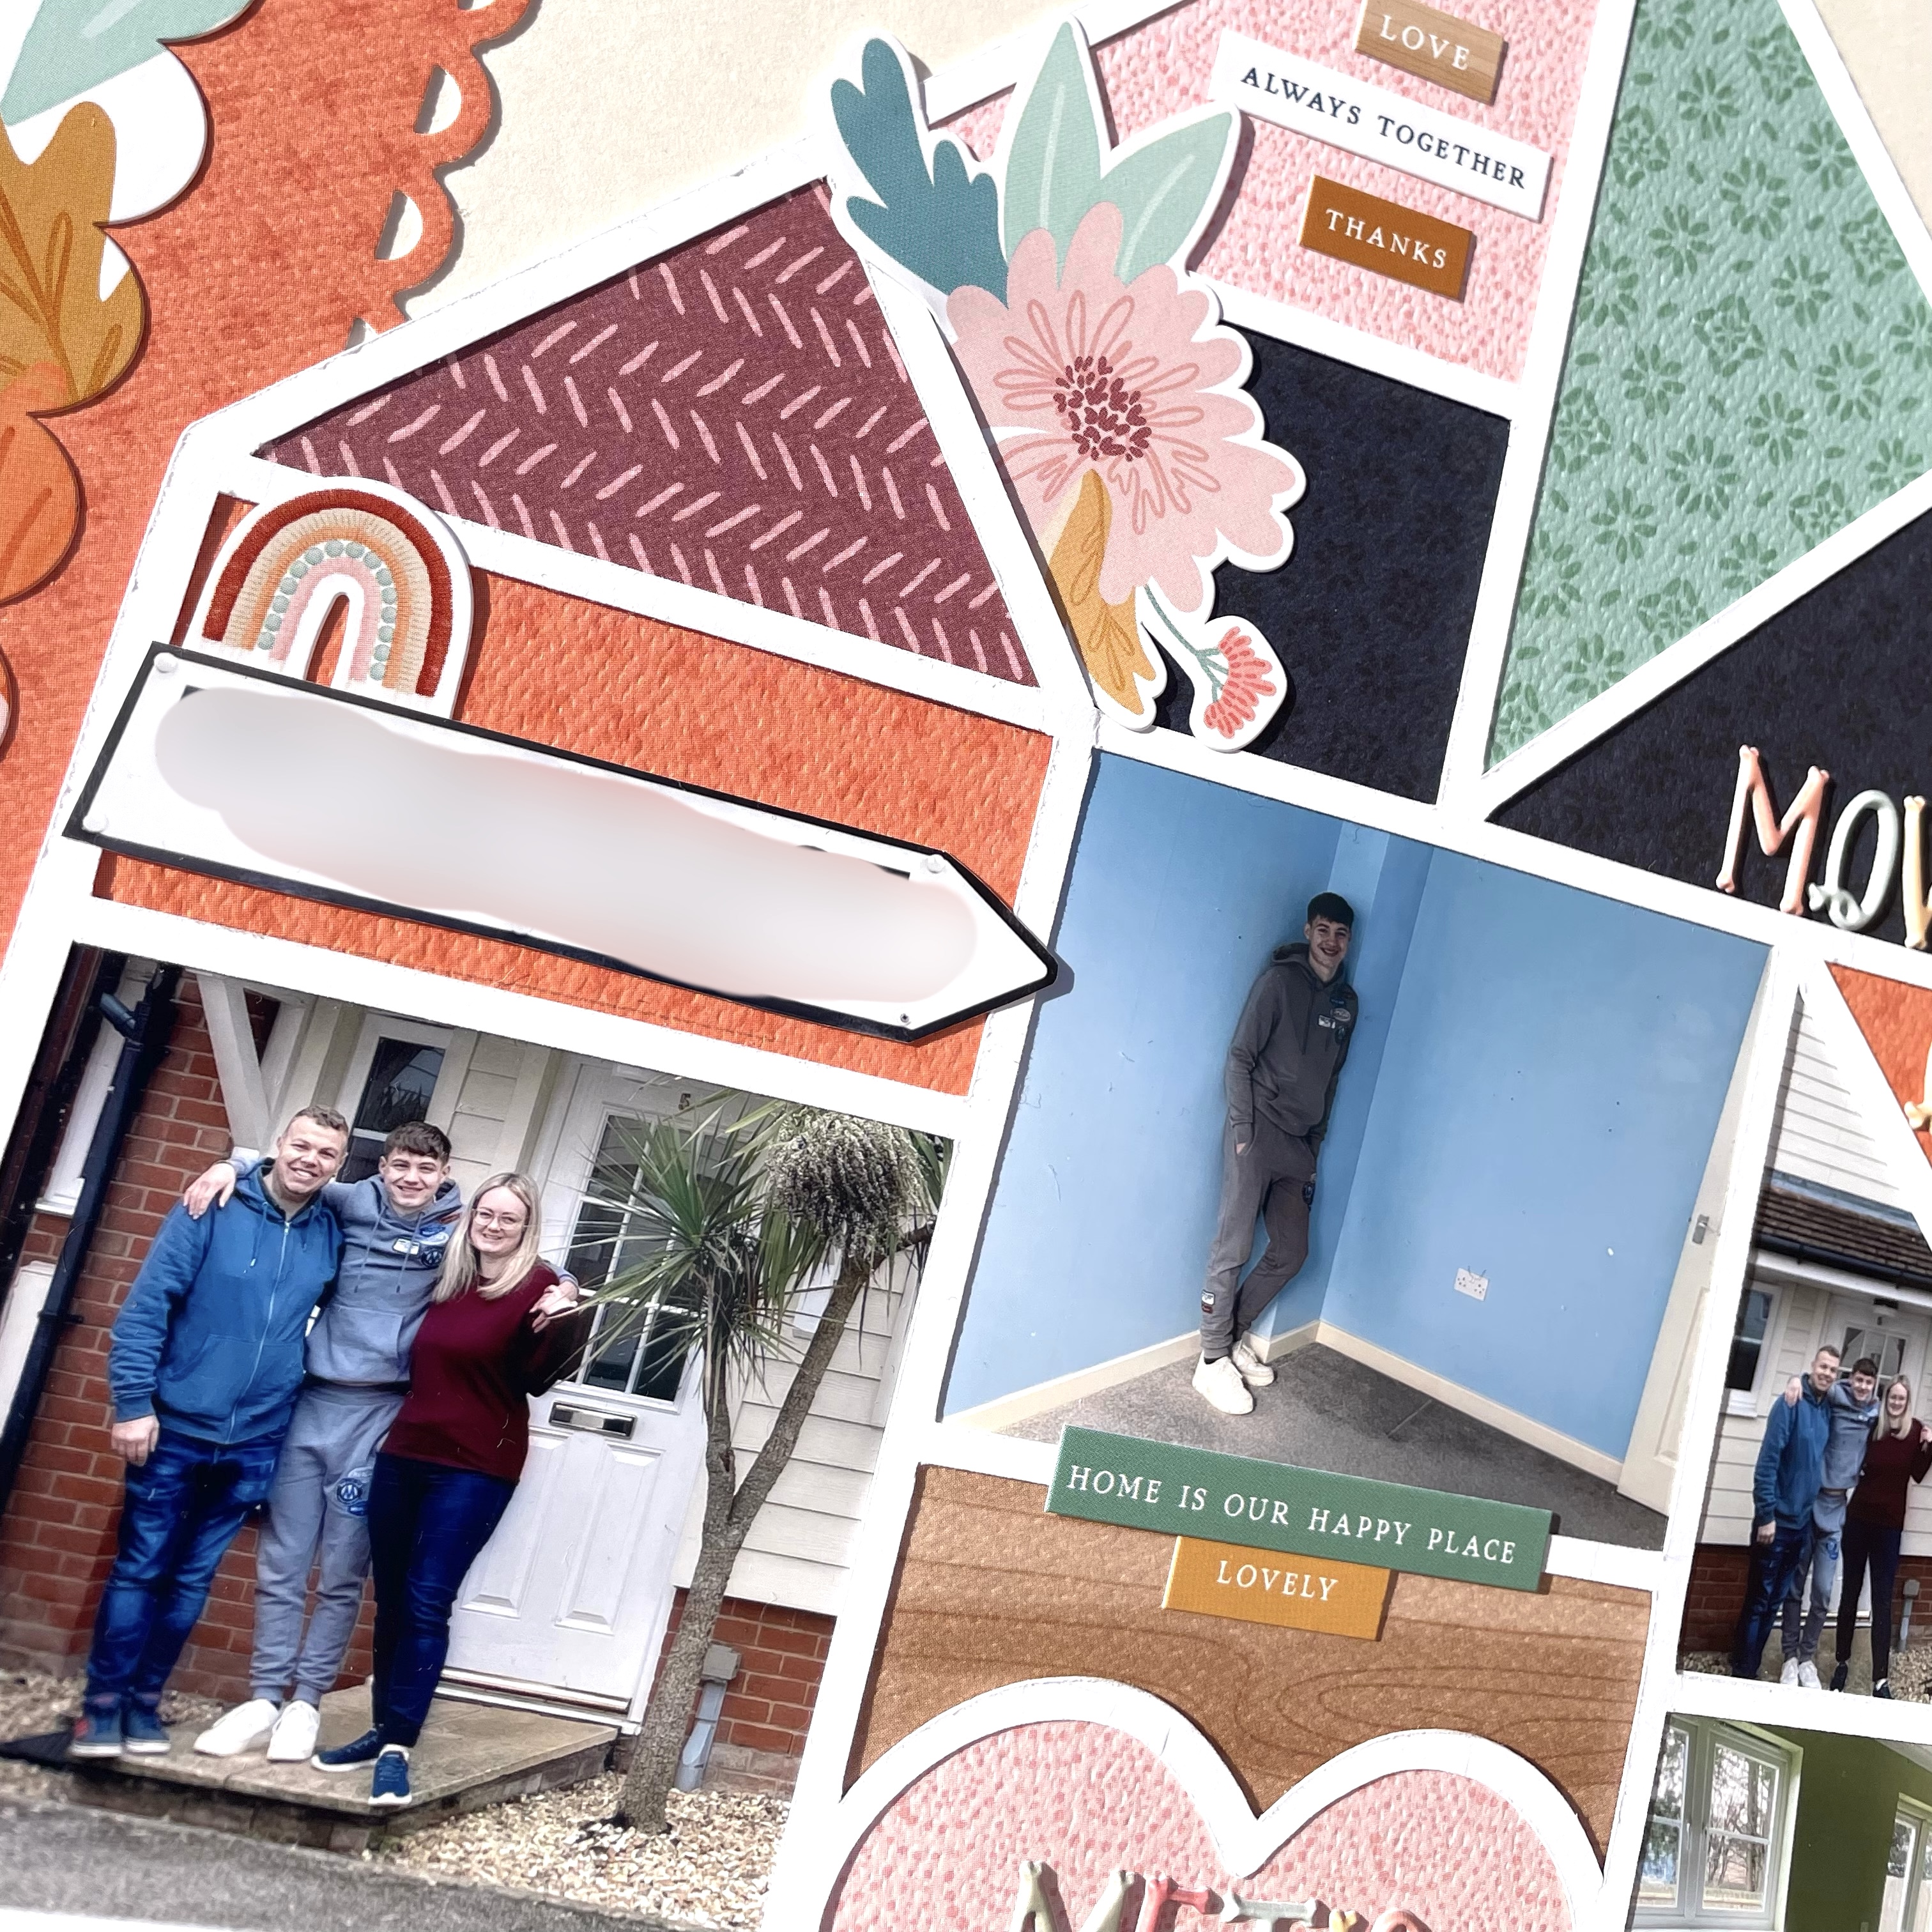
I began by cutting out a house cutfile by Paige Evans. I knew that I wanted to back each of the sections with photos and some of the patterned papers from the collection. So I worked out which pictures fit in where first before filing the rest with the patterned papers. 


I mounted my finished cutfile onto some bazzill cardstock which I had added some patterned papers to the left hand side as well as a boarder sticker. 


I used several stickers from the Element Stickers to embellish my page. These were tucked in and around my cutfile house. 
I added a title and subtitles with some mini alpha stickers by Cocoa Vanilla Studios.


Thanks so much for looking! 
See you next month when I’ll be working with Noteworthy by Simple Stories

Anna
X