Showing posts with label Cut Apart Patterned Paper. Show all posts

Monday, 10 November 2025

Bella Blvd ~ Documented #3 🌷

Hi everyone, it’s Anna here with you today. I have one last layout to share with you before I move on to Christmas! 
So I thought I’d use up my leftover supplies from Bella Blvd Documented which you can find in the shop here


My last full sheet of patterned paper was ‘captured’ which I used as my base. 
I had some tags and 3x4 cut apart elements left on the ‘daily details’ paper so I decided to create a grid design with them. Those that know my scrapbooking style will know that I love a grid layout! 


I mounted my photos on to the 3x4 cut apart elements and arranged them in a grid on some white cardstock. I then adhered this to my background paper and added a boarder sticker from the Doohickey Cardstock Stickers.


I added two tags at the top left and right side of the grid and the added my title. I used some of the Alpha stickers from the ‘Doohickey Cardstock Stickers’ and also some Doodlebug Designs Abigail Alpha stickers in Beetle Black - but there’s lots of colour options here.


I added some stickers from the ‘Doohickey Cardstock Stickers’ as well as some twine to the tags, which completed my layout. 


Thanks so much for looking and I’ll see you later in the month with my advent calendar! 

Anna 

@acraftylifewithanna

Friday, 19 September 2025

Simple Stories ~ Happy Travels ✈️ #2

Hi everyone, it’s Anna back with you today. I’m sharing my second layout using Simple Stories Happy Travels. 
You can find this collection in the shop here


To create this layout, I started with the b side of ‘Here & Now’ as my base. 
I then cut out a large circle from some white bazzill cardstock and a thinner boarder circle ‘Scenic Route’ 


I mounted my photo on to some coordinating cardstock from the matchmaker pack and double mounted on to the b side of journal elements


I cut out a journaling card from the journal elements and adhered it to the right of my photo. 


I then added various stickers from the element stickers and placed them in a cluster across the page. 


I fussy cut some clouds from ‘scenic route’ and adhered them to the top right of the circle. 


Thanks so much for looking! 

See you next month with a new collection. 

Anna 

@acraftylifewithanna

Saturday, 6 September 2025

Simple Stories ~ Happy Travels 🧭 #1

Hi everyone, it’s Anna back with you today. 
This month I’m working with Simple Stories Happy Travels which you can find in the shop - here
This collection has been out for a couple of months now, but it’s still available in the shop and it is perfect to document your post summer holiday travels.  


To create this layout I gutted ‘Travel Buddies’ and trimmed down some white bazzill cardstock, leaving about an inch on each side. I adhered the cardstock to ‘Travel Buddies’ creating a border. 


I then printed my photos and mounted them onto coordinating cardstock in strips. 


I cut out some journaling elements from ‘Journal Elements’ and placed them alongside my photo strips to use as my journaling boxes. 


I added some element stickers around the layout, including the ‘Let’s go exploring’ title, at the top of one of my photo strips. 


I wanted to add in some extra detail to the top right of the layout. So I cut out a small section of paper from 3x4 journaling cards, along with a couple of element stickers. 


Thanks so much for looking! 
See you later in the month with another layout using this collection. 

Anna 

@acraftylifewithanna

Wednesday, 13 August 2025

Photoplay Paper -Travel Junque- Girlie Weekend

 Hi everyone! Rebecca Bee here today! For my final layout using Photoplay Paper Travel Junque collection, I wanted to focus on some of the softer colours and images in the collection. While the collection itself is generally quite vintage and grungy (which I love!) there are also some softer pink and yellow hues which I felt suited my girlie caravanning weekend away absolutely perfectly! 


The caravan image on the sticker sheet was crying out to be used for this layout, as it perfectly matches the caravan we were away in. The caravan is nicknamed Esther so a girlie layout featuring Esther the cute caravan just had to be made!


I've isolated the more feminine colours and images from the cut aparts in the Post Card & Roam patterned papers and sticker sheet, and paper-pieced an envelope shape from the Tickets paper.


I offset a piece of Bazzil cardstock in the shade Touch of Pink onto the Away We Go Ledger paper to add a softer background for my photographs. I've added two 2x3" photographs and tucked all my fussycut elements into my paper- pieced envelope. Finally to create my title I've used some of the cut apart letters in the Roam paper coupled with a perspex piece to finish off my title. 

I hope you've enjoyed the layouts I have created using Travel Junque or been inspired by them in some way. Until next time XOXO


Friday, 11 July 2025

Travel Junque- Photoplay

 Hi everyone!

I am so excited to be new to the Papermaze design team this month! As a relatively recent scrapbooker since 2019 my scrapbooking style seems to have settled into colourful layouts with a messy or grungy edge, but I still really enjoy to play with pretty pinks and fresh florals too when the mood strikes!

For my first month on the team, I have been using the Travel Junque collection by Photoplay . As my family and I tend to take holidays within the United Kingdom, the colours and images in this collection fit our UK holiday photos so well!


For my first layout I have made a feature of the cut apart tags in the Explore paper, adding eyelets and some twine for added texture.


As a continuation of the tag theme, I cut a large 6x8" photograph into four equal sized tags as a large feature across the bottom half of the page. I also added two smaller 2.5x3" photos  matted onto the tag cut-apart tags. Behind the photo I have tucked some of the tag ephemera fussy cut from the A side of the Roam paper. 


The alphas and phrases on the B side of the Roam paper from the collection lend themselves excellently to being cut apart and used as my layout title. Finally I have added some leaf charms and some of the phrases from the Element Stickers over the photo tags to add interest.


I hope you join me again to see what else I have created with this gorgeous collection and I hope I have inspired you to create with some of your UK holiday photographs. 

Bye for now! 
Rebecca Bee 
XOXO


Monday, 12 May 2025

Echo Park ~ Born to Travel ✈️ #1

Hi everyone, it’s Anna back with you today and this month I’m working with Echo Park - Born to Travel. 

You can find the whole collection in the shop here


For this layout I began by using ‘Postcard’ as my base. I then trimmed roughly 1/4 of the ‘b’ side of ‘Ready to go Luggage’ down as well as trimming it around the edge to fit inside the boarder of ‘postcard’. 

I placed the boarder sticker from the element stickers down the edge of ‘Ready to go Luggage’ 


I mounted my photo on to the b side of ‘Soaring Hot Air Balloons’ and cut out two journal cards from ‘Travel Journaling Cards’. One of which was to act as my title and the other being my journaling space. 
I adhered these three pieces vertically along the edge of my patterned paper. 


I cut out some strips from ‘Tourist licence Plates’ and adhered a strip under my photograph, with a couple of extras used elsewhere on the layout. 


I then pulled out the element sticker sheet again and added a few to my layout, including the aeroplane and some florals. 


After adding my journaling, that was my layout complete! 


Thanks so much for looking!
 See you again later in the month for a second layout using this collection. 

Anna 

@acraftylifewithanna

Monday, 3 June 2024

American Crafts ~ Rainbow Avenue

Hi all, it’s Anna back with you today and for June I’m working with Rainbow Avenue by American Crafts. 

You can find the collection in the shop here

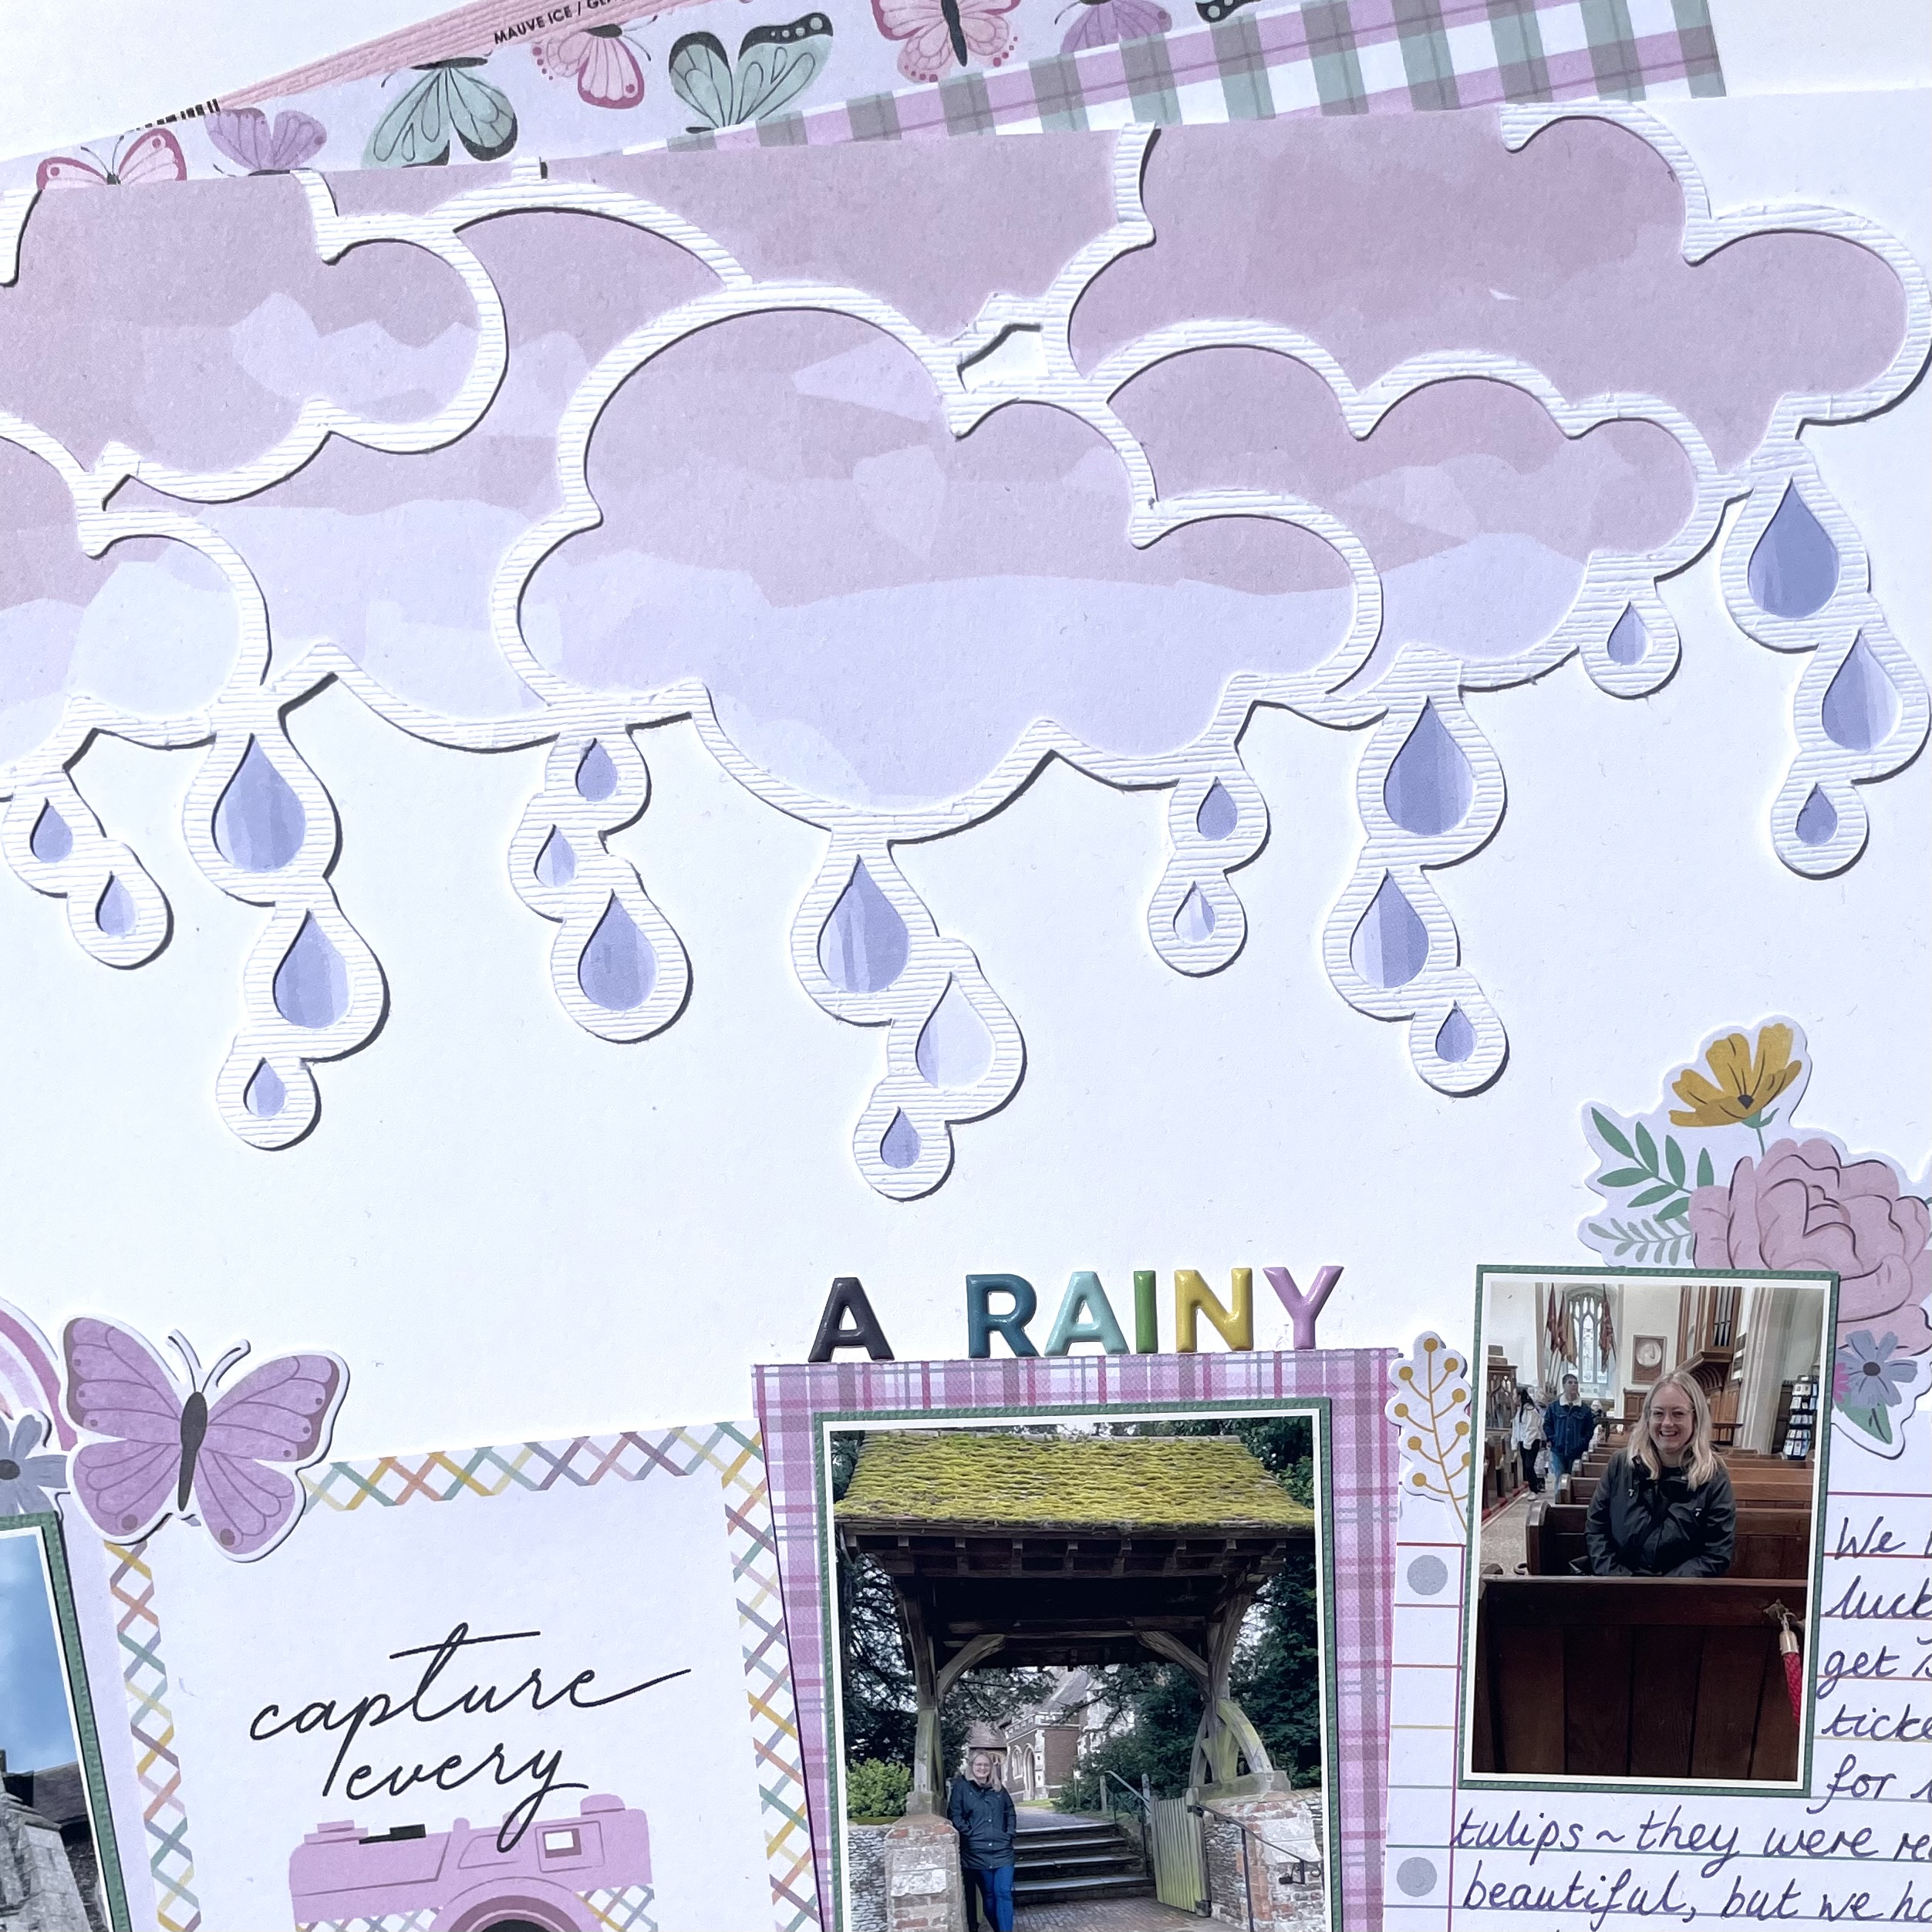
Over the last few weeks we’ve had quite a lot of wet weather here in the UK. So I have some rainy photographs to scrapbook!


So my first layout uses a raincloud cutfile by Peartree cutfiles, which I cut out on white textured bazzill cardstock
I also used a sheet of 12x12 bazzill cardstock as my base

I backed my cut file with ‘Pink Dreams’ I love how the paper naturally created textured cloud shapes.

I trimmed the top of the cutfile off and adhered it to the top of the cardstock.  

I cut some of the 3x4 journaling cards from ‘Dreamy Day’ and adhered them at an angle across the page. 

I mounted my photographs in some coordinating cardstock from the matchmaker pack and adhered them on and around the 3x4 cards.

I added a title and some of the cardstock stickers to finish my layout! 

Thanks so much for looking! 

See you later in the month with another layout using this collection. 

Anna

@acraftylifewithanna

Friday, 5 April 2024

Simple Stories - Noteworthy - Memories Documented

Hi everyone,

Claire here today sharing a new layout made with the Noteworthy collection from Simple Stories

This collection is a pocket pages style collection, with lots of cut apart elements.  Although I don't make pocket pages, i'm always drawn to these collections. The patterns on the b sides are so much fun, you can really let your imagination run wild!   Add to that, the cut apart elements give you tonnes of mileage and really let you stretch the collection and bulk out your ephemera. It's a great value option.

I've used three major cut apart elements in this layout, creating a big statement just by fussy cutting.


To the Premium White Cardstock, I added a piece of the March paper, cut to 8.5" square with distressed edges, created by scuffing the edges of the paper with my scissors. Along the top, I used a punch to give a notebook edge look.

Using the cut apart elements from this paper, I cut two tall elements, a spiral notebook and envelope, from the March and June papers, and lay these on top of each other, slightly offset, to create an anchor for my photos to sit on.


I raised the spiral notebook piece on foam and cut right around the wire to help it look more authentic. I also added a foam sticker clip for extra interest. 

To balance the page across the square, I used another cut apart element, this time from the April paper. It had three coloured squares like Post It notes and I thought it would be perfect to house my photos. I flipped it horizontally across the page and adhered my photos on thin foam, showing just a bit of the coloured square underneath to help frame them.


To the left of the photo strip, I created a small cluster using floral ephemera, a sticker from the Cardstock Stickers and a clipboard from the Journaling Bits pack.


I also added a small floral cluster on the opposite end of the photo strip for balance.

Next, I added some of the cards from the Journaling Bits and stickers to the top of the photo strip to replicate a MemoryDex effect. I love how this part turned out - It's pulled all the colours, the paper elements and florals together in a single cluster. I think it's my favourite part of the whole layout.


To finish the layout, I added a bold title from the Foam Stickers, showcasing all the colours in the collection. As a final touch, I added the cute pencils to make it look like I'm ready to add journaling to the page.


This has been a really fun page to create - the colours in this collection are my favourite - lots of pinks, yellows and teals - what's not to love!

I'll be back in a few weeks with a second layout, and look forward to seeing you then.

Happy Scrapping!

Claire xx
@scrappysoulmate

Wednesday, 5 July 2023

Cocoa Vanilla Studio ~ Happy Days #3 💕

Hi all, it’s Anna here today! 
I’m back to share one final layout with Cocoa Vanilla Studio Happy Days - you can find the collection in the shop here


For my final layout I used the b side of paper ‘Juicy Fruit’ as my background paper. 


I chose to use one of my favourite Disney photos on this layout, which was printed 7x5, along with a magical memories’ title cutfile which was just perfect for this photo. 


The cut file was originally cut in white cardstock. So to make it stand out on my page a bit more, I added some distress ink in the shade of Speckled egg. I then backed the ‘memories’ part of the cutfile with the gorgeous rainbow effect Lollipops paper. 


I mounted my photo with coordinating cardstock from the matchmaker pack and assembled my photo and cut file together on the Juicy Fruit paper. 


I cut out florals from Lush Blooms and some elements from the cut apart paper, Feel Good.
I also chose some stickers from the Accessory Stickers, including a journaling spot and arranged them around my photo and cutfile title. 
I used some of the gold foil images from the specialty paper, including the jar, which was perfect for my photo featuring Tinkerbell. To had some extra fairy magic I dotted a random scattering of white Nuvo Drops coming from the jar. 
Finally, I added a couple of Disney finishing touches from my stash along with some Nuvo Drops around the edges of the page. 


Thanks so much for looking! 
I’ll be back with a new collection soon, see you then. 

Anna 

@acraftylifewithanna