Showing posts with label woodenElements. Show all posts

Monday, 5 May 2025

April Papermaze Kit - Part 2

Here is my second DT post, with two layouts made using the April Papermaze kit. As well as the six patterned papers, the kit has a collection of  embellishments. There are two sheets of Bazzill cardstock included, and you can also buy four more in the co-ordination pack. I have dipped back into the past for these two layouts with photos from 2008 and 1995.


Before looking at how I made the layouts, here are the details of what you will find in the kit.


Patterned Papers:
Mintay Papers - 
Photographer collection - #02 & #05
Stamperia - Alterego collection - Postcard & Turquoise Wallpaper
Stamperia - Create Happiness collection - Dewdrops - Wood
P13 - Love Stories collection - #06


2, 49 & Market frames, 6 pieces 49 & Market acetate ephemera, 1 strip Prima crystals, 1 sheet P13 alpha stickers, selection of Cocoa Vanilla foam stickers, 12" lace, 6" Tim Holtz filmstrip ribbon and 6x Tim Holtz brads


Bazzill Basics Cardstock - Twig & Whirlpool (included in kit). Coastal, Avalanche, Jade & Cinnamon Stick (in extra Bazzill pack)


Home Sweet Home - My son at 3 years old, helping to clean the Wendy house


For the background I used the sheet of Turquoise Wallpaper paper. Onto this I added a strip of paper torn from Dewdrops - Wood, and placed this vertically onto the background, after inking the edges. I followed the line of the wood effect paper, with a strip of my own filmstrip washi tape.


I arranged my photo overlapping the strips, in the centre. Then I fussy cut some flowers from Mintay #05 (scraps leftover from previous layouts). I inked these and mounted them onto the page using 3D pads.


For my title I used the word 'HOME' from the Cocoa Vanilla foam stickers in the kit. I added the rest of the title using some tiny letter stickers from my stash.


I tucked some cheesecloth along the joins in the papers and around the flowers.


I added a little wooden house, numbers for the date and a key to the layout. 


I made a small journalling tag from Dewdrops - Wood paper, and a die from the Tim Holtz Sizzix Tag collection set.  I inked the edges, and wrote my journalling, then tucked it just under the flowers.


Finally, I added a scattering of water drops.


Memories - A photo of me with my husband on a family day out in Essex. We visited the Battlesbridge Antique Centre, and here we are at the very top of the building in the cafĂ©.


I started this layout with the sheet of Whirlpool Bazzill. Then I added torn pieces to the top and bottom of this cardstock, leaving a gap of the Bazzill in-between. The top area is from Postcard, and the bottom area from the Dewdrops - Wood paper. I tore some small triangular pieces from the scrap cut away from the #02 camera paper. These pieces were placed over the other papers, to give the appearance of small tears.


I cut a two complete and two incomplete postcards from the remains of the Postcard paper. I mounted my photo onto some corrugated card. I arranged the photo and postcards in a fan overlapping each other, so it appeared the postcards were all complete. I placed these in the centre of the layout.


I decorated the layout with the 49 & Market acetate ephemera from the kit. The title was made with Cocoa Vanilla foam stickers which are also included in the kit.


I used a Tim Holtz Idea-ology label holder from my stash, to add the date with some alpha stickers.


Finally, I scattered the Prima crystals from the kit, around the page.


That's all for the April kit. Back with the May kit soon.
Thanks for looking
Lynn x

Wednesday, 17 April 2024

April Papermaze Kit - Part 1

Lynn here with the pretty Papermaze kit for April. There is a lovely range of colours, purples, pinks, greens and blues in this month's selection. I have been experimenting with Distress Watercolour Pencils and Distress Oxide Inks.


 Here are the details of what is in the kit:


Patterned Papers (photo below shows both sides of each of the papers)
49 and Market - Colour Swatch Teal - Teal Paper 2
49 and Market - Spectrum Gardenia collection - Classics - Floral Serenade
American Crafts - Dreamer collection - Floral & Stamped Hearts
Pebbles - Cool Girl collection - Petals
Pebbles - Cool Boy collection - Tie Dye


Embellishments: 4 American Craft Puffy Icon Stickers, 2 paper tie on tags, 2 - 49 and Market acetate-filmstrips, 3 wooden butterflies, strip of pearls, 12" lace, 1 Woodware label clear stamp, 4 pieces Rosie's Studio floral ephemera


Bazzill Basics Cardstock - Coconut Swirl and Blue Calypso included in kit. Twilight and Jade, Romance and Juneberry included in extra Bazzill pack.


Blinky the Owl - A photo from a trip to Hall Place Gardens and the Jamb Owl Centre.


On my most recent visit to Papermaze, I treated myself to a tin of Distress Watercolour Pencils (set 2). I was keen to try these out, so I selected the colours, I felt complimented the papers in this kit - Mermaid Lagoon, Prize Ribbon, Kitsch Flamingo, Seedless Preserve and Iced Spruce. I scribbled some rays radiating from the centre of the sheet of Coconut Swirl Bazzill, Mixing two or three colours in each ray. Then I took a water brush and ran it along the length of the rays, and the colours blended beautifully. Once dry I trimmed this cardstock to measure 11" x 11".


I cut nine wedge shaped pieces from 'Petals' and 'Floral' papers. I distressed all the edges, and inked them with Black Soot Distress Ink. These were attached, over the rays, radiating out from the centre. With black thread and the sewing machine, I stitched around the outside of the cardstock. Then I stitched along the centre of each of the wedge shaped pieces. I used a combination of zig-zag and straight stitches. 


The white cardstock was mounted over the Juneberry Bazzill from the kit, this was gutted first. I placed my photo into the centre of the photo. With a set of Memory Box feather dies, I cut six feathers from scraps of papers already used. I inked the edges with more Black Soot. The feathers were scattered around the photo, using 3D foam pads.


Using my Cricut and a scrap of the Juneberry Bazzill I created my title, and stuck this to the bottom right of the photo. Then I added journalling with a black marker pen.


Finally, I added the pearls from the kit, in clusters of three, all over the page.


Caught on Film - My daughter on The Great Orme, trying out the video camera.


This layout uses a combination of cutfiles and Distress Oxide Inks. First, I cut the 'Filmstrips Background' Peartree Cutfile from some scrap cardstock. This was placed onto a sheet of smooth white cardstock, to be used as a stencil.


With a combination of Distress Oxide Inks (Villainous Potion, Shaded Lilac, Salvaged Patina and Salvaged Patina), I worked the ink over the stencil with a blending tool. Once the stencil was removed, I spritzed a little water over the page.


My photos were mounted onto white card and placed in the centre of the page. Then I cut the 'Caught On Film' Peartree Cutfile using the Jade Bazzill. I backed the cutfile with one tiny image, and white card. I wrote my journalling onto the card with a black marker pen. The date was created with Doodlebug Designs Alphabet Soup puffy stickers in Swimming Pool.


I added the three wooden butterflies from the kit, adding some DMC embroidery thread through the holes and tying it to create antenna. I also place the Rosie's Studio flower ephemera around the photos using some 3D foam pads. I punched some leaves using more of the scrap papers and tucked these around the flowers.


I finished off with some Nuvo Glitter Drops to highlight the leaves and flowers. Dots of Nuvo Crystal Drops were added to the background of the layout.

That's all for today, back with more layouts from this kit soon.
Thanks for looking.
Lynn x

Sunday, 19 February 2023

Pinkfresh Studio ~ Spring Vibes #1 🌸

 Hi, it’s Anna back on the blog today, hope you’re all having a lovely weekend? 

For my next few blog posts I am going to be working with Pinkfresh Studio Spring Vibes. You can find the collection in the shop here


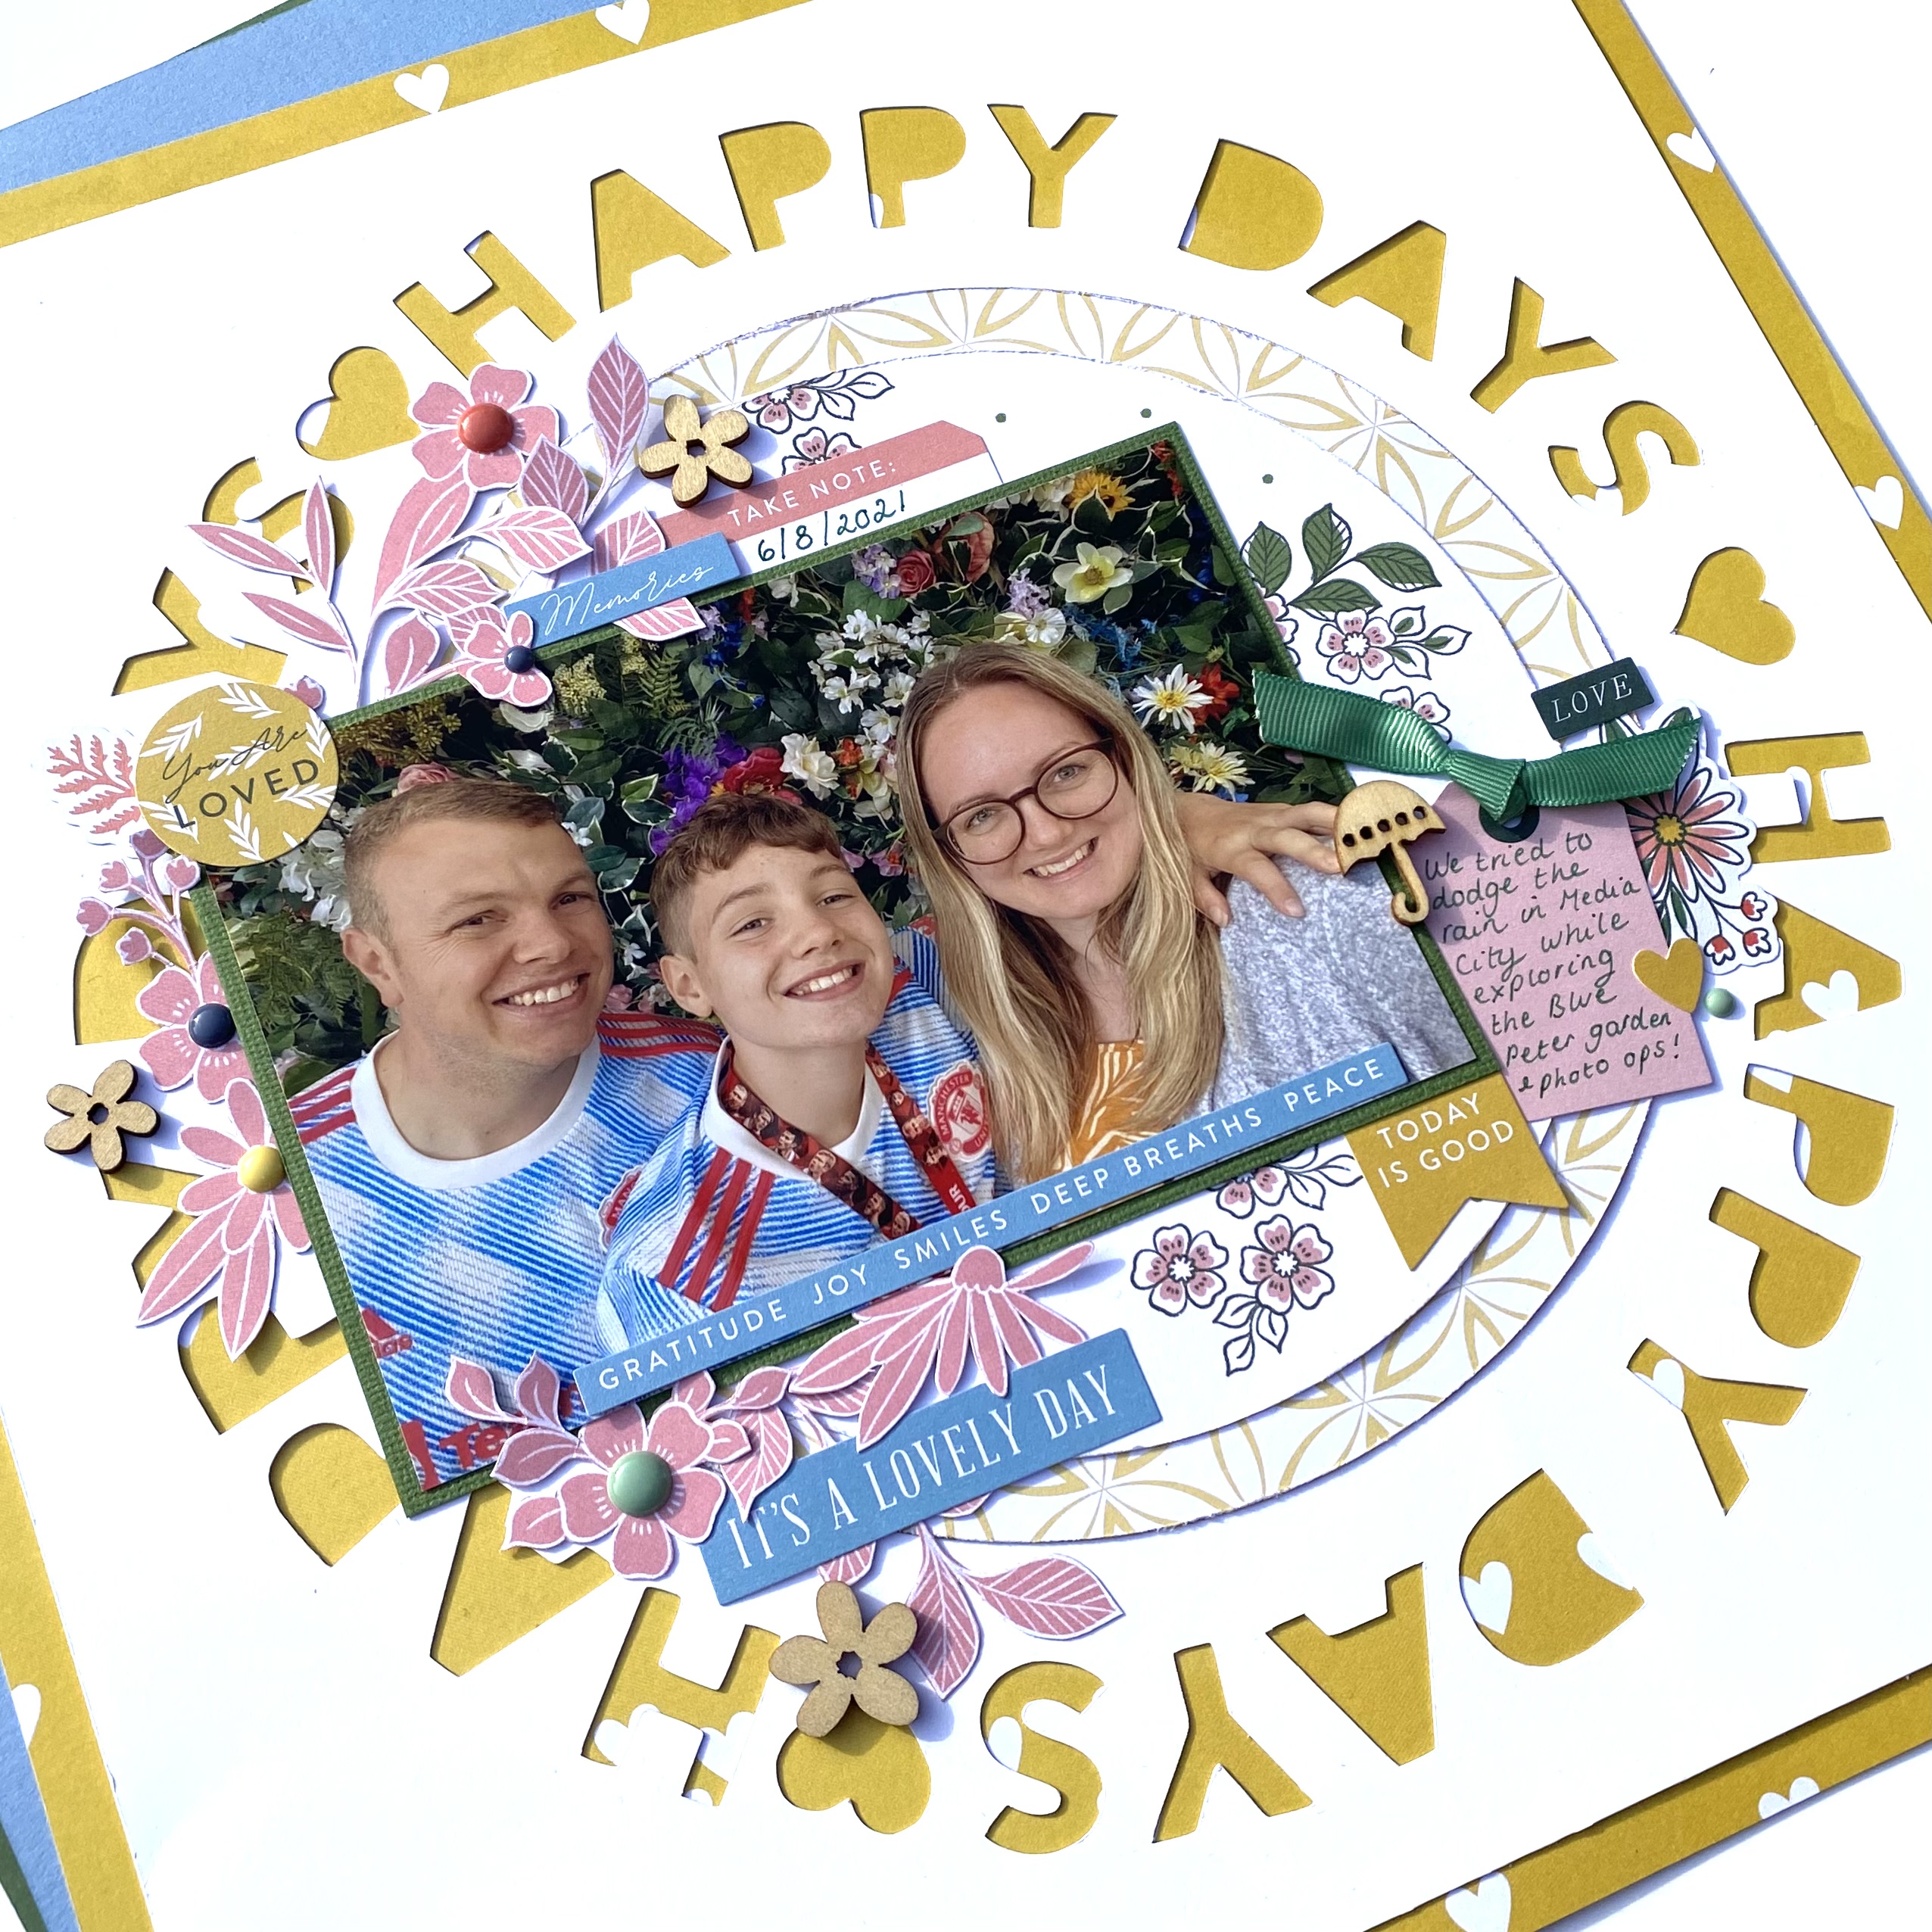
For my first layout with this collection I have created this circle based design. 
I began by cutting this ‘Happy Days’ cutfile by Peartree Cutfiles on white bazzill cardstock
I then trimmed down the cardstock, taking about 1cm off each side.
Before using the ‘Moments of Joy’ paper to back my white Bazzil, I cut out a circle from the centre of the paper, and kept it aside to use on my layout. This ensured I was making the most of the paper and not wasting the middle. 


I cut a slightly bigger second circle out of the Cherish This paper, and layered it in the centre of my layout along with the circle I’d cut from Moments of Joy


I mounted my photo onto coordinating cardstock from the matchmaker pack and adhered it to the left side of the circles. 
I then fussy cut several florals and leaves from the Daisies paper and tucked them in clusters around my photo. I added a few enamel dots to the centres of some of the flowers too. 


I used some of the cardstock stickers  to embellish my layout building up clusters around my photo. 


I journaled on one of the cardstock stickers and added some ribbon through the tag. Finally, I chose a few wooden embellishments from my stash to add a few finishing touches. 


Thanks so much for looking! 

See you next month with another layout using this collection. 

Anna

Monday, 17 October 2022

October Papermaze Kit - Part 1

Lynn here today, with my first two layouts made using the new Papermaze Kit for October. A beautiful collection in subtle colours. For my first post, I made a wedding layout and a heritage page.


 Before looking at how the layouts were made, here is a look at what's in the kit. 

Patterned Papers:
49 & Market - Serenity - Brief Glimpse & Fluttering Trio
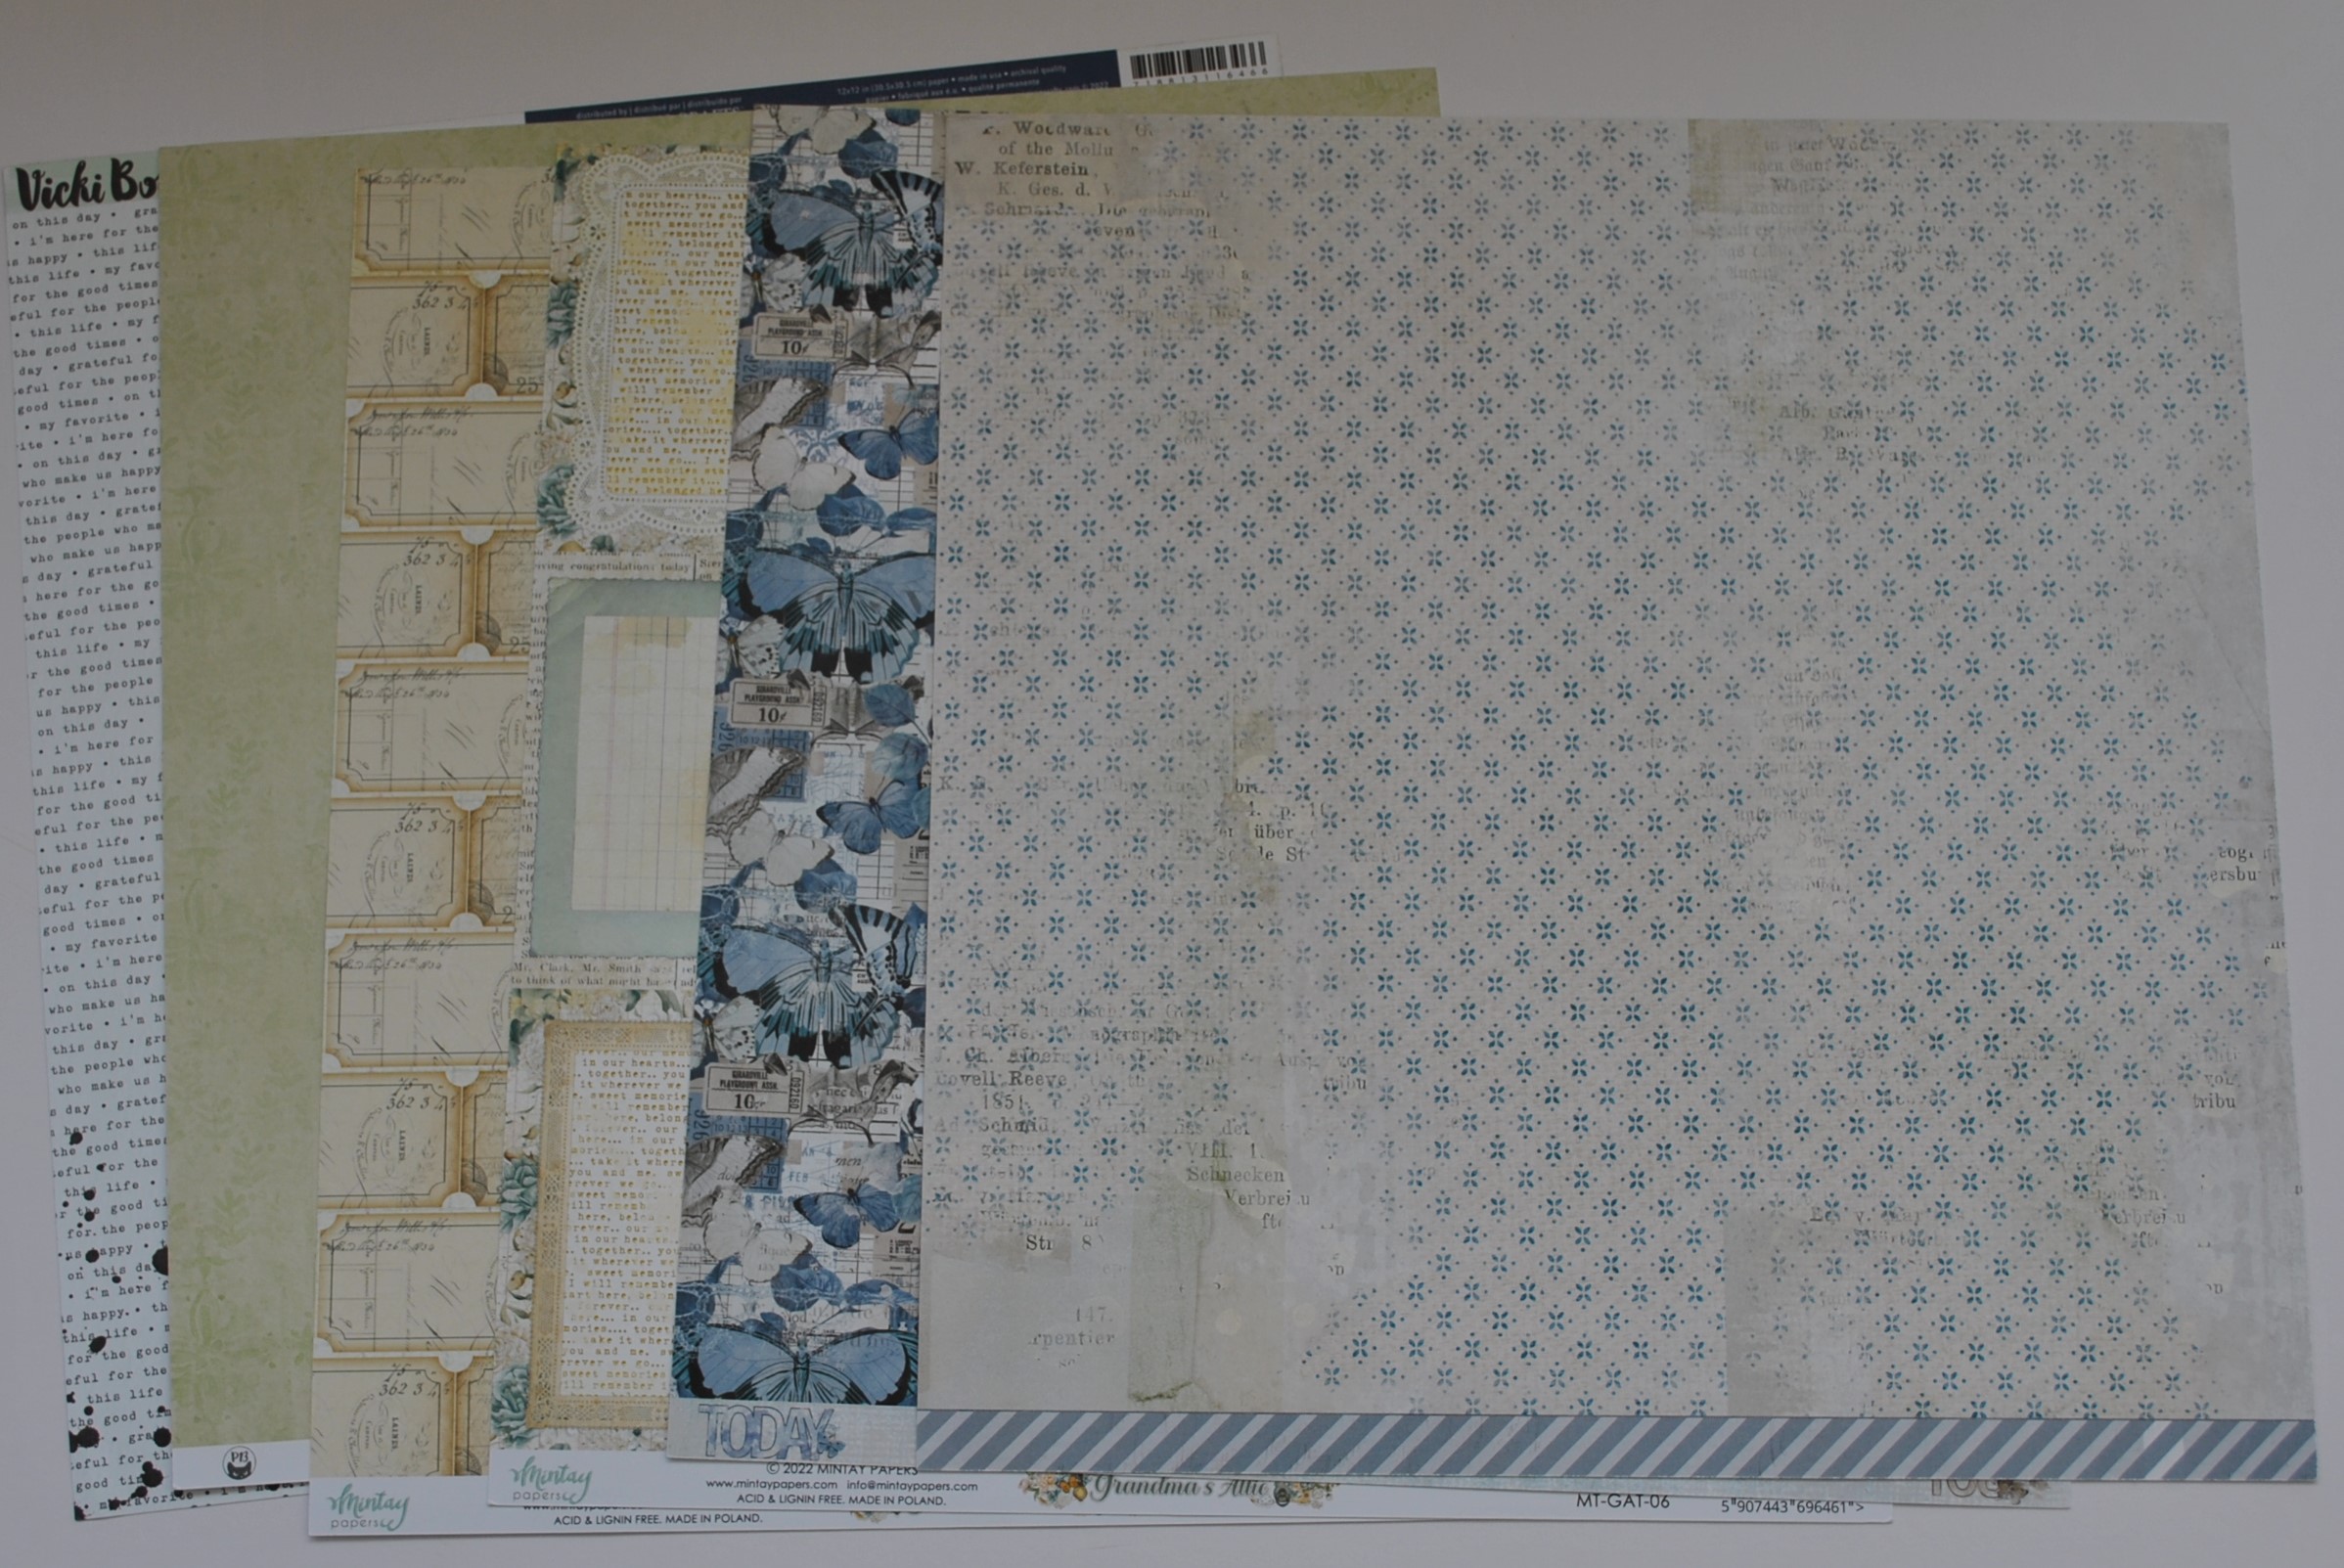
Mintay Papers - Grandma's Attic - #05 & #06
P13 - Lady's Diary - #02
American Crafts - Vicki Boutin - Print Shop - Typeset

Bazzill Basics - Touch of Pink & Rain

Reverse side of papers


Embellishments:
12" cream lace, Mintay Clock Chippie, vintage label plate, pinch of clear gems, large Prima flower, 3 large pearls, resin flower, 4 pearl hearts, 5 wooden leaves, Thought Token, leaf charm


Extra Bazzill Pack - Aloe Vera, Blue Star, Almond Cream & Casa

Wedding Guests - My daughter and her husband at a friend's wedding earlier this year.


I used a spare sheet of 12" x 12" paper as a base for the layout, then set about building the background with papers from the kit. I trimmed the 'Typeset' paper to 15cm deep and tore along the bottom edge. At about 12cm in from the right, I tore up from the bottom by a few cm.

From the remaining piece of 'Typeset' I tore a turquoise strip from the flip side, and tucked this under the previous piece. The bottom area of the layout was filled with 'Grandma's Attic #05'.

There is already a flicked black ink design on the paper, I added to this by flicking Cosmic Shimmer, Shimmer Mists (Bronze Blush and Ocean Sunlight) over the page. 

The photo was mounted into a chipboard frame (Scrapiniec), and placed to the left side of the layout. I ran a length of pleated ribbon across the layout, 10cm down from the top. 


The large paper rose from the kit was fixed at the top of the tear in the paper, and I added three of the wooden ferns. With some embroidery thread I attached the leaf charm to dangle from the rose. 


I placed the resin rose at the base of the photo, together with the remaining two wooden fern leaves.

My title was created with some Authentique Petit Type letter stickers and some die cut letters, using more of the 'Typeset' paper. 


Finally I scattered pearls, sequins, gems and Nuvo Glitter Drops over the page. 


Herbert Claude Banks - A family history page made with this cute photo of Herbert as a small boy.

Using the P13 Lady's Diary paper, with the sage side uppermost, I used some Distress Mica Stain Sprays to age the backdrop.

From Grandma's Attic paper #06, I cut five of the frames, trimming around the shape of some with deckle edge scissors. Each of these frames were inked with Gathered Twigs Distress Ink. I arranged these pieces onto the background paper, then mounted my photo in the centre.


I took the clockface from the kit, inked it with more of the Distress ink, then placed it onto the bottom right of the layout.


Flipping the remainder of the #06 paper over, I fussy cut lots of the elements, inked the edges and arranged them on the layout. I attached some with glue and others with 3D foam pads.


I used the Vintage Label Plate from the kit to add the dates of Herbert's life. I backed it with a scrap of the patterned paper, then added numbers cut from Bazzill with the Tim Holtz Sizzix Thinlits Tiny Type set.


Using the Tiny Type upper and lower alpha dies, I cut the name and place titles. 


That's all for today, I will be back soon with more from this kit.
Thanks for looking
Lynn x