Showing posts with label Cocoa Vanilla. Show all posts

Wednesday, 2 July 2025

June Papermaze Kit - Part 2

Lynn here today, sharing my next two creations using the delightful Papermaze kit for the month of June!  The kit is comprised of six double-sided patterned papers, two sheets Bazzill Basics cardstock and a whole bunch of co-ordinating embellishments. There is also a pack of four extra Bazzill Basics matching available to purchase to compliment the kit. Two  new layouts featuring baby Florence. this time I added some non-traditional elements to the layouts, in the form of cake toppers and playing cards.


Patterned Papers:
49 and Market - Vicki Boutin - The Flower Emporium - Starters Paper 3 & Starters Paper 9
Echo Park - Firefly - Bright Floral & Shining Daisies
Simple Stories - Sunny Days - Happy Days & Soak It Up!


The photo below shows both sides of the papers:


Embellishments:
Pretty Little Studio - Love is Kind - Friends Forever Die Cut Titles
Pinkfresh - Chrysanthemum - Chipboard Flair
Rosie's Studio - Keeping Cool - Puffy Stickers & Frames
Cocoa Vanilla - Storyteller - Wood Button
Doodlebug Designs - puffy hearts - Bumblebee
Washi Tape


Bazzill Basics Cardstock - Coconut Swirl, Patch (included in Kit), Petunia, Powder Blue, Tangelo & Yukon Gold (in Extra pack).

Happy Beeday - A few days after Florence's first birthday, she came to stay and we celebrated with a cake. 

The background for this layout is the Powder Blue Bazzill from the kit. Distress Oxide Inks (Faded Jeans, Wild Honey & Mustard Seed), were stencilled using a Vicki Boutin honeycomb stencil from her 'Art for Everyone' set. I sprinkled a little water over this to oxidise the inks. 


I cut a selection of 1.24" hexagons using a Memory Box die set. I used both sides of Bright Floral & Shining Daisies for the hexagons, I inked the edges and arranged them over the layout. 


I cut a piece of Soak It Up! 3.25" x 9", with the orange side up, and mounted my three small photos onto this. My photos were placed to the right side of the page, just over half way down.


For the title I used the cake topper I had for the cake, I also used bees from some cupcake toppers.

From the kit, I used the Rosie's Studio - Keeping Cool - Puffy Stickers and the Cocoa Vanilla - Storyteller - Wood Button. 


My journalling was added directly to the Bazzill with a fine black marker pen. The date was added using Doodlebug Designs Sunshine Alphabet Stickers - Bumblebee.


Daddy's Girl - Happy Families - Florence went to visit Daddy at work at the Butcher's in Blackheath. 


For this layout I used both sheets of 49 and Market - Vicki Boutin - The Flower Emporium - Starters Paper 3 & Starters Paper 9. I started by using the #3 paper as the base, and I cut apart #9 paper into the seperate sections to be used as photo mats and a journalling spot.


I trimmed my photos to fit within two pieces selected and cut from #9 paper, I rounded the corners using a punch, and inked the edges with Distress Ink. I also chose the postcard piece and treated this as before. I used some bronze alphabet stickers for a sub-title and added journalling to the postcard.


I cut my title using a Sizzix Bigz XL Alphabet die and some fine corrugated cardboard. I inked the edges and fronts of the letters. 


I found a children's 'Happy Families' card game, and selected the butcher family, I arranged these down the right side of the layout, together with some smaller traditional playing cards for the back view. 


Once all arranged, I stuck the pieces in place and added a date to the little banner flag on one of the photo mats, using a Sizzix Alphanumeric Tiny Type upper and lower die set. 


That's all for the June kit, I'll be back with the July kit soon. 
Thanks for looking.
Lynn x

Monday, 5 May 2025

April Papermaze Kit - Part 2

Here is my second DT post, with two layouts made using the April Papermaze kit. As well as the six patterned papers, the kit has a collection of  embellishments. There are two sheets of Bazzill cardstock included, and you can also buy four more in the co-ordination pack. I have dipped back into the past for these two layouts with photos from 2008 and 1995.


Before looking at how I made the layouts, here are the details of what you will find in the kit.


Patterned Papers:
Mintay Papers - 
Photographer collection - #02 & #05
Stamperia - Alterego collection - Postcard & Turquoise Wallpaper
Stamperia - Create Happiness collection - Dewdrops - Wood
P13 - Love Stories collection - #06


2, 49 & Market frames, 6 pieces 49 & Market acetate ephemera, 1 strip Prima crystals, 1 sheet P13 alpha stickers, selection of Cocoa Vanilla foam stickers, 12" lace, 6" Tim Holtz filmstrip ribbon and 6x Tim Holtz brads


Bazzill Basics Cardstock - Twig & Whirlpool (included in kit). Coastal, Avalanche, Jade & Cinnamon Stick (in extra Bazzill pack)


Home Sweet Home - My son at 3 years old, helping to clean the Wendy house


For the background I used the sheet of Turquoise Wallpaper paper. Onto this I added a strip of paper torn from Dewdrops - Wood, and placed this vertically onto the background, after inking the edges. I followed the line of the wood effect paper, with a strip of my own filmstrip washi tape.


I arranged my photo overlapping the strips, in the centre. Then I fussy cut some flowers from Mintay #05 (scraps leftover from previous layouts). I inked these and mounted them onto the page using 3D pads.


For my title I used the word 'HOME' from the Cocoa Vanilla foam stickers in the kit. I added the rest of the title using some tiny letter stickers from my stash.


I tucked some cheesecloth along the joins in the papers and around the flowers.


I added a little wooden house, numbers for the date and a key to the layout. 


I made a small journalling tag from Dewdrops - Wood paper, and a die from the Tim Holtz Sizzix Tag collection set.  I inked the edges, and wrote my journalling, then tucked it just under the flowers.


Finally, I added a scattering of water drops.


Memories - A photo of me with my husband on a family day out in Essex. We visited the Battlesbridge Antique Centre, and here we are at the very top of the building in the cafĂ©.


I started this layout with the sheet of Whirlpool Bazzill. Then I added torn pieces to the top and bottom of this cardstock, leaving a gap of the Bazzill in-between. The top area is from Postcard, and the bottom area from the Dewdrops - Wood paper. I tore some small triangular pieces from the scrap cut away from the #02 camera paper. These pieces were placed over the other papers, to give the appearance of small tears.


I cut a two complete and two incomplete postcards from the remains of the Postcard paper. I mounted my photo onto some corrugated card. I arranged the photo and postcards in a fan overlapping each other, so it appeared the postcards were all complete. I placed these in the centre of the layout.


I decorated the layout with the 49 & Market acetate ephemera from the kit. The title was made with Cocoa Vanilla foam stickers which are also included in the kit.


I used a Tim Holtz Idea-ology label holder from my stash, to add the date with some alpha stickers.


Finally, I scattered the Prima crystals from the kit, around the page.


That's all for the April kit. Back with the May kit soon.
Thanks for looking
Lynn x

Friday, 16 February 2024

February Papermaze Kit - Part 1

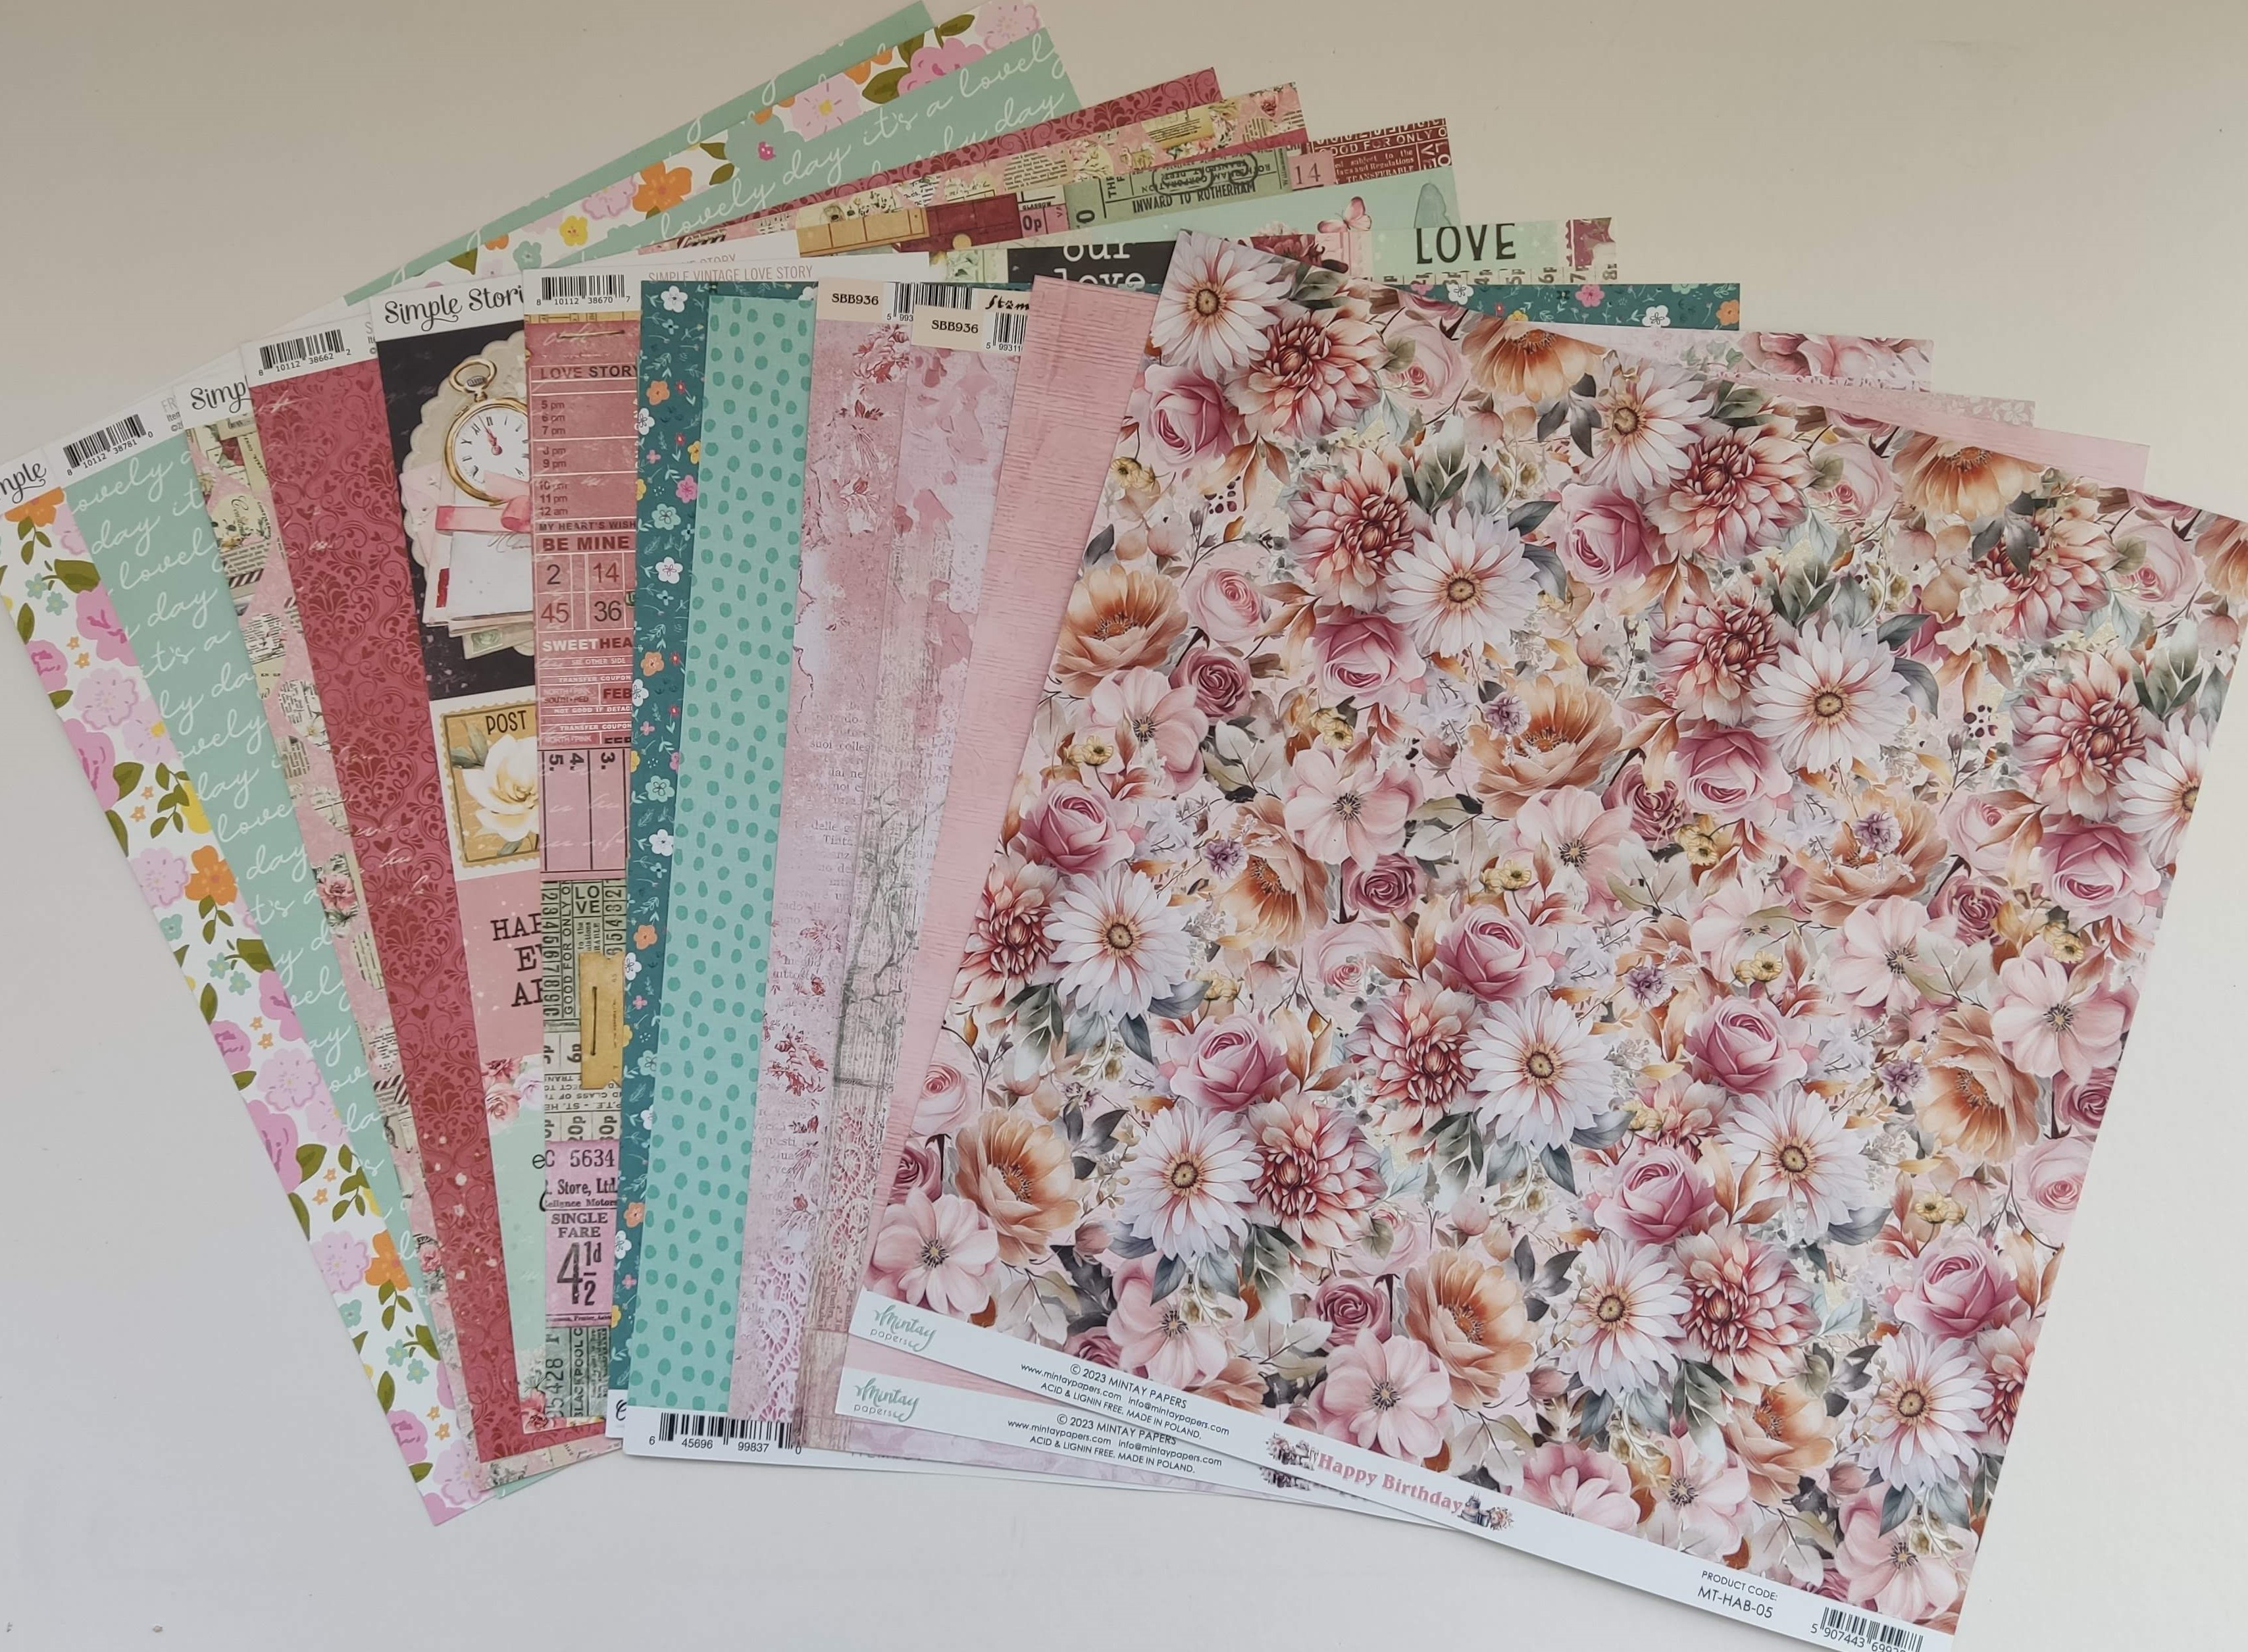
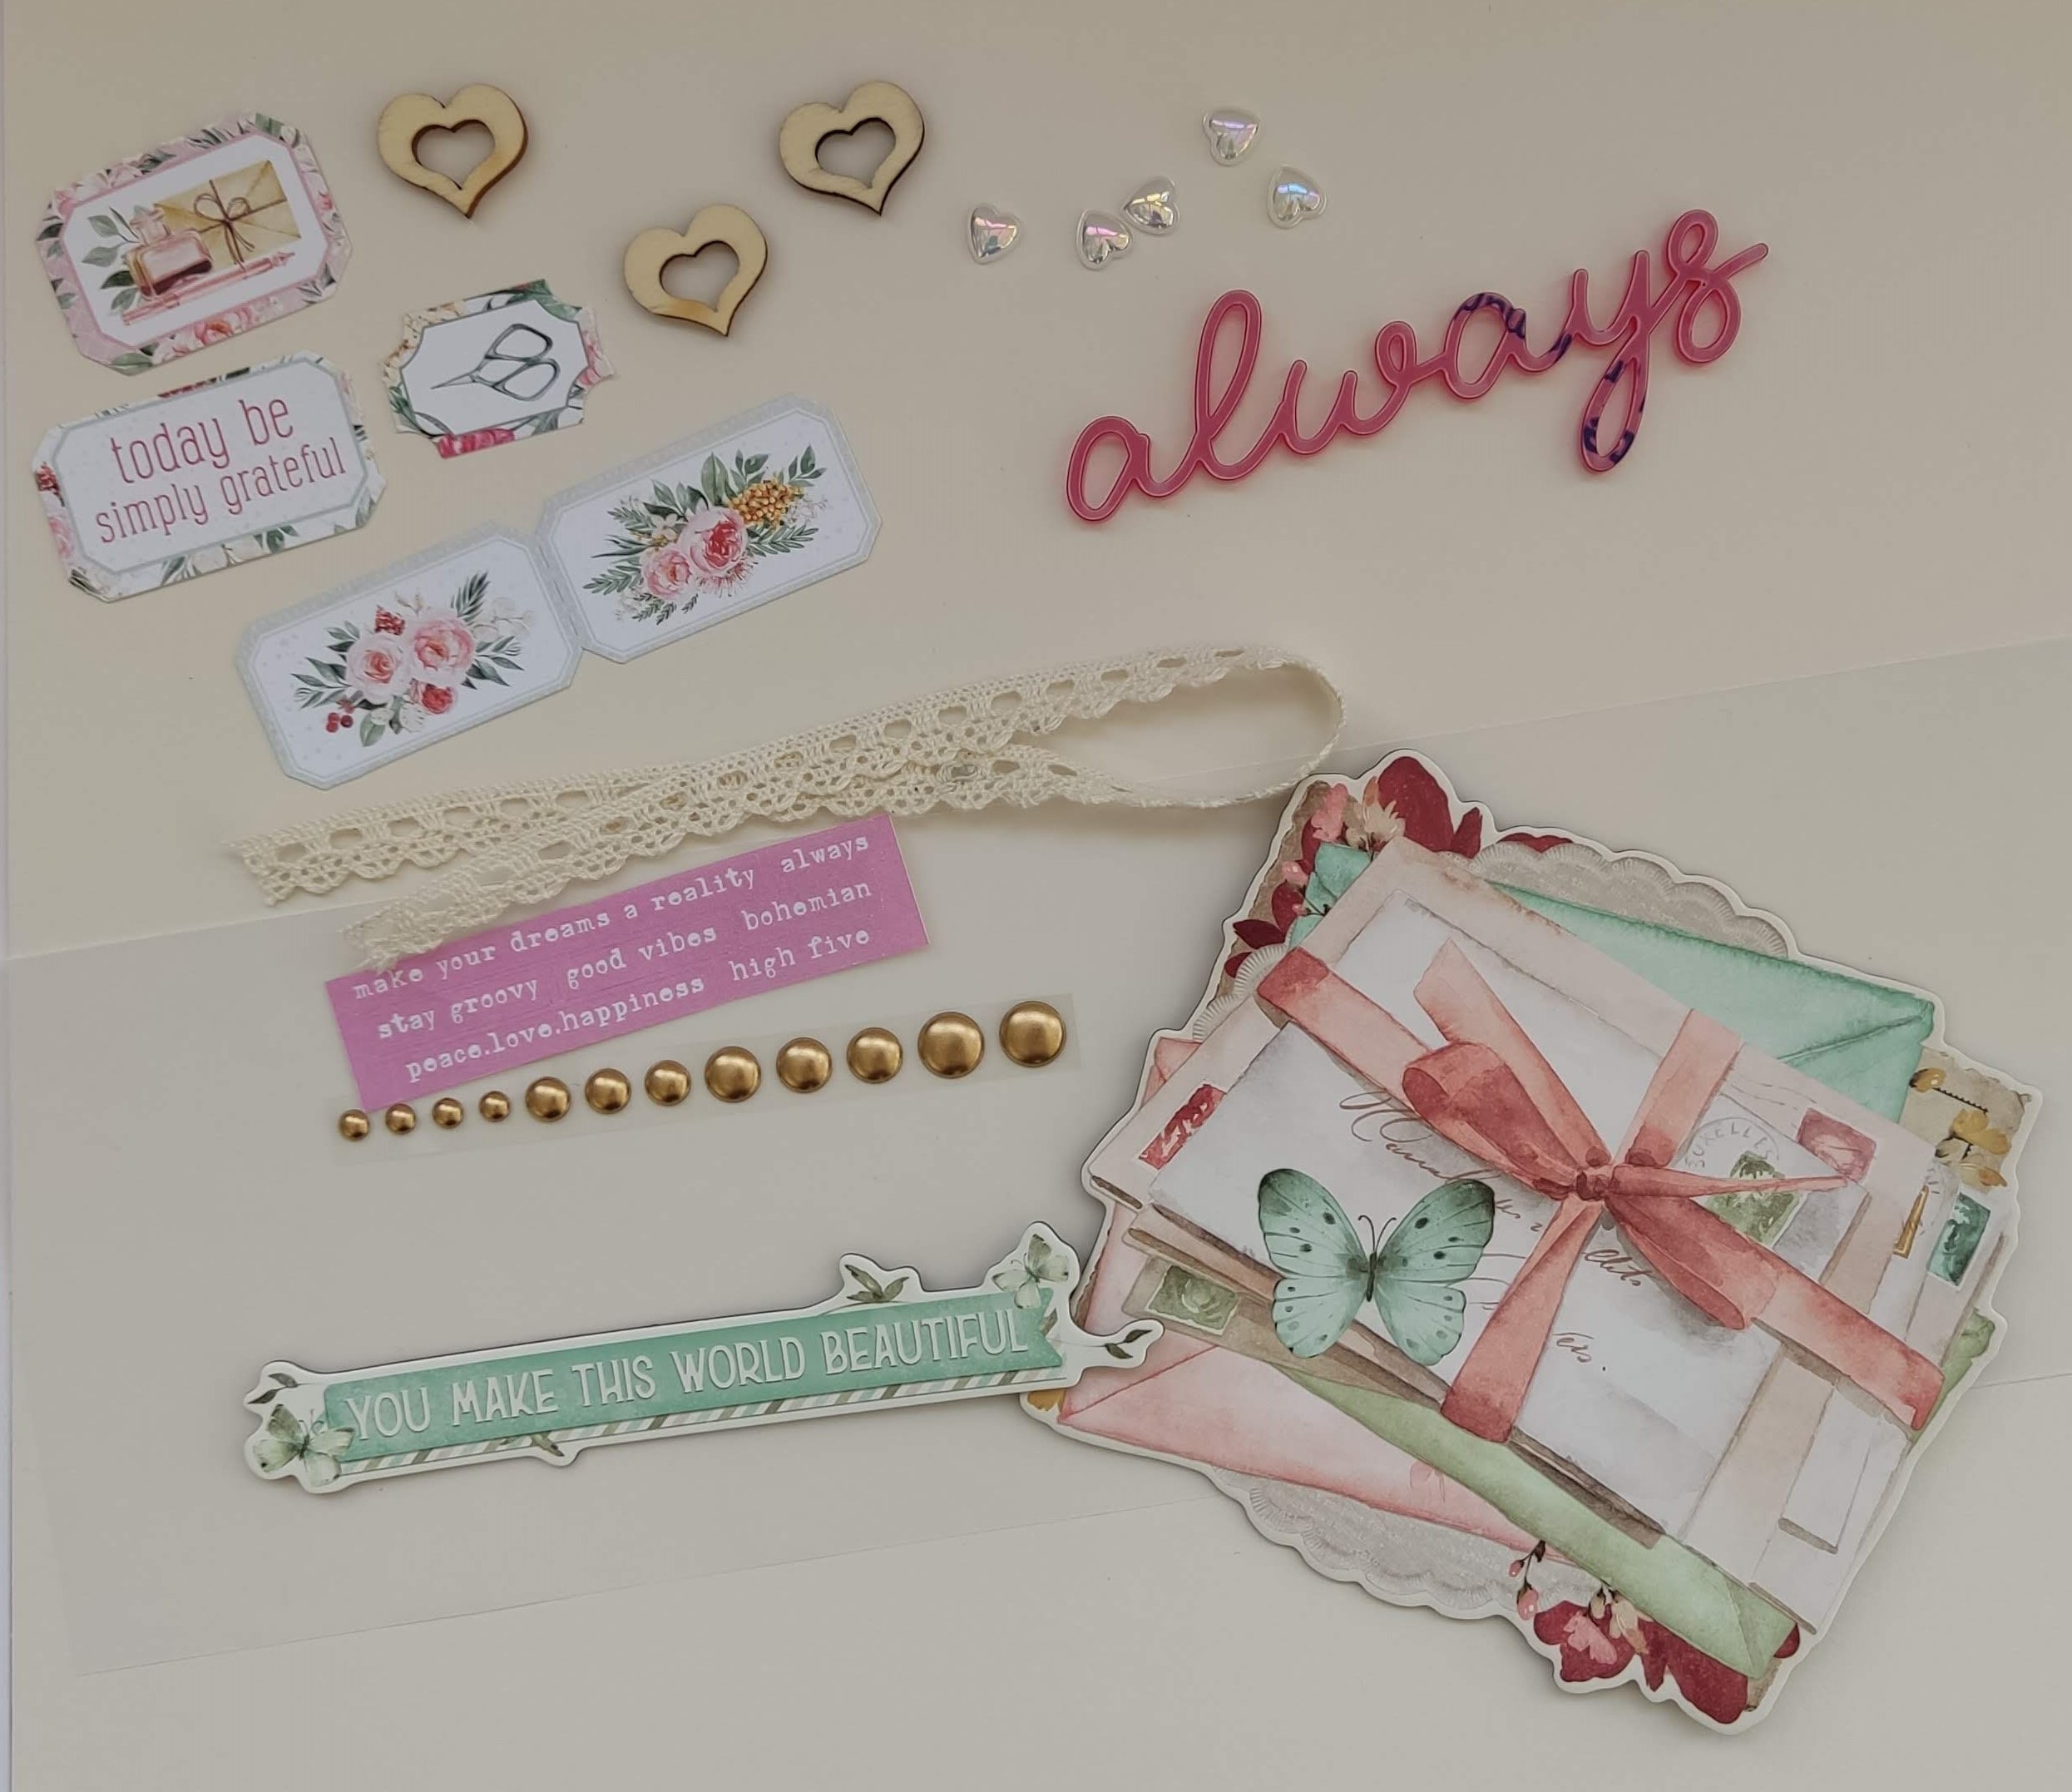
Lynn here today with a lovely, romantic new Papermaze Kit for February. I have created four layouts using this kit and here are the first two.


Patterned Papers:
Mintay Papers - Happy Birthday collection - MT-HAB-05
Stamperia - Roseland collection - Flowers
Simple Stories - Simple Vintage Love Story collection - 2x2/4x4 Elements & My Heart
Simple Stories  - Fresh air collection - Fresh Start
Cocoa Vanilla Studio - Happy Days - Little Blossom


Bazzill Basics Cardstock - Cherry Splash and Walnut Cream (included in the kit). Yukon Gold, Blossom, Flintstone and Sea Glass (extra Bazzill pack).


Embellishments:
3 wooden hearts, 12" lace, 5 water droplet unicorn hearts, 1 exclusive acrylic word, vellum, 2 Simple Stories Chipboard Clusters, 1 strip of Pinkfresh enamel dots, 5 P13 tickets and a selection of word stickers.


Always - one of the official photos from my daughter's wedding.


I created the mixed media background on the Walnut Cream Bazzill using Distress Oxide Inks of several shades of red and pink, watered down on the craft mat, and transferring it to the card on a scrap of acetate. Once dry I stamped the word 'love' several times with Distress Oxide Ink and some old cling foam alphabet stamps from Tim Holtz (Idea-ology Type Lower). I spritzed the letters with water to allow them to oxidise further.


Once the ink was dry, I stamped with 49 and Market - Gabi's Stitches Clear Stamp Set, and Onyx Black Versafine ink (any water-resistant ink can be used).


I cut some of the images from the '2x2/4x4 Elements' paper and layered these with the photograph on top.


The Papermaze February Kit exclusive acrylic word was added as my title to the bottom right of the layout.


From the kit I added more embellishments, including the water droplet hearts, wooden hearts and mini word stickers.

Other gems and water droplets were added from my stash.


Happy Together - This layout shows my nephew and his girlfriend on holiday.


I started this layout (inspired by Paige Evans), by cutting a large heart from the centre of the Sea Glass Bazzill. With the cut out, I drew around the heart, onto a scrap sheet of 12" x 12". I used this to work out where the scalloped shapes would need to go, and a few lines helped me to line the up too.


I cut scalloped strips approx. 0.75 deep, in strips about 11" wide from the 'Little Blossom' and 'Fresh Start' papers. I used both sides of the papers to vary the patterns and stuck them sown in overlapping rows. Once the heart shape was covered I added the heart cut-out sheet over the top of the scrap sheet and glued this on place.


I glued the photo in place, then added a fine lace trim around the heart edge.


I made three clusters of flowers, using paper flowers from my stash to match the paper colours. I layered up the flowers, then used brads to hold the layers together and attach the flowers to the page.


From the Bazzill heart shape left over, I punched some leaf fronds, and inked them with some Distress Ink to make them a slightly darker shade. I added these to the flower clusters.


I added a title using Doodlebug Designs Loopy Lou cardstock stickers in Lily White. To make the letters stand out, I drew around the edges with a black marker pen.


That's all for today. back with more soon.
Thanks for looking.
Lynn x