Friday, 6 March 2020

Quick Cards using Simple Stories Hey Crafty Girl collection

Hello, Karen C here again. Today I have some quick cards to share with you using the Simple Stories Hey Crafty Girl collection. Simple Stories always include in their collections a paper with 2x2 elements and often other 'grid type' papers too. These are perfect for making quick greetings cards.


The cards I made were all based on a sheet of the Happy Place paper.


I loved this sheet of paper but was struggling to figure out how to use it on a scrapbook page so I decided to cut it into squares of four images and make some cards from it.


The squares were mounted on 6" square white card blanks with foam underneath to give some dimension.


I added some stickers from the Combo Sticker Sheet, fussy cut some images from the rest of the Happy Place paper and the 2x2 Elements paper, punched a heart from a scrap of paper and made some tiny bunting for one of the cards.


These cards are very simple but I think they would be fun to send to crafty friends.

Why not have a look at  2x2 elements papers and other grid type papers (there's lots to choose from in the shop) and make a few cards.

Take care
Karen x x

Wednesday, 4 March 2020

Every Moment Matters ..... Prima Aricot Honey pt 3


Hi There

Anita here today and I am sharing my final layout using the last left overs of Prima 's stunning Apricot Honey Collection. I am not a massive fan of scrapping with just plain cardstock...not for me to scrap with anyway. I am a die hard patterned paper girl....however I AM in awe of so many scrappers who do base most of their layouts round cardstock and how they create such uncluttered, striking layouts


So I thought as I only had a few scraps that I would base mine of a sheet of Fawn cardstock.
I sprayed a few squirts of some brown, copper and gold ink sprays I had in my stash...I really couldn't make myself leave it plain lol!

The papers have some beautiful copper foiling detailing on them and so I decided to echo this all round the edge of the layout (See....I just KNEW I wouldn't be able to keep it very clean!)


 I gently sponged some FlitterGlu round the edge of the layout and then rubbed some copper gilding flakes all around before buffing them up to finish the technique off. I love how it shines so nicely in the light and I feel it really enhances the page.


I cut various panels and embellishments from the sheets of  Deep Love  and Happiness Looks Good On You
I layered these up and raised on foam pads to add a little dimension to my layout and cut a photo to the same size as the panels to add to the bottom row. The original photo had lots of different blue tones in the background so I had it re printed in B&W and then it will work on any papers.

 I gently inked around the edges of each of the panels with an old ink pad and added a few co-orinating Chipboard Stickers
I then added a few flat back gems and half pearls .....and then I had to sit on my hands....just to stop myself chucking lots more bits and pieces on the page and probably spoiling it!


So that's it for me now with that gorgeous range of papers. I have had a lovely time playing with them and am looking forward to working with my next set of papers.

Have a great week!

Warmest wishes
Anita xxx

Tuesday, 3 March 2020

Dear Lizzy -She's Magic #2

Hi, it's Anna back with you today. I'm sharing my second layout using the Dear Lizzy She's Magic collection. Take a look at the whole collection here.
For this layout, I used this collection alongside the Simple Stories - hey, crafty girl collection as I wanted to use these photographs of me as a child getting creative - I've always been a crafty girl!


I began by using a piece of white bazzill cardstock and trimmed it down by about 1cm each side. I then mounted it onto a navy sheet of bazzill 12x12 cardstock. I used distress ink with a stencil and lightly inked over the stencil in a few places. I used a light sprinkling of Infusions in a rough circle and spritzed with water.  


I cut out a circle of cardstock and adhered it over my rough circle created with the inks and infusions.
I wanted to use the chipboard frames from the Dear Lizzy She's Magic collection. I adhered my photos behind the frames and placed them on top of my circle. With two of the frames, I backed them in cardstock and used some of the element stickers from the Hey, Crafty Girl collection.


Thanks for looking!
Have a great week!
Anna
X

Friday, 28 February 2020

Scrapbook Layout - 'Happy Birthday' using Kaisercraft's Oh Happy Day Collection

Hello, Rebecca back with you again with another 12x12 layout created using the 'Oh Happy Day' Collection by Kaisercraft. This collection has been great for me as it was my little boy's 3rd birthday at the beginning of the year so I've had plenty of photos to scrap.


I didn't have many whole sheets left from this collection so decided to get my circle dies and punches out. I have the world's smallest manual die cutting machine so I was limited on how big I could make my circles so went a bit 'old school' and used a compass to draw the larger circles and then hand cut them out.


I used two sheets to cut my circles from - '100's and 1000's' and both sides of 'Yay'. I then also cut some of the word phrases from the 100's and 1000's paper. I arranged these on the page around my photo and stuck some down with a layer of foam behind to add dimension.


I fussy-cut my title 'Happy Birthday' from the 'Garlands' patterned paper and placed this 'hanging' across the top of the page - again stuck down on foam dots to raise it off the page a little.


I felt like the bottom of the layout needed something, so I tore a small section of the background off and backed it with a sheet of gold card, created using a gold Embossing Powder and a white sheet of card, to co-ordinate with the gold foil in the collection.

I hope you've enjoyed this layout. I'll be back again next month with more 12x12 layouts.

Take care,

Rebecca x

Monday, 24 February 2020

Hey Crafty Girl - This is my Happy Place

Hello Karen C here again with another scrapbook layout using the gorgeous Hey Crafty Girl collection from Simple Stories.

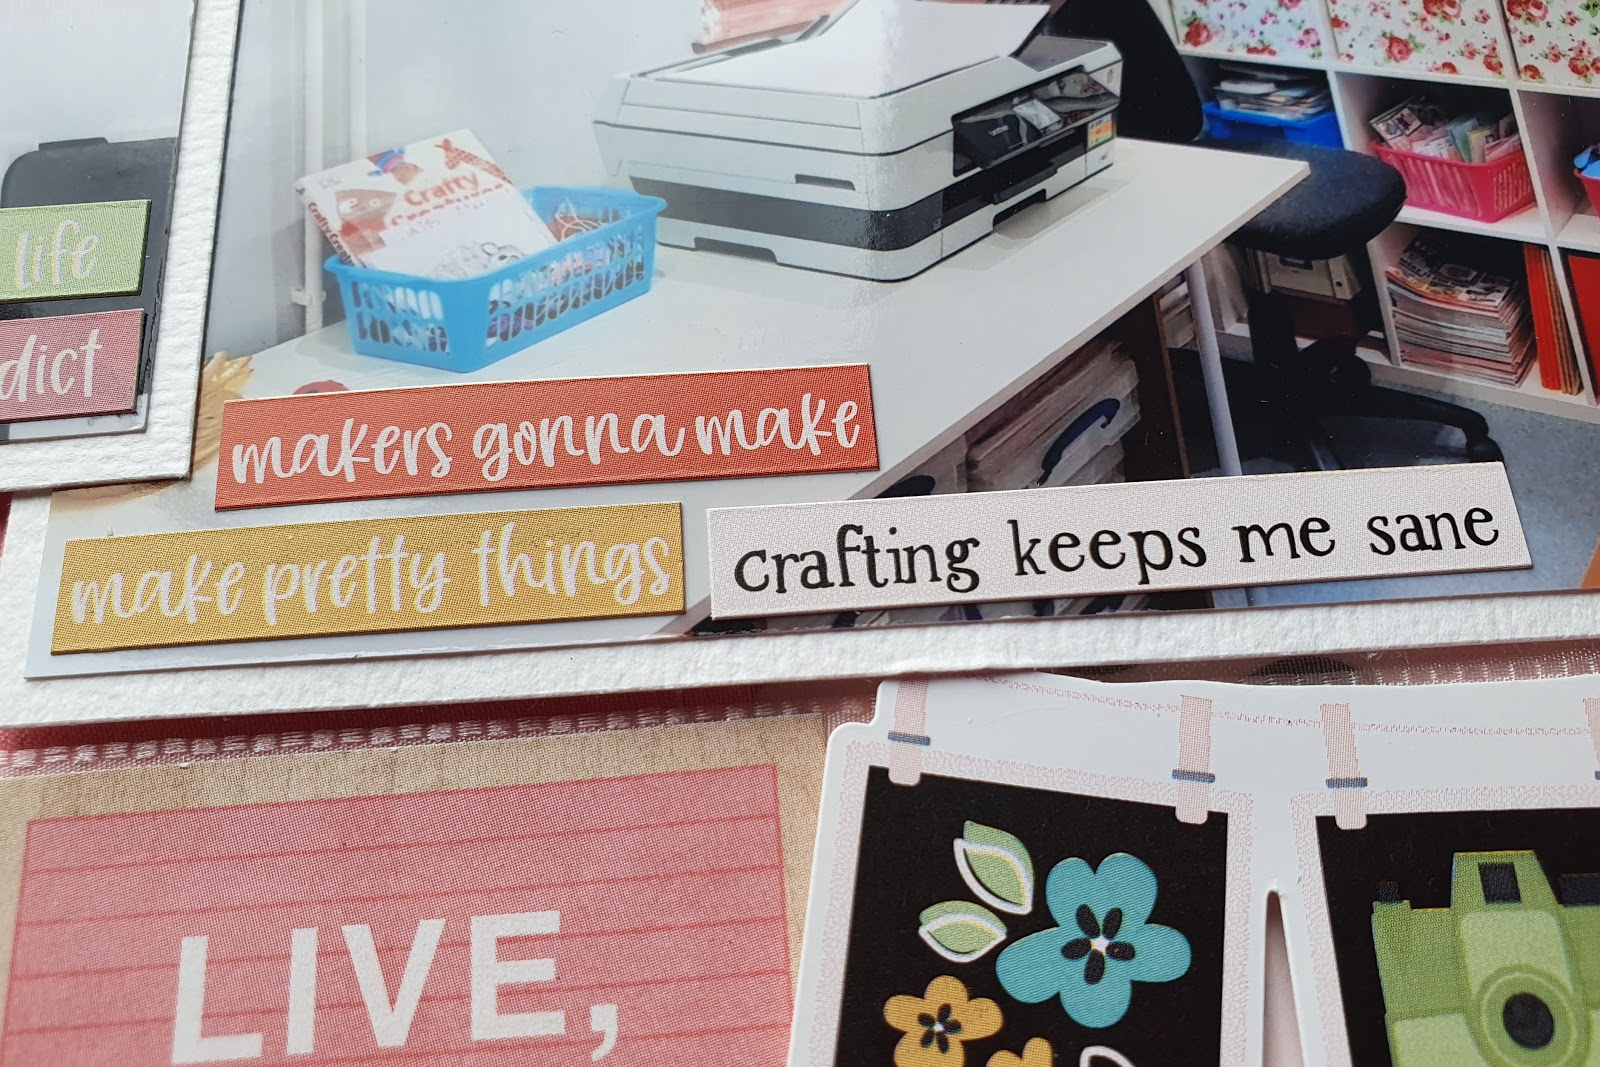
A couple of year ago, after many, many years of crafting either on the dining room table or my bedroom floor and having craft supplies scattered throughout the house, I finally got my own craft room. It really has made a difference and the Hey Crafty Girl collection was perfect for scrapbooking some photos of the room.


I started by gutting a sheet of the Made With Love paper and in the centre attached a sheet of white Bazzill cardstock which I had trimmed to approx 11" x 11". Onto the white cardstock I layered a piece of the remaining Made With Love paper, and strips of the Crafty and Happy paper and some pink cardstock. I machine stitched around the edges of all the papers with white thread.


Two 4x6 photos were matted on white cardstock and then placed on the layout with foam underneath to add some dimension. I cut out some of the 2x2 elements and used these to embelish the layout. Stickers from the Combo Sticker Sheet were also added.


There are some great phrase stickers on the sticker sheet which are perfect for a layout like this.


A banner sticker, which by coincidence is very similar to how I display some of my scrapbook layouts in my craft room, was stuck beneath one of the photos. 😀


To add some texture to the layout I added some organza ribbon and pink wooden buttons and also scattered a few black sequins around the layout.


A white paper doilie was tucked behind the photos and to complete the layout I die cut the title from some black cardstock and attached this just above one of the photos. I also used some tiny black stickers to add the date.

I hope that I have inspired you to take a look at the Hey Crafty Girl collection and I'll be back again soon with another project.

Take Care
Karen x x

Friday, 21 February 2020

Papermaze February Kit

Lynn here today with the new February Papermaze Kit. I have been having fun creating a total of four layouts with this very pretty selection. Today I have my first pair of pages to share with you. 


Here is what is in the kit this month:


Patterned Papers:
Cocoa Vanilla Studio - Unforgettable collection - Natural Beauty
Cocoa Vanilla Studio - More Than Words collection - Darling Buds
Kaisercraft - Ladylike collection - Rose
Kaisercraft - Lily and Moss collection - Circular
Prima Marketing Inc. - Apricot Honey collection - All Together

Stamperia - House of Roses - Tags
Bazzill Basics Cardstock - Lagoon and Bark


The extra Matchmaker Bazzill Basics Cardstock Pack: Sunset Rose (Dotted Swiss), Mauve Ice, Bazzill White and Cinder


Embellishments: 2 tickets, crochet flower, Prima flower, 3 pink rosebuds, 10 clear Dew Drops, long strip of pearls, Kaisercraft rhinestone flower, Kaisercraft Curio, 12" lace, Dusty Attic chipboard, gold doily, 5 rose gold buttons


A Thousand Years For this layout I featured a photo of my daughter making an entrance to the wedding ceremony to the instrumental version of A Thousand Years.


I used the sheet of Natural Beauty from the kit as the back drop for my page, and with a new TCW stencil (Mini Ring Doily) I purchased from the shop and some Texture Paste mixed with some snow glitter, I created the circular shapes onto the paper. Once dry, I splattered some lightly diluted Distress Paints (Picked Raspberry and Worn Lipstick) before drying again. Then I added a few flicks of Dylusions White Linen Ink Spray.

With a piece of Bark Bazzill, I made a mat for the photo and added this to the page with some foam tape. Above and below the photo I added some ornate decoration with some Scrapiniec die cut chipboard. 

I made two large blooms with the
Sunset Rose (Dotted Swiss) Bazzill and the Sizzix Bigz Tattered Poinsettia die (they are not just for Christmas!!). The centre of each bloom was created with the pearls from the kit. I added leaves cut from White Bazzill and the Sizzix Skeleton Leaves Thinlits die set. I coloured the leaves and the edges of the petals with Distress Inks. 


For the title I cut my large letters using the Sizzix Bigz XL Handmade die and the white Bazzill which I coloured ombre style by blending Distress Inks. Once the letters were stuck in place I added some Glossy accents. The tiny letters were cut with the Sizzix Thinlits Alphanumeric label die set, white and Bark Bazzill. 


Inspired by Jane Austen
- Emily enjoyed a weekend leading a series of Playford dances, popular in Austen's time at a public event held in Wentworth Woodhouse. It was a project she took part in with the Nottingham Folk Dance Club, and was performed in historical costume she made herself. 


All the card and papers for this layout were distressed and inked with Gathered Twigs Distress Ink.
Stamperia - House of Roses - Tags
To make the most of both sides of the beautiful sheet of Stamperia - House of Roses - 'Tags' paper, I started by cutting away a clock from the bottom row and two tags from the centre of the paper. Then I flipped the paper to use the leafy side. I trimmed this to 12" x 8".

With a scrap sheet of 12" x 12" paper (This is a sheet of thin scrapbook paper from my stash which I don't like or ever think I will use for a layout, rather then throw it out, I keep some for this purpose). To this scrap paper I added a piece of Bark Bazzill 4" x 12" to the bottom part, and the leafy paper to the top. There were gaps, but these were covered by the photos later. 

Kaisercraft - Lily and Moss - Circular
Using the Lily and Moss Circular paper I cut the three frames away from the paper and gutted the centres from them, I mounted my photos behind the frames, then created the arrangement I wanted. Before sticking them to the layout I cut away some of the frames from under where they overlap.

With the scraps of the leafy paper I added a second layer over the one already placed, making use of the brick areas in the corners. Then I added the scraps of white wood cut away from the frames, to create planks across the layout. Next all the gaps were covered by my photo arrangement.

I printed my journalling onto some white paper and trimmed it to be a tiny bit smaller than the 'Be Kind' piece from the Circular Paper, then used this as a mat. Add this to the bottom right of the page overlapped by the lower photo frame.


I trimmed the two tags saved earlier, and with a large copper brad set into the top of each one, I continued to decorate them. 


For the tag on the right - I cut the gold doily into two pieces and stuck each half to the sides of the tag. Then I cut a scrap of lace and velvet ribbon to lay across the tag. I tied the three rosebuds together with a piece of pink ribbon and curled the wire stems. These were placed in the centre of the tag with a paper leaf added to the arrangement. With some cream seam binding ribbon I tied a bow through the eyelet. I glued this tag to the page to the left of the journalling.

The tag on the left - I tied a length of fine net around the tag, and used more seam binding ribbon through the eyelet, but this time I left longer tails after tying a bow. I stuck the tag to the left of the first tag using foam tape to raise it up from the page. I placed double sided tape from the bow, down the sides of the tag onto the background. Then I pleated the excess ribbon over the tape, trimming the ends when I was happy with the length and pleats.I arranged some more paper flowers and leaves from my own stash on and to the left side of the tag. 

I created my title with scraps of Bark Bazzill, making a shadow for the larger letters with a little of the Sunset Rose Bazzill. I used some old Boxed Brush Sizzlits alpha dies and for the small letters I used a Sizzix Sizzlit Typeset Decorative Strip.

That's all for today, I will be back with two more layouts from this kit at the beginning of March.
Thanks for looking.
Lynn x

Wednesday, 19 February 2020

You are somebody's reason to smile! ....Prima Apricot Honey

Hello again,

It's Anita back again today with my 2nd layout, using the beautiful Apricot Honey from Prima. You really need to see these papers in the flesh to truly appreciate the rich copper foiling and delicate patterns.


My eldest daughters fiance took these lovely photographs of her and their dog, Bear, last summer in some fields near their home. He is a gorgeous boy and they all adore each other.
The layout was backed with a sheet of Jetstream cardstock and then topped with a sheet of Tiny Blossoms. I took a small strip off the top and one  side, then distressed all around the edge of the paper ( making some little rips in random places)


I cut some horizontal slashes and peeled the edges back to expose the card underneath and added some cotton lace under the torn edge on the right hand side of the layout.


There is a lovely set of chipboard stickers that co ordinate with the papers and I used a few across the layout.


I also cut out different elements from the sheet of Deep Love and added in various places. A copper ink pad was used to gently ink the stickers, cut outs and edges of the layout and torn edges.


I had a rummage in my metal embellishment box in my craft room and picked out a few bits and pieces and added to the page.


I also added some blossoms, some from my own stash but also this beautiful corner spray, Berry Sweet Flowers, from the matching collection. I extended the spray by adding a few extra flowers of my own.

I then finished the embellishing off by adding some coppery brown gems in patches around the outer edge of the layout.


This has been such a gorgeous collection to work with. Prima have a stunning range of products and you can find them all here in the shop.

Thank you so much for popping by xx
Warmest wishes
Anita xxx