Showing posts with label boarder punches. Show all posts

Monday, 11 May 2026

April Papermaze Kit - Part 2

Hello, Lynn here today with the last pair of layouts made with the pretty April Papermaze Kit. I have made two very different layouts, one with photos taken only the day before making the page, and the other a heritage page, with a photo from approximately 100 years ago! 


Before explaining how the layouts were made, here is what you will find in the kit:


Uniquely Creative - Floral Archives collection - Pretty Pollinators
Uniquely Creative - Ultra Violet Delight collection - Layers in Lilac
Uniquely Creative - Bohemian Escape collection - Lazy Afternoon
49 and Market - Plume & Petal collection - Joy & Bliss
Mintay Papers - Man Cave collection - #5

The photo below shows both sides of the papers:


Embellishments: Laser Cut Wildflowers, Foam Stickers Dreamer, Little Birdie Butterfly, Little Birdie Flowers, Simple & Basic Dots, P13 Word Stickers & Ribbon


Bazzill Basics Cardstock - Whirlpool, Touch of Pink (included in Kit), StonewashVelvet, Date Swirl & Heidi.


Easter Bunny
- My daughter and I set up an Easter egg hunt as a bit of fun for little 2-year-old Florence to find some colourful eggs in the garden. Catherine wore the bunny ears and got carried away with some selfies!


I started with the Velvet Bazzill, and gutted it to make a frame of about 1" deep. The Bliss paper was cut into two pieces 11.5" x 3" and 11.5" x 8.25", I placed them side by side with narrower piece flipped over to the B side. The edges were all distressed, and before sticking them down I used some left over papers from the previous layouts to make a decorative strip along the join between both pieces...


... I tore the edge of the scrap of Joy paper with the music note side up. then with A border punch I used the remainder of the Layers in Lilac paper to make a lacy trim. At this point all these pieces were stick into place.


I printed five small photos, and mounted them onto some white card, I inked the edges and arranged them across the page.


Next for the embellishments and title - I chose the Spellbinders Say Cheese Classic Mouse - Die Set to cut the title letters twice, once from scraps of Velvet Bazzill and secondly from scraps of Lazy Afternoon paper. These were inked and layered, then added to the layout. 


I used a few of the phrases from the P13 sticker sheet provided in the kit, to add some relevant words to the left of the title. From the kit, I also used a few of the Dreamer Foam Stickers and the ribbon. I tied the ribbon into a bow and attached it to the bottom of the large foam sticker with a small decorative pin.  


The Little Birdie butterfly and flowers, together with the Simple & Basic Dots, were all usde to finish off the page.


Henry Charles Edwards - I love this Mintay Papers - Man Cave collection - #5 paper, from the April kit. I wanted to use it for a masculine layout using my new Vault Watch Gears Sizzix die set. I decided to scrap this photo of my husband's grandfather.


The background for this layout is the sheet of Date Swirl Bazzill, across which I layered torn strips of the Man Cave #5 paper. Leaving the cardstock showing above and below the paper.


I cut myself some frames from card and chipboard using the Stitched Rectangles Sizzix Die Set. I covered the largest of these in more scraps of #5 paper and distressed then inked the edges. I used this to frame my photo. 


With a mix of Distress inks and water, I coloured some watercolour paper, then just before it was completely dry I ran it through the Sizzix machine in a A6 Sizzix 3-D Texture Fades Folder - Numbered. Once dry, I lightly sprayed with some Distress Mica Sprays. I also rubbed in a little gilding wax to highlight the numbers. Then I cut this piece to fit into two of my frames. 


I made the pocket watch using more of the card scraps used for the frames, some black Bazzill and a scrap of the #5 paper. Embossing enamel was used to add texture and an aged metallic effect to the outer watch case. I built up the layers including the numbers and a layer of acetate for the glass. I also used a brad to hold the hands in place in the watch centre. I attached a small chain to the handle, and anchored this to the page with another brad. I placed the finished watch next to the photo, layered up with some 3D foam. 


I made a small oval frame and backed it with a scrap of Lazy Afternoon paper. Then with more numbers cut from the same die set, I added the birth and death date.


I found some elements, left over from a 49 and Market Krafty Garden Acetate Assortment. I selected a leaf branch and film strips to add to the layout. I also had some tickets and stamps left over from a previous Papermaze kit. 

The title was cut on the Cricut, from more of the card scraps I used earlier, and this was placed to the bottom right of the page.

That's all from the April kit, although I still have papers, cardstock and embellishments left to use. 
Thanks for looking.
Lynn x

Wednesday, 8 April 2026

Simple Stories ~ Say Cheese Happiest Place #1 ✨

Hi everyone, it’s Anna back on the blog today. 
For April, I will be working with Simple Stories Say Cheese Happiest Place which you can find in the shop here

For my first layout, I wanted to use a large photo that I’ve been holding on to for a while. It’s a 8x12 photo of a scenic castle view at Walt Disney World, which we are in. 


I used ‘Toon Town’ as my base and adhered the photo above centre. I used a boarder punch to punch a strip of red from ‘Having a Blast’ which I placed above and below the photo. 


From the same paper, I cut a small circle and then cut the centre too, to create a boarded circle. I distressed the edges and I used this to stick on the photo to highlight us in the large photo! 


I added one of the boarder stickers from the Cardstock Sticker Icons to the bottom of the photo, just above the boarder strip. I also added some word stickers and the title - ‘good times’ from the same sheet. 


I fussy cut some flowers from ‘Happy Memories’ and stuck them in clusters in the top left and bottom right of the layout. To finish I added a few more floral stickers from the Cardstock Icon Stickers


Thanks so much for looking! 
See you later in the month with a second layout using this collection! 

Anna 

@acraftylifewithanna


Friday, 14 June 2024

Echo Park - Summer Vibes - Vacay Vibes

Hello everyone!

Welcome back to the Papermaze Blog! It's Claire here with you today and this month I am working with the Summer Vibes collection from Echo Park.

This is a really beautiful collection, full of warm tones, fun patterns and lots of ephemera perfect for documenting a wide range of summer memories.

For my first layout, I'm scrapping some photographs of a visit to a local restaurant on a recent trip away. The photographs have lots of warm orange tones, greens, blues and yellows and seemed to match this collection so beautifully, I couldn't resist!

I started with a piece of smooth white Bazzill Cardstock in Coconut Swirl which came with the Matchmaker Pack.

I cut four strips of patterned paper with approximate sizes as follows:

I distressed the edges of each piece ad drew a white border around the outside. For extra interest, I used a punch to add some decorative elements to the 2nd and 4th strip.  To create a shadow, I adhered each strip to my page with foam tape, replicating the evening shadows from the sun.


To draw your eye into the photos, I used a piece of 4x4 Journaling Cards and Pool Pals papers to double mount the photos, pulling the different colours in the collection together.


I created two clusters on either side of the photos, mixing materials by using the Element Stickers and Sticker Book, along with some icons from the Chipboard Phrases.


I complemented this with some small phrases from the Element Sticker sheet, raising some on foam and sticking some flat.


For my title, I opted for this fun Vacay Vibes piece from the Chipboard Phrases, layering stickers underneath. For a little extra drama, I also added a long border sticker from the Sticker Book along the top edge of the Tropical Vibes paper which takes your eye across the page to the title.


I love how this turned out. It's been so much fun to create with this collection, and I'm looking forward to sharing another layout with you soon.

Check out the collection in full here.

Happy Scrapping!

Claire x
@scrappysoulmate

Friday, 23 February 2024

Carta Bella ~ At Home #2 🏡

Good morning everyone and welcome back to the Papermaze blog. 
It’s Anna back with you today and I’m sharing my second project using Carta Bella’s At Home Collection. You can find it in the shop here


To create this layout, I used the following:
Carta Bella at Home - wonderfully beautiful 
Carta Bella at Home - 3x4 journalling cards
Carta Bella at Home - Good morning moths
Carta Bella at Home - Beautiful chaos flowers
Carta Bella at Home - Bursts of Love
Carta Bella at Home - Simple Things Signs
Carta Bella at Home - Bazzill Matchmaker Cardstock 
Carta Bella at Home - Element Stickers


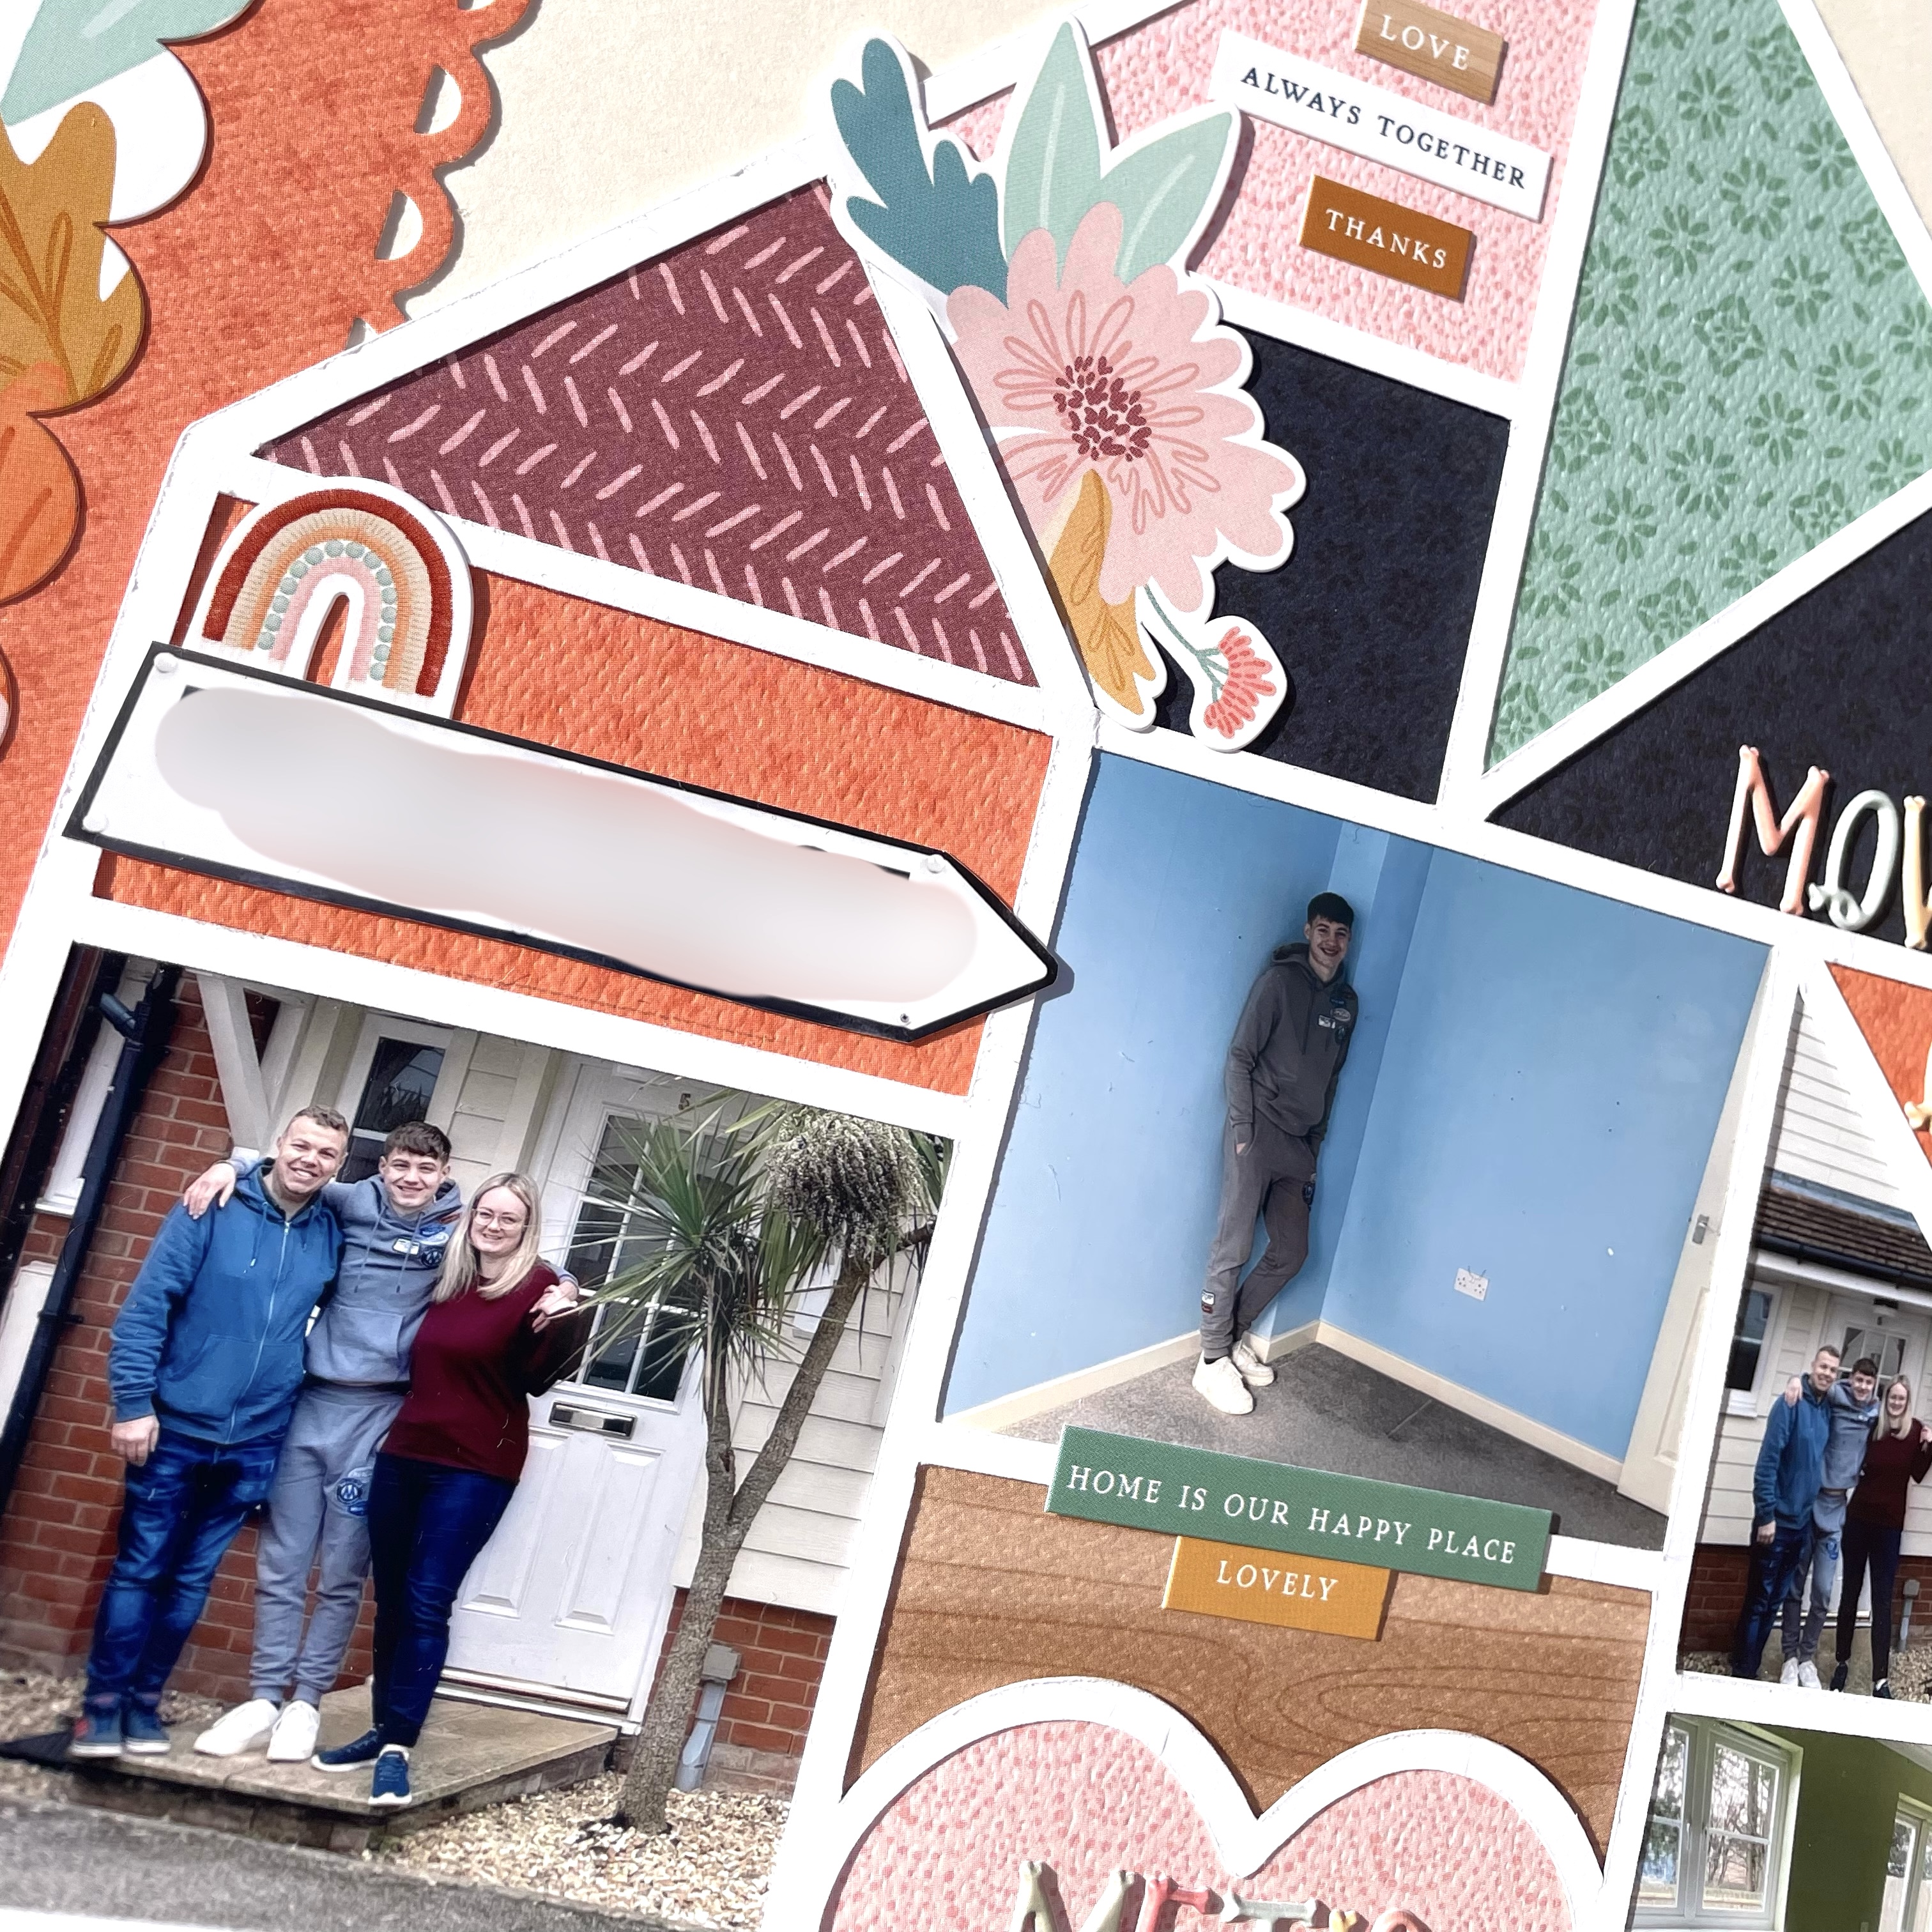
I began by cutting out a house cutfile by Paige Evans. I knew that I wanted to back each of the sections with photos and some of the patterned papers from the collection. So I worked out which pictures fit in where first before filing the rest with the patterned papers. 


I mounted my finished cutfile onto some bazzill cardstock which I had added some patterned papers to the left hand side as well as a boarder sticker. 


I used several stickers from the Element Stickers to embellish my page. These were tucked in and around my cutfile house. 
I added a title and subtitles with some mini alpha stickers by Cocoa Vanilla Studios.


Thanks so much for looking! 
See you next month when I’ll be working with Noteworthy by Simple Stories

Anna
X

Monday, 5 February 2024

Carta Bella ~ At Home 🏠 #1

Hi all, it’s Anna with you today. I’m sharing a piece of home decor today using the At Home collection by Carta Bella. 
You can find the collection in the shop here


I used an 8x8 box photo frame, keeping the cardboard insert. I then backed the centre with ‘wonderfully beautiful’ and added a strip of ‘Good Morning Moths’ at the top and bottom using a boarder punch


I set my Silhouette Cameo to work to cut out a house and the word ‘home’. I cut the house shape twice, first with  the reverse side of ‘3x4 journaling cards’ and a second time with the reverse of ‘Beautiful Chaos Flowers’.
I used 3D foam pads to adhere the house to the centre of the frame and then glued the outer shape down around it, adding in the window inserts and the word ‘welcome’ from the chipboard


I fussy cut some florals from ‘Beautiful Chaos Flowers’ and ‘Wonderfully Beautiful’ and then adhered them to the top left and bottom right side of the house. I added some enamel dots to the centres too. 
You can find enamel dots here


I then chose a few pieces of chipboard from the ‘Chipboard Phrases’ to use to add some extra detail to the frame. 


I will place this frame on a shelf in our new home and add on the address. 


Thank you so much for looking, I hope this inspires you to do something different with your scrapbooking supplies. 
See you later in the month for another project using this collection. 

Anna 
X