Wednesday, 22 October 2025
Bella Blvd ~ Documented #2 🌈
Monday, 1 July 2024
American Crafts ~ Rainbow Avenue 🌈
Monday, 19 June 2023
Cocoa Vanilla Studio ~ Happy Days #2 🌈
Friday, 9 June 2023
Smile - Pretty Little Studio - Sunkissed Collection
Hello, it’s Rebecca with you today sharing my first for June. This month I am very fortunate to be working with the new Sunkissed collection from Pretty Little Studio. It’s a fun and colourful collection - perfect for Spring and/or Summer projects with nods to rainy days and sunny pool days! You can find the collection in the shop here.
The first thing I noticed about this collection is just how big it is!! There is so much included and we are super lucky that Papermaze stock most of it!
I was immediately drawn to the ‘Sunburst’ patterned paper. I’m a sucker for a starburst patterned paper, and an even bigger sucker for a rainbow coloured starburst paper! However, I decided I wanted to something a little different with this paper. Usually with a starburst paper I’d slice it up and arrange the ‘shards’ around a photo - usually coming out, diagonally through a photo. Today however I decided not to use all the colours - and just focus on a few. So I opted for the blues and greens, with a hint of yellow and pink!
I arranged the segments horizontally across the page, alternating them so that the thicker ends weren’t all on the same side.
Each segment has some black detailing to it, so I matted my photo with some black cardstock which I think really helps it to pop against all the colours. My photo was taken in May. We’d had a few days of glorious weather and then the day a friend and I took our children to a theme park, it rained non-stop!! Although we found these gorgeous rainbow wings in the park which certainly brightened our day.
I’ve used one of the Iced Tea Words Die Cuts for my title - selecting ‘Keep Smiling’ because even on the coldest, wettest of days - we were still smiling and having a fab time!
I didn’t want to embellish too heavily and cover up all the beautiful colours and detailing on the patterned paper segments, so I created a few small clusters using the In the Clouds, Shooting Stars, and Daisies die cuts.
I finished the layout with the addition of my much-loved nuvo drops. I selected colours to match the patterned papers and added some dots along the wide edges of the paper segments.
This is a really simple layout, but I love the way the colours really pop and look clean and crisp against the white background. Sometimes Simple can be more effective!
Thanks for reading. I hope you’ve enjoyed this layout. I’ll be back later in the month!
Take care
Rebecca x
@preciouspagespapercraft
Friday, 7 October 2022
Paige Evans ~ Garden Shoppe #1 🌈
Wednesday, 27 July 2022
Doodlebug Designs - My Happy Place - Colour Me Happy
Hi everyone!
Claire here today, sharing my second layout using the My Happy Place collection from Doodlebug Designs.
Last week, I was on holiday in Venice, Italy, and took a trip to Burano - Its full of bright coloured houses - each one painted a different colour. It's so vibrant and reminded me immediately of the cute coloured houses included in this collection.
I started with a piece of Premium White Cardstock and the b side of the Garden Girl paper - it's full of bold colourful stripes. I tore different length strips, laying some flat and some on foam in an alternate pattern.
Under each side, I added a strip of Homeward Bound paper to help ground the colour.
I decided to print my photos twice. It's the same picture, just once in colour and once in black and white. I double mounted them on some green Bazzill cardstock and Cozy Spot paper.
I created some small floral embellishments around the photos using flowers fussy cut from the Garden Girl paper.
I also added in some stickers from the Icon Stickers and This & That sticker sheet.
For my title, I used some small tile stickers from the Simple Stories Color Vibe Alpha Sticker Book and the word Happy from the Odds & Ends Chit Chat Pack.
At the bottom of this vertical design, I just had to use those gorgeous coloured houses from the stickers sheets - they represent the coloured houses in the photograph perfectly!
As a finishing touch, i added a few small clusters of Nuvo Drops across the design to bring in a touch more black, and that was the page complete!
I've thoroughly enjoyed this beautiful collection and hope my layouts have inspired you to create.
You can check out the full collection here.
Until next time, take care.
Claire xx
@scrappysoulmate
Monday, 25 April 2022
The Sweet Life - Vicki Boutin - Sweet Rush Collection
Hello, it's Rebecca with you today sharing my second layout using the bright and beautiful 'Sweet Rush' collection by Vicki Boutin. The full collection has finally arrived and is now in stock here.
I had an amazing photo of my little boy playing with his Grimm's Rainbow on my photo pile and I thought this collection would be perfect to scrap it. Starting with a sheet of the Simple Pleasures patterned paper, I cut a circle about 9 inches in diameter and adhered it flat to the centre of a sheet of Premium White Cardstock. I love how the colours match my photo and look almost like a rainbow.
I placed my photo, already matted onto black cardstock, to the bottom right of my circle - raised up on some craft foam for dimension. Then, using my Cutter-Bee scissors, I fussy-cut some florals from the Perfect Day patterned paper and placed them either side of the photo to create some clusters. To help balance the page, I also placed a floral cluster to the top left of the circle. This cluster is from the Icon Ephemera and I cut the white border off so that it matched the other florals.
I absolutely adore the Phrase and Icon Thickers in this collection and selected 'The Sweet Life' for my title. I placed it to the left of my title and love how it pops with the white border against the coloured background.
To build on this cluster, I also added a camera icon from the same pack, and also a large arrow from the Icon Ephemera.
I don't think a 'Sweet Rush' layout would be complete without some fussy-cut butterflies courtesy of the Soar patterned paper...so those were the next thing I added. I tried to place them tone-on-tone to match the colours in my background circle. As always, I only placed some wet glue behind the body of the butterflies and left the wings free so that I could bend them up slightly. I love how realistic this makes them look - as if they have flown down and landed on my layout!
Finally - I added a bit of drama to the page with some black! I created a ring of black Nuvo Drops around the edge of my patterned paper circle and finished off with some large black splatters.
I hope you've enjoyed this layout and it's given you some inspiration. This collection is stunning with all it's bright colours - Vicki Boutin has really outdone herself (again!).
Until next time, take care.
Rebecca x
@preciouspagespapercraft
Monday, 11 April 2022
Hello Sunshine - Vicki Boutin - Sweet Rush Collection
Hello, Rebecca with you today sharing my first layout created with the new 'Sweet Rush' collection, designed by Vicki Boutin for American Crafts. You can find the collection in the store here. At the moment, we have all the papers and some of the embellishments available, but we are still waiting eagerly for the ephemera to arrive. It won't be long now!
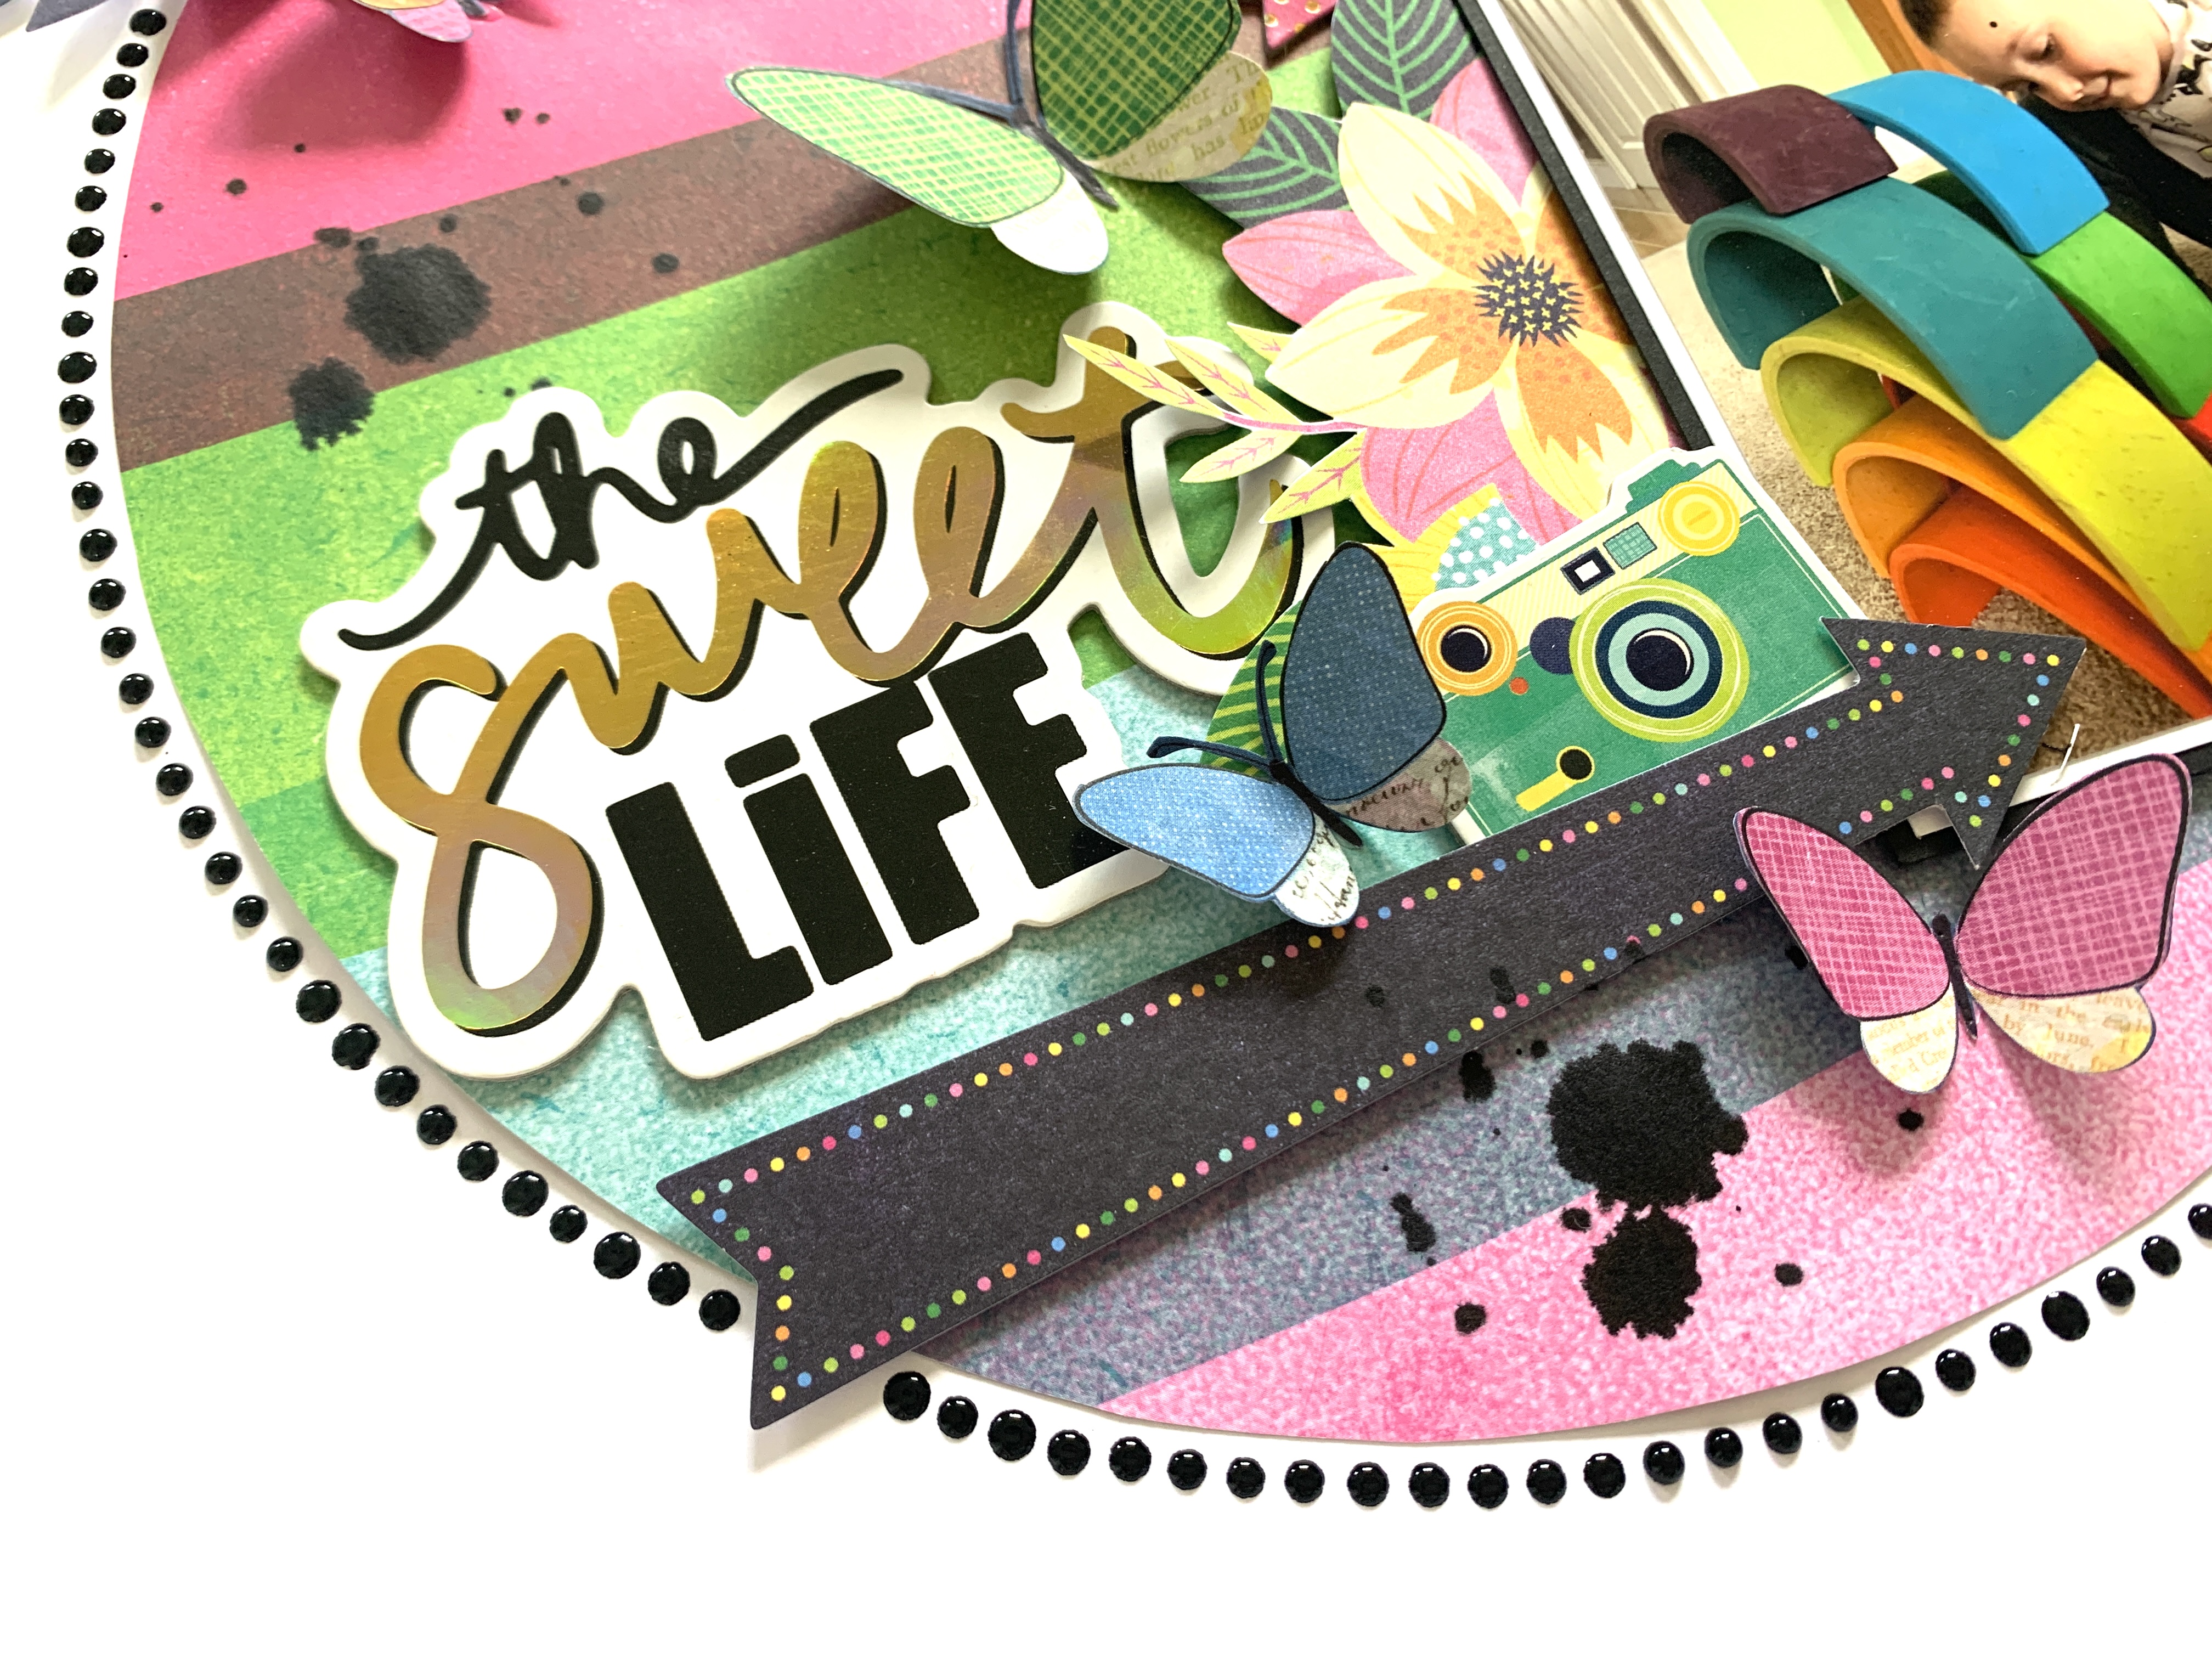
My eye was immediately drawn to the Rainbow Swirl patterned paper. Obviously. I'm a sucker for a rainbow paper and this one was no exception! I cut the rainbow in half so that I had the warmer colours on one section, and the cooler colours on another. I then cut along the adjoining lines (not all the way though!) so that I could distress all the edges in between the colours to introduce a bit of texture.
Next, I placed the blue-green section of the rainbow towards the top of my page, and then turned the warmer coloured section up the other way, so that I could place my circular photo in the centre, and it would look like the rainbow rays were coming out of my photo.
As I mentioned, we are still waiting for a lot of the ephemera and stickers etc to arrive - so I had to get my fussy-cut on and create myself some embellishments for my layout! I cut the clouds from the Silver Lining paper, the flowers from the Daisy Chain paper, and possibly my favourite - the butterflies - from the Soar paper. There is so much fussy-cutting potential in this collection which means you can really stretch it!
I placed the clouds across the rainbow, towards the top of my page, and a couple peeking out from behind my photo. I distressed the edges of them to give them a 'fluffy' appearance.
I added some of the fussy-cut flowers either side of my photo, following the diagonal design of the rainbow. I raised the petals up with foam pads to give them a more dimensional appearance.
I then added the butterflies in a tone-on-tone fashion, varying the sizes for interest. As with all my layouts, when I use butterflies I only ever adhere their bodies to my page. I love to leave the wings flapping free so that I can bend them up and make it look like the butterflies have just flown onto my layout.
For my title, I selected the phrase 'Hello Sunshine' from the Loving This Phrase Stickers. I love the way the black 'pops' against all the bright colours of my rainbow. I also added 4 of the heart-shaped Layered Stickers, again trying to stick to tone-on-tone. I bend the edges of the hearts up for dimension.
I finished off my layout with some black 'Holy Moly' acrylic perspextives from Bramble Fox, and some black ink splatters to add a bit of drama and impact.
I hope you've enjoyed this layout. I'm really impressed with how many embellishments I was able to create by fussy-cutting some of the patterned papers! If you'd like to watch this layout come together, there is a process video up on my YouTube layout, which you can find here.
I'll be back later in the month with another 'Sweet Rush' layout - and by then the ephemera will have arrived so I'll have a lot more to play with!
Take care,
Rebecca x
@preciouspagespapercraft


