Showing posts with label Accessory Stickers. Show all posts

Wednesday, 6 September 2023

Simple Stories - Trail Mix - Outdoors Adventure

Hi there,

I hope you've had a fabulous Summer Holiday, despite summer being somewhat lacking here!

Autumn has definitely arrived and I'm loving it! It's my favourite time of year, and this month i'll be documenting it using the Trail Mix collection from Simple Stories which you can find in the shop here.


I was surprised how versatile this collection is. It combines earthy tones like I've used here, with brighter more vibrant colours which I'll use in my next post. That gives it great range for scrapping brighter Spring/Summer adventures with those more woodland walks through Autumn to Winter. I do love a collection that has multiple uses!

As usual, I reached for a base of White Premium Cardstock, and some Distress Oxide Inks in shades that reflect this warmer tone palette. I used:

I applied them using a gel printing plate, creating circular prints going vertically down the page.


Once I had these in place, I knew I wanted to create a circular design, pulling all the different circular elements from the collection to build clusters around my photograph.

I first cut a range of circles in different sizes using dies, but you could use punches or an electronic cutting machine like Cricut or Silhouette to achieve the same result. I used the blue and green sheets from the Matchmaker Pack, along with the 3x4 Elements and 2x2/4x4 Elements papers.

I stuck some of these flat, but raised most on foam, gathering them in 3 main spots to create anchors for each cluster.


To each cluster I added some ephemera from the Bits & Pieces pack, alongside some stickers from the Sticker Book.

The Ephemera pack includes these cute little bugs which make a great addition to the page and really help to give it that outdoorsy feel.


Just above my photo, I wanted to create a larger cluster, so fussy cut this big compass from the 2x2/4x4 Elements Paper which really helps to balance the page as it's offset against a larger photo. This also acts a a subtitle for the layout.


Again, you'll see I couldn't help but add another one of those cute bugs to bring the page to life!

My title is made from a large statement piece from the Page Pieces pack. I love these packs. They contain 15 staple die cuts including ephemera and journaling pieces, that give you everything you need to create a beautiful layout, and they're great value for money!

I added the 'adventure' from the Bits & Pieces Ephemera Pack to help bring a bit of the darker brown to the bottom of the page.


I also added a small cluster of trees using the Bits & Pieces and Sticker Book to help incorporate the title a bit more, and bring the it into the design.


With a few extra splatters of Distress Oxide, the page was complete!

This was a very quick and easy page to put together, and I can't wait to come back later this month with another layout from this beautiful collection.

There's still plenty of this collection in stock, so check it out here.


Claire xx

@scrappysoulmate


Wednesday, 5 July 2023

Cocoa Vanilla Studio ~ Happy Days #3 💕

Hi all, it’s Anna here today! 
I’m back to share one final layout with Cocoa Vanilla Studio Happy Days - you can find the collection in the shop here


For my final layout I used the b side of paper ‘Juicy Fruit’ as my background paper. 


I chose to use one of my favourite Disney photos on this layout, which was printed 7x5, along with a magical memories’ title cutfile which was just perfect for this photo. 


The cut file was originally cut in white cardstock. So to make it stand out on my page a bit more, I added some distress ink in the shade of Speckled egg. I then backed the ‘memories’ part of the cutfile with the gorgeous rainbow effect Lollipops paper. 


I mounted my photo with coordinating cardstock from the matchmaker pack and assembled my photo and cut file together on the Juicy Fruit paper. 


I cut out florals from Lush Blooms and some elements from the cut apart paper, Feel Good.
I also chose some stickers from the Accessory Stickers, including a journaling spot and arranged them around my photo and cutfile title. 
I used some of the gold foil images from the specialty paper, including the jar, which was perfect for my photo featuring Tinkerbell. To had some extra fairy magic I dotted a random scattering of white Nuvo Drops coming from the jar. 
Finally, I added a couple of Disney finishing touches from my stash along with some Nuvo Drops around the edges of the page. 


Thanks so much for looking! 
I’ll be back with a new collection soon, see you then. 

Anna 

@acraftylifewithanna

Monday, 19 June 2023

Cocoa Vanilla Studio ~ Happy Days #2 🌈

Hi all, it’s Anna back with you today! 
I’m here to share my second layout with Cocoa Vanilla Studio’s Happy Days Collection. 
It is such a bright, happy and summery collection, I love it! 
You can find it all in the shop here


For this layout I pulled out the Rainbow Bright paper. I decided to trim the rainbow down a little so I had a bit more room on my layout. So I cut the darker pink strip of the rainbow off and trimmed the inner white section of the paper out too. 
I took inspiration from one of the journalling cards and added a sunshine behind the rainbow. To do this I just cut out a circle using yellow cardstock from the matchmaker pack and some thin strips to make the sun rays. 


I cut a couple of the sections of rainbow out and distressed the edges before sticking it back in place again. I then picked a few of the colours to add some stitching to with a matching coloured thread. I used different stitches for each one, matching the patterns on the rainbow. 


I backed my 6x4 photo onto coordinating coloured cardstock from the matchmaker pack and placed it slightly off centre. 
I then fussy cut some florals from ‘Lush Blooms’, some elements from ‘Feel Good’ and some pieces from the ‘accessory stickers’ and tucked them in opposite corners around my photo. 


I fussy cut the word ‘sunshine’ from ‘definitive’ but you can also buy the ‘chipboard stickers’ which are lovely too and mean that you can create your own title. 


To finish, I fussy cut a couple of butterflies from ‘flutterby’ and adhered them to my layout. 


Thanks so much for looking! 
I have one more layout to share with this collection before I move on to a new one.

See you for that soon! 
Anna 
X

@acraftylifewithanna

Monday, 5 June 2023

Cocoa Vanilla Studio ~ Happy Days #1 🦋

Hello! It’s Anna back with you today! 
 This month I’m working with Cocoa Vanilla Studio’s Happy Days collection. You can see it in the Papermaze online shop here

For my first layout, I focused on using the speciality paper with gold foil. A beautiful paper with lots of frames, just crying out to be fussy cut! So that’s exactly what I did! I cut out nine different frames, all of which were the square and rectangle shapes. 


I added my photos behind some of the frames and adhered some patterned paper from the collection to the remaining three frames. 


I cut out a few elements from ‘Feel Good’ including the journalling card. 
I arranged the frames and journal cards on a sheet of white bazzill cardstock, moving them around to try and find the best fit. 


I cut out the word ‘lovely’ from ‘definitive’ and some of the florals from ‘lush blooms


Once everything was starting to come together on my page I adhered everything to the background cardstock. I then started to embellish the frames with the patterned paper. I added a gold foiled butterfly from the speciality paper to one. A butterfly from ‘flutterby’ for another and some phrase stickers from the accessory stickers to another. 
I added the florals and some more accessory stickers to my layout to fill in some of the gaps around the frames. 


Thanks so much for looking! 
I’ll be back later in the month with another layout using this collection. 
See you then! 

Anna
X

@acraftylifewithanna

Monday, 7 March 2022

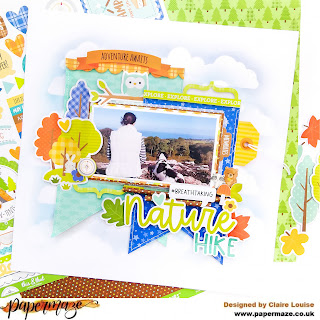
Doodlebug - Great Outdoors - Breathtaking Nature Hike

Hi everyone!

Claire here with you today, and this month, I am pushing myself right out of my comfort zone with lots of bright colours, patterns and mixed media - and I am having so much fun!!

During March, I'm using Doodlebug's Great Outdoors collection which you can find in the store here.

Doodlebug is a brand that's new to me, and I have been completely blown away.  The collections are bursting full of the most fabulous patterns with colours that immediately inspire creativity.  The ephemera packs are unlike any I have come across before - they contain so many different elements, I could make a dozen pages and still have product left over to play with!  

For my first page, I'm documenting a hike to the top of Howth Hill in Dublin. The views from the top are exquisite. 


I used two shades of Distress Oxide in Stormy Sky and Tumbled Glass, brushing them across a cloud cutfile from Cricut Design Space.

Once the background was done, I cut two rectangles (one slightly smaller than the other) from the b sides of the Happy Camper and Wild Things paper, and cut in fishtails to form two banners.

I sticthed around the edges in white thread and raised these on foam pads before adhering to my page. Along the top of each banner, I added some trim from the This and That Stickers, along with an orange 'Adventure Awaits' banner from the Odds & Ends Chit Chat pack.


Next, I positioned my photo, backing this with the Colors of Nature and Wildflowers papers along with some tissue paper for extra texture.


I built clusters around my photo using those beautiful coloured trees from the Odds & Ends friendly Forest pack - a real must have with this collection!


I also clustered some leaves from the same pack around my title and added a few of those super cute forest critters from the Campground Critters Shape Sprinkles pack - the cutest things you'll ever see!


The Breathtaking Nature Hike title is made from the Odds & Ends Chit Chat pack. It's full of statement pieces that make titles super easy. I stitched through the Nature Hike , folding them over for extra texture before sticking to my page.


This was soooo much fun to create - and I'll let you into a secret - Once I had created this one, I just kept going, making multiple pages one after the other!! The possibilities with this collection are endless and so enjoyable to play with.


You can explore everything this collection has to offer here, and I'll be back with another layout (or 2 or 3 or 4!) in a few weeks time.

See you soon!


Claire

@scrappysoulmate

Friday, 23 April 2021

Pebbles, Jen Hadfield - Reaching Out - You Make Our House A Home

Hi everyone!

Claire back again with my second layout from Jen Hadfield, Reaching Out.

As promised - I'm using the bold, bright and fun side of this awesome collection - I had an absolute blast making this page!


I started with a sheet of the blue Bazzill cardstock from the Matchmaker pack. I gutted the paper to leave an inch or so border and mounted a piece of smaller white premium cardstock on top.

Now, some of you may know, that I cannot resist a paper with houses - they are screaming to be fussy cut and I decided it would be rude not to (especially with my track record!).  One of my favourite design elements is repeating shapes, so I decided that this time I would make a house from mini houses - why not?! :)

I took a piece of the Be You paper and cut a house shape to make an aperture. I also trimmed the paper to about 10.5" and distressed the edges. Before sticking it down, I hand stitched a border around the house in blue thread for extra definition and machine stitched around the edge, lifting the edges slightly to get a bit more height.

And now the fun part - I fussy cut the houses from the Hi Neighbor paper and mounted them on foam pads. I strategically positioned them inside the house aperture until the shape was full.

Next, I double mounted my photo using the 'b' side of the Stick Together paper and the 'b' side of the Scatter Friendship paper. I left the bottom layer a little longer and ripped the end for extra interest.

Once the photo was positioned, I set to embellishing.


I used some florals and houses from the ephemera pack around the photo, with a floral rainbow along the top. I also added a floral cluster from the Accent Stickers.


For the title, I used the Navy Puffy Alphabet Thickers coupled with some chunky white thickers from my stash. To finish the page off, I used a red heart from the Hello Phrase Thickers above the chimney and added a few Prima Crystals in Golden Desert for each cluster.

The journaling was hand written on some strips of left over white cardstock and added on foam pads.

This was an incredibly fun page to make - so many great elements to play with and so different to Layout 1 I shared earlier this month.

It's been a while since I saw a collection with this many options - it's exceptional value for money and I feel like I have only just scratched the surface of what this has to offer.

Hope you've managed to enjoy some scrappy time this month.  I will see you next time.

Take care,

Claire xx

Monday, 8 February 2021

Simple Stories Simple Vintage Great Escape - Let's Wander

Hi Everyone!

It's Claire here and today I'm sharing a layout with you using the Simple Stories Simple Vintage Great Escape collection.  This is an older collection that was released last year, but somehow I completely missed it when it came out!  I am thrilled I get the opportunity to play with it now because I think it has to be one of my all time favourites!

The entire collection is just beautiful - and very fitting for all the walks we're all taking now we are back in lockdown again.

My first layout captures a walk in some woods by our house a few years back.  The walk was quite hilly so we stopped to sit on a fallen tree for a break and my dog looked as if she was smiling with a huge grin on her face - perfect scrapbooking photo!!


This collection has taken me on a real 'journey' - no pun intended! It's really made me think a lot about the type of layouts I want to make and i've found i'm really enjoying white space.  So - it won't surprise you to see I started the layout with a piece of White Premium Cardstock. I like the crisp fresh feel it gives and seems to really suit this collection.

Next, I cut a large circle from the B side of the Lets Explore paper. It has a lovely, almost mixed media effect about it, with a golden coloured pattern that fades to white, and some stamped effect ferns in a grey colour towards the top.

I positioned it centrally and poked holes all the way around it, adding hand stitching in white.

Within this collection are some fabulous chipboard frames from the Layered Frames Pack - of all different shapes, sizes and clusters - giving you lots of options for framing photos, journaling or layering. I used one of the smaller frame clusters to mount my photograph and I added a 'Stay Wild' sentiment which I cut from the 2x2 Elements Paper.


Just above and to the left of my photos, I decided to add a woodland mushroom cutfile from Peartree Cutfiles and backed it with the Nature Lover paper, using both the A and B sides - Now I must confess, i'm a little bit obsessed with this paper!  Those different varieties of mushrooms on the A side are just gorgeous and they capture the feel of the woods brilliantly!

To help them stand out, I drew an outline with black pen around the cutfile and added some Nuvo Drops in Moroccan Red to the spots - it's the perfect colour match to the red of the mushrooms.

One of the things I love most about this collection are the papers - and the unbelievable amount of fussy cutting opportunities they provide!  I've had a field day with these and they've added real interest to the page.  First, of course, I cut some extra mushrooms from the Nature Lover paper and positioned these at the bottom of my cutfile. Then, I added three clusters of fussy cut fern leaves and cut a few different mushrooms from the 100% Natural paper.


From this paper I also cut a butterfly and some insects which I absolutely love! They look so at home on the page!

To balance the layout and give an anchor to the bottom of the page, I used a sticker from the Banner Sticker sheet. These are AWESOME! I've never seen a sticker sheet like this before but they have so many different elements, all built up into a single sticker which is super easy to use. 

I lay it across the bottom of the page so that it looks like my frame is resting on it. It helps draw the eye across the page a bit more too.  I also added an 'Adventure' sticker to the top of the smaller frame for a bit of extra interest.

Finally, I added a title, following the curve of the base layer and that was it!

I hope you've enjoyed this layout - I think it is one of my favourites and i'm really looking to sharing another layout with you using this collection later this month.


Until then, take care.

Claire xx


Monday, 11 January 2021

Cocoa Vanilla Studio ~ Merry and Bright #3

Happy New Year everyone and welcome back to the Papermaze blog! It’s Anna back with you sharing my third project with Cocoa Vanilla Studio’s Merry and Bright collection. You can find the collection in the shop here
I have made a Christmas Day scrapbook layout to share with you today...


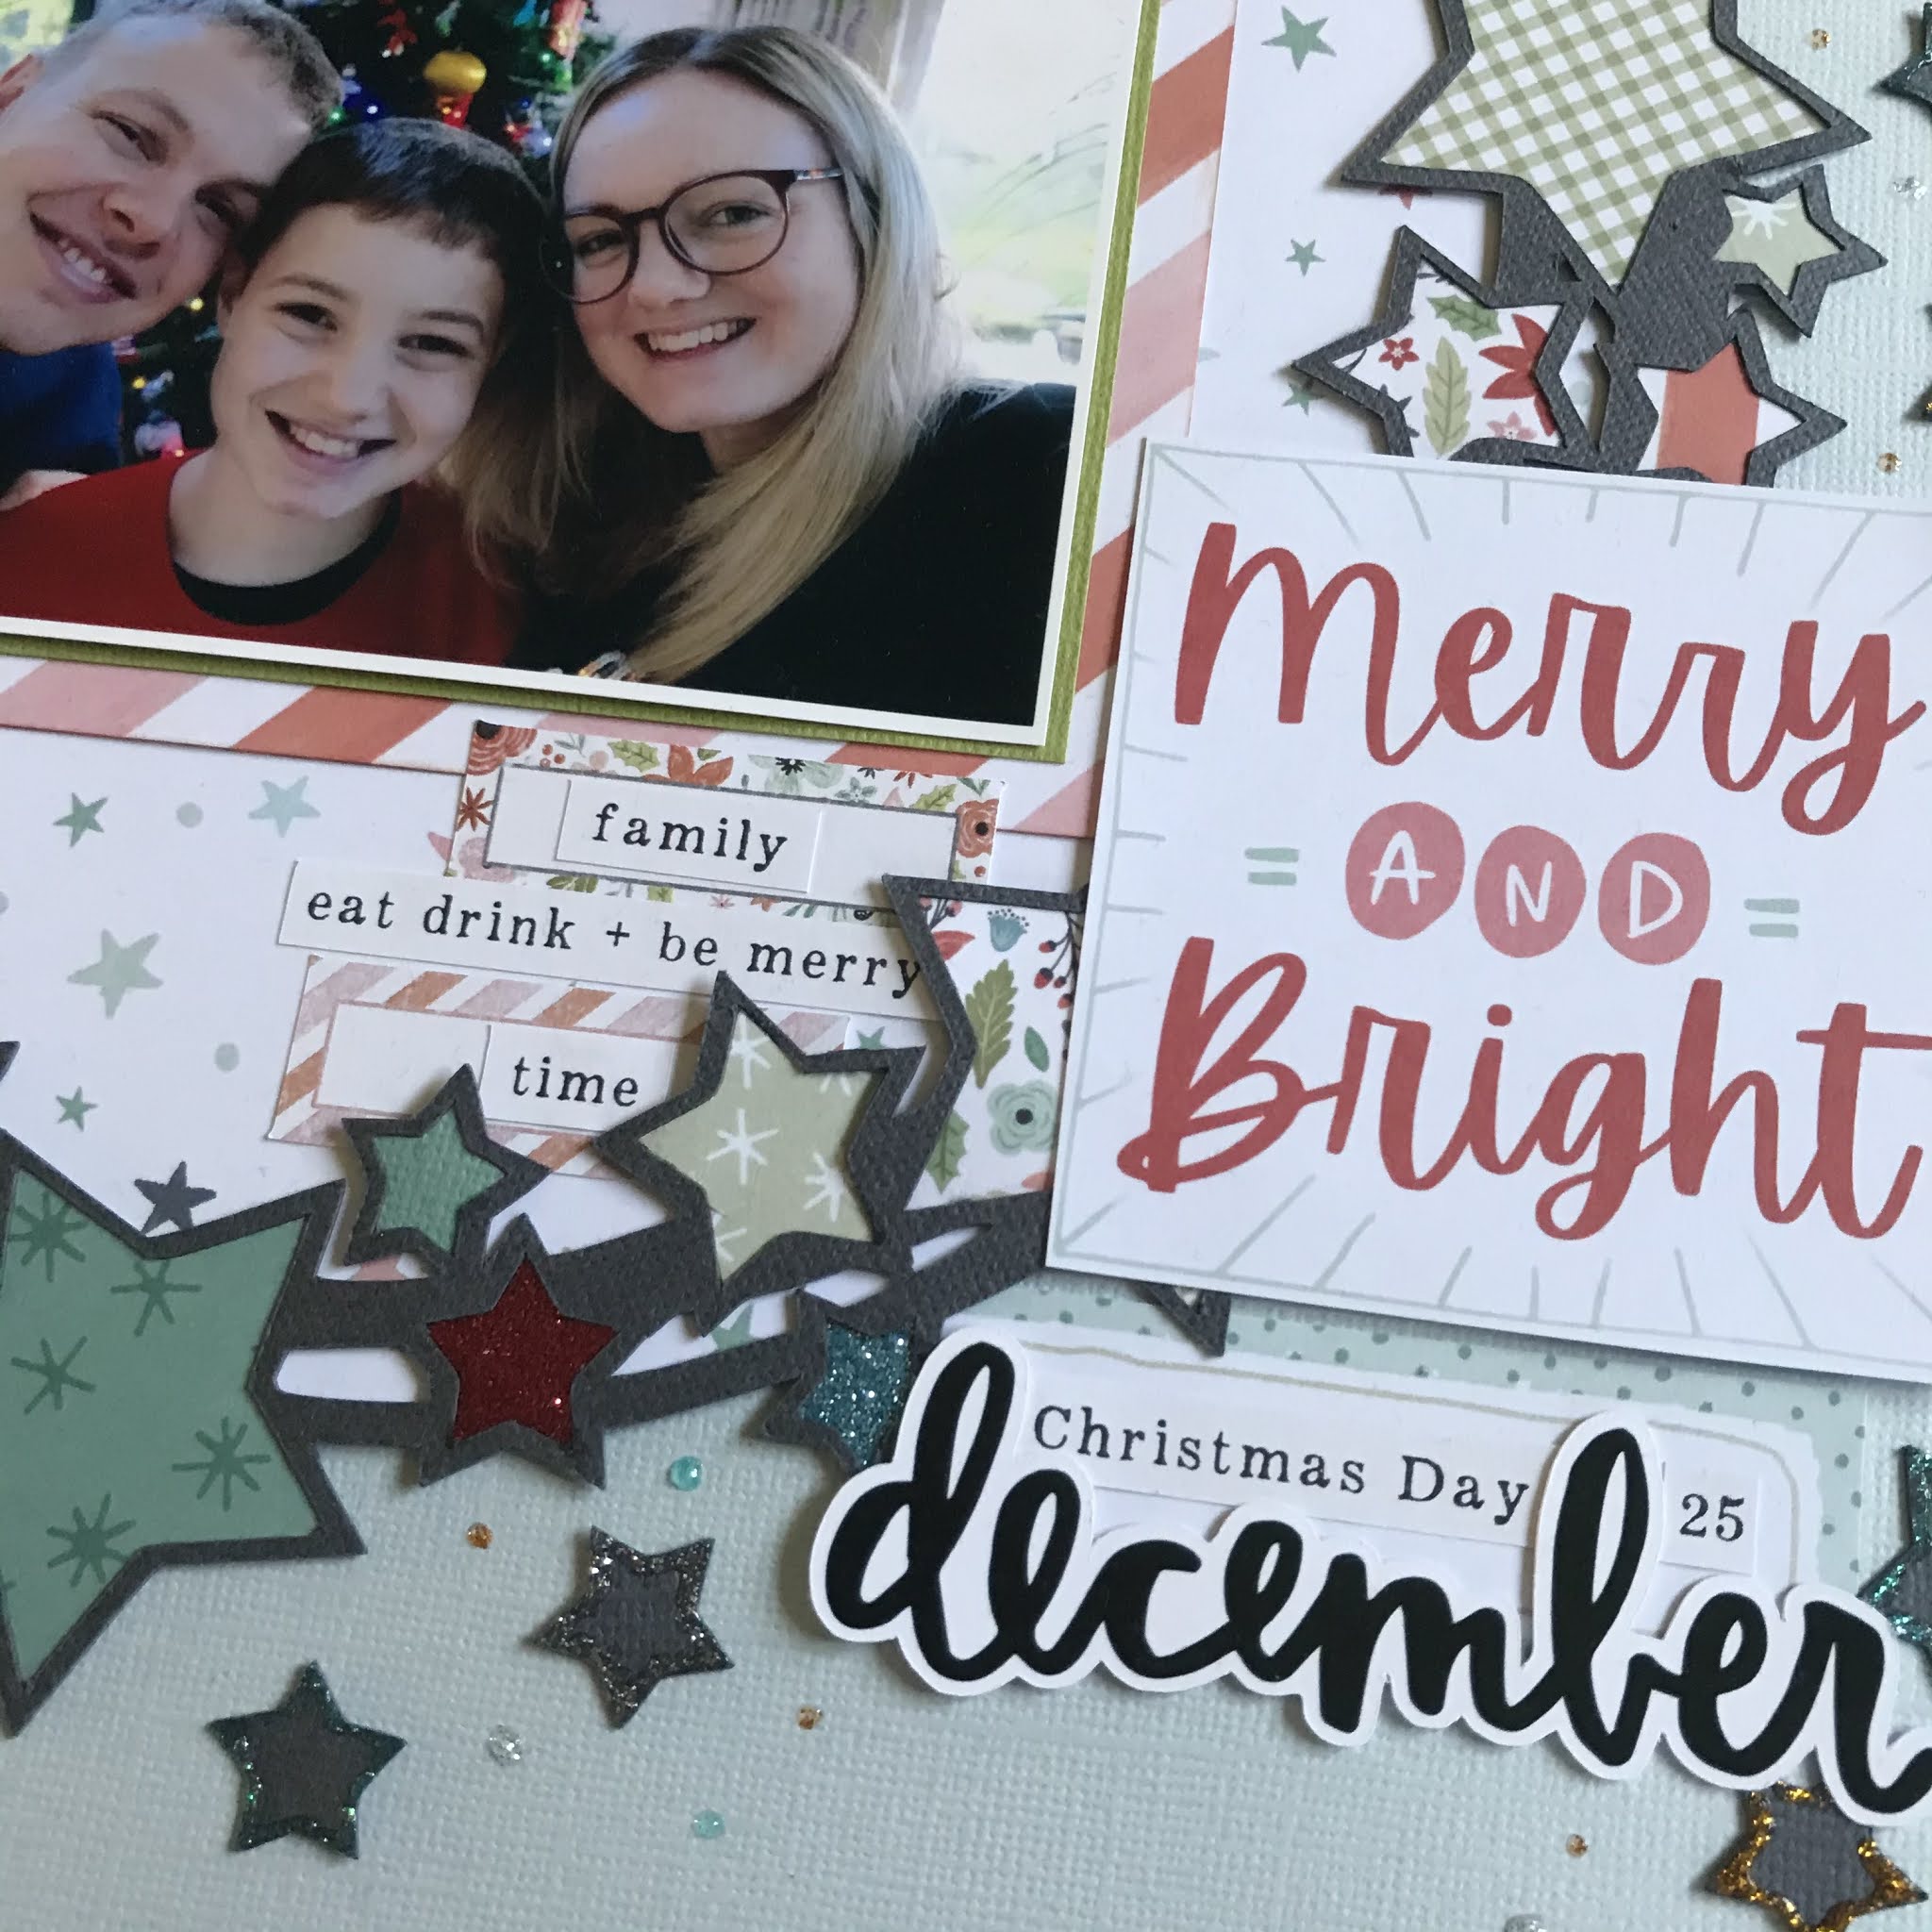
I began with a sheet of 12x12 bazzill as my base. I used this star wreath cut file from paper issues and backed all of the stars with patterned paper from the collection as well as some cardstock from the matchmaker pack and some glittered cardstock. I really wanted to incorporate the star bright patterned paper, so I cut out a large circle and adhered it behind my cut file.
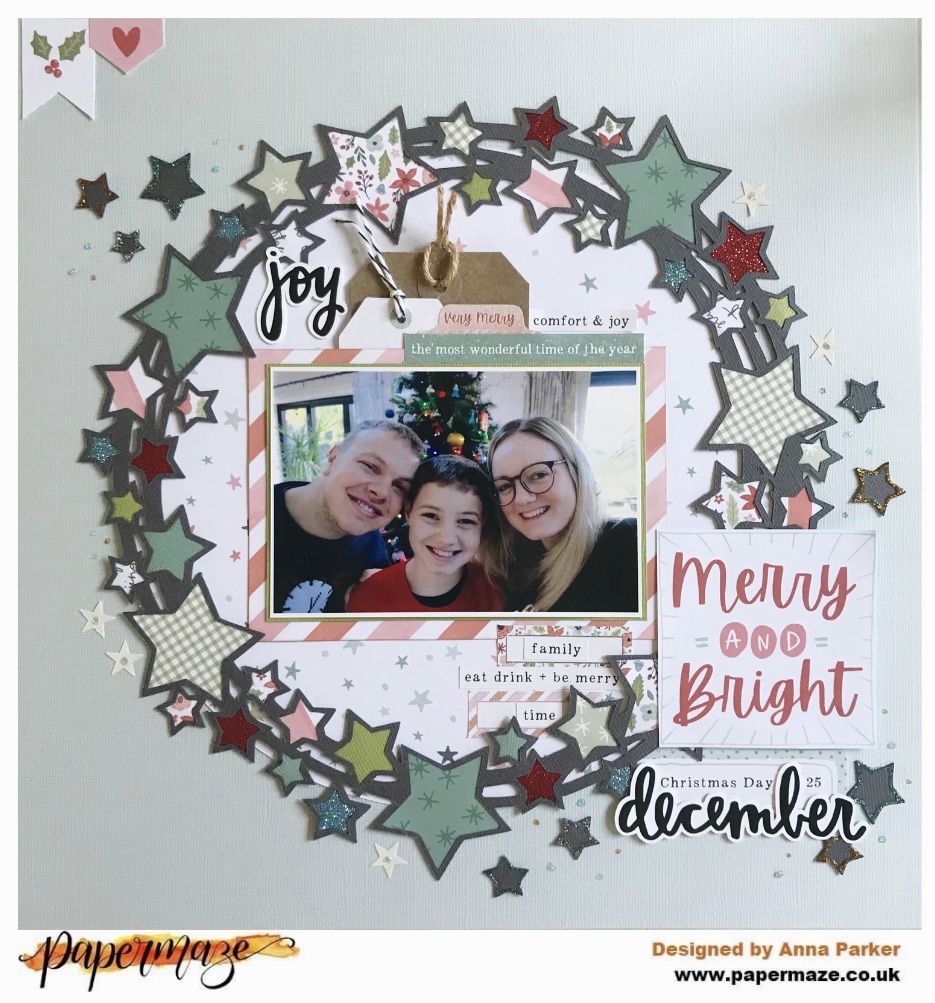

I added a few elements from the accessory stickers and cut out ‘Merry and Bright’ from the cut apart patterned paper sheet 'oh what fun'. I used the tag sticker from the accessory stickers too and layered it alongside a kraft tag along with some of the word phrases, which were also on the accessory stickers sheet.


I also used some of these sequin stars by Pink Paislee as well as some old pretty little studio Christmas words.


I used some of the leftover stars from the cut file and edged the outside with different coloured Nuvo drops and well as some random drops around the layout. 


Don't forgot to check out the January sale in the shop, you can save 20% off everything *excluding newly released products during the sale, gift vouchers and kits.* This link will take you right there - Shop!

Thanks so much for looking! See you later in the month!
Anna