Friday, 16 April 2021

My Boy - P13 Paper Products - Soulmate

Hello, it's Rebecca with you today sharing my first layout for April. I can't believe how fast this month is going! I had so much fun last month designing with P13's 'Beyond the Sea' that I've chosen another of their collections to work with this month - 'Soulmate'. I have to say, it is equally as beautiful and I'm really enjoying it so far!

I decided I was going to challenge myself to create another layout without white cardstock! I selected Paper #7 for my background and trimmed down Paper #6 to 8.5 inches squared to sit on top. I felt that I needed another layer between them to offer some separation so I added a layer of brown Bazzill cardstock from the Matchmaker Pack. I machine stitched around the edges of both squares with white thread to add some detail and texture to the page, and of course I distressed all the edges.

I added the same brown Bazzill cardstock behind my photo and added a second mat using Paper #7 (I'd gutted the background sheet before stitching so that it wasn't wasted!). I situated my photo in the top left corner of the layout and then set about fussy-cutting some of the papers!

These P13 collections are fantastic if you enjoy fussy-cutting! Several of the papers are made up of images that you can cut out to make fabulous embellishments. I took some time to cut some of the florals from Paper #2, along with the moths from Paper #3. But it's Paper #7 that I enjoyed cutting the most! It has so many individual images on it that once cut up, it's like having a whole pack of ephemera at your disposal!

Once I had everything cut up, I started to create some clusters around my photo. The florals were the largest elements so I positioned those first, and then slotted everything else in around them. I also added one of the circular stickers from Sticker Sheet #3 with some gold metallic thread behind it.

The collection also comes with a pack of Banner Die Cuts so I selected one of those to position behind my photo, with the fishtail visible underneath. I purposely selected the banner with the big black heart on it as I couldn't see me using it - it's a little bit 'too much' for me!! However, the heart has some flowers at the top of it too - so I ended up fussy-cutting it out and positioning it above my photo to bring some colour to that area of the page.

The bottom section of my layout needed something to balance out the page so I placed a tag from Cardstock Tags #2 which says 'Wild Heart' to the bottom left, with a circular tag from Cardstock Tags #1 beneath it. I also brought some of the gold into this cluster by threading some of the gold thread through the 'Wild Heart' tag.

The Soulmate collection comes with two sets of alpha stickers - I have Sheet #2 which is Navy (Sheet #1 is brown), but I didn't have any other navy tones on the page so they wouldn't have worked for this layout. It was a case of Paper #4 to the rescue! This patterned paper is full of letters so I was able to fussy cut some to spell 'My Boy' - and they work perfectly with the neutral tones of this layout.

I finished my layout off with a scattering of sequins to add a bit of sparkle (who can resist a bit of sparkle?!).

If you'd like to watch the process of this layout coming together, I have a video up on my YouTube channel, which you can find here.

I'll be back later in the month with another 'Soulmate' layout - but in the meantime, if you like the look of this layout then head over to the shop because it's selling out fast!

Take care,

Rebecca x

Wednesday, 14 April 2021

April Papermaze Kit - Part 1

Lynn here today with the first of two posts showing you what I have created with the April Papermaze Kit. This kit is full of spring & Easter, pretty pastel papers, card and embellishments, including an exclusive acrylic treat!

Here are my layouts:

As always, let's find out what is included in the kit:

Patterned papers:
Simple Stories - Bunnies + Blooms collection - Tags
Echo Park - Welcome Spring collection - Bumblebee Breeze
Echo Park - Welcome Easter - Pastel Petals
Echo Park - Welcome Baby Girl collection - Dreamer Floral
Kaisercraft - Flower Shoppe collection - Conservatory
American Crafts - Paige Evans - Go The Scenic Route - #12
Bazzill Basics - Avalanche & African Daisy

Embellishments:
Large doily, 4 buttons, 12" washi tape, 5 paper flowers, 1 resin rose, diecut polaroid frame, 3lines gold puffy phrase stickers, 3 large pearls, clear stamp, exclusive acrylic phrase.

Extra Bazzil Pack - Quartz, Wisteria, Hillary & Jetstream


Bloom Where You Are Planted - For this layout I used a professional photo of the children taken at a Twins Club event Easter 1998.


The base for this layout is the Echo Park Baby Girl 'Dreamer Floral' paper. I cut an egg shape from the Quartz Bazzill - this is roughly 23cm tall x 16cm wide. I worked around the edge with an eyelet tool making holes about 0.5cm in from the edge and 1cm apart. With some DMC Petra cotton and a 2.5cm hook - I croched around the outer edge of the egg. I only made the stitches where they would show, there are no stitches under the photo.

The large photo was mounted onto some foam and applied over the egg. I chose two tags from the Simple Stories Bunnies & Bloom 'Tags' paper. I inked the edges with Forest Moss Distress Ink. I punched a hole in the top of each tag and applied a large coloured brad through each hole. These were arranged at the top left of the layout, tucked under the egg and photo. A ribbon bow was attached to the top tag.

Using two sets of Tim Holtz Sizzix Thinlits dies (Funky Nature and Feathered Friends), I cut three eggs, two birds and a selection of leaf fronds. I used Bazzill Hillary, Quartz and African Daisy. I inked the pieces with Forest Moss, Worn Lipstick and Mustard Seed Distress Inks

The birds were attached with foam tape to add dimension. The leaves were tucked behind the large bird in the bottom right corner. The eggs with some left over fronds from the leaves were added to make a nest bottom left. The small bird was placed top left of the photo. 


With alpha letter stickers from my stash I added the word 'Easter' and the year to the tags.

Finally I applied the exclusive acrylic phrase from the kit to the top of the egg, and the resin rose to the tags.


Hello Fabulous - A photo of my daughter, delighted with a new sun hat!


For this layout I distressed the edges of the card and paper and inked them with Shaded Lilac Distress Ink. The border of this layout is the Paige Evans - Go the Scenic Route #12 paper, I gutted this to give me a pink floral border 4cm deep. Over this I placed Wisteria Bazzill trimmed to 24.5cm x 24.5cm, and gutted to make a frame 2.5cm deep. Then I topped this off with the Avalanche Bazzill trimmed to 23.5cm x 23.5cm.

Before attaching the Avalance Bazzill I used a floral stencil from my stash and worked some Shaded Lilac Distress Oxide through with a brush. I splattered this with some drops of water to create some oxidation. I also flicked over some Shimmerz Inklingz (Corny Flower Blue) and Shimmerz Spritz (Cotton Candy).

I mounted the photo onto Wisteria Bazzill. I then cut four pieces from the Kaisercraft - Flower Shoppe - Conservatory paper; these were the same size as the photo. I arranged them under where the photo will lay fanned out across the page, with two pieces window side up and two pieces floral side up. The doily from this kit was placed over these and then the matted photo on top.

I cut another tag from the 'Tags' paper, added a brad to the top and strung two lengths of twine through the hole, tying them in a bow. This was tucked under the photo on the right of the layout. My journalling was added to the tag.

I placed a flair badge bottom right to the photo, and flowers from the kit over the page. I added a title using the gold puffy word stickers. Finally I scattered some sequins and sparkly bits over the multi-media on the page. 


That's all for today, back with more soon.

Thanks for looking.
Lynn x

Monday, 12 April 2021

Echo Park ~ Magical Birthday Boy #3

Hi all, it’s Anna back with you again! Today I’m sharing my fourth and final layout with the Echo Park magical birthday boy collection. Which you can find in the shop here.
You can see my first layout and blog post here and my second and third layouts here
In my first blog post I mentioned that I hoped I’d show you a variety of layouts created with this collection. Although my other layouts have been birthday related as per the theme of the collection. My final layout isn’t birthday related, but is still Disney themed! 

I have used the balloons patterned paper (b side) from the collection as my base. I then used an Echo Park cutfile, which I cut out on vellum to create the castle. 


Around the edge of the vellum castle I created a silver Nuvo drop boarder. 
I fussy cut lots of the clouds and balloons from the tags patterned paper. I adhered some flat and others slightly raised on 3D foam pads. I then used some silver thread to hand stitch the balloons’ string. 


I’ve included a few interactive elements in these magical birthday boy pages and I’ve done it again on this layout! There was some journaling that I wanted to include which is important to the page. So I made the photo into a flap, which opens to reveal two sides of journaling. I used two Project Life journaling cards for this. My reason behind this was because I really didn’t want to go overboard with this layout, I really wanted the castle to be clear to see. If I’d of added too much more to the page or lots of journaling, it would have been a shame to loose the look of the castle. So interactive elements are also a great space saver. 


I added a phrase fussy cut from the birthday fun patterned paper to the top right hand corner along with a couple of the banner stickers from the element stickers and some acrylic embellishments.  


Thanks so much for looking, have a great week! 
I’ll be back soon with a new collection. 
Anna 
X


Saturday, 10 April 2021

Pebbles, Jen Hadfield - Reaching Out - Let's Celebrate

Hi everyone,

Claire here and this month I am coming to you with the Pebbles, Jen Hadfield, Reaching Out collection which you can find in the shop here.

As soon as I saw American Crafts preview this collection I knew I had to have it. I bought it immediately and am having loads of fun creating with this one. It is a collection of two halves and incredibly versatile. 

There's a very bright, fun and playful side and then there's a more muted soft and pretty side.

For this layout, I have decided to focus on the softer, more muted tones of the collection.


I've had this photo printed for a while but never got around to scrapping it. It was taken in August 2019 on a night out to celebrate mine and Mr Claire's 9th anniversary.

I started with a piece of white Bazzill Cardstock from the Matchmaker pack. For my anchor, I used a piece of the Here for You paper (b side), and tore across the bottom for a more rustic look.

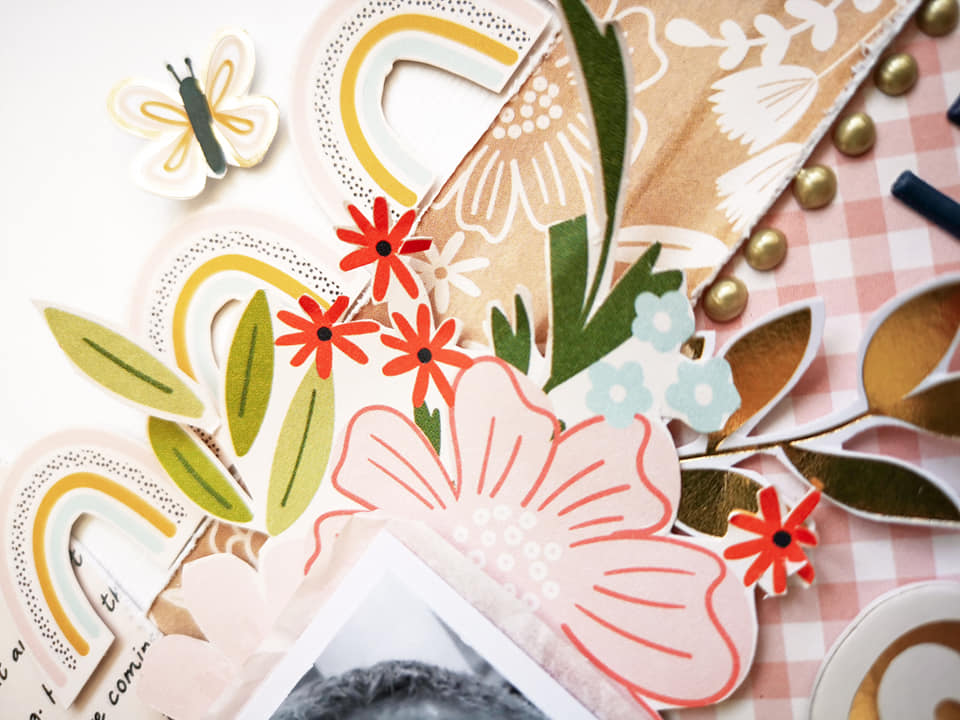
On top of that, I cut a strip of the Over the Rainbow paper. This has got to be one of my favourite sheets of paper in the collection - It has that beautiful white floral design on the 'b' side and those stunning muted rainbows on the 'a' side. I distressed the edges and laid it along the top of the pink gingham paper and added a row of gold nuvo drops underneath.
 
Once it was in place, I fussy cut a strip of rainbows and placed them along the top, raised up on foam pads.

Next, I cut a wide strip of the b side of the Reaching Out paper and tore across the bottom for a rough edge. I added a few rows of machine stitching through the centre and distressed the edges.


I left the threads loose at the end for a bit of extra texture. I layered my photo on some white cardstock and added a layer of tissue paper before placing it on top of the papers.


I set about fussy cutting, using those beautiful florals from the Blossoms for You paper to create some large floral clusters in the top right and bottom left of the photo.

Once these were in place, I started to embellish the layout. From the ephemera pack, I used a smaller floral cluster under the bottom right of my photo and a beautiful butterfly along the top of the rainbows. I also added some gold foiled leaves to the larger floral clusters.

For my title, I used the big 'Celebrate' phrase Hello Phrase Thickers and added the rest of the title using the Navy Puffy Alphabet Thickers.


And that was the page done! I hope you like it.

I will be back in a few weeks time with my next layout, which will feature the bolder, brighter side of this collection and will show you just how versatile it is.

If you like what you have seen, please do head over to the shop and check it out as this collection is proving very popular and is flying off the shelves.

See you soon.

Claire xx

Friday, 9 April 2021

Cocoa Vanilla Studio Sunkissed

Hello. Karen C here again. Today I have a layout to share with you using the new Sunkissed collection from Cocoa Vanilla Studio. If you like bright sunny collections, this is right up your street! The collection celebrates all things Summer and is full of bright juicy colours and is perfect for documenting past and future summer memories. 

My layout today is of my daughter on the beach and uses all the zesty colours in the collection.


Inspiration for my layout came from a sketch on Lets Get Sketchy although I didn't stick too closely to the sketch.


I started with a sheet of the Feeling Fine paper which after trimming a quarter of an inch from each edge I mounted on a 12 x 12 sheet of white Bazzill cardstock and then using a black gel pen drew round the edge. 


I used a hexagonal die to cut several hexagons from papers from the collection as well as from some of the pockets cards, doodled round the edges of these and stuck them on the layout to the left of where my photo was to be placed.

My photo was double matted on white and black cardstock and then placed on the layout with 3D foam underneath.


From the Fun in the Sun cut apart sheet I cut a strip of rainbow stripey paper and placed this next to the photo.  I attached a strip of white cardstock next to this that I punched with a border punch and on top I attached a thin strip of the B side of the Feeling Fine paper. To add some texture I added some cross stitches to the paper strip using white embroidery thread.


One of the pocket cards was added to the layout with 3D foam underneath.


The Growing Wild paper is perfect for fussy cutting and I cut some of the florals from the paper to use as embellishments.


The word Sunkissed was cut from the packaging containing the pocket cards and was placed on top of the fussy cut flowers. 


In the top left corner of the layout I created a cluster with some of the die cut ephemera pieces

To complete the layout I used some tiny letter stickers from my stash to add the date and place and dotted some gold sequins around the layout.

I hope I have inspired you to pull out your sunny summer photos and document those memories, or perhaps have a go at using a sketch, The Sunkissed collection is available in the shop now.

Take Care,

Karen x x 

Wednesday, 7 April 2021

A Big Hello! From Meghan

Hello Papermazers, Meghan here!

I'm so excited to be sharing my first ever blog as the newest member of the Papermaze Design Team! I thought I'd start with introducing myself and show some of my favourite scrapbook pages, to hopefully give a flavour of what I'm all about. 

I live in Wiltshire with my husband, 4 year old son, 1 year old daughter and our 10 old cat Pepsi. Before scrapbooking, I dabbled in arts and crafts occasionally but nothing really stuck - then in 2016 when my eldest was born, I decided to create a scrapbook for him. 

At first, I remember looking through Pinterest for inspiration and I was just so overwhelmed by it all. I felt so lost until I came across Facebook groups and I started interacting with the scrapbooking community. From there, I began to learn more about the terms and techniques I had seen on Pinterest but didn't know how to attempt, began to relax and experiment more and as a result, I think my scrapbook style has (quite recently!) come together! 

I really enjoy scrapbooking and I do it most days - I just love the beautiful products that are available (shopping is definitely as big a hobby for me as the actual scrapbooking!), how supportive the scrapbooking community is, seeing all the wonderful creations other scrappers make and of course taking the time to unwind with some paper and glue. It amazes me how 'social' scrapbooking can be, even though it can also be a solitary hobby! 

To show you more about my scrapping style and give you an idea of my upcoming Papermaze projects, I have picked a few of my favourite layouts: 

First I'd like to share this layout I created using Paige Taylor Evans Bloom Street. I started by making the two pinwheels, then I arranged them on my page with my photo, fussy cut the florals and arranged them by colour before using mixed media splatters to coordinate with the fussy cut colours and sticking it all down. This is one of my favourites because of the riot of colour and that fussy cutting was great fun! 


Next up I have this layout, created with Cocoa Vanilla Studios Daydream collection and a cutfile by Peartree Cutfiles. I love a soft, simple layout every now and again and I think this is a good example of that. 


Third layout of mine is this one, using Simple Stories Cozy Days collection and some gorgeous autumnal paper leaves. This page is up there as a favourite because of the texture given by the leaves, the wonderful autumn colours and the effect made by folding back the paper - this is a technique I sometimes do when I can't decide which side of the paper to use!


Finally the last layout I'm going to share with you is a recent one I completed last week, using Paige Taylor Evans Wonder collection and one of her free cutfiles. I started this page with the idea of creating a long multicolour wavy title and the rest went from there! I like how organic the shapes feel on this page and again the beautiful colours. 


Thank you so much for popping in and reading my post - I hope you enjoyed it and I will be back soon to share my layouts using the beautiful Keeping it Real collection! 

In the meantime remember to drop by and check out the other Design Team members projects and take care of yourself! 

Meghan x


Monday, 5 April 2021

Turning Boring Envelopes into Happy Mail & Journal Pockets


Hello. Lisa with you today.
I hope you had a lovely Easter weekend.

I have a fun DIY to share with you today.
You can choose to use it as a fun pocket for your journals or for happy mail.
All you need is an envelope and some scrap paper.


Here I'm using a C6 envelope.
I do have a process video here if you fancy seeing how both the happy mail and the journal pockets come together.  

 All you do is cover the envelope in your scraps.


I like to lay my envelope down and draw around it. I cut just inside my lines so I have a border.


I then do the inside too. I love using contrasting papers like this.

Here are links to the papers I have used.


These are my happy mail envelopes which are smaller.


But you can also stick them in your journal to add flip pages.

I've stuck mine in with thick washi here. I've added a small piece of card in the corner which holds my photos in place. 


The photo card pulls out (the piece on the left) and I've journaled on the back and also journaled here on the reverse of the envelope (which sits under the photo card).


When the envelope is flip over you can see how I've made another photo card, this time to be placed inside the envelope. I've added 2 strips of paper to the envelope too for more photos.


 This little pockets holds so many photos and so much journaling.
It's so handy.

I really hope you enjoy this and also give this ago.

Hope you enjoy the video too.

Lisa x