Monday, 31 March 2025

The Cutest Collection


 Good Morning,

Time to get crafty together.

Today I'm playing with the 49 & Market - Toddler Time collection here.


It was this paper here that drew me in.

Isn't it cute?!

And I love the colours.


I ended up creating this page here.


I wanted to create a page to document our son's birthday.

I love this paper with these huge tags which I cut up and created this flip. I used a scalloped punch to create that fun edge.


Aren't these tags cute?!


The flip then opens to reveal this sweet wording that I cut from the same paper that the tags were on.

Flips work so well for hidden photos and journaling.


And I added a little ribbon scrunched up and stapled for some added texture.


I also used some of the matching ephemera to create this little envelope pocket.

 The little pull out card has photos on the back.

I'm so pleased with this new page and my journal is almost finished now.

Happy Scrapping!!
Lisa xx


Friday, 28 March 2025

Simple Stories ~ Tea Garden #2 🌸

Hi, it’s Anna back with you today. I’m sharing my second layout using Simple Stories Tea Garden which you can find in the shop here

For this layout I created a frame using the b side of ‘Enjoy Life’ 


I began with a white bazzill base and then trimmed ‘enjoy life’, creating a frame which was about 2 inches wide. I adhered the frame to the centre of the cardstock. 


I double mounted my 6x4 photo onto coordinating cardstock from the bazzill matchmaker pack and placed it off centre in the frame. 


I cut in half the remaining floral bits and pieces and tucked them under the edges of the frame. 


I then added a title using the cardstock sticker ‘all smiles’ as well as a few of the sentiment stickers. 
I added a sub title using doodlebug alphabet soup stickers.
I added a few more floral bits and cut out a journaling box from ‘journal elements’. 


Thanks so much for looking! See you next month. 

Anna 
x

@acraftylifewithanna

Thursday, 27 March 2025

March Crop

 It's been a while since our last crop, but finally the March one is here!  This month's kit uses some beautiful papers from the Simple Stories Life In Bloom collection...


As always there will be plenty of homemade cakes, punches and dies for you to use, tea and coffee and a discount in the shop on anything you buy!  We're at Otley Village Hall from 10am until 4pm, just drop me an email if you'd like to come along!

Monday, 24 March 2025

Big Moments - Simple Stories - Simple Vintage Flower Shoppe Collection

Hi everyone,

It’s Rebecca here, and today I’m excited to share my second layout of the month using the gorgeous Simple Vintage Flower Shoppe collection from Simple Stories. With the first signs of Spring finally upon us, it feels like the perfect time to showcase this beautiful collection. You can find it in the shop here.


For this layout, I was drawn to the Polaroid frames from the ‘Captured’ patterned paper. I decided to fussy cut a few in a variety of colours and arranged them in a vertical design, slightly overlapping, on a sheet of Premium White Cardstock. To extend the design horizontally, I added the scalloped border sticker from the Cardstock Stickers and a similar one from the Ephemera pack, positioning them across the Polaroid frames.


The space in the centre of the frames was the perfect spot for my photo, so I mounted it using a patterned paper from the 6x8 Paper Pad. To add extra detail, I tucked a few elements from the Ephemera pack behind the photo for more texture and dimension.

As someone who absolutely loves viewfinders, I was thrilled to find a few on the papers in this collection. I fussy cut one from the corner of the ‘Treasure’ paper and placed it to the left of my photo, which helped add visual interest to that side of the layout. Since I planned to position my title on the right, the viewfinder was the perfect touch to balance the overall design.


For the title, I chose an element from the Bits & Pieces pack. After raising it up with foam pads for dimension, I placed it beneath my photo.


To further enhance the page, I added a few clusters of florals from the
Floral Bits & Pieces and fussy cut some butterflies from the ‘Dreamer’ patterned paper. Fussy cutting is such a fantastic way to stretch a collection and create additional embellishments!


Thank you so much for stopping by! I hope you’ve enjoyed seeing my layouts this month. I have a couple more to share, so be sure to keep an eye out for those! This collection is selling quickly, so don’t miss your chance to grab it in the shop before it's gone!

Take care,


Rebecca xx
@preciouspagespapercraft

Friday, 21 March 2025

49 & Market - Birdsong - Together

Hi everyone,

Claire on the blog today and I'm sharing another layout with the Birdsong collection from 49 & Market.


I wanted to create a vertical, floral design with lots of fresh spring colours, so on top of my Premium White Cardstock, I cut a strip of the Blue Solids 1 paper, texture side up to create a kind of hessian vibe.


On top of this I created layer after layer to bring colour and depth to the design.  I adhered the printed Washi Tape Sheet to some of the yellow solids paper and curled the edges. Then I selected multiple elements from the Ephemera Bits and Laser Cut Elements before housing my photo on top.


Once these layers were in place, I chose two florals from the Essential Rub On Transfer Sheet and positioned thee on either side on the paper strips.


To add more interest, I layered some florals from the Wildflower Laser Cuts , adhering these in between the layering pieces.

I also added a few extra bits from the Laser Cut Elements to give an extra pop of colour.

Finally, for my title, I again reached for the Laser Cut Elements choosing the bold blue Together Forever sentiment and the smaller favourite moment stitched label. I love the stitched effect 49 & Market use in their collections. It adds so much detail.


I hope you've enjoyed this layout and it has inspired you to get creative.

Claire x
@scrappysoulmate

Wednesday, 19 March 2025

Mintay Paper Blossom Serenity - Flowers For Mummy

Hello, Karen here, back with another scrapbook layout for you. Spring is definitely in the air, and the shop is packed with amazing new collections. I've been having so much fun with Mintay Papers' Blossom Serenity collection. Mintay describe it as 'A celebration of Spring's beauty and charm! A joyful collection filled with soft sunlight, juicy shades of pink, and blooming flowers, capturing the essence of a warm and inviting garden atmosphere. Perfect for creating projects that bring a touch of serenity, hope, and happiness, Blossom Serenity invites to craft with the magic of springtime.' Basically, it's all the best parts of spring in paper form!

My layout today is very simple to recreate and whilst I cut into whole sheets of paper it could easily be made using scraps.


To start my layout, I took a black sheet of 12x12 cardstock and  placed a trimmed-down sheet of white cardstock on top, ensuring a thin border remained around the edges. 


Using my sewing machine I stitched a straight stitch round the edges of the white cardstock with white thread to add some texture.


Next, I used 1-inch and 2-inch square punches to cut squares from papers #1, #2, and #3. I then arranged these squares in a grid pattern at the centre of my layout trying to distribute the colours evenly. After finalising the placement, I glued the squares in place.


Then, I added my black and white photos. I printed a 2-inch square and a 4-inch square photo, both with white borders, and placed them on top of the paper squares. I used 3D foam underneath the photos to make them pop a bit.


I added die cuts from the Die Cut Pack, tucking them behind the photos.


Using small pink puffy alphabet stickers I added a title beside the larger photo and a butterfly die cut was placed next to it.


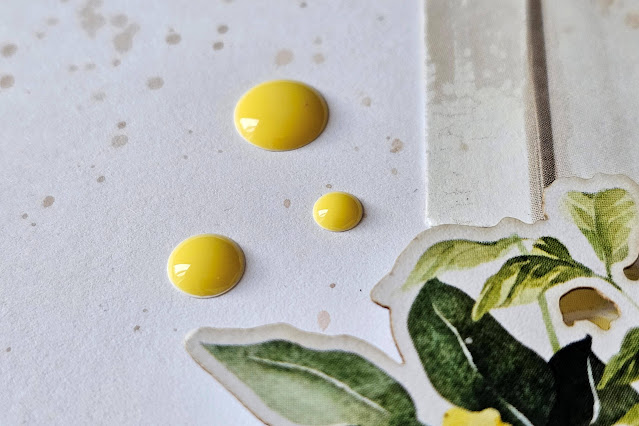
Finally I added some yellow enamel dots and some splatters of grey ink.

I hope this layout has given you some ideas, particularly for using squares as a background. Be sure to check out the Blossom Serenity collection, as well as the other lovely spring collections, in the shop and I will be back again soon with another project.

Take Care,
Karen x x

Monday, 17 March 2025

March Papermaze Kit - Part 1

Welcome to the March Papermaze Kit, and I'm kicking off with a double layout for a change. Both of these layouts can be independent of one another, they can also be arranged either way around. The March kit is full of pretty spring papers, embellishments and cardstock colours. The photos show my baby granddaughter and friends, at the sensory group they attend weekly, celebrating World Book Day, Flo's favourite book of the moment being a Peek-A-Boo Book with a strawberry character on the front, so she is dressed in strawberries!


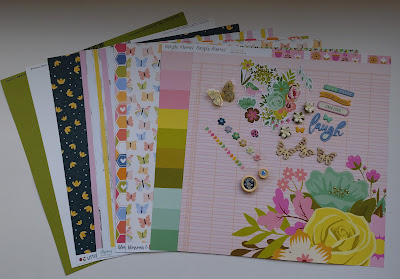
Here is the kit, showing the 6 papers, 2 sheets of cardstock and a selection of matching embellishments to try. Don't forget there is also a pack of 4 sheets of cardstock, selected by Vanessa, to go with the kit as an extra purchase (see all six sheets of cardstock in a photo below).


Patterned papers:
Simple Stories - Tea Garden collection - Lovely Day & Be Happy
Echo Park - Blossoms & Bees collection - 4 x 4 Journalling Cards & Bright Hexagons
Echo Park - Little Things Mean A Lot collection - Free Spirit Fireflies
Mintay Papers - Blossom Serenity collection - #04

The photo below shows both sides of the papers:


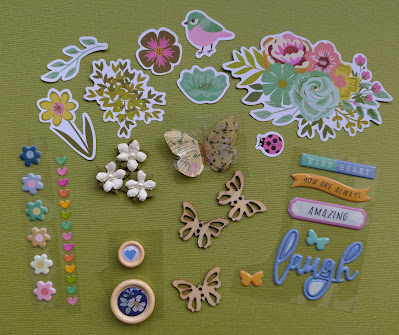
Embellishments: SS 8 Tea Garden Bits & Pieces, Rosie's Studio butterfly, 2 Rosie's Studio Button Embellishments, 3 wooden butterflies, strip of puffy flower stickers, selection of Rosie's Studio puffy sentiments, 3 mini flowers, strip of Doodlebug enamel heart sprinkles.


Bazzill Basics Cardstock:
CS White & Parakeet (included in main kit). Yukon Gold, Twilight, Petalsoft & Lagoon (in extra Bazzill Pack).


World Book Day - Left-Hand Side


For the left-hand layout, I used the 
Lagoon Bazzill as the backing. I wanted to use the photo of Flo and her friends as the main feature, so printed it A4 size. Then with the sheet of EP Bright Hexagons, I set about cutting a frame of hexagon shapes, cutting the center of the paper away in an irregular pattern. (I set aside the centre of this sheet of paper for use on the right-hand side.)

I set the frame of hexagons over the Bazzill, and arranged the photo to the left side of the page, leaving room for the details and title. I cut three tags using scrap white card and the Sizzix, Tim Holtz, Tag Collection die set. With a little of the
Yukon Gold Bazzill I cut the rings to reinforce the tag holes and threaded them with some orange ribbon from my stash. I placed the tags to the top right of the photo and added my journalling.


I made the title with several different fonts on the Cricut, and cut with various scraps of Bazzill from the kit and my stash. I placed the title to vertically to the right of the photo.


To embellish this page I used the Rosie's Studio Button Embellishments, strip of Doodlebug enamel heart sprinkles and some of the Tea Garden Bits & Pieces, keeping some back for the next page.

Peekaboo - Right-hand side

For this page I purchased an extra sheet of Lagoon Bazzill as the backing, to match the first layout. From the left-over piece Bright Hexagons paper, I cut three irregular panels of hexagons. These were placed vertically onto the Bazzill. 


On the Bright Hexagons paper many of the hexagons have several layers and a heart in the centre, I wanted to recreate this as a large shape, to use for the title. I created these shapes using my Cricut - two hexagons in Yukon Gold Bazzill, one with 9cm sides and the other with 10.5cm sides. Then I cut another hexagon from some white scrap cardstock measuring 9.45cm.  These were layered up, then I added a heart shape cut from the same white cardstock, 11.5cm across. I placed the finished shape over the three strips of paper.


I placed my four photos across the layout, leaving enough white space to add a title later.


I used the Cricut to cut the date, in more scraps of Bazzill from the kit and my own stash. I placed the date in the bottom left corner of the page. I also made the title and place this over the white heart.


I embellished the page using the same elements as for the left side (Rosie's Studio Button Embellishments, strip of Doodlebug enamel heart sprinkles and some of the Tea Garden Bits & Pieces).

That's all for today, I'll be back later with two single layouts made from the same kit.
Thanks for looking
Lynn x