Showing posts with label Punch. Show all posts

Friday, 16 February 2024

February Papermaze Kit - Part 1

Lynn here today with a lovely, romantic new Papermaze Kit for February. I have created four layouts using this kit and here are the first two.


Patterned Papers:
Mintay Papers - Happy Birthday collection - MT-HAB-05
Stamperia - Roseland collection - Flowers
Simple Stories - Simple Vintage Love Story collection - 2x2/4x4 Elements & My Heart
Simple Stories  - Fresh air collection - Fresh Start
Cocoa Vanilla Studio - Happy Days - Little Blossom
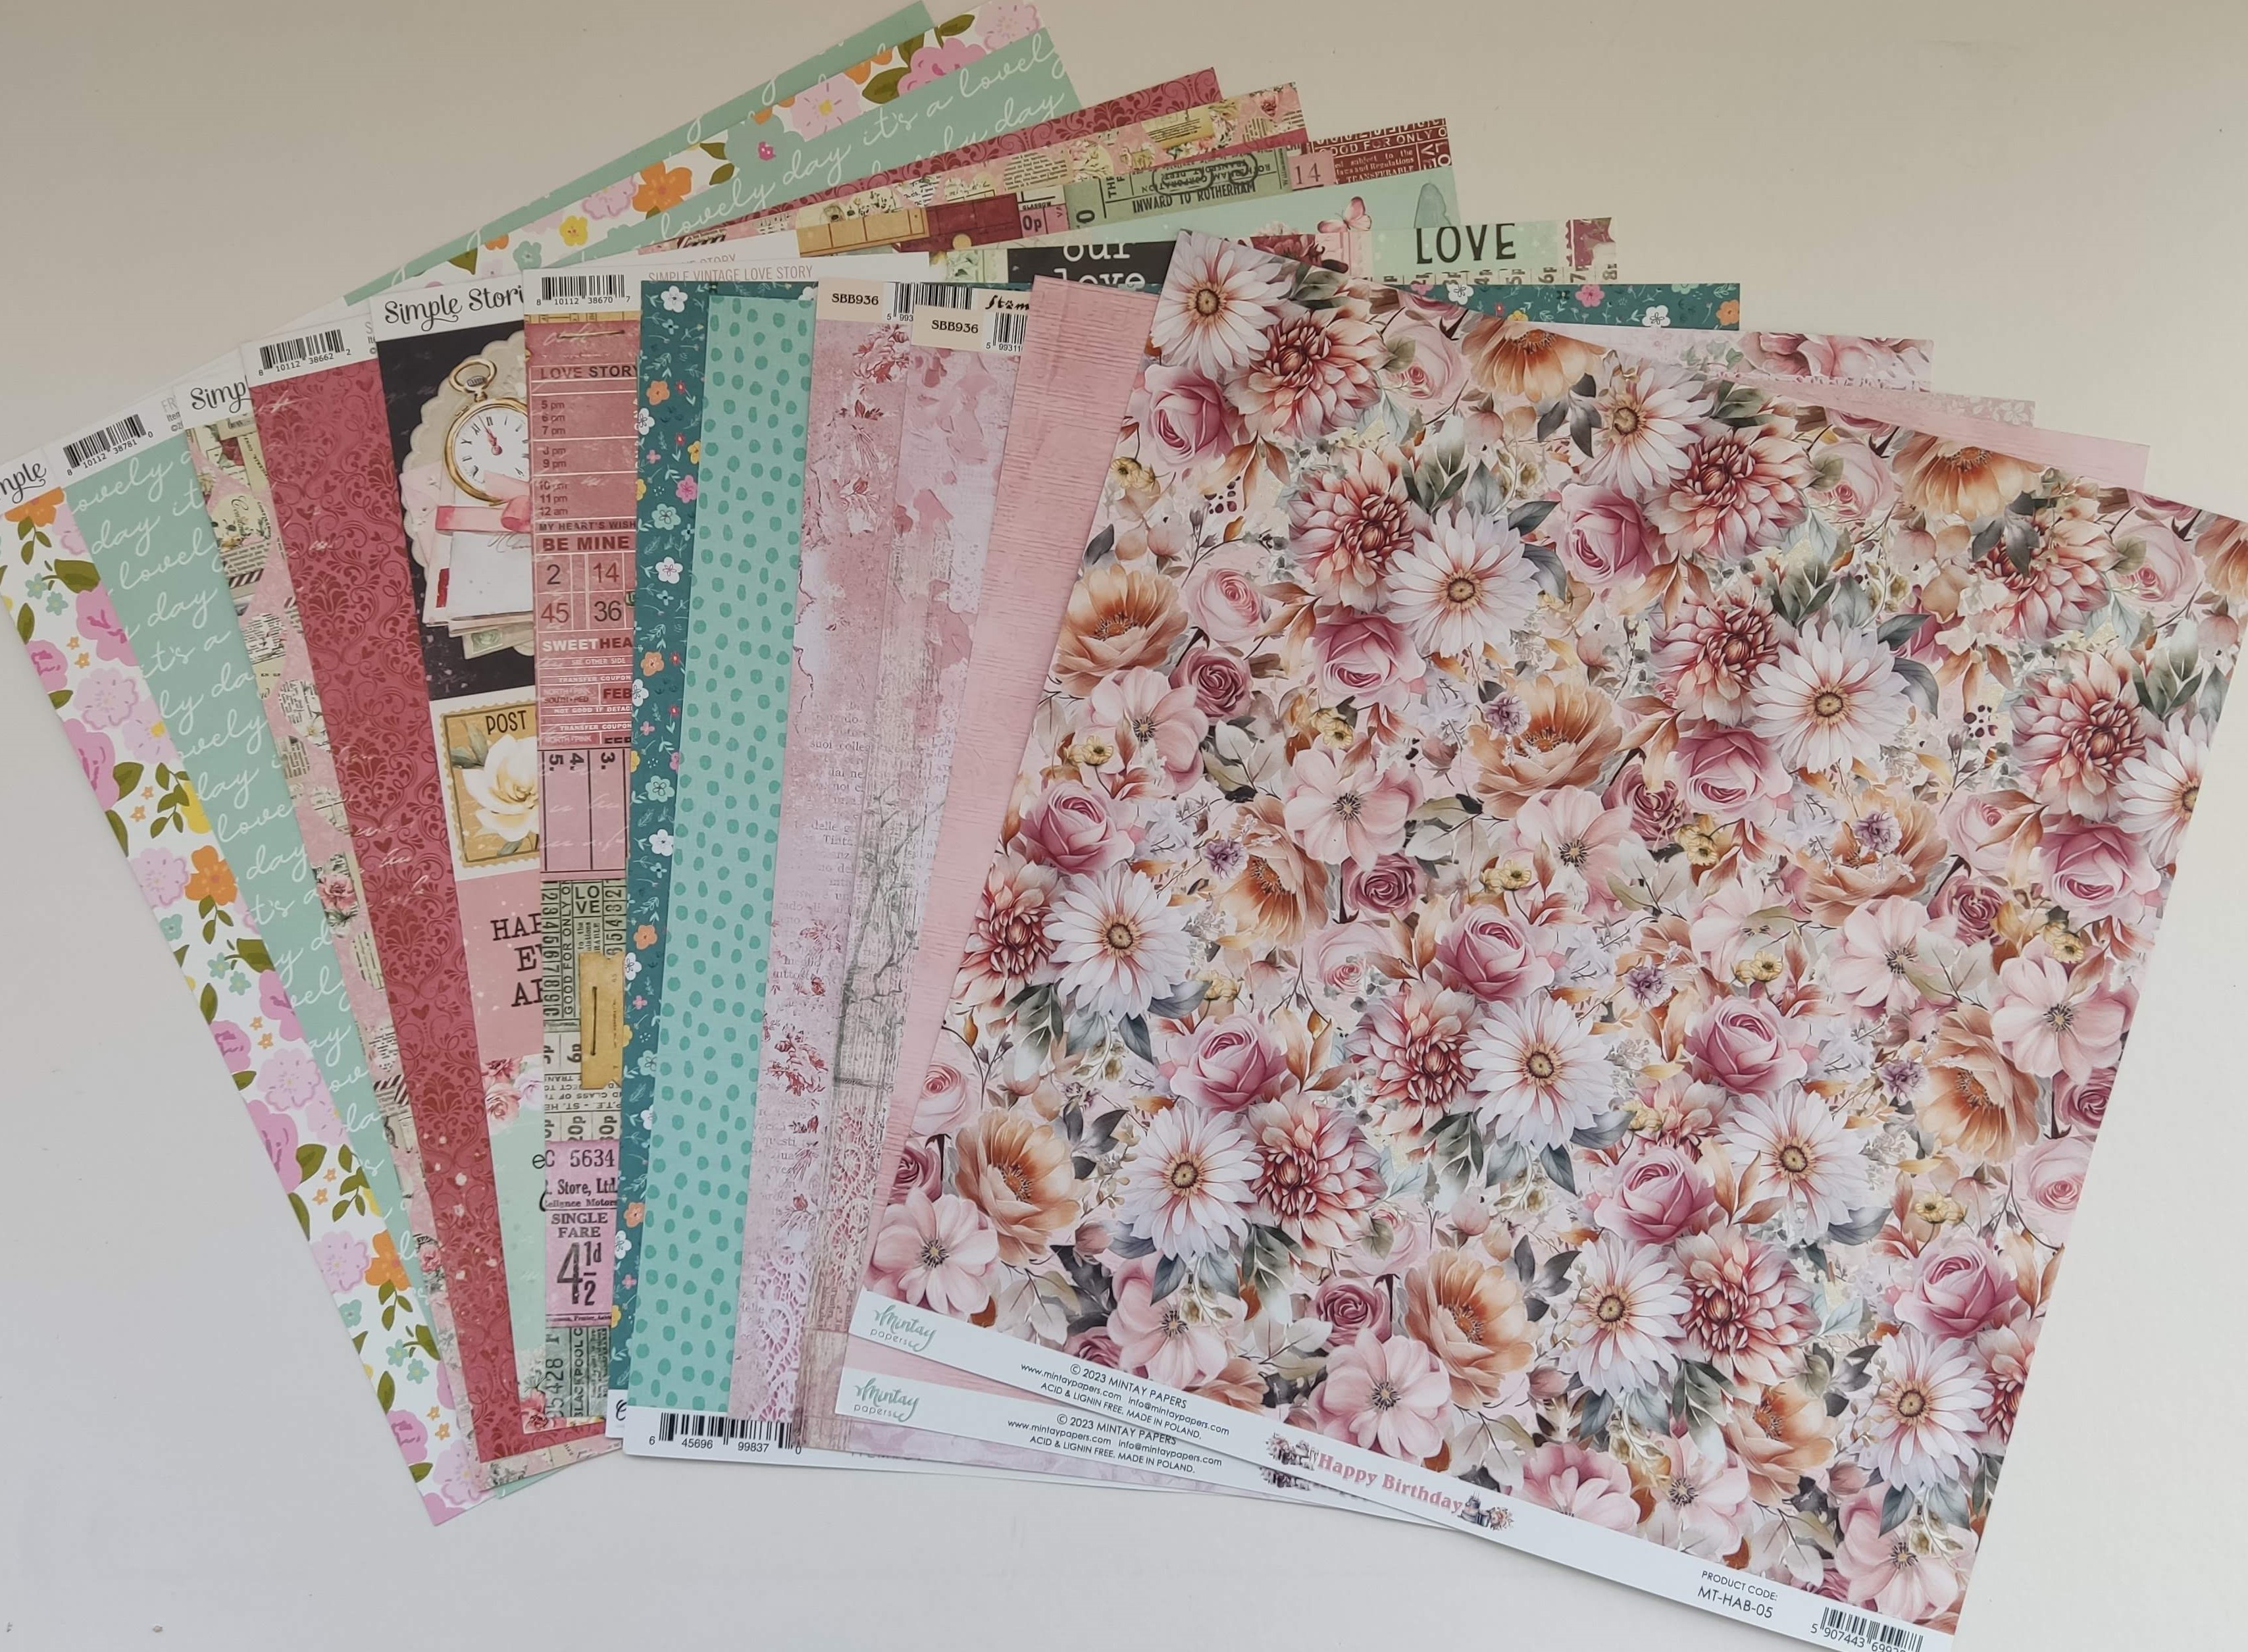

Bazzill Basics Cardstock - Cherry Splash and Walnut Cream (included in the kit). Yukon Gold, Blossom, Flintstone and Sea Glass (extra Bazzill pack).


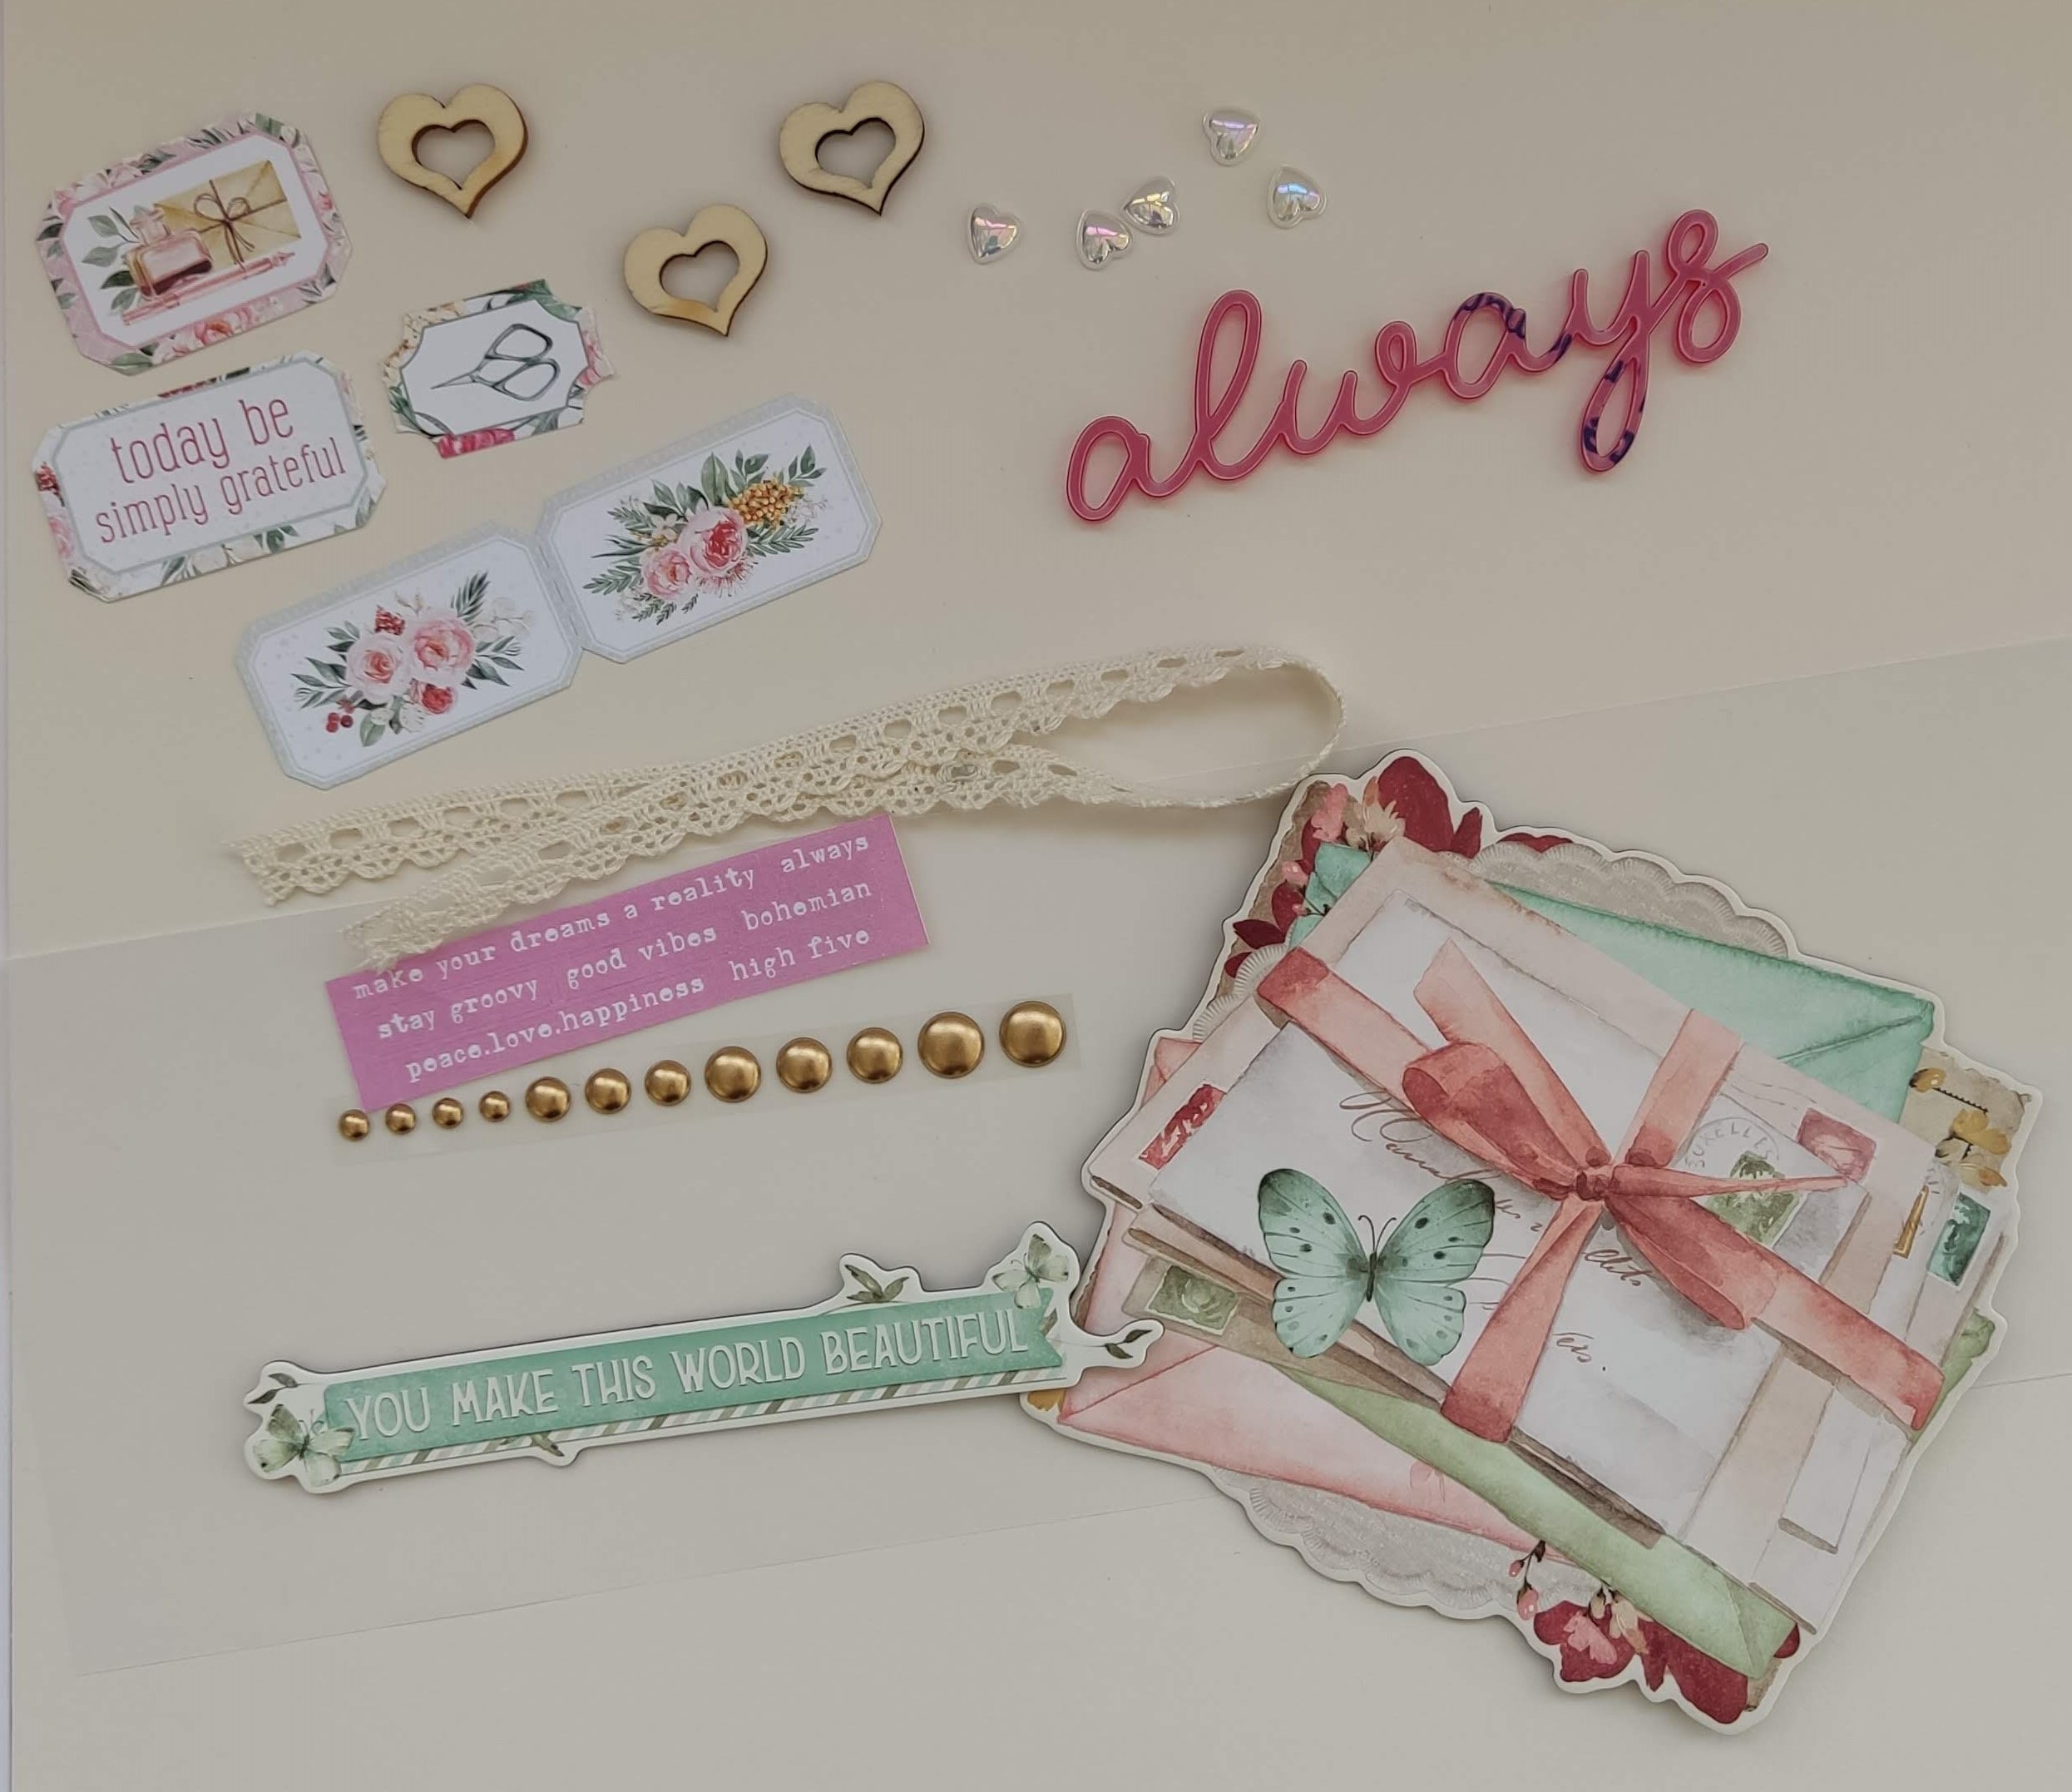
Embellishments:
3 wooden hearts, 12" lace, 5 water droplet unicorn hearts, 1 exclusive acrylic word, vellum, 2 Simple Stories Chipboard Clusters, 1 strip of Pinkfresh enamel dots, 5 P13 tickets and a selection of word stickers.

Always - one of the official photos from my daughter's wedding.


I created the mixed media background on the Walnut Cream Bazzill using Distress Oxide Inks of several shades of red and pink, watered down on the craft mat, and transferring it to the card on a scrap of acetate. Once dry I stamped the word 'love' several times with Distress Oxide Ink and some old cling foam alphabet stamps from Tim Holtz (Idea-ology Type Lower). I spritzed the letters with water to allow them to oxidise further.


Once the ink was dry, I stamped with 49 and Market - Gabi's Stitches Clear Stamp Set, and Onyx Black Versafine ink (any water-resistant ink can be used).


I cut some of the images from the '2x2/4x4 Elements' paper and layered these with the photograph on top.


The Papermaze February Kit exclusive acrylic word was added as my title to the bottom right of the layout.


From the kit I added more embellishments, including the water droplet hearts, wooden hearts and mini word stickers.

Other gems and water droplets were added from my stash.


Happy Together - This layout shows my nephew and his girlfriend on holiday.


I started this layout (inspired by Paige Evans), by cutting a large heart from the centre of the Sea Glass Bazzill. With the cut out, I drew around the heart, onto a scrap sheet of 12" x 12". I used this to work out where the scalloped shapes would need to go, and a few lines helped me to line the up too.


I cut scalloped strips approx. 0.75 deep, in strips about 11" wide from the 'Little Blossom' and 'Fresh Start' papers. I used both sides of the papers to vary the patterns and stuck them sown in overlapping rows. Once the heart shape was covered I added the heart cut-out sheet over the top of the scrap sheet and glued this on place.


I glued the photo in place, then added a fine lace trim around the heart edge.


I made three clusters of flowers, using paper flowers from my stash to match the paper colours. I layered up the flowers, then used brads to hold the layers together and attach the flowers to the page.


From the Bazzill heart shape left over, I punched some leaf fronds, and inked them with some Distress Ink to make them a slightly darker shade. I added these to the flower clusters.


I added a title using Doodlebug Designs Loopy Lou cardstock stickers in Lily White. To make the letters stand out, I drew around the edges with a black marker pen.


That's all for today. back with more soon.
Thanks for looking.
Lynn x

Friday, 1 December 2023

November Papermaze Kit - Part 2

Lynn back today, with the second pair of layouts made using the November Papermaze Kit. A lovely selection of bright colours with some black and white too.


Here are the details of what you will find in the kit.


Patterned Papers:
49 & Market - Spectrum Gardenia - Painted Foundations Color Wheel
Doodlebug Design - Hello Again - Dainty Dots
Simple Stories - The Little Things - Always Remember
Simple Stories - Simple Vintage Life In Bloom - Make Time
Simple Stories - What's Cookin' - Let's Eat
American Crafts - Shimelle Main Character Energy - After Hours
Bazzill Basics - CS White and Hillary

Reverse side of papers

Embellishments

9 frames of Tim Holtz Film strip ribbon, 3 Paige Evans die-cut leaves, heart button, 1m black twine, 1 sheet alphabet stickers, 1 strip of enamel hearts, 1 flair badge, 6 water droplets

Bazzill Basics extra pack - Blackbird, Apricot, African Violet and Petunia

Yes, You Can! Photos of the girls on the way home after their first ballet exam.

For this layout I used the CS White Bazzill from the kit and did some stencilling down the centre matching the colours of the papers. I chose Peacock Feathers, and Picked Raspberry Distress Oxide Inks through a stencil from my stash. I flicked more of these inks and some water over the area too.  


I cut two large triangles from the striped side of 'After Hours', then I cut two more slightly larger from the spotty side of  'Make Time', paper. The stripes were mounted over the dots and then applied to either side of the layout.


My photos were mounted on to white, then black cardstock scraps. and then arranged onto the layout. From scraps of the Make Time paper I cut some of the tickets and tucked these around the photos. 


My title and some arrows were taken from Vicki Boutin's The Details Thickers puffy phrase stickers pack.  More details were added with the alpha sticker pack from the kit.


Finally, I added the water droplets from the kit.


 Baby Girl - I used a photo of the very youngest member of the family.


I completed all the cutting and mounting of papers and cardstock, before working out where to do the stamping. The sizes for this will depend on the size and orientation of the photos. For this I used the Petunia Bazzill, both sides of the 'Dainty Dots' paper and the spotty side of the remains of the 'Make Time' paper. I mounted my photo onto some scrap white cardstock, and cut and arranged the mounted patterned papers across the page. Using Blackbird Bazzill as a base, and without sticking anything in place, I worked out where the stamps should go. I made light pencil marks before everything was removed from the background.


With a VersaMark ink pad and Jofy stamp set #14, I stamped the daisies onto the black, and heat embossed with white embossing powder. The paper, card and photo were then glued in place.


I punched some butterflies using a Martha Stewart 3 in 1 punch, I places a cluster of these around the flowers.


With another scrap of Make Time paper and more Petunia Bazzill, I made a half tag, punching a hole and rounding the corners. I used the heart button and the black twine from the kit to attach to the tag and mounted it to the top left of the layout.


I created some dots around the flowers and butterflies with White Gloss Nuvo Crystal Drops.


My title was created with some white foam letter stickers. With the sticker pack in the kit, I added Poppy's name and the date. Finally, I trimmed a selection of phrases from the 'Always Remember' paper, and placed them around the page.

That's all from the November kit, I'm currently preparing layouts with the December kit - I'll be back soon.
Thanks for looking.
Lynn x

Wednesday, 14 June 2023

June Papermaze Kit - Part 1

The new Papermaze kit for June is now available in the shop, and online. An amazing collection of travel and floral papers in a selection of blues and oranges. Plenty of embellishments and Bazzill cardstock. There are two sheets of card stock in the kit, and a pack of four colour matched sheets in the extra pack. Here are the first two of my four layouts made using this kit, both with a summery vibe.

Before looking at how the layouts were made, here are the details of what you will find in the kit.


Patterned Papers:
49 & Market - Vintage Artistry collection - Everywhere - Ticket Montage
49 & Market - Colour Swatch Inkwell collection - Paper 3
Heidi Swapp - Set Sail collection - Ledger Peach & Circles
Jen Hadfield - Flower Child collection - Keeping Tabs
Prima Marketing - The Plant Department collection - Fleur
Bazzill Basics Cardstock - Pigment & Typhoon

Reverse side of papers


Embellishments: 7 Rosie's Studio puffy stickers, 2 49 & market frames, 10 water droplets, 10 Crate Paper enamel dots, 2 Prima tickets, 3 Prima tags, 4 lines of Pretty Little Studio stickers, 50cm peach twine.

 Extra Bazzill Basics pack - Bazzill White, Quartz, Powder Blue & Pear

Family Reunion - This photo was taken when we met up with family rediscovered through Ancestry. We took the opportunity to share a meal when visiting Harrogate recently.


To make a base for this layout, I stared with a spare sheet of 12" x 12" paper. This meant I could use both sides of the patterned paper. All my cut papers were inked with Saltwater Taffy Distress Ink. I cut two panels 4" x 12" from the wooden plank side of the Heidi Swapp Set Sail - 'Ledger Peach' paper. I placed these either side of the base paper.

I then cut a flowery panel from Jen Hadfield's Flower Child - 'Keeping Tabs' paper, this was 5" x 12". I placed the floral panel in the centre of the page. I cut 2 pieces 1" x 12" from the ledger side of the Set Sail Paper, I used a border punch to create a pattern along the length of the strips and tucked them just under the centre paper.


My photo was mounted onto a piece of Powder Blue Bazzill. I cut two of the ledger pieces from the other side of the Flower Child paper, and all three pieces were arranged to the left side of the layout.


With two more smaller pieces from the Flower Child paper, I wrote my journalling on one and mounted it onto the other. These were placed to the right bottom area of the layout. I made a small tag with more of the same paper and added the date to my journalling with some Doodlebug Designs Alphabet Soup puffy stickers in Mint.


The title was made with more puffy alpha stickers from my stash - Pink Paislee Happy Life Thickers and Pinkfresh The Best Days.

I added a heart phrase embellishment I had left over from a previous Papermaze kit to the top right. A Peartree Flair was positioned near the journalling.


Finally, I added clusters of paper roses in four different colours, together with some leaf fronds cut using a Tim Holtz - Sizzix Thinlits Funky Floral die set. To cut the leaves I used Powder Blue and Pigment Bazzill.

 
Life is Good - Photo taken at the start of our two-week Greek Island sailing trip.


I used the beautiful 'Ticket Montage' paper as the backdrop for this layout. Then I tore a panel from 'Circles' paper 12" x approx. 5 1/2" and placed this, stripe side up, across the centre of the page. I tore two more narrow strips and with the circle side up, I placed these above and below the centre panel.

I cut two wreaths using Tim Holtz Sizzix Thinlits set - Funky Wreaths and Pigment Bazzill. I plaited three lengths of jute twine and tied the finished plait into a circle. The three circles were placed to the left of the page so they would peek out from under the photo.


The photo was placed to the left of the layout on foam to give it dimension and allow it to sit over the jute twine.


I placed four acrylic seagulls from Bramble Fox at the top of the layout. A Peartree acrylic title was placed to the right of the stripe paper to make the title.


The date was made with Doodlebug Designs Alphabet Soup puffy stickers in Lily White. I cut the words 'Set Sail' from the detail strip of the patterned paper and placed it just under my title.


My journalling was written to the bottom right of the layout, and embellished with the enamel (heart) dots from the kit. I also added a Rosie's Studio puffy sticker, to my photo (also from the kit).

That's all for today, I have two more layouts to share soon.
Thanks for looking.
Lynn x

Monday, 1 November 2021

October Papermaze Kit - Part 2

Lynn here today with two more layouts I have created using the zesty kit for October from Papermaze. The colour pallet this month is lemon, black, white and jade. Both of the layouts I'm sharing today use a cut file.


Before the instructions, here is a reminder of what is in the October kit:

Please see Part 1 for full details of the kit.

Sweet Moment - Me and my sister in the garden on our bicycles, in what we called our 'sweetie' dresses.

I started with the half sheet of white Bazzill left over from a previous layout. I stuck this vertically to the centre of a spare piece of 12" x 12" paper. With a Tim Holtz Layering Stencil #2 - Bubble and Distress Oxide Inks (Mustard Seed and Squeezed Lemonade). I also flicked some of the ink and water over the panel, with the addition of a little Black Soot Distress Oxide Ink. 


I tore two strips of '
Sweet Pollen' paper (4" x 12"), and applied one either side of the white Bazzill. I tucked a strip of black cotton lace under the edge of each paper panel.

My photo was placed in the centre of the layout with foam tape underneath to raise it up over the lace.


I used a Peartree cutfile 'Sweet Moments' and cut this from Patch Bazzill. I backed the word Moment with scraps of '
Fresh Squeezed' paper. The date is made from the Glitz alpha stickers included in the kit. I found two small tags in my stash to add some journalling. A short length of organza ribbon was attached to each tag.


The central panel was decorated with sequins, gems and tiny punched butterflies.


Hollins Hall - This layout uses a photo of my sister enjoying the garden swing at our brother's wedding.


The base for this layout is the Blackberry Swirl Bazzill. I cut the Overlapping Circles Peartree Cutfile across the whole sheet of  'Shine Bright paper. The first step was to apply the main pattern onto the Bazzill, then all the pieces were inked with Peacock Feathers Distress Ink, and shaped with a ball tool to give some dimension. I then glued each shape into place - a bit like making a jig-saw!


My photo was mounted onto
Kachina Bazzill, and placed towards the right of the layout. Before sticking the photo down I embellished the left side of the photo by tucking in the Fancy Pants flash card, and a black doily (cut into two pieces). All these pieces were then glued into place. 


I added my title with some black and white foam, glittery alpha stickers. I added five paper roses and some glittery black ribbon.


The
Dusty Attic Chipboard Adornment was treated with a coat of Gesso, and then Black Soot Distress Paint and finally some Nuvo Glitter Drops - Night Sky.

With a Martha Stewart leaf punch and some Patch Bazzill, I made leaf fronds to add to the rose cluster. Finally I popped black gems to the points were the circles overlap on the cut file background.


I have enough papers, and cardstock leftover to make at least one more layout.

Thanks for looking
Lynn x