Showing posts with label pinkfresh essential jewels. Show all posts

Monday, 1 January 2024

December Papermaze Kit - Part 3

Lynn back today with and extra post for the Papermaze Kit. There was plenty of paper and embellishments left over after my first four layouts, so here are two more layouts. This year's Christmas kit includes a mix of traditional and contemporary and designs. 


Before looking at how the layouts were made, here is what you will find in the kit.


Patterned Papers:
Vicki Boutin - Peppermint Kisses collection - Winter Magic & Christmas Jammies
Echo Park - Happy Holidays collection - Festive Lights & Under The Tree
Echo Park - Have A Jolly Christmas collection - Holly Jolly Holly
Paige Evans - Sugarplum Wishes collection - #2

Image below shows both sides of the six sheets of patterned paper.


Bazzill Basics: Peacock & Coconut Swirl (included). Aqua, Bottle Green, Bazzill Red & Blossom (Extra co-ordinated Bazzill pack)


Embellishments: 2 red doilies, selection of Puffy Rosie's Studio Phrases, 3 Rosie's Studio vellum star diecuts, 1 Woodware Postmark stamp, Pinkfresh chipboard frames, 5 Pinkfresh title ephemera pieces, 3 glittery snowflakes, pinch of Pinkfresh jewels, 2 Prima flowers.

25th December 2016 - This layout shows two photos of family lunch at my brother's home.


The base for this layout is the flip side of Winter Magic paper. I worked out the size for 24 blocks to be arranged around the outer edges of the paper and cut the remaining scraps of papers already us
ed into 1.5" x 1.5" squares. These were applied to blocks of Peacock Bazzill cut to 1.6" x 1.6". All 24 blocks were then attached to the layout.

My photos were mounted onto more of the Peacock Bazzill and arranged towards the top of the layout. I attached Basic Grey numbers from various different collections from my older stash. These were all the same font, so I cut the title on the Cricut using the Cafe Rojo font and Peacock, Red and Bottle Green Bazzill. 


The title was added to the layout and embellished with Prima flowers from the kit and two extra from my stash. With a fine line black marker pen, I drew around all the numbers and the title. 


Tinsel Trio - The children just before their second Christmas, tangles in tinsel!

From the remains of the Sugarplum Wishes paper left over from other layouts I fussy cut the remaining flowers.


I cut the bauble wreath cutfile (Paige Evans) using Moody Blue Bazzill, and backed the baubles with remaining papers and Bazzill leftover from the previous layouts. I used some silver metallic card for the top of each bauble. I raised the whole wreath with foam pads before applying to the Blossom Bazzill.


I placed two photos into the centre of the wreath. I used the flowers I fussy cut earlier to decorate two of the baubles and to arrange around the photos.


My title and the date were created with Sugarplum Wishes mini puffy alpha stickers.


I trailed some Tim Holtz Idea-ology Silver Tinsel around the wreath, and scattered the Pinkfresh Jewels over the layout.


That's all for the December kit, back with the January kit soon.
Thanks for looking.
Lynn x

Wednesday, 19 July 2023

Echo Park ~ Wizards & Company #1 🧙‍♀️

Hi all, it’s Anna back with you today. 
I’m working with Echo Park Wizards and Company for my next few blog posts…
You can find the collection in the shop here. 
I was keen to get my hands on this new collection to document some of my Harry Potter photos from our Orlando holiday last year. 


For my first layout, I have created a grid page. This style of page is definitely my go to page design - especially when I want to include lots of photographs. I had lots of pictures from the Wizarding World of Harry Potter as there’s so many little details to take note of. 

I used the 2x2 squares on the 6x4 journaling cards paper combined with my photos to create my grid. I used a large square punch to cut out my photos which were printed 3x4 and just trimmed them down slightly to measure the same size as the 2x2 squares.


I arranged my grid in the centre of white bazzill cardstock. I decided that a boarder was needed so I gutted the ‘Lets Fly Away’ paper and mounted my cardstock with the boarder. 


I added some stickers from the element stickers around my layout, mostly in clusters at the sides of the grid, but also dotted around on the grid between the photos. 


I added a few Pinkfresh Studio Jewel Essentials around my layout too. 


Thanks so much for looking! 
I’ll be back again in August with more from Wizards & Company. 

Anna 

@acraftylifewithanna

Monday, 13 March 2023

Simple Stories - Wildflower - Cherish Today

Hi everyone,

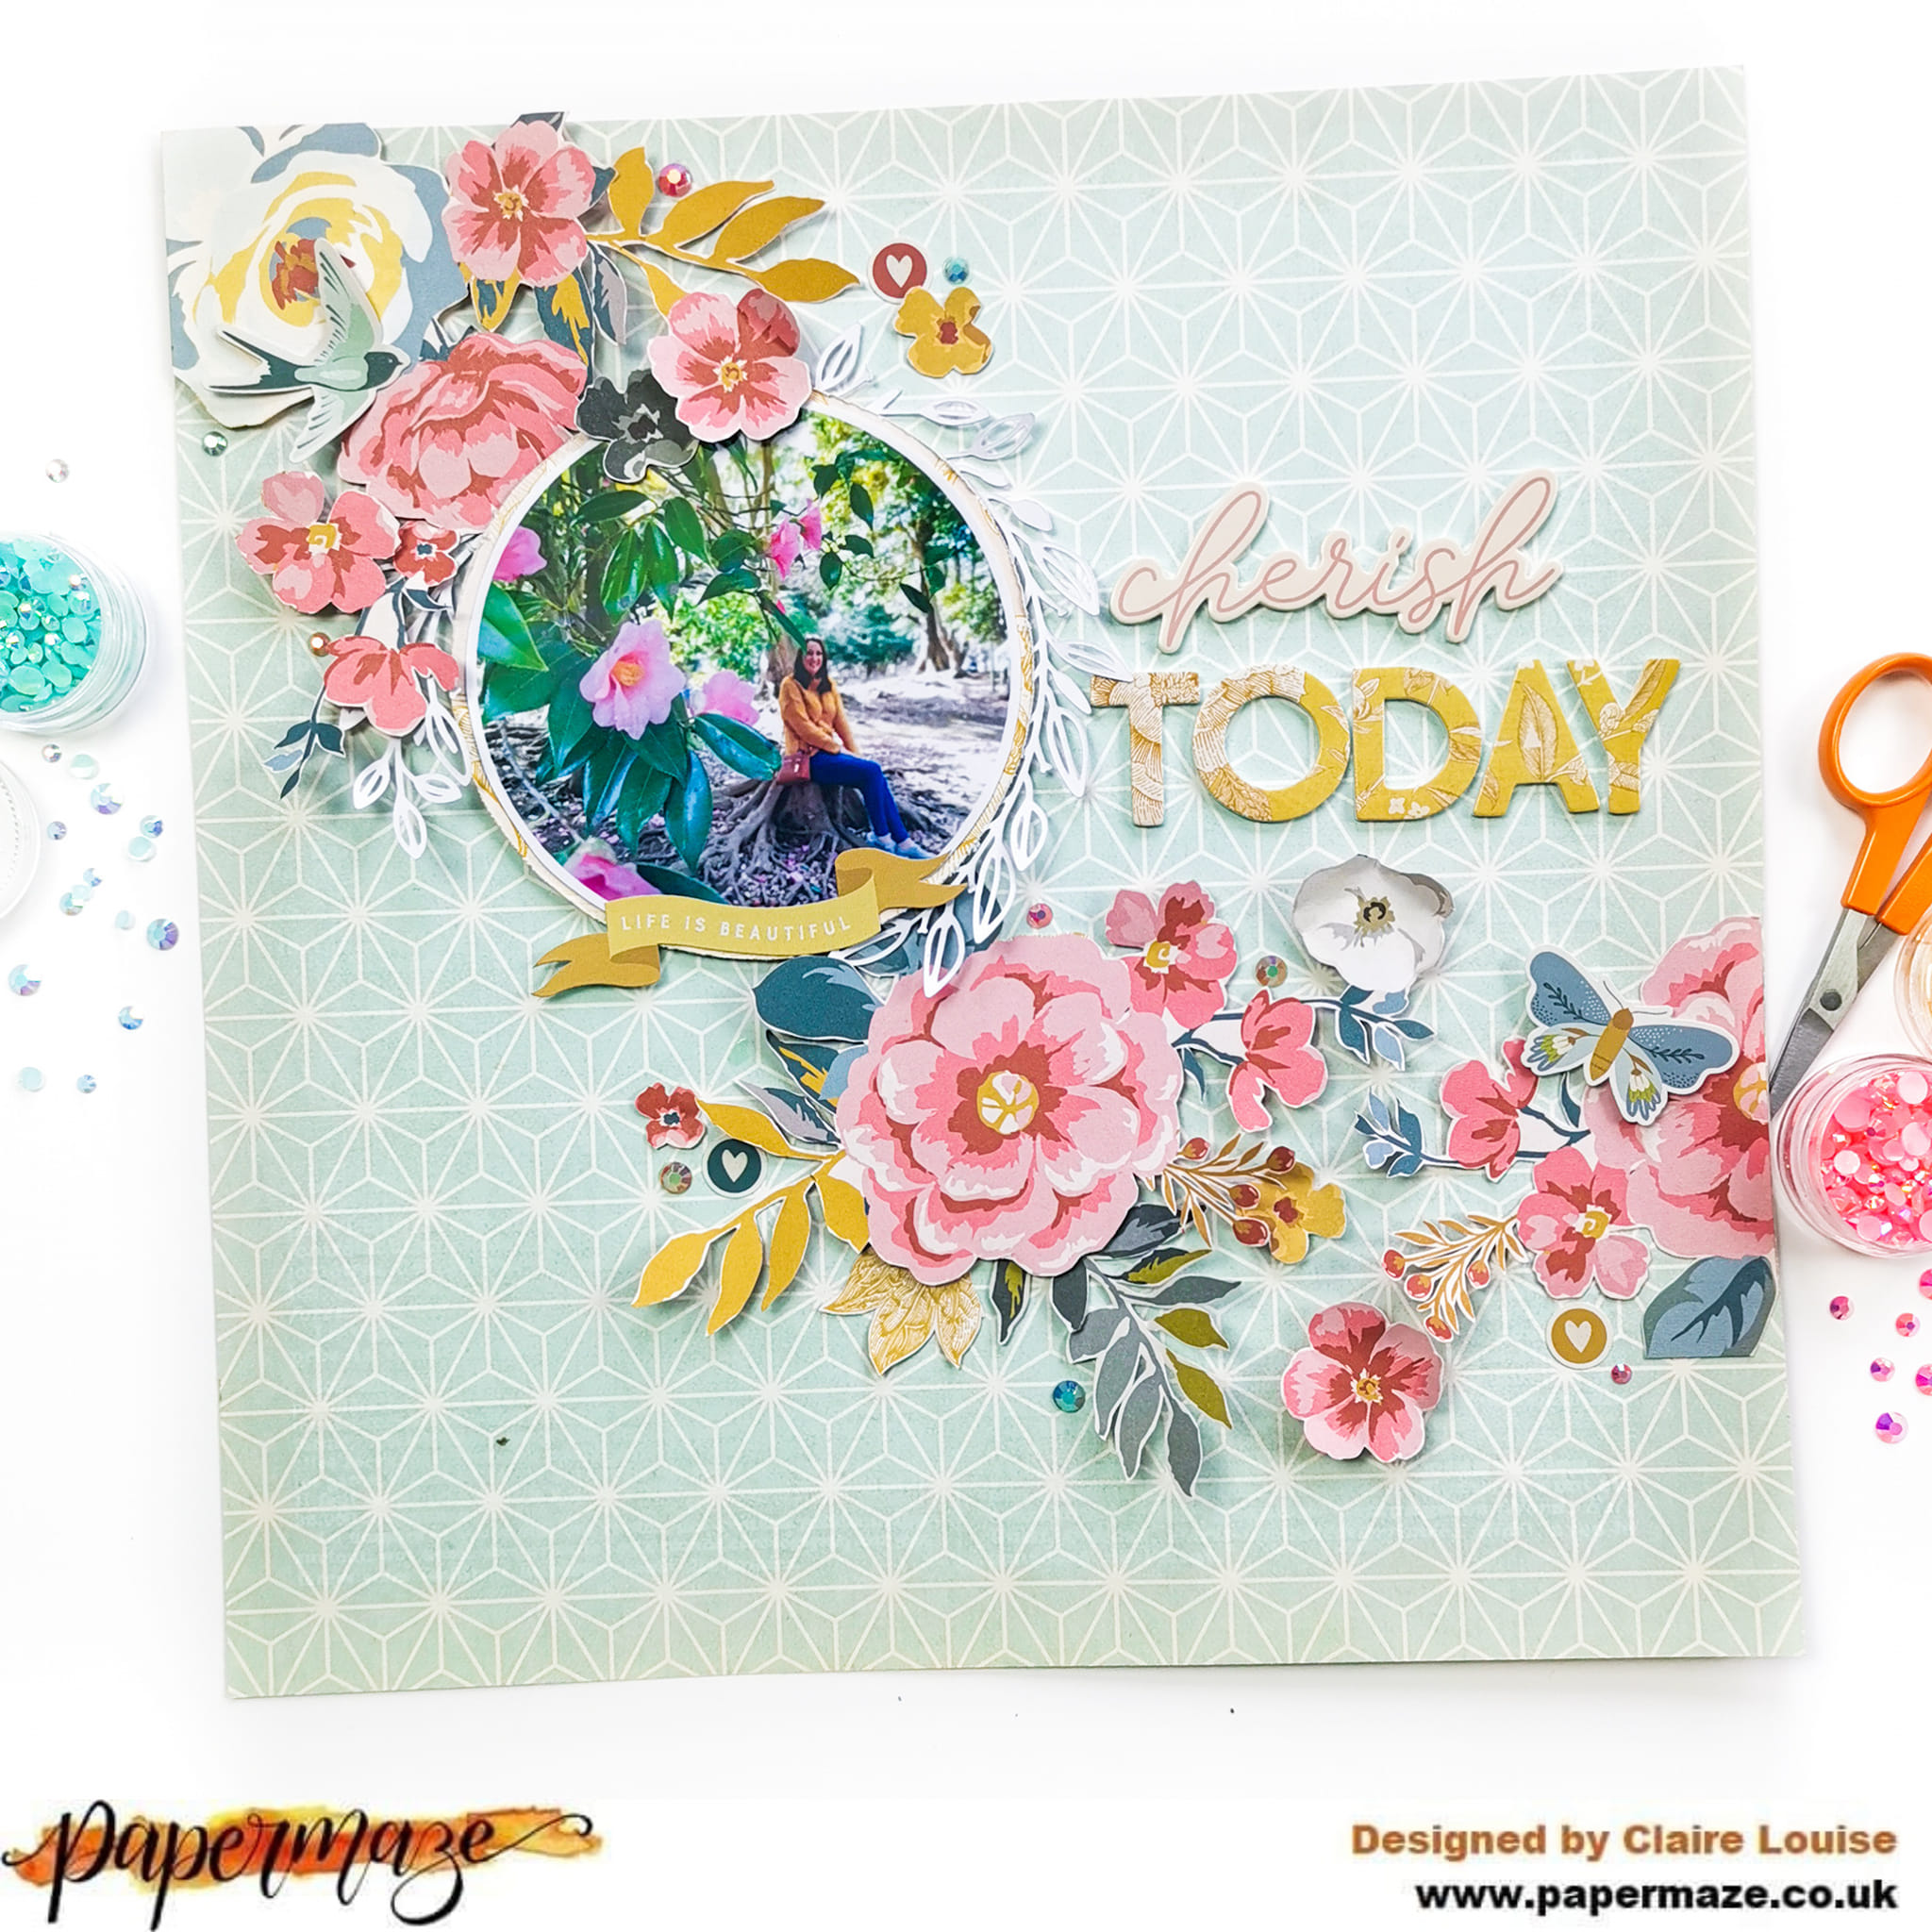
Claire here, and i'm popping in with my second layout using the Wildflower collection - this really is such a gorgeous collection. I think it's definitely going to be one of my favourites of the year and we're only in March!


This time, I'm focusing on the patterned paper, using it firstly as my background, and secondly, enjoying lots of fussy cutting to create a sweeping floral design across the page.

The base of my layout uses the b side of the Journal Elements paper. It's a really lovely soft teal colour, with a very dainty pattern that works perfectly for a background paper.

To this, I added my circular photo, which I mounted on the Breath Deep paper and framed it using a 'Leafy Wreath' cutfile from Anetts Designs.


Across the bottom, I created a small subtitle, using the pretty yellow banner from the Combo Stickers.


Next the fun part!!  The Flowers! This collection really does have the prettiest floral papers I have seen in a long time. The choices - and possibilities - are endless!

I used the Complete Bliss paper, fussy cutting both small and large clusters, as well as individual flowers and leaves to stretch across the page - but honestly, any of the floral papers in this collection would work just as well. They're all stunning!


I started in the top left corner, raising some on foam, and leaving some flat, curling the leaves to create movement and dimension.


Once all the florals were in place, I began to add some smaller embellishments. I took a bird and a butterfly from the Combo Stickers, raising these on foam to sit in amongst the floral clusters.


I added a few small sticker hearts also sprinkled some Pinkfresh Studio Jewel Essentials in Peach Fuzz, Sky Blue and Ballet Slipper - they're the perfect hint of sparkle and match the colours in this collection so well.

To the right of my photo was an open space, ideal for creating a large title. So I took the opportunity to use two of the Foam Stickers.


I adore these. They're my favourite element of Simple Stories collections so I was delighted to get two on a page. They sit just to the right of my photo and pull in all the colours of the design. Just the job to finish the page off.

I hope you have enjoyed this layout - I certainly enjoyed making it.

See you next time.


Claire xx

@scrappysoulmate

Monday, 6 February 2023

Pinkfresh Studio - Flower Market - Magical

Hi everyone and happy February!!

I'm so pleased we made it through January, and this month I have a new collection to play with - the beautiful Flower Market collection from Pinkfresh Studio. You can find it in the shop here.

I was immediately drawn to the Palette paper and wanted to use it to create a dimensional layout, mimicking confetti.  Here is the result.


Initially, my plan was to cut the strips of paper, leave them flat and create a column of confetti, falling from the top to the bottom of the page but it didn't translate very well on my layout. I remembered I had seen a few people using paper curls to create a similar effect - including our very own Rebecca on a layout she'd done in December.

As I'd already cut the strips, I didn't want them to go to waste, so I curled them around a wooden skewer to create these cute dimensional twirls.


I still wanted to include a column in my design, so decided to create a sunken column. I cut a rectangle from my white cardstock base and backed it with the b side of the palette paper, using foam tape to give extra separation and depth.

Next, I backed my photo using some white tissue paper and one of the striped pieces of card from the Journaling Bits Pack (it's the reverse of the piece that says 'Love This'). I chose it because it contains all the colours of the paper and helps bring the design together.


I layered this on top of two small chipboard frames for extra interest, before layering a banner from the Journaling Bits pack underneath (cut in half to ensure each piece shows on either side of the photo).


On either side of the picture, I created small floral clusters using flowers from the Floral Ephemera Pack, mounting them of different depth foam to create extra layers of dimension on my page.

Once the photo and clusters were in place, I adhered the paper curls to the page using Glossy Accents to ensure a firm hold. I followed a circular shape to give the illusion of a party popper, which seemed appropriate for my proposal photograph :) 


In between the paper curls, I added some Pinkfresh Jewels in Peach Fuzz - a beautiful shade to accent the colours in this collection.

To create my title, I used the blue Flower Market Puffy Alpha Stickers - I love Pinkfresh Alphas - they match so beautifully and are always such a lovely font. 

I sat the title at the bottom of the sunken panel - an effect I really love as the title feels so integral to the design.


For my subtitle, I used a piece from the Ephemera Pack again raising on foam for dimension.


As a final touch, I added a few pale blue Nuvo Crystal Drops in Gloss Blue Babe.

I'm sure you know by now that I'm a huge Pinkfresh fan and this collection certainly does not disappoint. Check out the collection in full, along with their other new release, Spring Vibes, in the shop here.


See you again soon with my second layout.


Claire xx

@scrappysoulmate

Saturday, 20 August 2022

August Papermaze Kit - Part 2

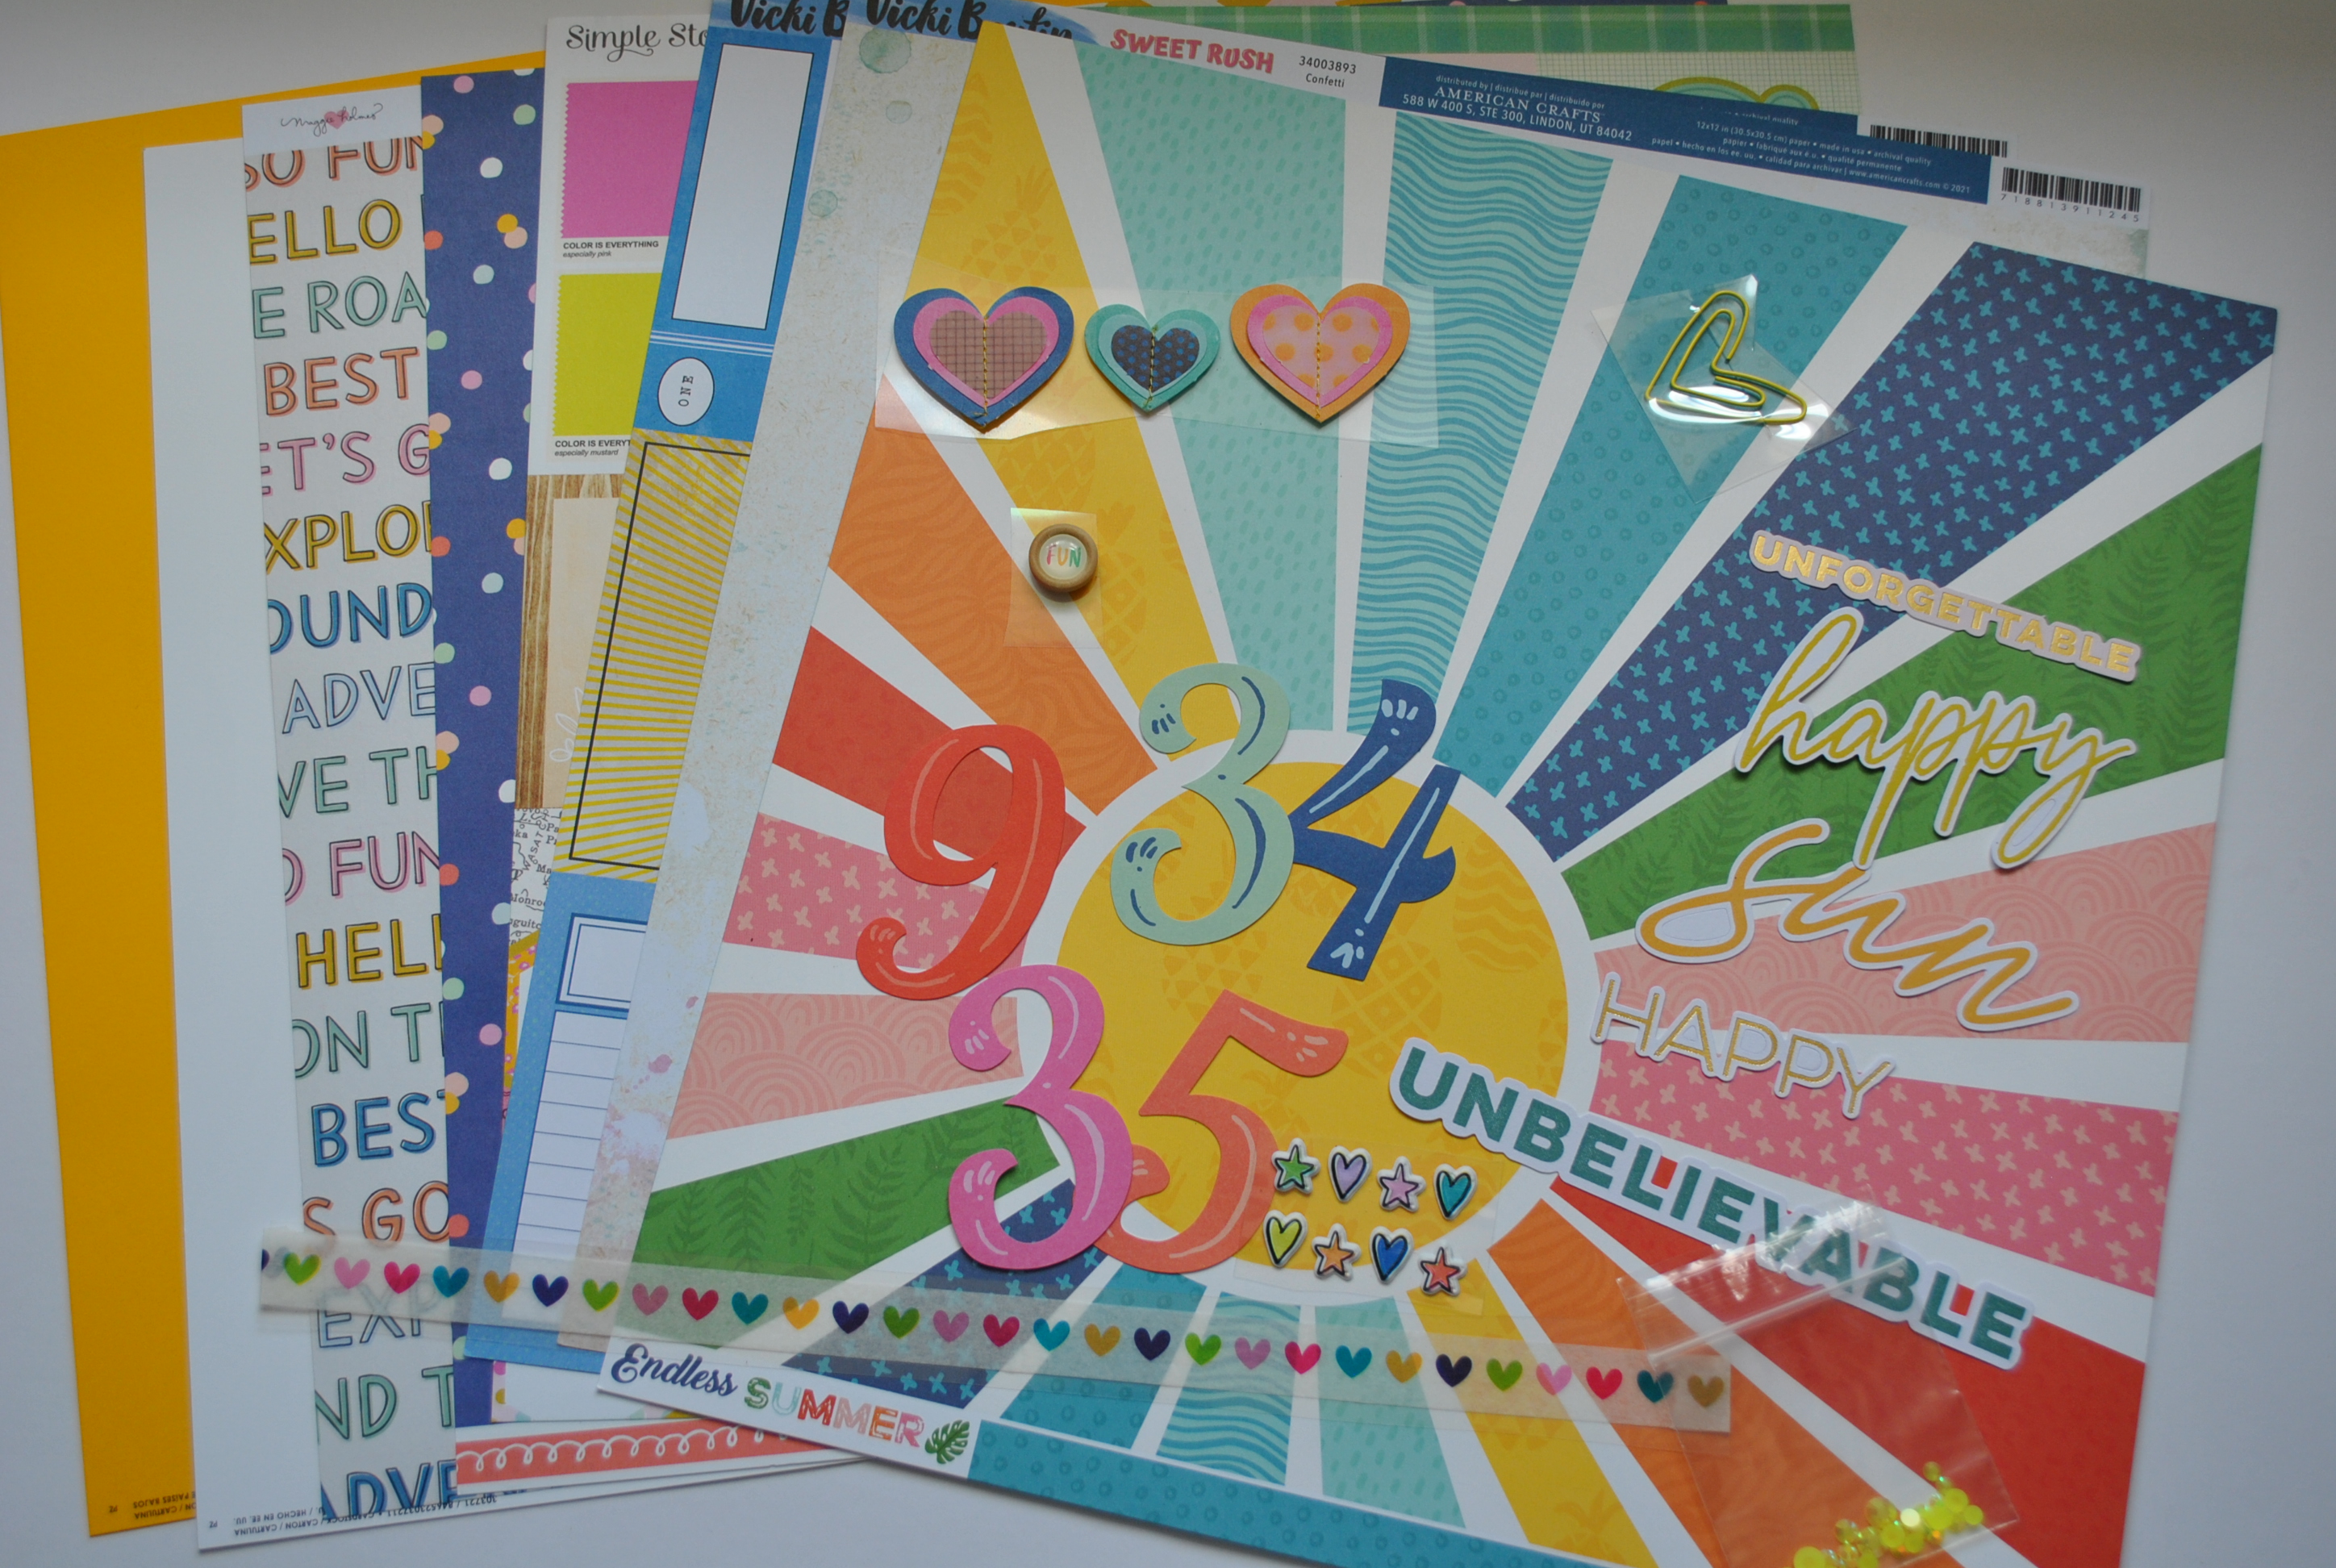
Lynn here today with my second pair of layouts made using the August Papermaze Kit. Such a bright, sunny colours - papers, cardstock and embellishments.

Before looking at the layouts, here is what you will find in the kit this month:


For full details of the papers, cardstock and embellishments, please see part 1.


Happy Face - My great niece having fun with face painting on holiday this year.

This lovely paper from Vicki Boutin's Sweet Rush collection is called 'Confetti' and I just loved all these colourful circles decorated with different designs. I decided to add different embellishments to each circle, keeping with the colour schemes. For this reason, I printed three small photos and arranged them so that some of each circle was left uncovered.

From top to bottom, left to right, this is what I used:

1. Dark Blue - Pinkfresh Studios (PFS) puffy mini alpha stickers, Doodlebug Designs Shape Sprinkles - Winter Hugs and Nuvo Crystal Drops


2. Orange - yellow and orange star gems

3. Light Blue - PFS Jewels Sapphire and Ocean Breeze

4. Dark Orange - Sequins and Nuvo Crystal Drops


5. Mid Blue - PFS Jewels Sapphire and Ocean Breeze and Nuvo Crystal Drops

6. Deep Pink -
PFS puffy mini alpha stickers


7, Yellow - Nuvo Crystal Drops and Vicki Boutin Embossed Puffy Stickers from the kit

8. Lime Green - lime green heart and round gems and
Vicki Boutin Embossed Puffy Stickers

9. Orange - Nuvo Crystal Drops and
Vicki Boutin Embossed Puffy Stickers

10. Dark Pink -
Doodlebug Designs Shape Sprinkles - Winter Hugs


11. Pink - Pink pearls and Vicki Boutin Embossed Puffy Stickers

12. Dark Blue -
PFS Jewels Sapphire and mini cameras cut from the detail strip on the 'On The Agenda' paper


13. Pale Orange and 14. Yellow - The exclusive acrylic title and PSF Jewels Sunshine both from the kit


15. Pale Green - Craftwork Cards Candi and Nuvo Crystal Drops


16. Light Blue - Vicki Boutin Embossed Puffy Stickers, Nuvo Crystal Drops and Doodlebug Designs Shape Sprinkles - Winter Hugs

Finally, along the bottom of the paper, I used the strip of Doodlebug Designs Rainbow Hearts washi tape from the kit.

25th Park Run - I decided it was time to document achieving my 25th Parkrun, in July this year.

I cut the sheet of 'On the Road' paper into 2.5cm strips, making sure the stars were in the centre of each piece. I inked the edges of the paper strips with Worn Lipstick Distress Ink and cut them in different lengths. Then I wove the strips basket weave fashion onto the sheet of Quartz Bazzill cardstock from the kit.


I mounted my photo onto a piece of the same coloured Bazzill from my stash. This was placed to the right centre of the layout. I used two of the Number Bits & Pieces numbers from the kit, and placed them into position with a 't' and a 'h' cut from the reverse side of the 'On the Road' paper. 


My title and subtitle were created with Pinkfresh Studio Puffy Alpha - The Best Day and some mini puffy alpha stickers from my stash. The date is made using Arctic Bazzill and Tim Holtz - Sizzix Thinlits - Alphanumeric - Label die set.


Finally I finished off with some phrase stickers I found in my stash.


That's all for today, and completes my usual four layouts, however I still had more paper, card and embellishments to play with, and by adding some white cardstock I have made two more layouts. I will be back with these soon.

Thanks for looking
Lynn x