Showing posts with label Combo stickers. Show all posts

Monday, 10 April 2023

Life in Bloom - Simple Stories - Simple Vintage Life in Bloom

Hello, it’s Rebecca with you today. I hope you all had a lovely Easter yesterday and are enjoying your Bank Holiday today. I couldn’t resist creating another layout with Simple Vintage Life in Bloom from Simple Stories - it’s going to be hard for Simple Stories to release another collection that knocks this one off the top of my favourites list! You can find the collection here.


I begun by tearing some strips from 3 different patterned papers, varying the lengths slightly. I distressed the edges and then rolled the bottom edge of each back a bit to reveal the colour from underneath. I layered these strips towards the bottom of my cardstock and placed my photo on top. I usually add a white frame around my photos, but I felt like trying something different today. Instead, I dabbed some white gesso around the edge of my photo to help it fade out towards the edges to give it a softer look. I really like how this turned out and will definitely try it again. 


I wanted to use the ‘life in bloom’ title from the Combo Stickers sheet as my little boy is holding my Mother’s Day flowers in the photo - which had finally bloomed! As it is quite a large title in comparison to my photo, I wanted to get it in place early on, to make sure I had the space for it. 


With my photo and title now in place, I moved on to embellishing. I absolutely adore all the pretty florals in this collection - the colours are stunning and they are so easy to use. I’ve used florals and leaves from the Floral Bits and Pieces pack and have tucked them in around the edges of my photo and paper strips. 


Above my photo, I’ve added a couple of smaller pieces of patterned paper - a torn scrap I had on my desk, as well as half a film strip from one of the cut-apart sheets (again, a scrap leftover from another layout!). 


Behind my title I added a couple of ticket stubs from the Bits and Pieces pack, and below my photo I added a gorgeous ‘cluster sticker’ from the Sticker Book. I love these stickers as they are made up of several elements which appear layered - even though they are flat stickers! 


I finished off the page with the addition of some fussy-cut butterflies (of course!) and some small hearts and sequins. 


Thanks so much for reading. I hope you’ve enjoyed this layout as much as I enjoyed creating it. Don’t forget to check out the collection in the store (this one won’t be re-stocked so grab what you can, whilst you can!). 


Take care,


Rebecca 

@preciouspagespapercraft

Friday, 24 March 2023

Simple Stories - Wildflower - Love This

Hi everyone,

Claire back with you today, sharing an extra layout using the Wildflower collection from Simple Stories. It's such a gorgeous collection, I couldn't resist just one more page. 


I was drawn to the scalloped circle frame from the Chipboard Frames Pack . Using this as the centre of my design, I opted to create layered circles, using 3 patterned papers.

I used the b sides of the Radiate Sunshine, Breath Deep and Live Large papers. I roughly positioned the largest circle on the page to understand where it would sit, and added Distress Oxide in Tumbled Glass to the white cardstock, creating a blue haze around the outside of the design.

I distressed the edges of each circle, and added a few rows of machine stitching, before layering one on top of the other with foam sheets.


I mounted the photo into the chipboard frame and adhered this flat to the page. Then came the embellishing.

If you've seen any of my other blog posts with this collection, you'll know I am besotted with the florals, and this design was perfect to host a big statement floral cluster at the bottom of the design.


I selected lots of florals and leaves from the Floral Bits & Pieces pack, with the largest pink flower coming from the Bits & Pieces pack. I curled the leaves and petals to create extra movement, and again layered these on foam, following the curved edge of the main design.


For my title, I used two stickers from the Foam Stickers sheet.


Once the main cluster and title were done, I wanted to add just a few more embellishments to balance the page. I selected a bow from the Bits & Pieces pack, and adhered this to the top of the design.


I also cut some butterflies from the Love Greatly paper and positioned these along with a pink moth from the Combo Stickers along the top left edge of the design, directly opposite the large floral cluster.


As I was choosing the embellishments, I saw this cute bird in the Bits & Pieces Ephemera pack and I really wanted him to feature on the page. So I found a small gap in the floral cluster and nestled him in amongst the flowers.


I hope you've enjoyed this extra bonus page with the Simple Stories Wildflower collection. There are a few pieces of this left in the store and I'd highly recommend you grab these whilst you can - it really is a truly beautiful collection.

I'll be back next month, but until then, happy crafting! 

Claire xx
@scrappysoulmate

Monday, 13 March 2023

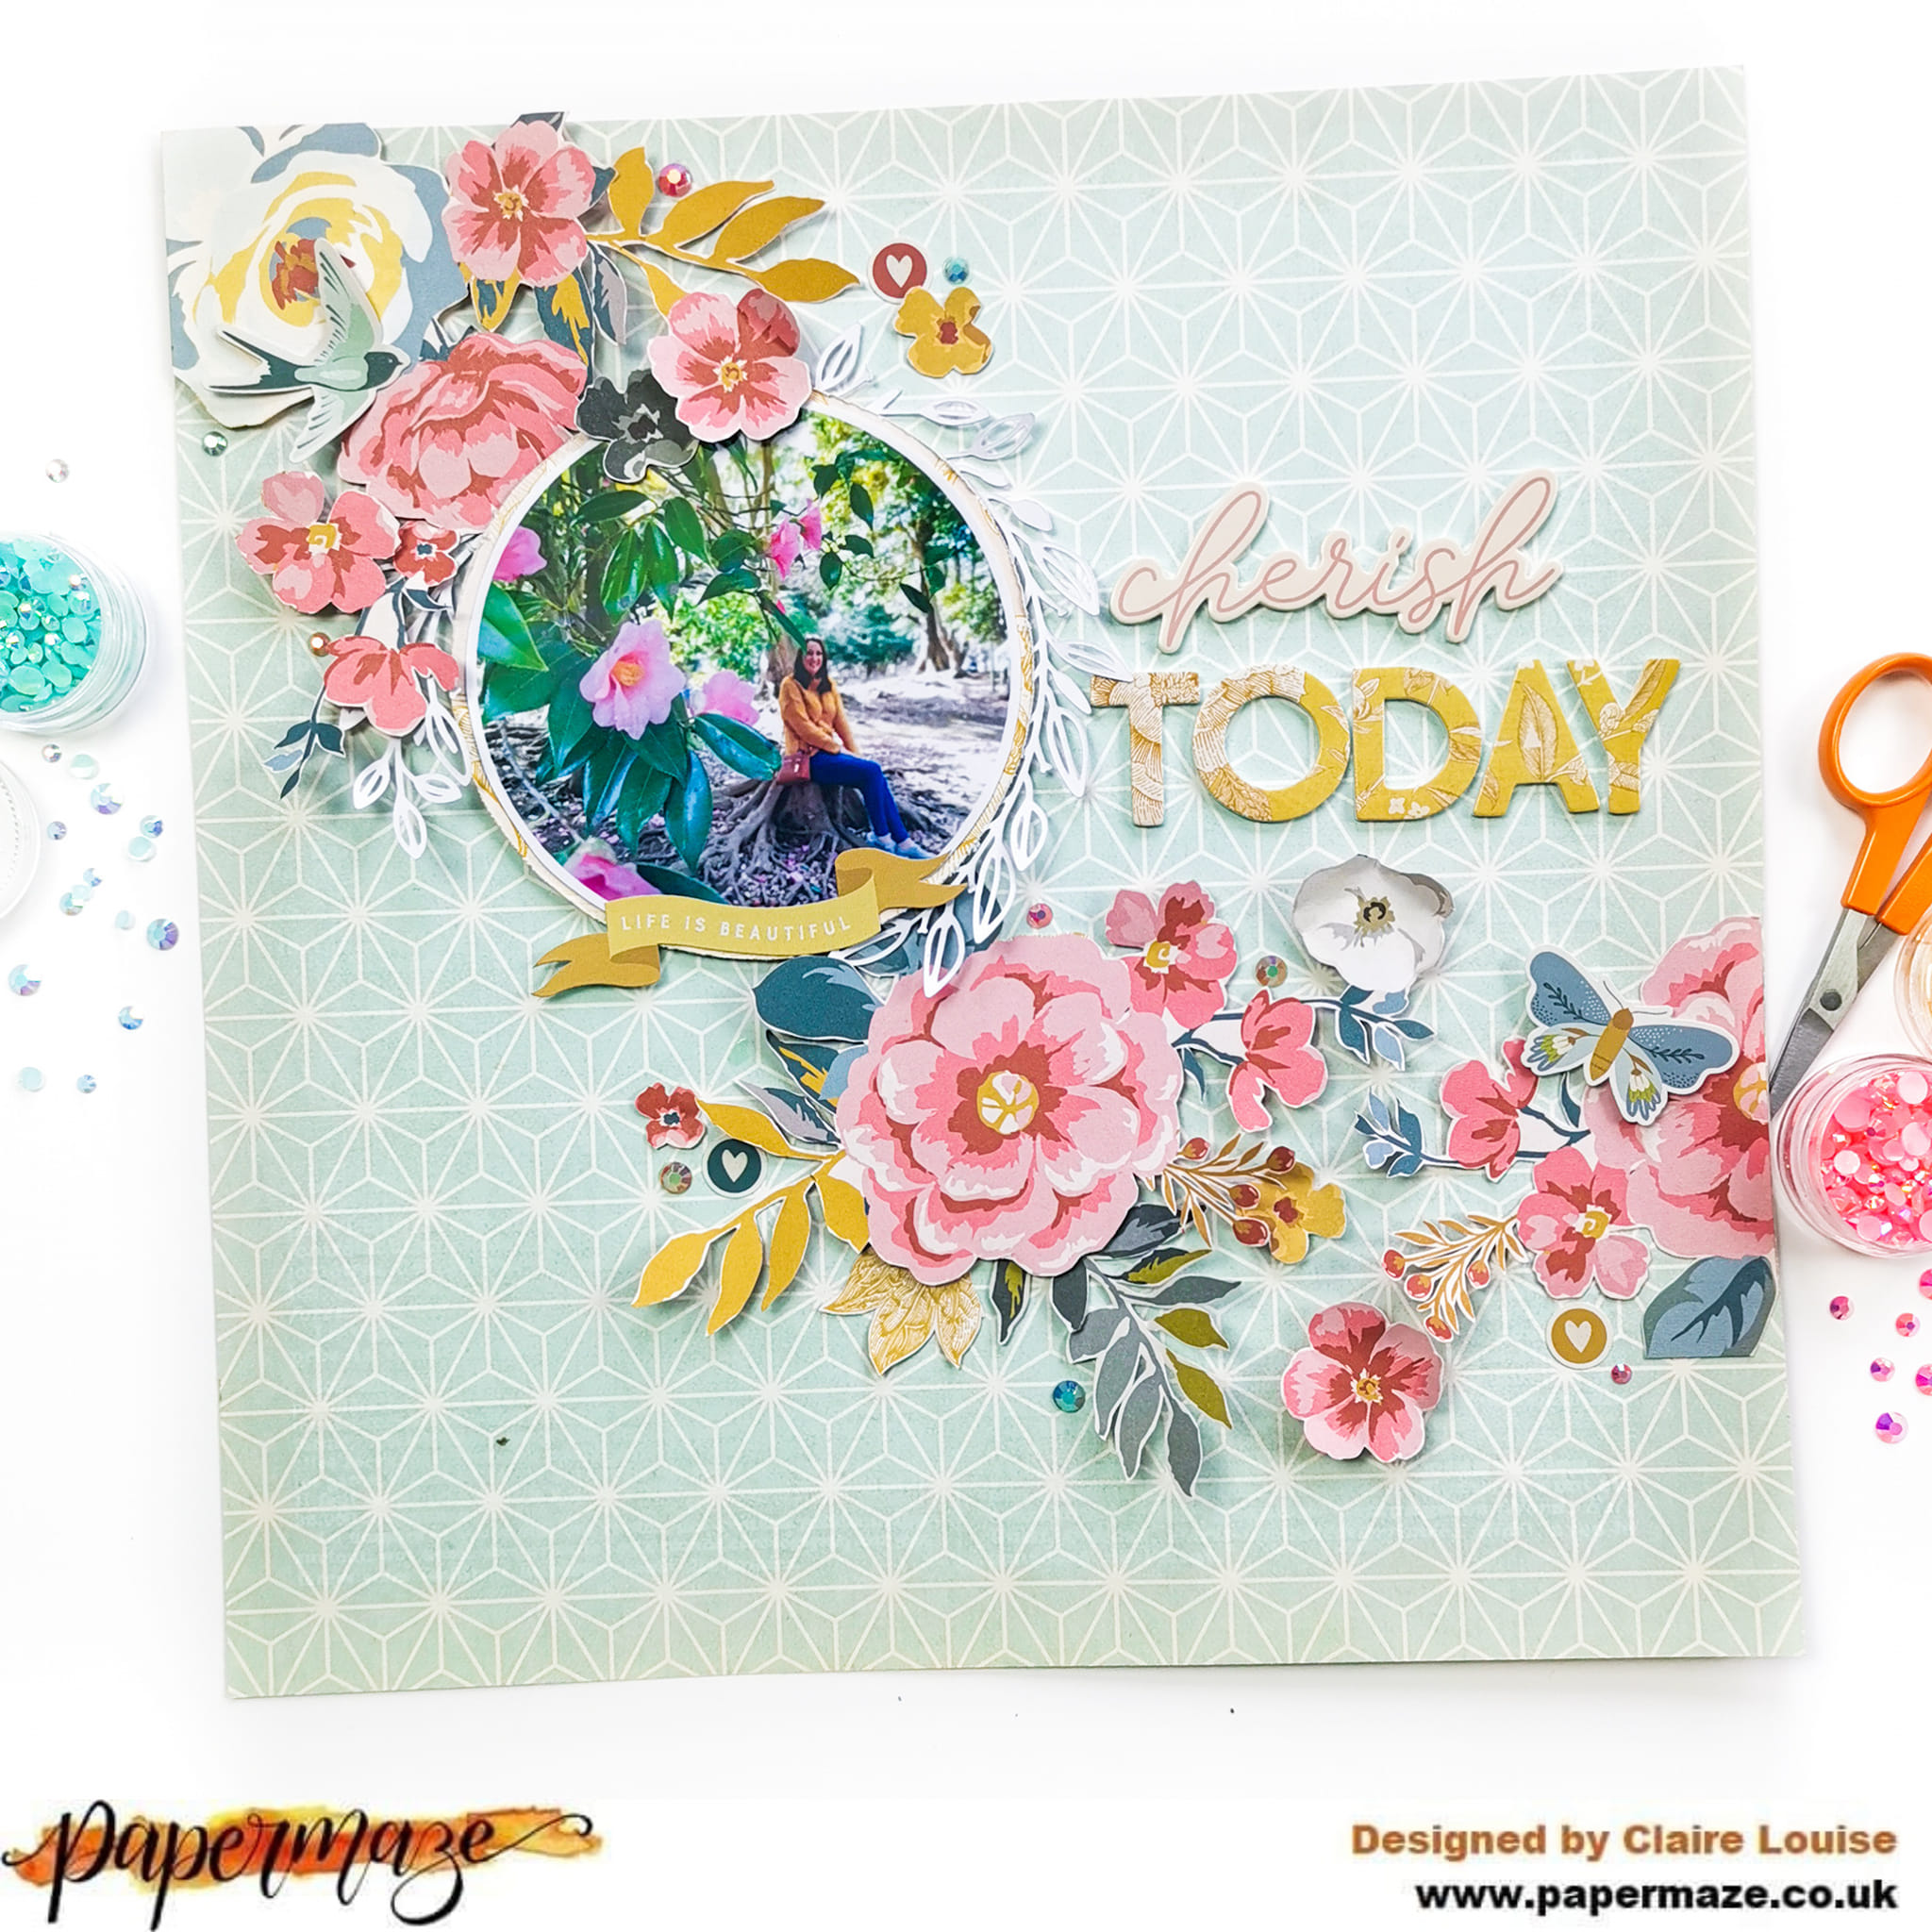
Simple Stories - Wildflower - Cherish Today

Hi everyone,

Claire here, and i'm popping in with my second layout using the Wildflower collection - this really is such a gorgeous collection. I think it's definitely going to be one of my favourites of the year and we're only in March!


This time, I'm focusing on the patterned paper, using it firstly as my background, and secondly, enjoying lots of fussy cutting to create a sweeping floral design across the page.

The base of my layout uses the b side of the Journal Elements paper. It's a really lovely soft teal colour, with a very dainty pattern that works perfectly for a background paper.

To this, I added my circular photo, which I mounted on the Breath Deep paper and framed it using a 'Leafy Wreath' cutfile from Anetts Designs.


Across the bottom, I created a small subtitle, using the pretty yellow banner from the Combo Stickers.


Next the fun part!!  The Flowers! This collection really does have the prettiest floral papers I have seen in a long time. The choices - and possibilities - are endless!

I used the Complete Bliss paper, fussy cutting both small and large clusters, as well as individual flowers and leaves to stretch across the page - but honestly, any of the floral papers in this collection would work just as well. They're all stunning!


I started in the top left corner, raising some on foam, and leaving some flat, curling the leaves to create movement and dimension.


Once all the florals were in place, I began to add some smaller embellishments. I took a bird and a butterfly from the Combo Stickers, raising these on foam to sit in amongst the floral clusters.


I added a few small sticker hearts also sprinkled some Pinkfresh Studio Jewel Essentials in Peach Fuzz, Sky Blue and Ballet Slipper - they're the perfect hint of sparkle and match the colours in this collection so well.

To the right of my photo was an open space, ideal for creating a large title. So I took the opportunity to use two of the Foam Stickers.


I adore these. They're my favourite element of Simple Stories collections so I was delighted to get two on a page. They sit just to the right of my photo and pull in all the colours of the design. Just the job to finish the page off.

I hope you have enjoyed this layout - I certainly enjoyed making it.

See you next time.


Claire xx

@scrappysoulmate

Monday, 6 March 2023

Simple Stories - Wildflower - Life In Bloom

Hi everyone,

Following lots of lovely new releases from Simple Stories, today I'm bringing you a layout made with the new Wildflower collection, which is a collaboration between Simple Stories and My Minds Eye.

In real life, this collection is absolutely beautiful, way beyond the pictures you see online.

For this page, I'm focusing on the patterned papers and florals, offset against a mixed media background.


I started with a piece of Premium White Cardstock, applying a heavy cost of gesso as I planned to add quite a lot of water to the page.

With watercolour inks, I applied blue, pink and yellow ink in vertical lines with a brayer, letting each colour dry before adding the next.  I love the effect this creates and enjoy the extra level of control the brayer brings so you don't get very messy!

Once the ink was dry, I took a scripty stamp from my stash and stamped randomly in black ink, in a vertical line. Some of this is hidden by the photo, but you can still see a hint of stamping which doesn't overpower the layout. 


To create my layers, I mounted my photo on several pieces of paper, using the b sides of the Complete Bliss and Breath Deep papers, as well as a piece of blue Bazzill cardstock from the Matchmaker Pack, distressing all the edges to give some extra texture.


Once these were in place, I started to embellish.

I decided to create three main clusters, colour-blocking each embellishment cluster with the ink I had added to the page, creating tone-on-tone clusters as much as possible. I used flowers from the Floral Bits & Pieces Ephemera Pack, and Combo Stickers. In this first yellow cluster I also added a pretty yellow tab from the Journal Bits & Pieces pack.


For the cluster on the left, I layered my florals, raising some on foam and some on flat sticky tape to give the cluster some real definition. 


Once they were in place, I added a tag from the Journal Bits & Pieces Pack, adding floss from my stash to tie a bow.


To give my page a title, I used a combination of a sticker from the Combo Sticker Sheet , saying Life' and Alphas from Rosie's Studio Frolic line which complement this collection perfectly and have the added bonus of gold foiling.


My subtitle, sitting to the bottom of my photo, uses a combination of  Wildflower Bits & Pieces and elements from the Journaling Bits & Pieces pack, layered on foam to draw the eye across the page.


I love the smaller design, with multiple layers of mixed media, paper, ephemera and stickers. This collection is so pretty, it was hard to restrain myself from using it allll in one go - so this design helped me focus and choose just a few key pieces to create my page.

I hope it's inspired you to get creating, and please do head over to the shop to check out this gorgeous range as I'm sure it won't hang around for long.

I'll be back later this month with some more pages.

See you soon.

Claire xx
@scrappysoulmate

Saturday, 31 December 2022

Simple Stories ~ Hearth and Holiday 🎄

Happy New Year! It’s Anna here with you today,  I’m still in the festive spirit so I’m sharing a layout using the hearth and holiday collection by Simple Stories. You can find it in the shop here. 
For my first project with the collection, I created a ‘12 days of Christmas’ advent calendar. If you would like to have a read, you can find my previous blog post here. But this time I’m back to a scrapbook layout…


To create this layout I used the Merry Christmas to all patterned paper as my base. I then cut a circle in the middle of the paper and adhered a square of Mistletoe Magic to the reverse, filling in the gap.
I used my silhouette cameo to cut a Christmas trees cutfile by Paige Evans. I cut it using Bazzill white and backed each tree and star with vellum. I then cut out each tree individually as they were originally joined in a row together. I couldn’t quite make that work on my page, so I decided to separate them instead.


I backed my photo with spreading cheer and cut out a selection of florals from the Mistletoe Magic paper. I adhered the florals around the other elements of my page, joining it all together.


I distressed the edges of the circle, before adhering everything down. 
I have also added a tag from the Tags paper and will use it for my journaling.
 I love these tags sheets by simple stories, they provided journaling options on one side and coordinating patterns and images on the other. You can find various examples from different collections here. 


I selected various stickers from the combo sticker sheet to embellish my page, adding lots of extra little details. 


Thanks so much for looking! 
See you in 2023!
Anna
X


Friday, 23 September 2022

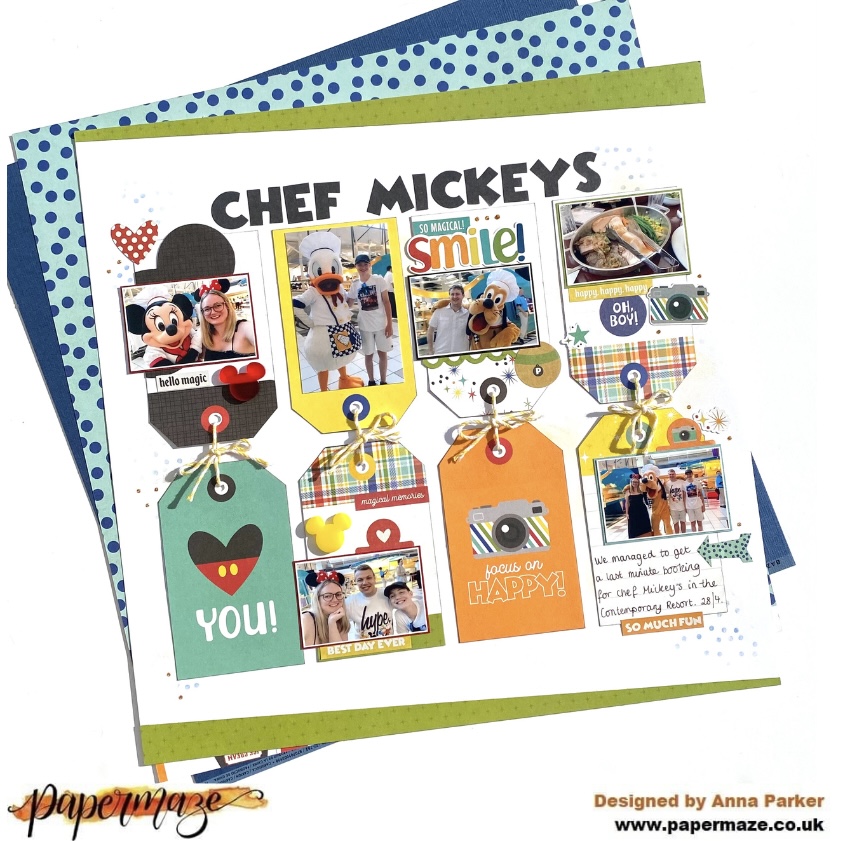
Simple Stories ~ Say Cheese at the Park #4 🐭

Hi it’s Anna back with you today! 
I have another layout to share with you using Simple Stories Say cheese at the Park - I have had a whale of a time with this collection, it’s been perfect for documenting magical Disney memories. 
You can find all of the collections as part of this release in the shop here.. 

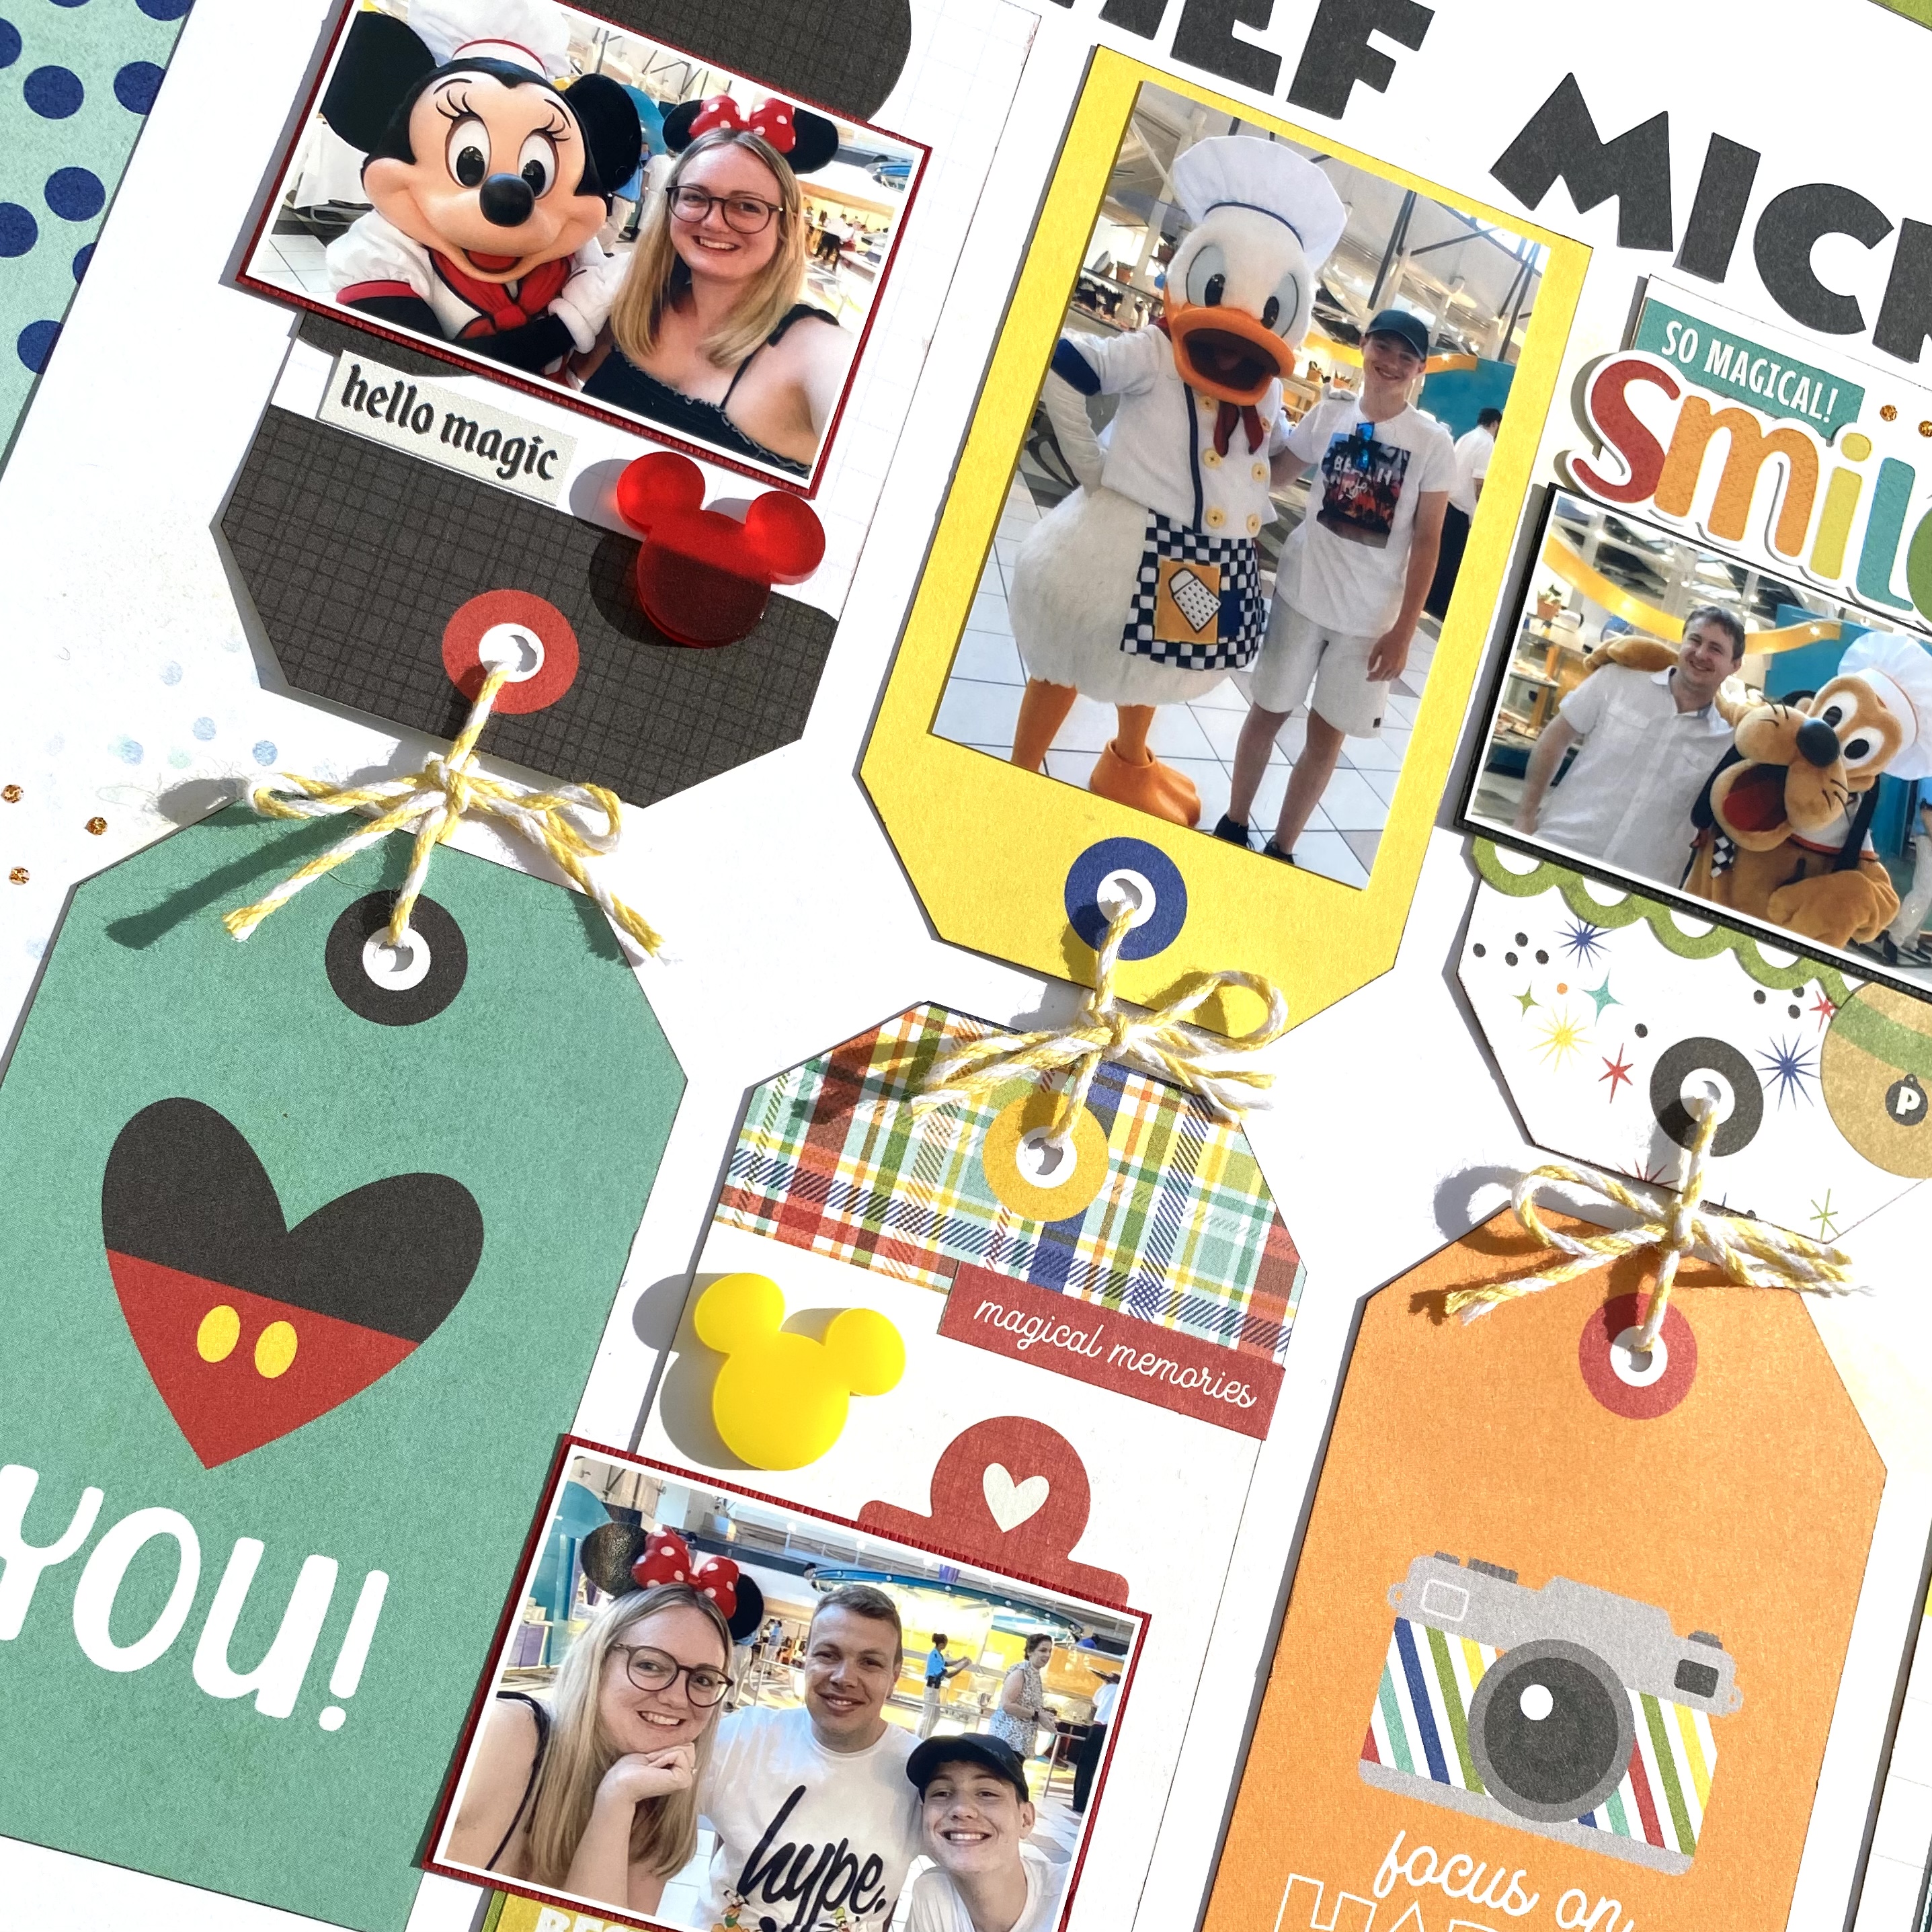
For this layout, I have used the Say Cheese at the Park part of the release and in particular the ‘Tags’ paper. 


I began with a 12x12 piece of white bazzill cardstock. I then selected 8 tags that I wanted to use. 
I decided that something was needed on the background, so I added some Distress Ink in the shade of Fossilised Amber. I then used a stencil to apply some more Distress Ink in the shade of faded jeans. 


I arranged the tags on my layout and added my photos to some of them, mounting them with cardstock first. 


I used stickers from the Combo Stickers and Sticker Book to embellish the tags. 

I added a few finishing touches, by randomly adding some Nuvo Drops. 


I used the alpha stickers from the sticker book for my title. 


I finished the layout off by adding some twine, tying it between each of top and bottom tags. 


Thank you so much for looking! 
See you again soon. 
Anna 
X

Monday, 12 September 2022

Life Is Better Lakeside - Simple Stories - Simple Vintage Lakeside Collection

Hello, it's Rebecca with you today sharing a new layout. I was grateful of a bit of scrappy time this weekend after my first week back at work following the summer holidays. I've scrapped a slightly older photo from 2020 using the gorgeous Simple Vintage Lakeside collection from Simple Stories - which you can find here. 


I started by cutting three squares of paper, about 4x4 inches - two from the Explore & Discover patterned paper, and one from the Relax & Unwind paper.  I arranged them at the top centre of my background, slightly overlapping, with some very basic mixed media behind them. I used a Distress Oxide Ink Pad in the shade 'Broken China' and the packaging technique to add the colour to my Premium White Cardstock. I chose blue to resemble water, and also because my little boy is wearing light blue in the photo - which I've adhered to the centre square.


For my title, I selected one of the Chipboard Stickers and placed it central on the page, underneath my photo. 


I've embellished either side of my photo using die cuts from the Bits & Pieces and Natures Bits & Pieces packs - focusing on ducks as my little boy is feeding the ducks in my photo.


Under my title, I added a couple of the Combo Cardstock Stickers and a few large splatters of ink.


I hope you've enjoyed this layout. I really enjoyed creating with this collection - it's one of those collections that looks lovely online but is even nicer in real life!


I'll be back later in the month!

Take care,

Rebecca

@preciouspagespapercraft