
Hello fellow crafters, Lynn
here today with the delightful May Kit from Papermaze. I love the
combination of oranges and blues. I have created two very different
styled layouts, taking inspiration from the patterend papers.

Before looking at how the layouts were made, here are the details of the kit:

Patterned Papers:
Jen Hadfield - Reaching Out collection - Birds Of A Feather & Stick Together
P13 - Till We Meet Again collection - #01
Heidi Swapp - Care Free collection - Sunset
Paige Evans - Wonders collection #11
Vicki Boutin - Story Teller collection - Mariposa
Bazzill Basics - Vanilla & Arroyo
Reverse Side of Papers:


Simple Stories Chipboard Frame, 3 paper flowers, strip of Doodlebug Jewels, 2 P13 decorative Tags, bird clip, 12" scalloped ribbon, metallic paper fern leaf
Extra Bazzill Pack:

Yukon Gold, Parakeet, Classic Blue & Tutu Pink
Shake Your Tail Feather - When I received the kit and found the 'Birds of a Feather' paper I just knew I wanted to use those cheeky peacocks on a layout. I had the perfect photo, my girls with their jazz dance class at the theatre ready to dance to The Blues Brothers 'Shake Your Tail Feather'.

I
strated by building up a background using 'Birds of a Feather' 30.5 x
12.5cm on the left, then 'Wonders #11' 30.5 x 16 cm on the right. I then
a strip of the reverse side of both papers inbetween the two. The egdes
of these were distressed.
With the Vicki Boutin Stencil from the Colour Study - Fresh stencil set, I used Texture Paste mixed with several colours of Distress Oxide Ink (Carved Pumpkin, Salty Ocean and Tumbled Glass), to create texture on the paper.

My photo was mounted onto Classic Blue Bazzill
and then applied to the layout raised up with some foam tape. The title
was next, I created this with my Cricut using Classic Blue and Vanilla
Bazzill, both from the kit. The Vanilla words / letters were inked with
Carved Pumpkin Distress Oxide Ink to create an ombre effect, they were
off-set onto the blue words / letters to make a shadow and arranged onto
the page.

I cut a selection of feathers using Memory Box dies
and more Vanilla Bazzill. Again these were inked with the Oxide
Distress Inks. They were arranged above and below the photo, some glued
to the paper, others on foam tape to raise them off the surface. A few
resin flowers from my stash were added to the feathers.
I added bling to the flower centres and papers, with Nuvo Glitter Drops - Dazzling Blue and Gloss - Ripened Pumpkin. A scattering of sequins and some journalling to complete the page.

Emma Ann Goldfinch 1844 -1934 - the history of this new found relative (thanks to Ancestry, can be read on my own blog), has been printed out and added to the back of this layout.

I love both sides of the P13 - Till We Meet Again collection - #01 paper, but in the end I chose the plainer side with the 'Photographs' detail in the bottom right corner. I trimmed this to 29 x 29cm and mounted it over a 2.5cm frame of Arroyo Bazzill 30.5 x 30.5cm. The edges of the paper were distressed and inked with Salty Ocean Distress Ink.
I drew a 24cm diameter circle centrally on the paper with a pencil, then marked it off in 2.5cm intervals, beginning and ending at the image in the corner. I used seam binding ribbon, and caught this in place around the circle at each point marked with a needle and thread.

My photo was mounted behind the Simple Stories Chipboard Frame from the kit, and applied to the layout mounted on some foam. Then I decorated the ribbon circle with some wired paper flowers - the three larger ones from the kit and others from my stash. I created three clusters with the larger blooms and then tiny flowers were added to the stiches inbetween.
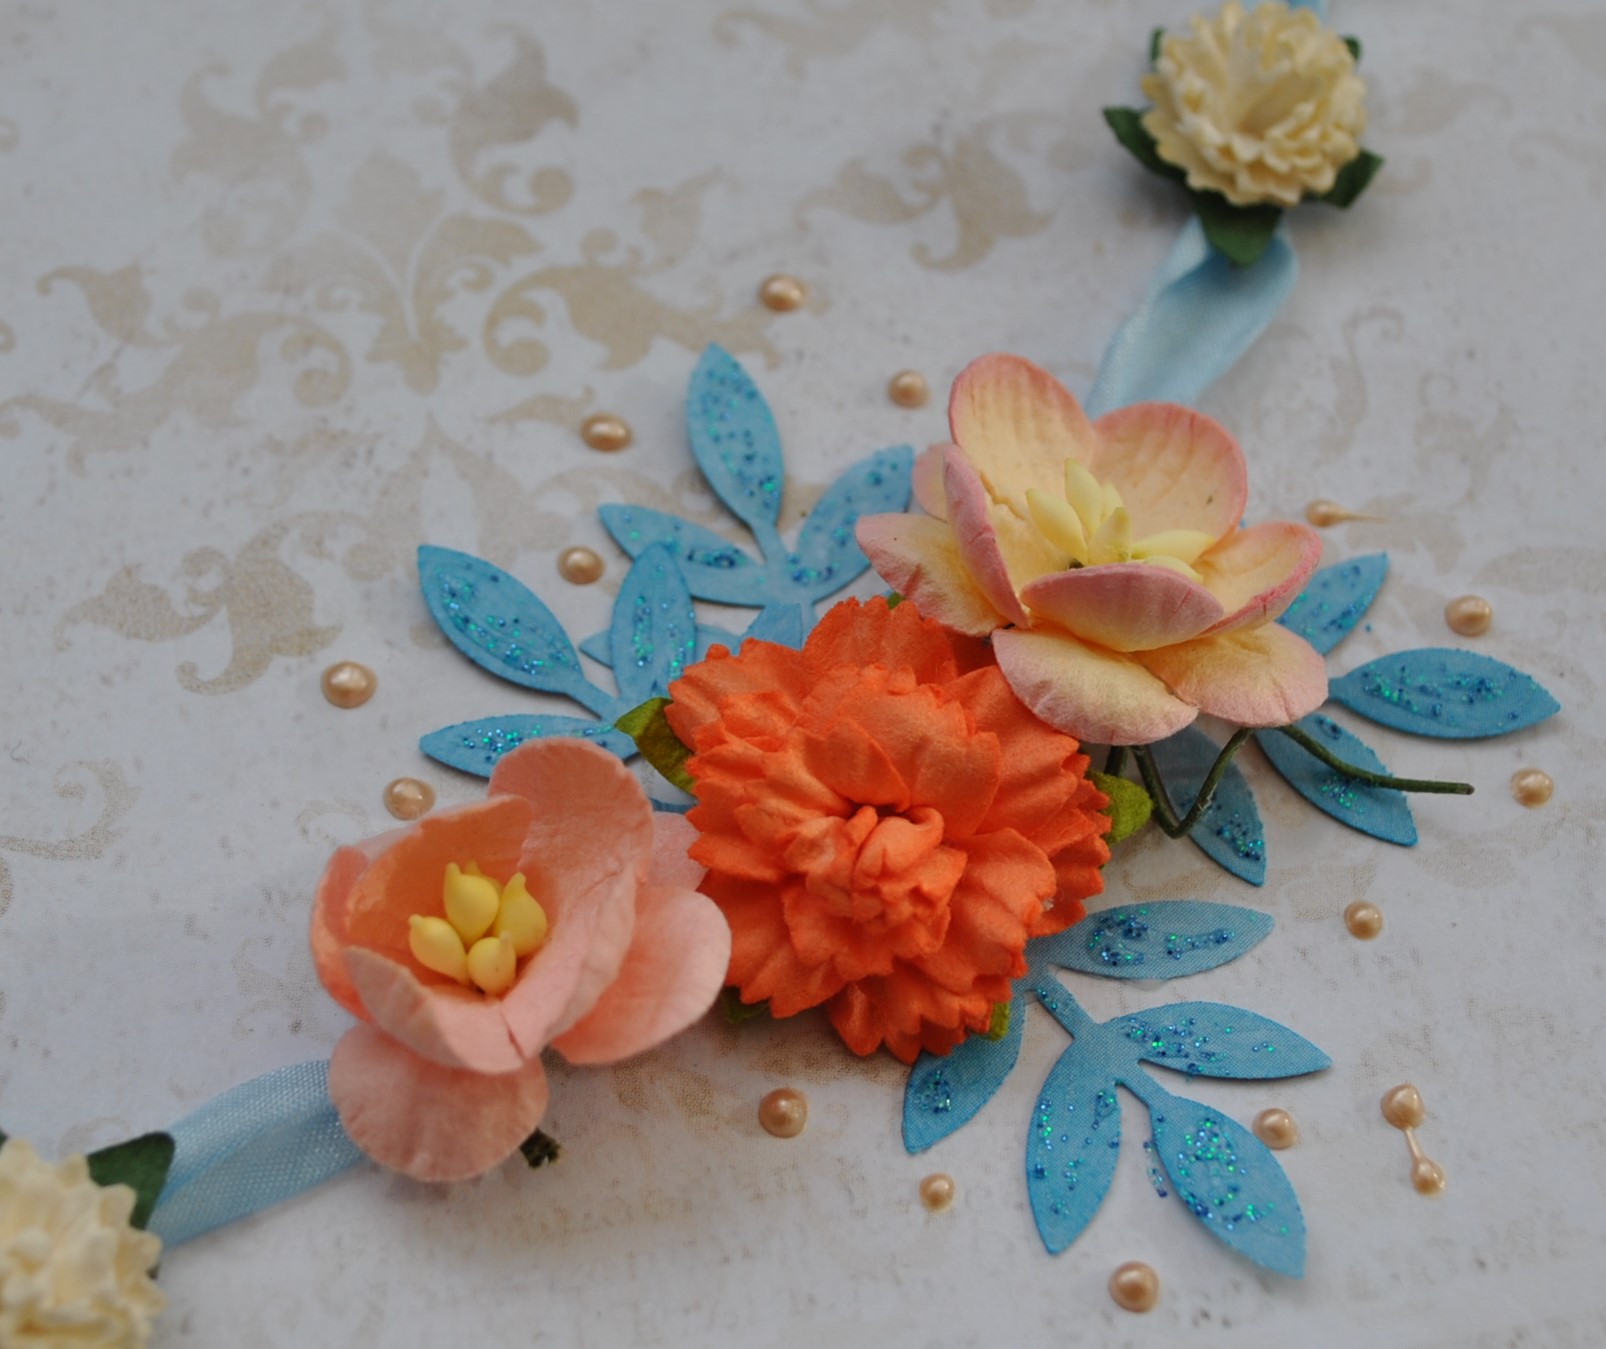
I added leaves to the flower clusters using a Martha Stewart punch and some left over 'Wonders' paper.

I used some old American Craft Thickers to add my title. The P13 banners from the kit were inked and tied together with more of the seam binding ribbon. I also attached a couple of charms from my stash. I applied them so they hung down into the wreath from the top cluster of flowers.

Finally I used Dazzling Blue Nuvo Glitter Drops to add some sparkle to the leaves, and a few dots of Caramel Cream Nuvo Crystal Drops around the flower clusters.

That's all for today, I will be back with part 2 soon, thanks for looking.
Lynn x
No comments:
Post a Comment