Hello everyone! Rebecca Bee here today sharing my second layout using Simple Stories Book Fair. This collection is mainly school themed but the book worm in me couldn't help but notice the book imagery in the collection, so I decided to create a page to document the books I've read up to the halfway-point of the year so far.
Friday, 12 September 2025
Stories | Book Fair by Simple Stories
Wednesday, 8 January 2025
49 & Market - Moonlit Garden - Favourite Photo
Wednesday, 6 September 2023
Simple Stories - Trail Mix - Outdoors Adventure
Hi there,
I hope you've had a fabulous Summer Holiday, despite summer being somewhat lacking here!
Autumn has definitely arrived and I'm loving it! It's my favourite time of year, and this month i'll be documenting it using the Trail Mix collection from Simple Stories which you can find in the shop here.
I was surprised how versatile this collection is. It combines earthy tones like I've used here, with brighter more vibrant colours which I'll use in my next post. That gives it great range for scrapping brighter Spring/Summer adventures with those more woodland walks through Autumn to Winter. I do love a collection that has multiple uses!
As usual, I reached for a base of White Premium Cardstock, and some Distress Oxide Inks in shades that reflect this warmer tone palette. I used:
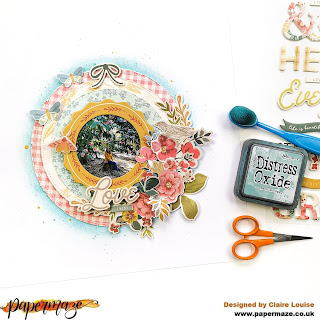
Once I had these in place, I knew I wanted to create a circular design, pulling all the different circular elements from the collection to build clusters around my photograph.
I first cut a range of circles in different sizes using dies, but you could use punches or an electronic cutting machine like Cricut or Silhouette to achieve the same result. I used the blue and green sheets from the Matchmaker Pack, along with the 3x4 Elements and 2x2/4x4 Elements papers.
I stuck some of these flat, but raised most on foam, gathering them in 3 main spots to create anchors for each cluster.
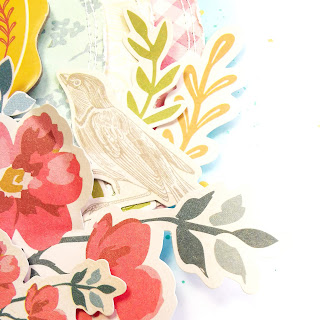
To each cluster I added some ephemera from the Bits & Pieces pack, alongside some stickers from the Sticker Book.
The Ephemera pack includes these cute little bugs which make a great addition to the page and really help to give it that outdoorsy feel.
Just above my photo, I wanted to create a larger cluster, so fussy cut this big compass from the 2x2/4x4 Elements Paper which really helps to balance the page as it's offset against a larger photo. This also acts a a subtitle for the layout.
Again, you'll see I couldn't help but add another one of those cute bugs to bring the page to life!
My title is made from a large statement piece from the Page Pieces pack. I love these packs. They contain 15 staple die cuts including ephemera and journaling pieces, that give you everything you need to create a beautiful layout, and they're great value for money!
I added the 'adventure' from the Bits & Pieces Ephemera Pack to help bring a bit of the darker brown to the bottom of the page.
I also added a small cluster of trees using the Bits & Pieces and Sticker Book to help incorporate the title a bit more, and bring the it into the design.
With a few extra splatters of Distress Oxide, the page was complete!
This was a very quick and easy page to put together, and I can't wait to come back later this month with another layout from this beautiful collection.
There's still plenty of this collection in stock, so check it out here.
Claire xx
@scrappysoulmate
Wednesday, 21 June 2023
Jen Hadfield - Flower Child - Bloomin Lovely
Monday, 1 May 2023
April Papermaze Kit - Part 2
Lynn here today with the second post sharing my layouts using the April Papermaze kit. The
two new layouts depict Easter fun, 25 years apart! The kit is full of pretty pastel papers, card and embellishments.
Here is what you will find in the kit, for more details please see the kit in the shop.
Patterned papers:
Simple Stories - Simple Vintage Life in Bloom collection - Celebrate Life & Shine Bright
49 & Market - Art Options Rouge collection - Coloured Foundations #1
Pinkfresh Studio - Spring Vibes collection - Daydreams
Photo Play - Bunnies and Blooms collection - Blooms
American Crafts - Paige Evans - Blooming wild collection - #20
Bazzill Basics Cardstock - Rain & Bazzill White
Embellishments:
6 buttons, 5 wooden hearts, 1 sheet Pinkfresh Studio mini puffy alpha stickers, 3 49
& Market chipboard pieces, Carta Bella chipboard frame, 2 Pinkfresh
layered stickers, strip of pearls, 3 Rosie's Studio tickets, 4 Pinkfresh ephemera
pieces.
Extra Bazzill Basics pack:
Yukon Gold, Silver Sage, Pink Icing & Lilac Swirl

Easter Bonnets - The children in their Easter Bonnets made for a school event, when they were five in 1997.
I chose the Pink Icing Bazzill as the base for this layout. With White Bazzill, I cut a large heart shape. With some rainbow-coloured thread, I worked blanket stitch around the outside of the shape. The heart was then glued to the Pink Bazzill.
My photos were mounted onto the Silver Sage Bazzill to create a narrow mat. These were arranged and stuck to the layout.
Then I cut a selection of multicoloured hearts from the Blooming Wild paper #20 from Paige Taylor Evans. I arranged the hearts across the page, some were glued to the layout and others were raised a little with 3D foam pads. I used enough to spell out my title and the year. Then I scattered a few more hearts peeking out from under the large heart.
I cut the letters for my title using Tim Holtz, Sizzix Thinlits die set - Alphanumeric Bold. The paper I used was left over from my wreath page I made in the previous post using 'Celebrate Life' paper. I inked the edges of the small hearts and the letters.
I finished off the layout with embellishments from the kit - the buttons, wooden hearts and the die cut shapes.
What3words East Egg Hunt - Photos of my children and their partners when they visited here last Easter and I organised an egg hunt with what3words locations as clues to find the goodies. I made it a little trickier by making some words into anagrams.
For this layout I used a lot of the leftovers from the previous three layouts. Working on a colour block design, I started by placing colour onto a sheet of White Bazzill, dividing the page into four vertical bands. For each colour, I added two or three colours of Distress Oxide Ink to a craft mat, added a little water and dipped a piece of acetate to transfer the colour to the area of the page I wanted to colour. I protected the area I didn't want to get the colour with more acetate placed onto the cardstock. I dried each panel of colour before moving onto the next one. Once each area was dry, I flicked some more colour over the section with a paint brush, drying each one at a time as before.
I cut two tags for each of the four colour blocks, one from patterned paper and another from Bazzill. I used Tim Holtz, Sizzix Thinlits die set - Framed Tags. I also added reinforcement rings using the same die set. I threaded Divine Twine into the holes at the top of the tags, in four colours the march the tags.
I cut the title using Tim Holtz, Sizzix Thinlits die sets - Alphanumeric Bold (for main title) and Label (for the smaller title and date).
Using scraps from the 'Shine Bright' paper I cut a selection of butterflies in colours to match the tags and added them to the layout.
I found some decorative pins in my stash and added two to each area, together with some of the chipboard and die cut embellishments from the kit.
Finally, I scattered the pearls from the kit around the layout on the inked areas.
That's all for this kit, back soon with layouts from the May kit.
Thanks for looking
Lynn x


.JPG)
.JPG)
.JPG)
.JPG)

.JPG)
.JPG)
.JPG)
.JPG)
.JPG)
.JPG)
.JPG)
.JPG)


.jpg)


.jpg)
