Showing posts with label halloween. Show all posts

Friday, 25 October 2024

Halloween - Simple Stories - Simple Vintage Scary Stories

Hi everyone,

It’s Rebecca back with you today and as we edge closer to the end of October, my Halloween preparations are well underway! It’s the perfect time to be sharing another layout created with the Simple Vintage Scary Stories collection by Simple Stories. You’ll find the full collection in the shop here


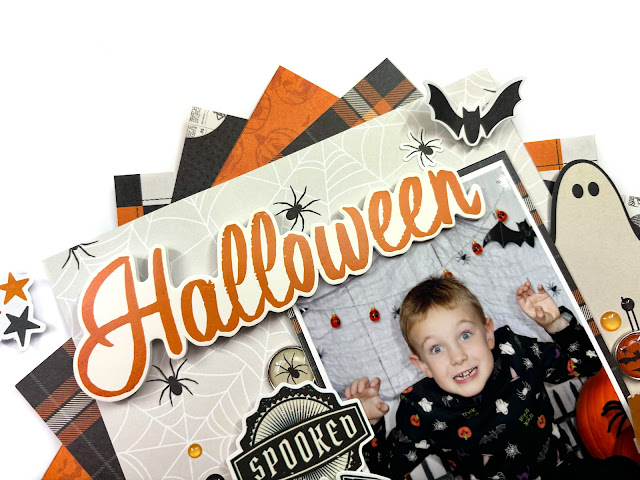
I love the patterned papers in this collection and wanted to feature several of them on my layout. I find the best way to do this, without overloading the page, is to use small amounts of each paper. I selected 6 papers to use, and cut a 6 x 6 inch square from each. I layered the papers in the centre of a sheet of Premium White Cardstock, and staggered them slightly so that only the corners of each were visible. I purposely selected the lighter pattern for the top piece as I knew that more of this paper would be visible. 


To the right of my papers, I’ve added my photo, matted with a dark patterned paper from the collection. 


For my title, I selected one of the Foam Stickers. I opted for an orange worded sticker to help bring a bit of brightness to the page as my photo is quite dark and has a lot of black in it. I positioned the title above my photo. 


This left me a nice open space to the left of my photo for embellishing. I selected a pumpkin cluster from the Cardstock Stickers and raised it up on foam pads. I like to adhere my stickers to white cardstock first to make them a tad sturdier. 


To the right of my photo I’ve introduced some die cuts from the Bits and Pieces and some of the adhesive Decorative Brads. I love how easy these are to use - no need to pierce holes and split pins open on the back - just stick and go!  


I finished off with a few glossy Enamel Dots in two clusters to add a little more texture to the page. 


Thank you so much for reading. I hope you like my layout and it offers you some inspiration.  Don’t forget this collection is available in the store now so grab it before it’s all gone! 


Take care,


Rebecca x

@preciouspagespapercraft 

Wednesday, 9 October 2024

Halloween - Simple Stories - Simple Vintage Scary Stories

Hi everyone, it's Rebecca with you today and I'm super excited because it's October, and October means only one thing for me... Halloween! I couldn't let the month go by without sharing some Halloween layouts, so here I am with my first one, created with the Simple Vintage Scary Stories collection from Simple Stories. You can find the full collection in the shop here


I started with a sheet of the 'Spooks Galore' patterned paper. I love the black-on-orange design on this paper but it was a bit too bold to use as a background paper. To help balance it out and give me some white space to create with, I trimmed down a sheet of white cardstock, tore the top and bottom edges and then distressed it all quite heavily before placing it on top of the patterned paper.

I gutted the centre of this sheet and then used the reverse side to introduce a darker tone to the layout. On top of this, I positioned my photo, matted on white cardstock and then a patterned paper from the 6 x 8 Paper Pad. Behind my photo, I layered two tags from the Tag Elements patterned paper.


For my title, I selected one of the Cardstock Stickers as it echoed the colours in the patterned paper bordering my layout nicely. I first applied the sticker to plain white cardstock, and then trimmed around the edge to leave a small white border to help the title stand out more on the page.


Around my photo, I embellished using elements from the Bits & Pieces, the large skeleton die cut from the Page Pieces and some spiders from the Sentiment Bits & Pieces,


To finish off the page, I added a few sequins and a hand-doodled black border to both sides of the white cardstock. 

I adore the traditional halloween colours of this collection. They are my favourite to scrap with so I can't wait to dive back in to create more layouts. I also can't wait to see what everyone else creates with this spooky collection!

Take care

Rebecca x 

@preciouspagespapercraft


Monday, 23 October 2023

Boo to You - Simple Stories - FaBOOlous Collection

Hi everyone, Rebecca back with you today. I'm getting more and more excited as we edge closer to Halloween! Today, I'm sharing another layout created with the FaBOOlous collection from Simple Stories. You can find the full collection in the shop here.


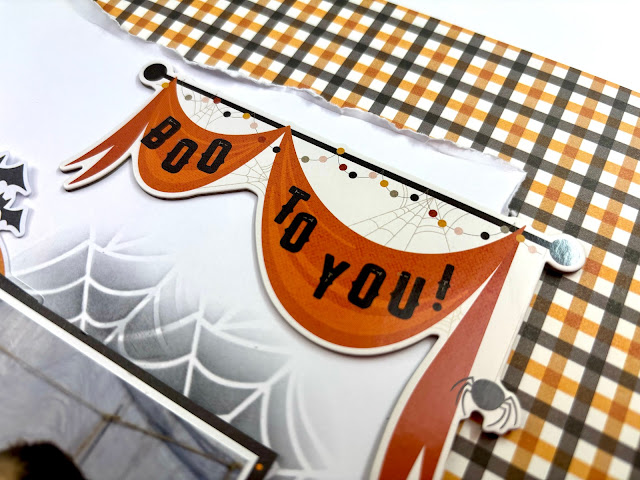
I was really drawn to the Shrieks and Screams patterned paper and wanted to feature it on my layout so I decided to be brave and use it for my background. It's obviously a very busy paper though, so I needed to bring in some white space to work on! I cut a piece of Premium White Cardstock down to about 7 inches wide and then shortened it by tearing along the top and bottom to create some texture. I adhered this to the centre of my page. 

The first thing I got into place was my title - the 'Boo to You' piece from the Chipboard Stickers. I've been wanting to use this piece for ages but haven't been able to make it work on previous layouts, so I got it into place early on today! 


I love this photo of my little boy from last Halloween, and due to the way his body is positioned in the photo, I decided to place it over onto the right hand side of the page so that he is 'looking' across the page towards the centre. I added a layer of dark patterned paper behind my photo to help make it pop against the crisp white background.


I love everything that is included in this collection, so I pulled out all the embellishment packs to see what I wanted to use to embellish. I started with the larger pieces as they obviously take up more space. I positioned the orange moon from the Journal Bits & Pieces in place first, along with some larger pumpkins from the Bits & Pieces


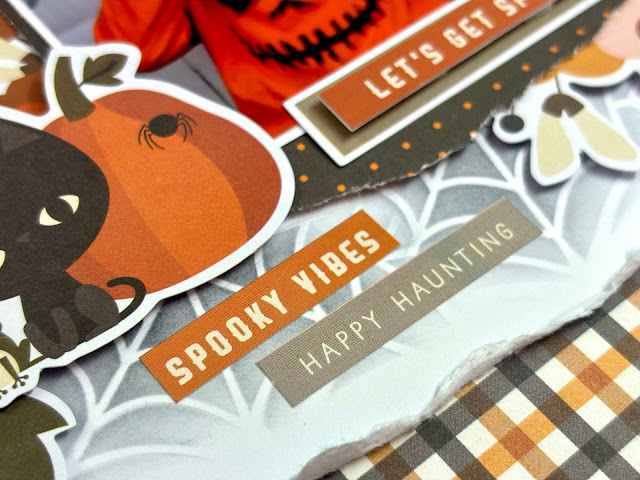
Once these were in place, I could clearly see where I had gaps and where I could tuck smaller things in to build up clusters. I've used some of the florals from the Floral Bits & Pieces pack and some phrase stickers from the Cardstock Stickers sheet. Once I had everything in position, I carefully started to adhere it all together, without sticking anything to my background. This is because I wanted to add some light mixed media to the background. 

When it comes to mixed media, sometimes I find it easier to get it on the page first, and then build my layout on top of it. But other times, I build my layout and then think 'ah, maybe I'll add some stencilling' - and this was one of those times! It means everything has to come back off the page, so by trying to stick it all together, it makes it easier as I can just move it off as one piece. 


I've used a stencil from my stash, along with a Distress Ink Pad in 'Black Soot' and added some spider web detailing around my photo and embellishment clusters. I love adding detail to my background in this way - it's subtle, and as there's no water or wet paint involved, it's not at all messy and doesn't require drying time - perfect when you are as impatient as me!


I finished off the layout with the addition of a cluster of bats from the Page Pieces in the top left hand corner. 

I hope you've enjoyed this layout and the previous ones I've created with this collection. Thanks so much for reading.

Rebecca x

@preciouspagespapercraft


Monday, 9 October 2023

Trick or Treat - Simple Stories - Faboolous Collection

Hello, it's Rebecca back with you today, and I am in full-on Halloween mode! The countdown is on in our house and we've already visited our first pumpkin farm of the season. Today I have another halloween layout to share with you, created with the wonderful 'Faboolous' collection from Simple Stories. You can find the collection in the store here.


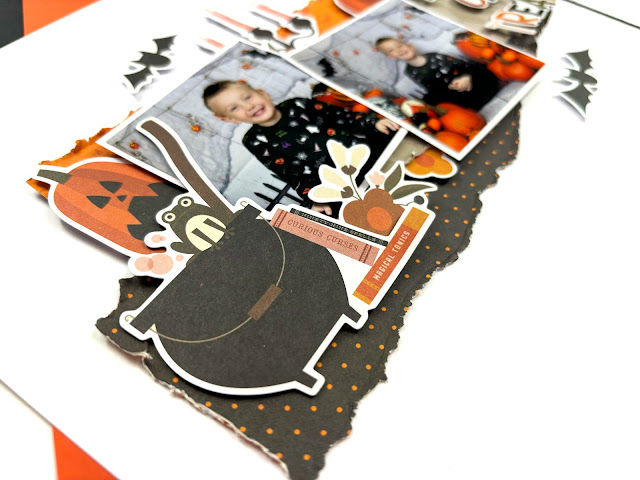
I began by tearing strips from 3 different patterned papers. I left the strips with a straight edge on one end, and then tore them to a point at the other, before distressing all the edges with the blade of my scissors. I matted my two photos with some white cardstock to help them pop, and also for continuity seeing as the Bits & Pieces all have a white border in this collection.


I overlapped my photos, with some foam behind them to introduce some dimension, and then positioned them to the right of the page, on top of my distressed papers. 

For my title, I've used some of the Cardstock Stickers. I loved that the letters were all different colours and matched well with my colour scheme. I raised the words on foam pads and adhered them over to the right of the page.


To embellish the layout, I've used lots of the Bits & Pieces - raising them up on foam where needed so that they could tuck in behind things. 


For the little dangling spider, I pierced two holes in my background cardstock and then threaded some embroidery floss through to look like a web attached to the spider.

To help balance the page, I then created some smaller torn strips of paper and placed them at the bottom of my layout, over to the right hand side. I then added a word sticker to this cluster from the Cardstock Stickers.


To finish off, I selected a few of the bat die cuts from the Page Pieces, raised them up on foam and scattered them around the page.


Thank you for reading! I hope you've enjoyed the layout. If you'd like to watch the page come together, there is a process video over on my YouTube channel.

Until next time,

Rebecca x

@preciouspagespapercraft


Saturday, 23 September 2023

Faboolous - Simple Stories - Faboolous Collection

Hi everyone, it's Rebecca with you today and I'm not going to try and hide it... I get a little bit excited at this time of year! I absolutely love Halloween, and it's my favourite season (yes, to me Halloween is a season!) to scrap. I'm always drawn to collections which have traditional halloween colours - oranges and blacks, so the Faboolous collection from Simple Stories is right up my street. You can find the full collection in the shop here.


I began with a sheet of Premium White Cardstock and using a craft knife, cut some slashes into it, going diagonally across the page. With the blade of my scissors, I then distressed inside these slashes and folded the cardstock out giving the effect that a monster had slashed across my layout with it's claws. Using several patterned papers from the collection, I then back-filled these areas so that small amounts of patterned papers were showing through. 

Before even starting this layout, I knew I wanted to use the large 'Faboolous' title from the Page Pieces, and so I positioned it diagonally on my page so it was running parallel with my slashes. I raised my title up with foam pads to bring some dimension to the page.

My photo today is 3x4 inches and fitted really nicely tucked behind the end of my title. I adore this photo of my little boy - pulling a 'scared' face during a halloween photoshoot last year! With my photo in place, I then moved on to adding a few embellishments.


I've used some of the Bits & Pieces, arranging them either side of my photo, and introduced a few of the Cardstock Stickers too to build these clusters up. I felt like the layout was getting quite heavy over on the right hand side, so added a little cauldron and spider to the left to help balance everything out.
 

I finished off with a few bats stickers and star die cuts raised up on foam. I always like to finish my layouts off with a few small bits, and the bats and stars were perfect for this.


Thanks for reading! I hope you've enjoyed this layout. It's the first halloween layout I've made this autumn, but certainly won't be the last. Don't forget to check the collection out in the shop.

See you next time,

Rebecca x

@preciouspagespapercraft


Saturday, 23 October 2021

Halloween - Simple Stories - Spooky Nights Collection

Hello, Rebecca here with you today sharing my second layout of the month using Simple Stories 'Spooky Nights' collection. It's getting closer to Halloween which means I'm getting increasingly excited! For now though, I'm finishing up scrapping my 2020 photos. You can find the Spooky Nights collection in the shop here.


I began with a sheet of white bazzill cardstock, which I trimmed to 10.5 inches squared and framed using the 'BooYa!' patterned paper. I then machine stitched around the edge of the cardstock with black thread to add some drama and texture. 


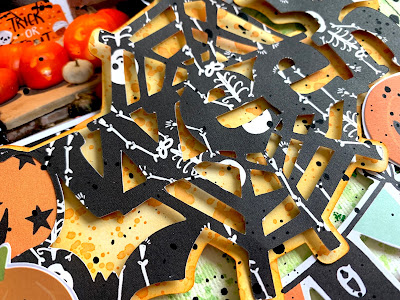
I purchased a cutfile from the Silhouette Store, which I cut from the B side of the 'One Cool Ghoul' patterned paper. I offset the cutfile and removed all the internal parts which gave me a background piece to sit my cutfile upon. I coloured this piece with a blending brush using a Distress Ink Pad in the shade 'Spiced Marmelade', and then added splatters on top to give it a bit of texture. I layered the two pieces up using foam pads to introduce some dimension to the layout.


I used another Distress Ink in the shade 'Twisted Citron' to add some bright green to my background, behind the cutfile - again using a blending brush and adding some splatters on top. 

The Cutfile offered a natural place for my photo, so I added a layer of the BooYa! paper behind it, and raised it up on foam before slotting it in above the cutfile. 


With the basis of my layout complete, I moved on to embellishing. I used several pieces from the Bits and Pieces pack including a signpost, a bunting piece, a trick or treat bag and a pumpkin.


I also introduced some of the Combo Stickers - but before adding them to my layout, I stuck them to white cardstock and cut them out, giving them a white border to help give them some separation from the background.


I also fussy-cut some haunted houses from the 'Let's Get Spooky' patterned paper in colours to match my mixed media. 


I wanted to extend the design further down the page, so used some of the label stickers from the Combo Stickers sheet with phrases which related to my photo.


I finished my layout off with some black splatters using watered-down acrylic paint.

Thanks very much for reading, I hope you've enjoyed my layouts using this collection. If you'd like to see this page come together, I have a process video up on my YouTube channel which you can find here.

Take care,

Rebecca x


Monday, 11 October 2021

Spooky - Simple Stories - Spooky Nights Collection

Hello, it's Rebecca with you today and I'm really excited to be sharing a Halloween layout with you! I absolutely love Halloween - it's possibly my favourite theme to scrap and this month I'm working with the 'Spooky Nights' collection from Simple Stories. You can find the collection in the shop here.


I started my layout with torn strips of patterned paper across the top of the page. I used the B side of 'Gone Batty' and the A side of 'Spooktacular'. Next, I cut a few of the sections from the 'Journal Elements' patterned paper - using two of them as staggered layers behind my photo and using a 3rd to create a sequin shaker pocket. I backed my shaker pocket with the orange bazzill cardstock from the Matchmaker Pack to bring in more of the colour to the page. 


I had the idea in my head to build the layout to the left hand side of my page with elements cascading down, so once I had my photo and shaker pocket in place I worked on my mixed media - keeping it to the left of the page.

I used Distress Inks in 'Dusty Concord' and 'Twisted Citron' to apply some colour to my background using the packaging technique, making sure to add enough colour so that the inks would show underneath my embellishments. 


I cut two of the tags from the 'Tags' patterned paper - choosing tags with colours that worked with my colour scheme. I distressed the edges and placed them under my photo, dangling down. I then added some embroidery thread through the holes to introduce a bit of texture and to help extend the design further down the page.


I embellished the layout with a few elements from the Bits and Pieces pack - I added a ghost wearing a witches hat above my photo, and a pumpkin, headstone and spiders web below. The 'Gone Batty' paper I've used at the top of the page has clouds, moons and bats on it so I also added corresponding pieces from the bits and pieces pack.


I further embellished the layout using a 'Trick or Treat' banner from the Combo Stickers sheet and fussy-cutting a haunted house from the 'Let's Get Spooky' patterned paper, in green to match the 'Spooktacular' patterned paper. 


The design I'd chosen offered an obvious spot for my title - which I added using one of the Foam Stickers which says 'Spooky' and I finished this off by dangling a spider from it which I found lurking in the 'Bits and Pieces' pack.


I finished my layout off with a scattering of sequins and some black splatters, using watered-down black acrylic paint.


Thanks so much for reading, I hope you've enjoyed my layout and it inspires you to have a play with this collection. If you'd like to watch it come together, there's a process video up on my YouTube channel, which you can find here.

I'll be back later in the month with another 'Spooky Nights' layout.

Take care,

Rebecca x

Saturday, 31 October 2020

Happy Halloween (2) - Simple Stories - Boo Crew Collection

Hello, it's Rebecca here - I couldn't resist popping by to say HAPPY HALLOWEEN and to share another layout I've created using the Simple Stories 'Boo Crew' collection. I am still really enjoying this collection, and think I'll be creating layouts with it for weeks to come!


I started this layout with a sheet of 12x12 textured ivory cardstock, and added some mixed media by colouring my texture paste with distress inks, and pressing it through a stencil by Echo Park (the stencil can be found here). This has given me a gorgeous orange and black star background to build my layout upon. I also mixed the two distress inks with a little water and added paint splatters using a paintbrush. The background did't take very long at all, and it was very simple - but its added a lot more interest to my layout. If you are new to trying out mixed media, using texture paste and a stencil is a really great way to dip your toes in!

I mounted my photos first onto white cardstock, and then onto black to help frame them and placed them in the centre of my page towards the top. I selected four tags from the 'Tags' patterned paper, distressed the edges and added some embroidery thread and placed two just peeking out either side of my photos.


For my title, I've used the 'B' side of the 'Happy Haunting' patterned paper. I hand-drew the letters to spell 'Halloween' and cut them out. I drew a black border on each of the letters using a black fine liner pen to help give them a more defined edge, which I think helps them to pop off the page a little more. I adhered the letters under my photos using foam pads to add dimension. I then placed the word 'happy' from the Bits & Pieces pack above to complete my title.

I felt like my layout needed something dark at the top and bottom as it was looking a little stark with just the ivory cardstock. So I tore some strips of the 'Happy Haunting' patterned paper - using both the 'A' and 'B' sides. I layered these on top of each other with the darker 'A' side being more dominant, and the orange 'B' side just peeking out from behind it.


Next, I set about embellishing my layout. I still had the female skeleton left over from my last layout so she finally found a home on this page! She's from the Bits & Pieces ephemera pack. I am really impressed with this pack- I don't think I've ever had an ephemera pack with so much in it, and I love every single bit! The little cat riding the broomstick is also from this pack, as is the 'Hey Pumpkin' banner flag at the bottom. I also fussy-cut a little dancing skeleton from the 'Tags' patterned paper.

The Combo Cardstock Stickers sheet in this collection is just as amazing as the 'Bits & Pieces' and is jam-packed with so much! I've used several stickers on this layout - The 'A Wicked Good Time' sign at the top left, the male skeleton, the banner under my title, the pumpkin and also the word stickers at the bottom! And I still have soooo much left on the sticker sheet! It's a bit like Mary Poppin's handbag... never ending!


I finished my layout by adding a male skull face from the Chipboard Stickers and several thread clusters in orange and black. 


When I started this layout I had no plan other than wanting to have the orange and black texture paste stars on my background! And from those stars, the layout just grew and came together really quickly.

If you'd like to watch how my layout came together, there is a process video up on my YouTube channel which you can find Here

Wow, that's me done for October! I can't believe how fast this month has gone. I still have loads of this collection left so I'm sure there will be more layouts here and there once we have some photos from this evening! Can you tell I love Halloween?!

I'll be back next month with some more layouts. I'm sticking with Simple Stories and working with the 'Cozy Days' collection so I can't wait to get creating some Autumnal layouts.

I hope you all have a fabulous weekend, and if you celebrate Halloween then I hope you have a wickedly spooky night, and stay safe.

Take care,

Rebecca x