Showing posts with label layered paper. Show all posts

Monday, 29 January 2024

Simple Stories Winter Wonder - Snow Much Fun

Hello, Karen here again. Today I have a scraplift  to share with you using the Winter Wonder collection from Simple Stories as well as a page from the Discover & Create Painted Backgrounds Paper Pad from Vicki Butin.

Inspiration for this layout was this gorgeous layout created recently by Jana Eubank. I was particularly drawn to the vertical collection of embellishments down the centre of the page.


For my layout I started with a sheet of paper from the Discover & Create Painted Backgrounds Paper Pad from Vicki Butin, which had a purple design on it. The Winter Wonder collection from Simple Stories doesn't have any purple in it, but as my daughter was wearing a purple coat in my photos, I thought the Background paper was perfect. I trimmed the paper down slightly and matted it onto a sheet of pale purple Bazzill cardstock to leave a narrow border all round the edge.


Inspired by Jana's layout, I layered papers from the Winter Wonder collection on top of the background.  Using a black gel pen I outlined all the papers as well as the background paper.


On to the papers I placed my two photos which were matted with white card and tucked a tag, cut from the tag elements paper behind one of the photos. The tag was tied with some black and white twine and the twine was secured in place with some wet adhesive.


Between the two photos I placed a couple of narrow strips of patterned paper to anchor the floral bits and pieces which I cascaded down the page. I chose pieces which were black, pink and green to co-ordinate with the papers used. There are 72 die cuts in the pack of bits and pieces so there were lots to choose from!


In my stash I found some wood veneer snowflakes and stars and added these on top of and around the die cuts.


Letters die cut from a scrap of black cardstock were used for the title placed beneath one of the photos.


The date, cut from more black cardstock, was added at the bottom of the layout.


I finished the layout by scattered a few sequins from Picket Fence Studios here and there.

I hope you like this layout. I'm loving the Winter Wonder collection and will be back again soon with another layout to give you ideas for your own scrapbooking. Winter Wonder can be found here.

Take Care
Karen x x


Sunday, 3 October 2021

Jen Hadfield Peaceful Heart - Leaves are Falling by Meg

Hello, happy Sunday and welcome to the blog today! It's Meg here sharing my newest layout, using the stunning Jen Hadfields Peaceful Heart collection, which I'm finding SO versatile and elegant! 

As my last page used delicate florals and peachy pinks, I decided I wanted to try a more Autumnal feeling layout this time. I started with some Autumn photographs of my little boy that I took in the woods last year and picked out the green Breathe Deeply paper which matched the green trees in my photos quite nicely! 

I didn't have much left of the Breathe Deeply paper after fussy cutting most of it for my last layout, so I cut a rectangle out of what I had left and went from there. I decided to layer up my photos and keep them central on the page, with a longer title on the green paper as a focal point. 

I wanted to use three photos on my page but they are all quite similar as they were taken at the same time, so I layered my favourite photo up with plain white cardstock, distressing the edges to add some texture. I cut my large green Breathe Deeply rectangle in half, so that half would become my title focal point on the right and the other half would be layered behind my photo on the left, to tie the green together across the page. I stitched the green paper onto a larger rectangle of vellum, to create a pocket. This is where I tucked away my extra photos - they don't tuck away entirely so that they are easy to pull out and they add interest to the page by being partly visible. I liked the effect of the extra photos layered up behind my first photo!

Next I splattered the page with dark green ink to coordinate with the Breathe Deeply paper, either side of where my central rectangles would be. I splattered white acrylic onto the green paper where my title would go. 

I then adhered the rectangles to the page and began creating the ephemera clusters either side. The green foliage was fussy cut from the Breathe Deeply floral side and I used the log circle, butterflies, a large floral element and a mug from the packet of Peaceful Heart Icon Ephemera. I used foam pads behind the butterflies to add some depth and the tag behind my photo came from the Thankful paper. I used acrylic autumn Bramblefox pieces and a few word phrases from my stash and I decorated with gold flat back gems and sequins. 

To make the page look more finished, I tore the white cardstock at the top and bottom and added the marble effect I Am Enough paper behind, with a few more small embellishments in the top corner. I created my title using a letter punch and added my journaling underneath. 

And that's that, my layout complete! I hope you enjoyed seeing what I've created with the Jen Hadfield Peaceful Heart collection and that you feel inspired to give it a try. Thank you for stopping by to have a read! 

I'll be back soon with another layout, so until then, 

Take care and have fun scrapping! 

Meg x 


Wednesday, 4 August 2021

My Candy Girl - 'Sugar and Spice' by Meg

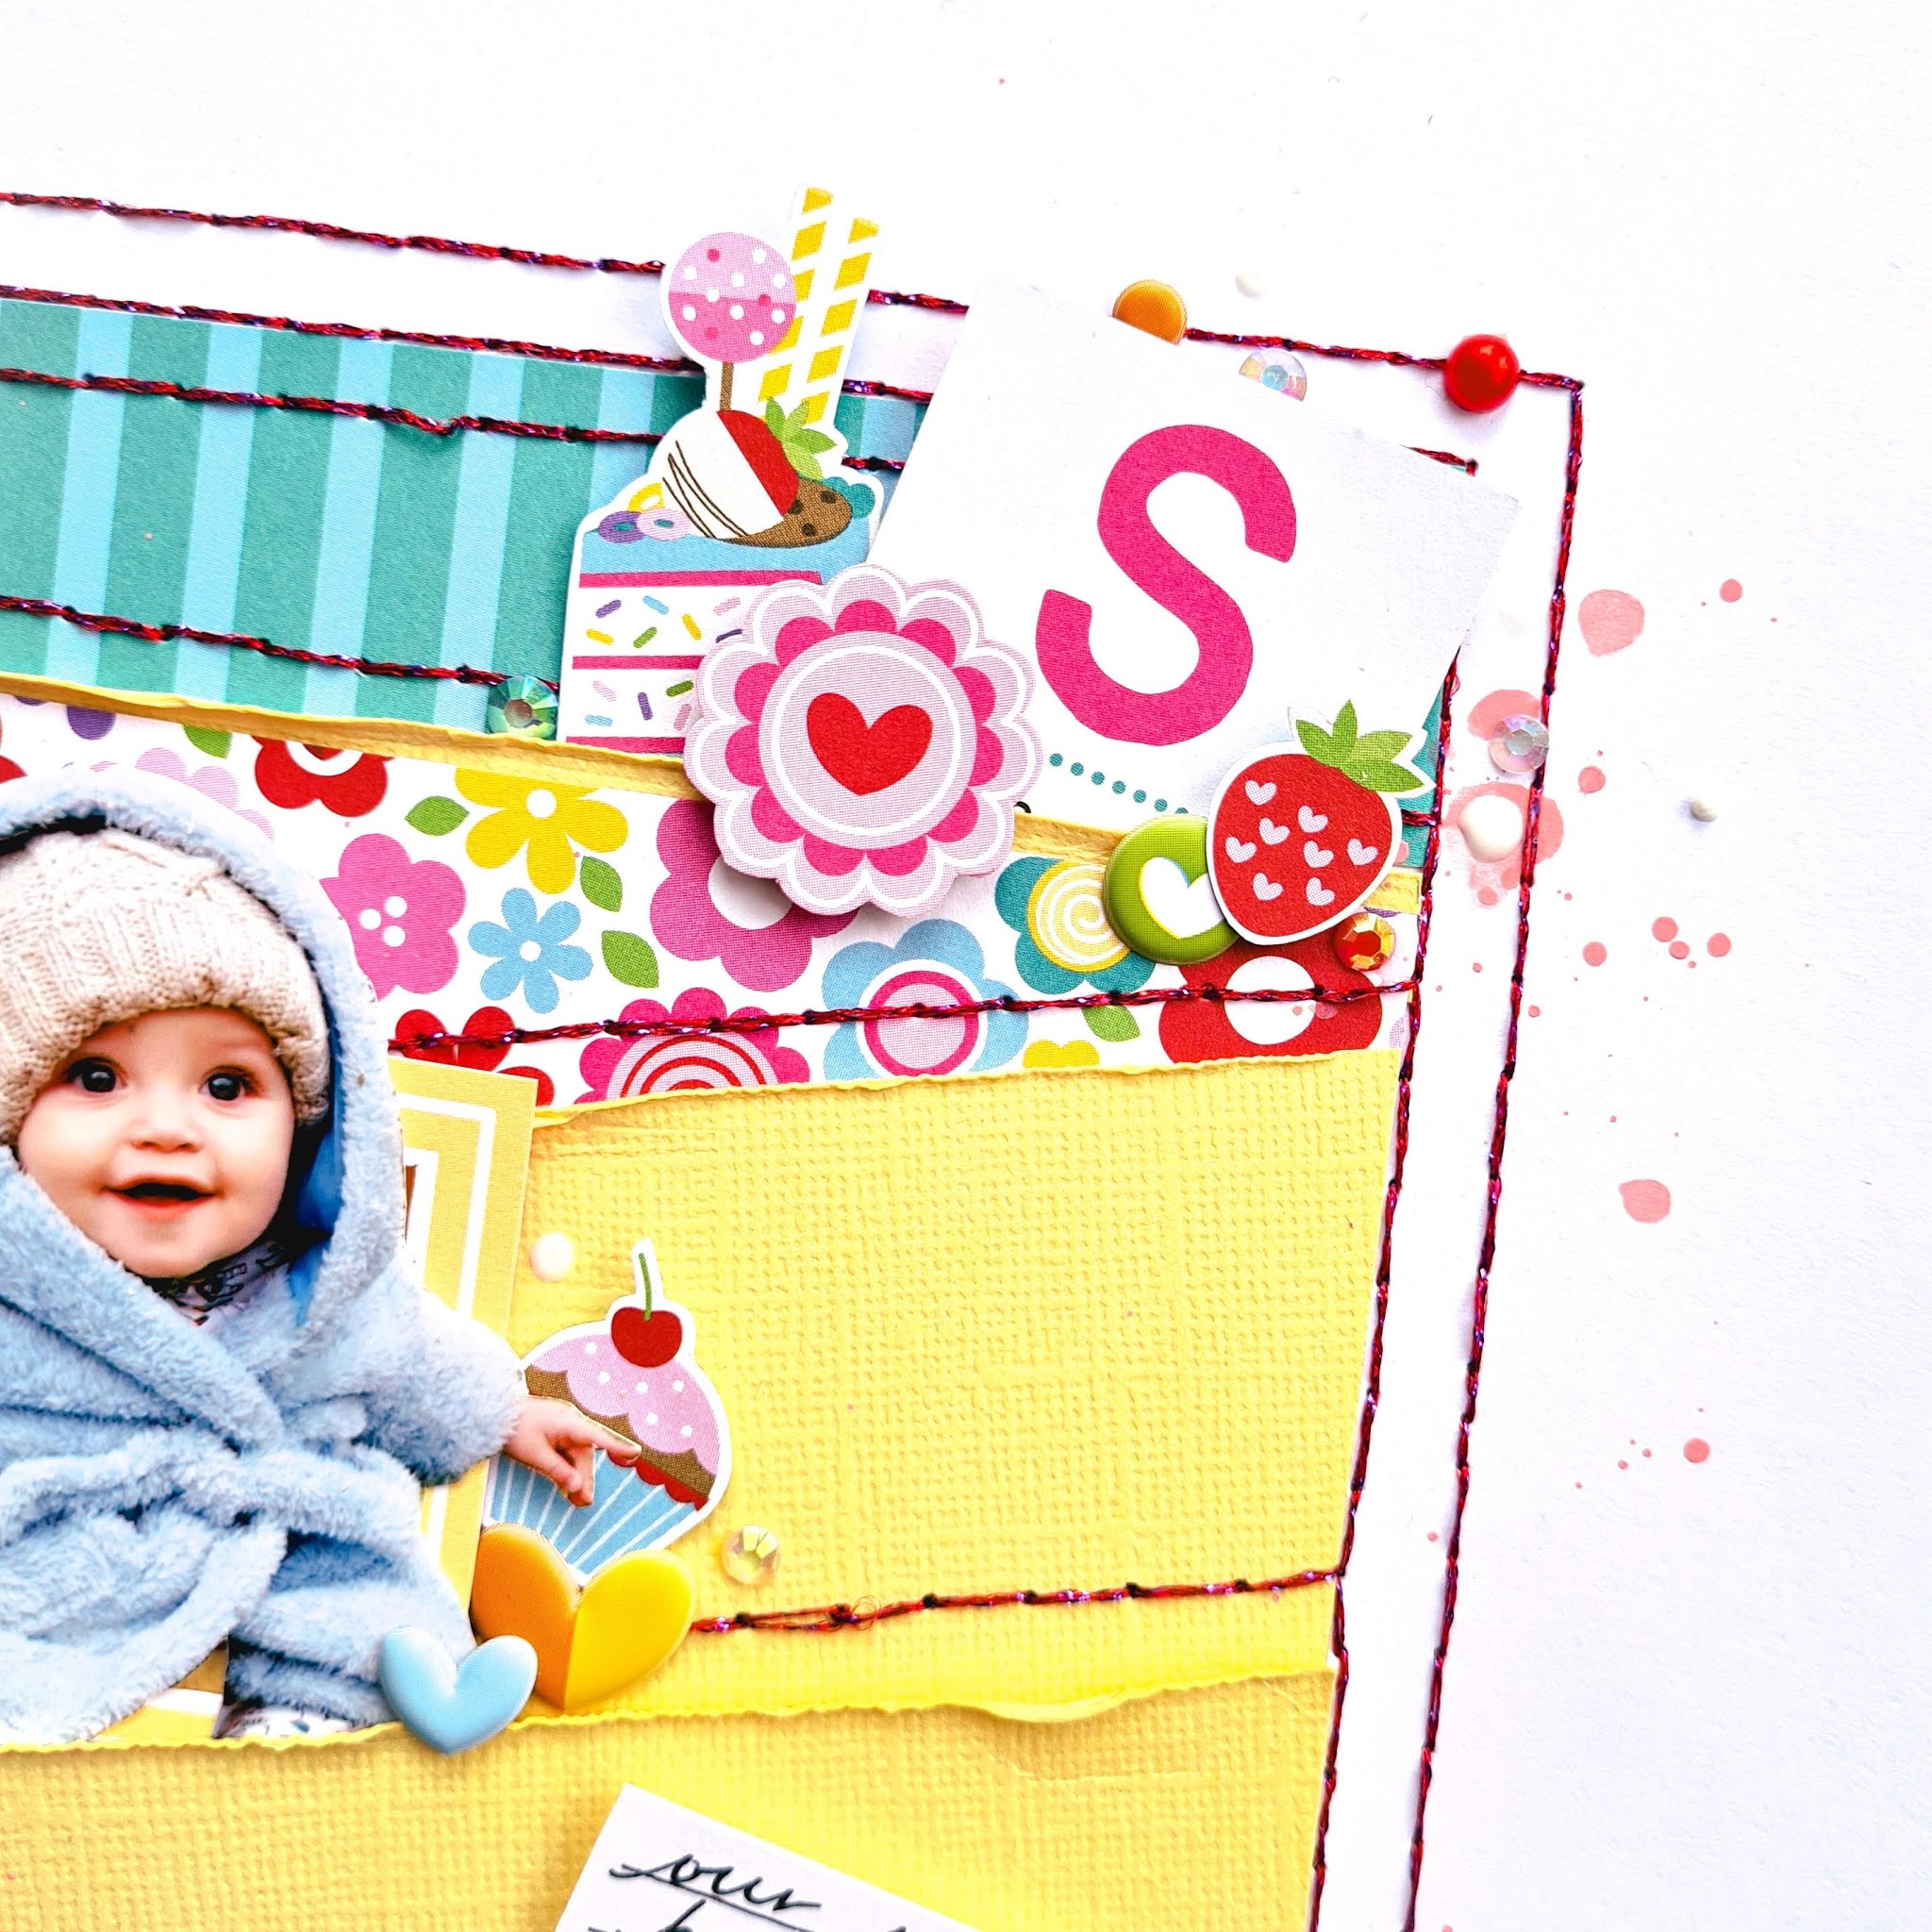
Hello everyone, it's Meg here sharing my latest layout using the delicious My Candy Girl collection by Bella Blvd!


My previous page with this collection was super pink and girly, so I knew this time I wanted to use a photo of my baby boy and I picked out my photo of him in his baby blue dressing gown. I thought it went really well with the bright colours! 

I knew I wanted to make the page full of colour so I decided I would layer paper in a central square with a wide white border around the page to really frame the colour and balance it out. I measured and drew a 6x6 square on white
Marshmallow Bazzill cardstock in pencil and cut strips from yellow Lemonade Bazzill cardstock. I then cut the striped turquoise border from the My Candy Girl Borders paper, cut it in half, arranged my strips in the square and trimmed them to fit. 

I glued in place, distressed the edges and handstitched across the strips and around the 6x6 square using a ruler and a pokey tool to poke holes in the paper every quarter inch, then I stitched in a dark pink glittery thread I had in my stash already. I fussy cut elements from the Borders paper, Sweet as Sugar paper and I cut out the 'Sugar and Spice' journaling element, 'S is for Sweet' plus a turquoise frame from the Daily Details paper. 

I splattered some pink acrylic around the edges of my 6x6 square and began tucking in my fussy-cut photo and the other fussy-cut elements in between the paper layers, in a triangle shape around my photo to draw attention to it. I finished with the Sugar Coating Puffy Stickers, flat back gems and a diamond shaped charm from my stash. 


And thats it! A colour-packed, sweet layout that came together quickly using My Candy Girl. I really loved how this turned out as I find bold colours a challenge sometimes, but these pieces are so cute and fun they feel like they don't need to be put together 'perfectly' to look good! 
Hope you enjoyed this page today and take care, 

Meg x