Saturday, 22 May 2010

Saturday Sketches - Number four...

Hi and welcome to number 4 of our saturday sketches...hope you all had a good week! I know i did and i am looking forward to this weekend to do some serious scrapbooking.

Anyway here is the sketch for today...bought to us by Page Maps...

Here is my take on the sketch...

I used the new October Afternoon for this sketch, also using come of their stickers from the sheets... Also using these thickers!!! you cannot see in the pictures but the white dots are actually little hearts!!!!!!!!!! so cute!


i am having a bit of trouble with my slide.com account...so at the moment i am waiting to be able to upload your pages for the saturday sketches. Also the winner of the colour challenge will be announced next week!
I hope this gives your a little bit of inspiration for the weekend...xxx

Thursday, 20 May 2010

Papermaze Workshops

I have had several people asking questions about the workshops that we hold here at Papermaze.. So i thought that i would pop in today and answer some of the questions that people have asked...

Here at Papermaze we hold several different workshops...they are held by myself and Carol...both of us do very different types of projects.
I do the wednesday workshops..these are held at the shop they are normally the 2nd and the 4th Wednesday every month ( dates do sometimes change)

These are very low key...not complicated. Basically i grab the newest stuff from the shop shelves and put together a page...they all come with written instructions and photos...i am there to help put the page together...the workshops are easy, fun to do and we have a great evening. They are suitable for all scapbookers..from new to advanced scrappers.It is a chance to have a fun evening out and to sit and chat with like minded people!!! lol

All you ever need to bring are your normal everyday cropping tools...trimmer, scissors...inks etc. About half way through the evening we get a cup of tea and some chocolate ( because you cannot scrap without it!!!) and at the end of a good evening you will have a page to take home.

These are always put up on the blog and then you can purchase them here...

Then there are Carols workshops...she is a stamp, ink, alcohol inks expert...you want distressing??? or making tags or altered canvases these are the workshops for you....anything goes and it is lovely and messy!!!!

Here workshops are done at the weekend and you always end up with a gorgeous stamped...inked work of art!!!! she will teach you different techniques to take home and use on your own projects...you can find her workshops here as well... again bring your normally cropping tools with you and as hers are on a saturday bring a lunch as well...

There are limited spaces avaliable on all workshops so always book and if you want to ask any questions about anything then you can always email me on wendy@bbbweb.com.

I hope i have answered any questions you may have asked and i hope to see you there!!!!

Wednesday, 19 May 2010

Greetings Card - Vintage Look


I really like this vintage look. There are so many products out there right now that make creating this look very easy.
This is how I've made mine:

Bo Bunny Mamma-Razzi papers. If you like this look, you will LOVE these papers. I love the fact that they are double sided too.
I've cut a 6x6'' piece to cover the front of my card and then inked the edges. This really does make a difference.
Tim Holtz Distress inks are my favourite right now.


I printed off a little message onto kraft card and also the 'Happy Birthday'and cut to size, but this could be a stamped image or quote too. The edges were inked again and backed onto black card to help it stand out a little. I used a strip of the same kraft card behind with a strip of thin satin ribbon.


These are my favourite mini alphas at the moment.They are from October Afternoon. They aren't too mini, so can be used for journaling and also titles. They also come in red,green, cream, blue.

To do something a little different with them and with fitting in with the card, I like to stick them onto a plain card and cut out and then ink the edges.

I've them finished the card off with a prima fabric flower.

And this is the outcome.

Monday, 17 May 2010

June classes

June workshops and ready for you sign up for...

The first one...
This workshop is on the 2nd June....at 7.30pm.Bring your normall cropping tools with you. TO complete this page you need to bring 3 wallet size photos the sizes for them are 8.5cm by 6cm. We are using the papers called On holiday line from The girls Paperie.

The next workshop is on the 23rd June...at 7.30.

Again bring your normal cropping tools with you. TO complete this page you need to bring a photo ( landscape) to the size 18cm by 13cm. This page is done using the Dear lizzy from American crafts.

Both of these pages with be done using glimmer mist.
Hope to see you there.

Edited to add...to sign up for a workshop...click here to go to the workshop page on the papermaze website. In a few days they will be up for you to purchase...if not send me an email on wendy@bbbweb.com and i can let you know all you need to know. :)

Saturday, 15 May 2010

Saturday Sketches - Number Three

Hi! So pleased it is finally saturday! it has been a long week this week! Anyway today is saturday and that means another sketch...This one this week is a card sketch...

Here is my card that i made using this sketch...

I used the last few scraps from my Girls Paperie Papers. I think i may have to go and buy some more as i have used all the last final bits!!! lol and i still have more things that i want to use it for!
To add the little tag pull out, i adhered the top layer on the card ( the yellow checked) with pop dots so there was space to put the tag.

Hope this gives your some inspiration, have a fab weekend! x

Friday, 14 May 2010

GOT TO LOVE PRIMA

What i love most about prima papers at the moment is the amount of cutting out work you can do to give your layout such an awesome dimension without hitting your spending budget on embellishments
This is such an easy layout to achieve

steps

1 mount your back ground patterned paper measuring 10/10 onto black card stock this always works well with any layout as you can see i use it all the time

2 cut two strips of patterned paper glue across the layout as shown cut a half circle in card stock and place to the right hand side of the layout curling the edge

3 cut a hand full of flourishes and shapes from the patterned papers i have found if it is not to the effect that i am looking for i do tend to stamp and cut my own flourishes to give it more of a fuller effect

4 using two different strips of ribbon place at the bottom of the patterned paper cross and fix with brads add your photo snugly tucking the corner of your photo behind

5 place all of your cut flourishes as shown i cut three different size butterfly's out of the patterned paper layer using 3d foam pads

add the remaining chosen embellishments and add your title to complete your layout

Wednesday, 12 May 2010

How to...photograph your pages.

Photographing your pages is a personal thing...lots of people have different ways to do it...one of the things i get asked quite a lot is how to do it, especially if they are sending it in for publication or a competition. I know that you seasoned scrappers out there know how but there are always people who are new to this craft that we can help.

As i said there are several ways..ie Vanessa who owns Papermaze scans hers...i dont have a scanner so i have to use my camera. Here is how...

First off you really need a good photo editing program...there is one with windows, but that is fairly limited. For those of us who dont have Photoshop ( me included !) the next best thing is a photo editing software that you can pay for or find. I have always had Picasa...which is a google photo editing program...we have done several posts on this on this blog...it is free and completely safe to download so google it and have a try.

Anyway here is how i photo my layouts...

Step one : I stand my page at the back door of my conservatory as that gives the best light at all times of the day...i bought an easel from Ikea
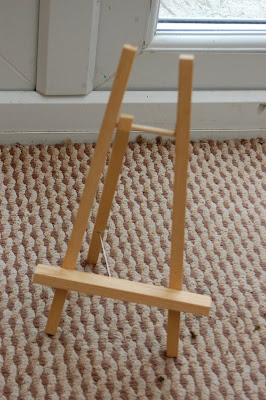
and place it on there.

step two: the next step is the important one...this makes the editing of it so much easier...
You have to photo the page straight on so your edges are straight...

I took this photo of the page...
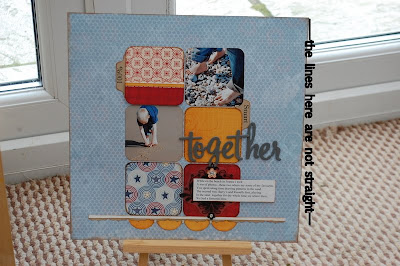
as you can see i was not directly in front of it so the lines of the edge of the page are not straight...so when i tried to crop it, it ended up like this...
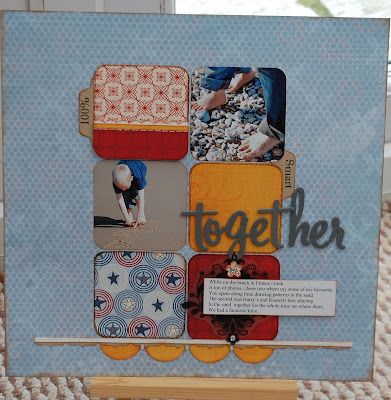
if i had tried to crop the edges even more i would have lost lots of the page trying to get it right. ( by the way Picasa allows you to write on your photos...and it is really easy as well, just go to the text option and follow the instructions)

So i try again...
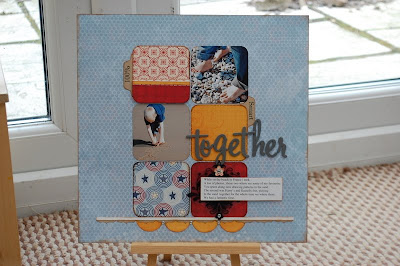
This time as you can see i photographed it straight on, so when i edited it it cropped really easily like this...
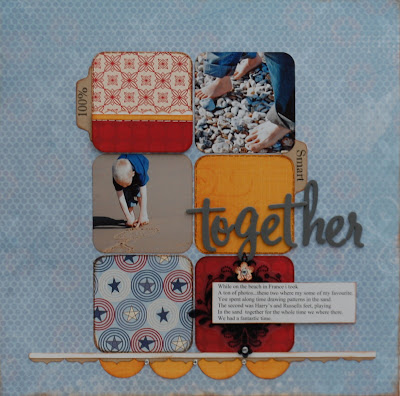
I always mess about a bit with the colour, light and contrast and i always sharpen it for the internet as well....but as long as you get the photo right in the first place it makes cropping much easier. If you have questions then please leave them in the comments section or i if you have another way you do it, again leave it in the comments section and we can add it onto this post to share with others...

If you have any questions about scrapbooking...how to questions, email me at wendy@bbbweb.com and we can do a post on them and answer some of your questions for you.