Showing posts with label Bits & Pieces. Show all posts

Monday, 23 June 2025

Great Outdoors Adventure - Simple Stories - Simple Vintage Woodlands Collection

Hi everyone!

It’s Rebecca here, sharing my second layout of the month with you. With the heat this week, it’s been lovely to escape indoors and scrap some cosy autumnal photos using the Simple Vintage Woodlands collection. You can check out the full Simple Stories collection here.


There are so many gorgeous patterned papers in this collection! After picking a few of my favourites, I cut them into 3.5 x 3.5-inch squares. I arranged them slightly off-centre and overlapped them a little to give the page a more relaxed, layered look. I then mounted my photo on white cardstock, followed by a darker patterned paper to create contrast, and placed it on top of the squares.


Next, I fussy-cut a couple of tags from the Tag Elements patterned paper, punched a gold metal eyelet through the top of each, and threaded some gold metallic thread through them for a touch of texture and shimmer.


For my title, I chose a Foam Sticker and placed it just beneath the photo, extending it with a die-cut phrase (from the Bits & Pieces) to read ‘Great Outdoors Adventure.’ I love mixing different textures and materials when building my titles — it adds so much interest and is always fun to experiment with!


I used Floral Bits & Pieces and Element Stickers to create clusters on either side of the photo. I chose several of the toadstool designs since we spotted so many of them on that woodland walk — such a fun way to bring the memory into the layout!


To finish the layout, I added a few fussy-cut butterflies and tore a section on the right side of the background. I backed the torn area with a coordinating patterned paper, which really helped balance the layout and tie everything together.

Thanks so much for stopping by and reading! I’ve really enjoyed working with the Simple Vintage Woodlands collection this month — it’s such a lovely range. It’s available in the shop now, so be sure to grab it while you can!

Take care,
Rebecca xx

@preciouspagespapercraft 

Wednesday, 11 June 2025

Simple Stories - Sunny Days - Smiles & Good Vibes

Hello,

It's Claire here today! I've been away from my scrappy desk for a while as I've been poorly, but I'm delighted to be back with all the gorgeous scrappy products Papermaze stocks and have my first layout to share with you!

This month I'm using the Sunny Days collection by Simple Stories, and it's a good one! So many gorgeous colours, patterns and icons, the possibilities are endless!


I started with a piece of Premium White Cardstock and used a Sunburst cutfile to create a backdrop for my layout. I resized it three times (approximately between 2" to 3") and cut each size twice in different patterned papers.

The papers I used are:

Once they were adhered flat to the page I thought they almost looked a bit like fireworks as well as sun beams, but the photographs I'm scrapping are of my first trip out after my stay in hospital so it definitely felt like a celebration to me.

I mounted my photos on cardstock from the Matchmaker Pack and layered them with foam on top of the big film strip from the Big Bits & Pieces pack. I then created a long fishtail banner from the Happy Days paper to anchor my photos into the sun bursts.


Next, I chose a selection of ephemera pieces from the Bits & Pieces using a combination of  the VW Van, 'Smiles' bottle top, sunglasses, bag and hearts.  

I also scattered some colourful hearts around the layout to create small clusters, with extra pops of colour coming from the polka dots in the Foam Stickers.

I adore the Foam Stickers in Simple Stories collections, so I also used the bug Good Vibes sticker for my title which helped stretch the design across my page.

As a final touch, I added some gold splatter for that extra touch of magic and sparkle and that was my layout complete!

I hope you've enjoyed this blog - I have really missed being here and am so happy to be back in this creative community sharing this lovely hobby with you all.

Until next time, happy scrapping!

Claire xxx

@scrappysoulmate


Monday, 21 April 2025

Good Vibes - Simple Stories - Simple Vintage Flower Shoppe Collection

 Hi everyone,

It’s Rebecca here today, and I’m excited to share my final layout using the Simple Vintage Flower Shoppe collection by Simple Stories. This collection has been such a joy to work with—especially now, as the sun is shining brighter and flowers are beginning to bloom again! You can find the full collection available in the shop here.


For today’s layout, I started by cutting three squares from two different patterned papers. I chose designs that complemented the colours in my photo, then trimmed the photo itself to match the same shape and size. I arranged all four squares in a diamond pattern in the centre of a sheet of Premium White Cardstock. Because of the direction we’re facing in the photo, I positioned it to the left—this way, our bodies are angled inward, drawing the eye toward the heart of the page.


One of my favourite Simple Stories products has always been the Foam Stickers—I love the mix of fonts and styles. For this layout, I picked a title sticker and placed it on the right-hand square to create a sense of balance across the design.


Having already used many of the large florals from the Floral Bits & Pieces pack, I flipped through what I had left and pulled a few smaller blooms. To stretch the collection even further, I turned to the 'Beautiful' patterned paper and fussy-cut some additional floral clusters. This is such a great way to get more from your stash!

I built two main floral clusters using a mix of those fussy-cut florals and smaller ephemera, adding foam pads for dimension. I also added a bold piece from the Bits & Pieces to the top cluster and a large Cardstock Sticker to anchor the bottom cluster.


To create a sense of movement across the page, I fussy-cut butterflies from the 'Dreamer' patterned paper and arranged them in a gentle cascade. I always attach butterflies by gluing just the body, leaving the wings free for a lovely 3D effect—almost as if they’ve just fluttered down and landed on the page.

Although I loved how the layout was coming together, the outer edges felt a little too bare. Instead of framing the whole page, I opted for thin, torn strips of patterned paper along two edges. It adds a bit of visual interest without overwhelming the centre. A couple of smaller Foam Stickers were the perfect finishing touch.


Thanks so much for joining me today. I've truly enjoyed working with this beautiful collection, and I hope my layouts have inspired you to dive into your own creative projects!

Take care,
Rebecca xx

@preciouspagespapercraft


Monday, 24 March 2025

Big Moments - Simple Stories - Simple Vintage Flower Shoppe Collection

Hi everyone,

It’s Rebecca here, and today I’m excited to share my second layout of the month using the gorgeous Simple Vintage Flower Shoppe collection from Simple Stories. With the first signs of Spring finally upon us, it feels like the perfect time to showcase this beautiful collection. You can find it in the shop here.


For this layout, I was drawn to the Polaroid frames from the Captured patterned paper. I decided to fussy cut a few in a variety of colours and arranged them in a vertical design, slightly overlapping, on a sheet of Premium White Cardstock. To extend the design horizontally, I added the scalloped border sticker from the Cardstock Stickers and a similar one from the Ephemera pack, positioning them across the Polaroid frames.


The space in the centre of the frames was the perfect spot for my photo, so I mounted it using a patterned paper from the 6x8 Paper Pad. To add extra detail, I tucked a few elements from the Ephemera pack behind the photo for more texture and dimension.

As someone who absolutely loves viewfinders, I was thrilled to find a few on the papers in this collection. I fussy cut one from the corner of the Treasure paper and placed it to the left of my photo, which helped add visual interest to that side of the layout. Since I planned to position my title on the right, the viewfinder was the perfect touch to balance the overall design.


For the title, I chose an element from the Bits & Pieces pack. After raising it up with foam pads for dimension, I placed it beneath my photo.


To further enhance the page, I added a few clusters of florals from the
Floral Bits & Pieces and fussy cut some butterflies from the Dreamer patterned paper. Fussy cutting is such a fantastic way to stretch a collection and create additional embellishments!


Thank you so much for stopping by! I hope you’ve enjoyed seeing my layouts this month. I have a couple more to share, so be sure to keep an eye out for those! This collection is selling quickly, so don’t miss your chance to grab it in the shop before it's gone!

Take care,


Rebecca xx
@preciouspagespapercraft

Wednesday, 12 March 2025

Beautiful - Simple Stories - Simple Vintage Flower Shoppe Collection

Hi Friends!

Rebecca here, sharing my first layout of March with you today. With Spring just around the corner and the weather starting to warm up, it felt like the perfect time to create with one of the latest collections from Simple Stories—Simple Vintage Flower Shoppe. It’s a stunning collection that truly captures the essence of Spring! You can find the full collection in the shop here.


I was immediately drawn to several of the journal card images on the ‘Journal Elements’ patterned paper, so I decided to cut them out and layer them behind my photo. To add texture and depth, I distressed all the edges—one of my favorite techniques to elevate a page. I matted my photo with a soft pink patterned paper from the 6x8 Paper Pad and arranged these elements in the centre of a sheet of Bazzill White Cardstock.

At this stage, I still felt like something was missing, so I knew I needed to add a little more behind the photo. I chose two patterned papers—the B side of the '2x2 / 4x4 Elements' and the B side of ‘Memories’—and cut them down to 7x5 inches. I then used a paper punch to add a notebook edge along the tops. Once I arranged these elements at angles behind my photo, I was much happier with the layout.


With the larger pieces in place, it was time to move on to embellishing. I selected some beautiful floral pieces from the Floral Bits & Pieces and layered them around my photo, allowing some to peek out from behind the patterned papers. 


I also added a couple of tin buckets filled with flowers from the Cardstock Stickers sheet to bring in more texture and detail.


For the title, I chose the word “beautiful” from the Foam Stickers and placed it just beneath my photo for a balanced look.                                                                                                                                   


To add the finishing touch, I fussy cut a couple of butterflies from the 'Dreamer' paper and adhered only the centres, letting the wings flutter freely. This gives the impression that the butterflies have just landed on the layout, adding a bit of movement.


Thank you so much for stopping by to check out my layout. I hope it inspires you to create something beautiful of your own! This collection is absolutely perfect for Spring, so be sure to head over to the website and grab it before it’s gone!

Take care, 


Rebecca xx 
@preciouspagespapercraft

Monday, 27 January 2025

Winter - Simple Stories - Simple Vintage Fresh Snow Collection

Hi everyone,

Rebecca here, back on the blog today to share my second layout of the year! This month, I’ve been working with the gorgeous Simple Vintage Fresh Snow collection from Simple Stories, and it’s absolutely perfect for winter. I’ve been hoping for snow every week just to gather some beautiful photos to scrapbook with it! (I'm still hoping!!) You can find the full collection in the shop here.


To start, I cut strips from both the Snug & Warm and Winter Wishes patterned papers. After rolling one edge of each strip for added texture, I arranged them horizontally across a sheet of premium white cardstock, overlapping them slightly.

Next, I added my photo, which I matted with a lighter patterned paper to help it pop. To the left of the photo, I placed an element from the Ephemera Pack, and above it, I added a tag which I'd fussy-cut from the Tag Elements patterned paper.


At this point, I felt the white background was washing out the lighter grey woodgrain patterned paper, so I tested out a few patterned papers as my background before settling on the Cabin Fever paper. I really love the leafy pinecone detail in the corners, and wanted to incorporate more of that to help my design flow with the background. I chose some beautiful elements from the Floral Bits & Pieces and added them diagonally, following the natural design of the background. To add some dimension, I raised the edges of these pieces with foam.


To bring a touch of sparkle to the layout, I added a few clusters of metallic silver thread. I love using silver with snow layouts, as it reflects the silvery glisten that snow often has, creating a nice cohesive feel.

For the title, I chose the word "Winter" from the Bits & Pieces pack. The darker letters really stand out against the soft tones of the layout, making the title pop.


To finish the layout, I created two small clusters of stars and snowflakes using die cuts from the Floral Bits & Pieces and Foam Stickers, and added a couple of Rub Ons for that final touch.

Thank you so much for reading! I hope this layout has inspired you to create something beautiful. The Simple Vintage Fresh Snow collection is selling fast, so be sure to grab it before it’s gone!

Take care,
Rebecca x 
@preciouspagespapercraft

Wednesday, 15 January 2025

Winter Wishes - Simple Stories - Simple Vintage Fresh Snow Collection

Hi everyone,

It’s Rebecca here, and I’m excited to share my first layout of 2025 with you today! This month, I’m working with the beautiful Simple Vintage Fresh Snow collection from Simple Stories. From the rich colours to the delicate patterns, I’m absolutely in love with everything about it. You can find the full collection in the shop here.

I’m a huge fan of woodgrain papers, and this collection includes a stunning grey woodgrain design with soft foliage accents in the corners. Naturally, it was the first paper I reached for. I cut a 6-inch wide strip, making sure to include some of the foliage at both the top and bottom. I wanted the paper to be centred on the layout but didn’t want it to extend from top to bottom. Trimming either end would have meant losing the beautiful foliage, so I decided to cut out a section from the middle and then reassemble the two pieces with tape on the back. I knew I could hide the seam with careful embellishment placement. With this done, I distressed all the edges to introduce some texture.


To complement the dark navy in my photo, I chose a darker patterned paper and tore a section to add some contrast to the lighter woodgrain. The mix of darker and lighter tones really made the page pop.

Next, I placed my 3x4-inch photo in the centre of the layout, but something about the sharp edges didn’t feel quite right. I wondered if a circular photo would balance the design better. Noticing a lot of brown tones in the embellishments, I decided to create a frame for the photo using a brown patterned paper.

Using a set of metal nesting dies, I die-cut three circles from a strip of patterned paper, making sure they were perfectly aligned. Rather than using the circles themselves, I opted to keep the negative space, which would typically be discarded. This leftover piece became the perfect frame for my photo. I adhered the photo behind the middle circle and trimmed the edge circles to leave them open. Then, I angled this strip across the layout for added interest.


With my papers and photo in place, it was time to embellish. I selected a few of my favourite pieces, including florals from the Floral Bits and Pieces and a sweet birdhouse from the Cardstock Stickers. I raised everything on foam pads to add dimension and arranged them in two clusters around the photo.


To finish, I added some Rub-Ons peeking out from behind the floral clusters. The Simple Stories rub-ons are so easy to apply and give a lovely texture to the page. I completed the layout with a couple of small hearts from the cardstock stickers.


Thanks so much for reading! I hope this layout inspires you. The Simple Vintage Fresh Snow collection is truly gorgeous, and I can’t wait to see the beautiful creations you make with it.

Take care,
Rebecca x 
@preciouspagespapercraft

Wednesday, 13 November 2024

Wild Life - P13 Paper Products - Into the Woods Collection

Hi everyone, 

It's Rebecca with you today sharing my first layout created with the stunning 'Into the Woods' collection by P13. It's been a long time since I've created with a P13 collection and I'd forgotten how much I love them! You can find the full collection in the shop here, but be quick - I have a feeling this one will sell fast!


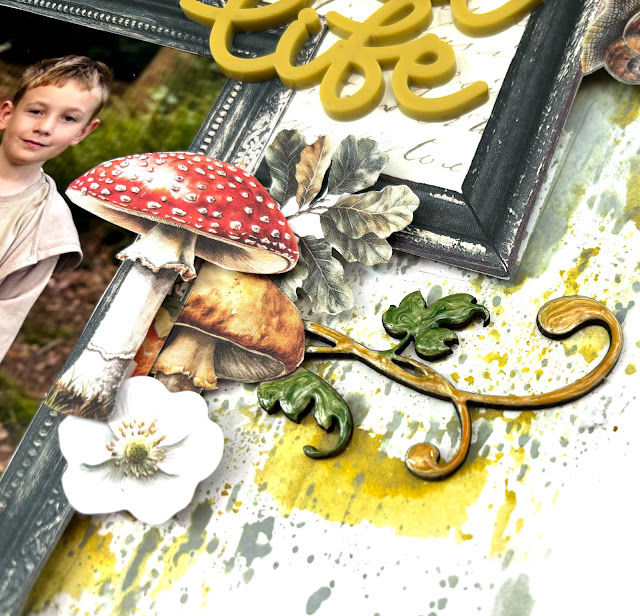
Paper #02 immediately caught my eye with it's triple frame design. I knew instantly that I wanted to use the frames to house my photos, but I didn't want the frames to sit flat on the page. For this reason, I decided to fussy-cut the frames, including the toadstools and snails and centre them on a sheet of Premium White Cardstock with adhesive foam behind them. This helps to create some dimension on the page and makes layering elements a little easier and more aesthetically pleasing.

I gutted the centre of the top and bottom frames and then backed them with my photos. We took a recent walk through Parkhurst Forest on the Isle of Wight, which is well known for red squirrel sightings and so I was able to get some cute photos of my (not-so-little anymore!) little one who has an obsessive fondness for red squirrels! This collection was perfect to document this memory as not only is it wood themed and perfect in colour, it also has some really sweet little squirrel images - albeit grey not red!

I left the centre frame as is as it has a light coloured script paper so it offered a nice contrast with the darker colours of the frames and the photos. On this frame I placed my title - an acrylic piece from Bramble Fox which matches the colour of some of the toadstools in the collection perfectly.


As with all P13 collections, Paper #07 is full of individual elements which can be fussy-cut. I cut out several leaf clusters, toadstools and a squirrel to use as embellishments. I created several clusters, and then added to these using some florals from the Ephemera - Flowers and Leaves and some stickers from both Sheet #1 and Sheet #3


I knew before I started this layout that I wanted some mixed media on my background so I made sure to stick all the embellishments to the frames, and not to the actual background cardstock. This meant that I could move everything on and off the page in one piece, until I was happy with the mixed media.

I reached for two Distress Oxide Ink Pads in the shades 'Iced Spruce' and 'Forest Moss'. I watered down some of the ink on some plastic packaging and then applied them to my background using a small brayer

Once this was dry, I adhered the embellished frames to the centre of the page. In some areas, I slotted in some chipboard elements by Dusty Attic. I opted for leafy elements to match my woodland theme. These chipboard elements come raw, which make them fab for colouring and putting your own stamp on. Two of my favourite ways to use chipboard is to either heat emboss them, or as I've done here, cover them with Crystal Nuvo Drops.

I finished off the layout by cutting away small sections of the background paper on either side, and then backing this area with Paper #04 to add a bit of darker colour to the outer edges.

Thank you for reading. I hope you've enjoyed reading about my layout and it offers you some inspiration.

I'll be back later in the month with my second 'Into the Woods' layout.

Take care,

Rebecca x 

@preciouspagespapercraft 


Friday, 25 October 2024

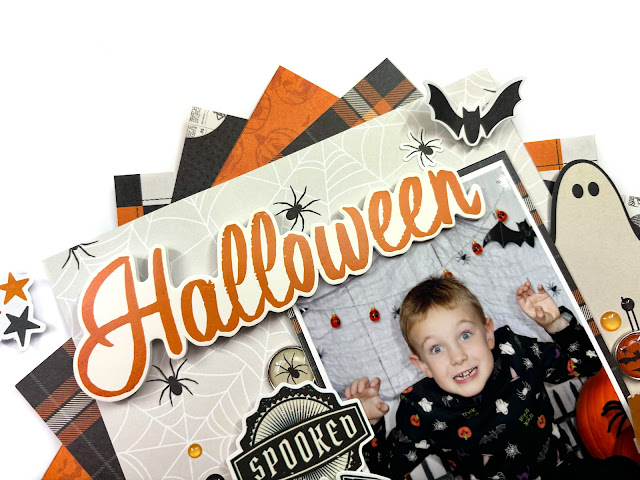
Halloween - Simple Stories - Simple Vintage Scary Stories

Hi everyone,

It’s Rebecca back with you today and as we edge closer to the end of October, my Halloween preparations are well underway! It’s the perfect time to be sharing another layout created with the Simple Vintage Scary Stories collection by Simple Stories. You’ll find the full collection in the shop here


I love the patterned papers in this collection and wanted to feature several of them on my layout. I find the best way to do this, without overloading the page, is to use small amounts of each paper. I selected 6 papers to use, and cut a 6 x 6 inch square from each. I layered the papers in the centre of a sheet of Premium White Cardstock, and staggered them slightly so that only the corners of each were visible. I purposely selected the lighter pattern for the top piece as I knew that more of this paper would be visible. 


To the right of my papers, I’ve added my photo, matted with a dark patterned paper from the collection. 


For my title, I selected one of the Foam Stickers. I opted for an orange worded sticker to help bring a bit of brightness to the page as my photo is quite dark and has a lot of black in it. I positioned the title above my photo. 


This left me a nice open space to the left of my photo for embellishing. I selected a pumpkin cluster from the Cardstock Stickers and raised it up on foam pads. I like to adhere my stickers to white cardstock first to make them a tad sturdier. 


To the right of my photo I’ve introduced some die cuts from the Bits and Pieces and some of the adhesive Decorative Brads. I love how easy these are to use - no need to pierce holes and split pins open on the back - just stick and go!  


I finished off with a few glossy Enamel Dots in two clusters to add a little more texture to the page. 


Thank you so much for reading. I hope you like my layout and it offers you some inspiration.  Don’t forget this collection is available in the store now so grab it before it’s all gone! 


Take care,


Rebecca x

@preciouspagespapercraft 

Wednesday, 9 October 2024

Halloween - Simple Stories - Simple Vintage Scary Stories

Hi everyone, it's Rebecca with you today and I'm super excited because it's October, and October means only one thing for me... Halloween! I couldn't let the month go by without sharing some Halloween layouts, so here I am with my first one, created with the Simple Vintage Scary Stories collection from Simple Stories. You can find the full collection in the shop here


I started with a sheet of the 'Spooks Galore' patterned paper. I love the black-on-orange design on this paper but it was a bit too bold to use as a background paper. To help balance it out and give me some white space to create with, I trimmed down a sheet of white cardstock, tore the top and bottom edges and then distressed it all quite heavily before placing it on top of the patterned paper.

I gutted the centre of this sheet and then used the reverse side to introduce a darker tone to the layout. On top of this, I positioned my photo, matted on white cardstock and then a patterned paper from the 6 x 8 Paper Pad. Behind my photo, I layered two tags from the Tag Elements patterned paper.


For my title, I selected one of the Cardstock Stickers as it echoed the colours in the patterned paper bordering my layout nicely. I first applied the sticker to plain white cardstock, and then trimmed around the edge to leave a small white border to help the title stand out more on the page.


Around my photo, I embellished using elements from the Bits & Pieces, the large skeleton die cut from the Page Pieces and some spiders from the Sentiment Bits & Pieces,


To finish off the page, I added a few sequins and a hand-doodled black border to both sides of the white cardstock. 

I adore the traditional halloween colours of this collection. They are my favourite to scrap with so I can't wait to dive back in to create more layouts. I also can't wait to see what everyone else creates with this spooky collection!

Take care

Rebecca x 

@preciouspagespapercraft


Wednesday, 28 August 2024
Summer - Simple Stories - Summer Snapshots Collection

Hi everyone, it's Rebecca with you today, back from the gorgeous Isle of Wight and sharing my second layout of August with you. This month I've been working with the cheerful Summer Snapshots collection by Simple Stories. It's a fabulous summer-themed offering, perfect for all your beach and holiday layouts. You can find the full collection in the shop here.  


I started with a 9 x 6 inch strip of the 'Keep it Sunny' patterned paper and a 10 x 4 inch strip of the 'Take the Shot' paper (both B sides). I tore the top and bottom edges of both pieces, and positioned them, layered, in the centre of a sheet of Premium White Cardstock. I love tearing the edges of papers as it helps to introduce some texture to the page. 

In the centre of the layout, I added my 3 x 4 inch photo and one of the tags from the 'Tag Elements' paper. I usually use the tags as layers behind my photos, or like on my previous layout, sticking out behind layers, however I really liked the image on this particular tag so placed it square on the page, with a metal eyelet through the top.


Underneath my photo and tag, I added my title. I've gone for a large title from the Bits & Pieces to make a statement. I liked the way the shadowing matched the colours in my photo. Just underneath this, I added a small Foam Sticker to extend my title.


With all of these larger elements in place, I focused on embellishing with the smaller elements in the collection. I've used elements from the Sticker Book (which is amazing value for money and includes 469 stickers!), the Layered Chipboard, the Bits & Pieces, the Journal Bits and Pieces and the Cardstock Stickers


I then finished the layout off with some of the Glossy Enamel Dots.


Thanks so much for reading. I hope you've enjoyed the layouts I've created with this collection. I've got a whole heap of fresh holiday photos to scrap so you'll definitely be seeing more of this collection!

Take care

Rebecca x

@preciouspagespapercraft