Showing posts with label Banner. Show all posts

Wednesday, 9 March 2022

'Love love love' page by Meg using Happy Hearts, Simple Stories

Hey all it's Meg here today and I'm sharing my last page (for now!) using Simple Stories Happy Hearts. I love all of the vibrant colours in this collection and so I wanted to try a colourful non-white background! 

I started with the navy Bazzill cardstock and I used my Cricut and a Paige Taylor Evans cutfile to make the butterfly background, which added lots of texture and interest. I backed it using coral Bazzill cardstock and the Wink Wink paper (confession time - I used two co-ordinating papers to back it because I didn't have enough of either ha)!

This cutfile gave me a great starting point and I knew I wanted to create a central cluster with lots of colour. I looked through my photos and picked a photo of my baby girl and cut it into a circle shape, then matted it using the coral Bazzill cardstock and I popped it up with foam tape. 

I cut a larger circle of the Happy Hearts - Forever Yours paper and a couple of torn circles of vellum to layer behind my photo and then I began tucking in lots of pieces of colourful ephemera! 

The bouquet, 'cute' banner, the hearts and little cake on the left came from the Bits And Pieces pack, the 'Love Love Love' was a Foam Sticker, I fussy cut a few tiny flowers from the Forever Yours paper and the rest were Happy Hearts Puffy Stickers. I finished my central cluster with a sort of diagonal splatter of white paint, which I reallyyyyy loved against the navy blue cardstock! 

I added journaling on a little tag that I fussy cut from the Happy Heart Day paper and I popped that up in the corner of my page, with an acrylic clippie embellishment that came from Bramblefox. 

As my cutfile came out a little wonky on the page (a happy error!), it wasn't completely central and I had a little extra space on the bottom of the page, so I used the border sticker from the 12x12 Combo Stickers page which really finished the page off! It matches the paper I'd used behind my photo and it couldn't have worked out better. 

I'm thrilled with how this page came together, especially because I don't often use colourful backgrounds, su that was a fun challenge! I hope my page inspires you in some way and thank you so much for reading. 

Take care and I'll be back again soon with another page from a new collection! 

Meg x 

Tuesday, 30 November 2021

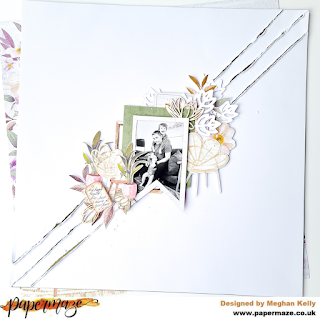
P13s Time to Relax, final layout by Meg

Hey all, I hope you're well and enjoying the winter weather we've been having - I absolutely LOVE this time of year and any excuse to get snuggly and festive!

Today I'm here to show you my third and final layout using P13s Time To Relax collection. I've really enjoyed playing with these papers and this time I thought I'd try a bit more of a neutral colour pallette, with the gorgeous green foliage and natural cane peacock chairs (because my last two pages with Time To Relax have been pinks and purples). 

I wanted to build a central cluster with some sort of diagonal background behind it - I originally played with some mixed media and texture paste but it didn't really turn out the way I had envisioned, so instead I decided to rip my white cardstock page into diagonal strips, distress the edges and I backed it with the green Paper #4. You can just about see the green come through, but the effect is quite subtle and leaves lots of white space for your eye to 'rest'!

I then started building my cluster - first by cutting out a grey garland from the Banner Die Cuts, to create a banner shaped frame around my photo. I fussy cut elements from the Paper #7 (the cane chair, a wooden frame, cream flowers, a small journaling tag, some bronze foliage and a potted plant) and I also fussy cut a second cane chair with a rug and little side table from Paper #5

I cut out a square of the green Paper #4 to use to add some colour behind my black and white photo and I adhered my photo on top using some 3D dimensional foam. I layered the wooden frame behind, along with another grey banner from the Banner Die Cuts pack. 

I began tucking in the fussy cut ephemera, a few white foliage pieces from a wreath cutfile by Page by Paige and some SnipArt chipboard pieces from my stash. P13 have included some similar chipboard pieces in the Time To Relax collection, as they just work so well with the natural colours and foliage! I love using chipboard, it's always so good at making a layout just a little more interesting and adding a different texture to the page.

I finished by popping on the mini journalling tag with some more 3D foam and splattering the page with some white acrylic to make it look a little less neat! 

And that's it, my minimalistic and third layout using the beautiful Time To Relax. I hope you've enjoyed my layouts and that you have a lovely December ahead of you! 

Take care and I'll be back again soon, 

Meg x 


Wednesday, 17 November 2021

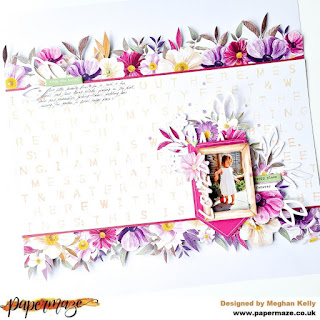
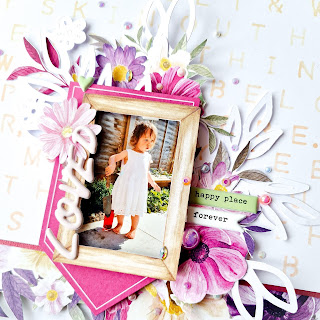
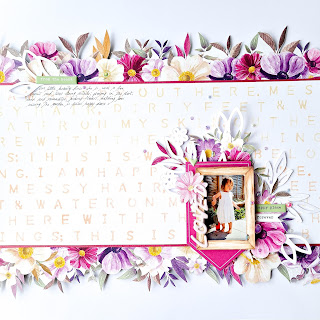
P13 Time To Relax collection - 'Loved' by Meg

Hey hey everyone, 

I'm swinging by today to share my second layout using P13s stunning floral Time To Relax collection. I've absolutely loved playing with these beautiful colours, they are so rich and vibrant! 

So with this page my main drive was just to create a cluster around my photo and layer up some of those beautiful fussy cut flowers. P13 flowers layered together just create such a soft pretty effect! I began by fussy cutting a few clusters from Paper #01, Paper #7 and thought about what sort of background I wanted on my page. 

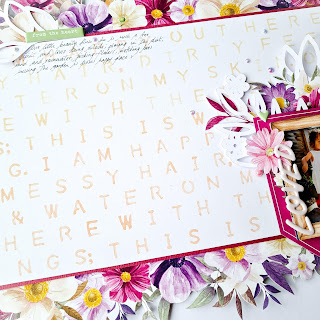
I decided I wanted a long quote to go with my photo - I found it on Pinterest and it says 'I am happy out here. Messy hair, dirty feet and water on my skin. Out here with the wild things; this is where I belong'. It fits perfectly with how I think of my toddler and it goes so well with my photo of her in the garden doing some digging! 

I used my We R Memory Keepers Punch Board to cut out the quote, which I used as a stencil. I used a Zig Brushables Pen in the Fawn colour to draw in the quote on a wide strip of Bazzill Coconut Swirl cardstock and used this as a background in the middle of my page. 

I matted the white cardstock with Bazzill Sweetheart (which matches the pinks in this collection SO incredibly well, including B side colour of Paper #03) and I fussy cut two borders from the Time to Relax Paper #4, which I tucked in on the top and bottom of the wide strip. 

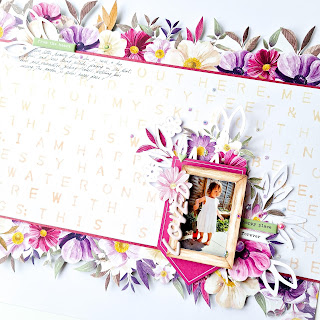
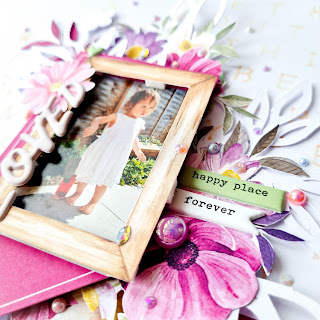
Next I began to create the cluster around my photo - using a wooden frame fussy cut from Paper #7, the fussy cut florals, a pink banner from the packet of Banner Die Cuts and some white leaf sprigs that came from a wreath cutfile by Paige Taylor Evans. 

I used foam to pop up parts of the cluster and add some dimension, before adhering to the right lower side of my page. I journalled in the opposite corner and finished my page with a few more pieces of foam to pop up parts of the floral borders, some puffy phrase stickers, the 'Loved' puffy title from my stash and lots of flat back gems from Little Things From Lucys Cards to add some sparkle! 

And there we have it, my second page complete! I hope you liked it and that it's possibly inspired you in some way! 


I'll be back again soon with another layout, but in the meantime I hope you stay well and scrappy, 

Meg x 


Wednesday, 3 November 2021

'My World' by Meg, with P13s Time to Relax

Hey all, I hope you've had a spooky fun weekend and I'm so glad you popped by today to see my new layout! Today I'm sharing my 'My World' page using P13s beautiful floral collection, Time to Relax

I started this page using a globe cutfile by Paige Taylor Evans, but unfortunately my Cricut misbehaved and only cut half the globe so I ended up freestyling the rest and cutting out out by hand! Which just goes to show you can try this layout without a cutting machine. I used an old wood grain paper I had in my stash already, from an older collection by Cocoa Vanilla Studio - it was one of the Unforgettable collection papers. The wood grain was a nice dark colour though that complimented the P13 collection nicely, so I wanted to pair it up. I think Time to Relax would suit any wood grain paper though, if you have any to hand! A solid colour cardstock would also look nice - Bazzill cardstock in the purple Bouquet matches Time to Relax perfectly! 

I only used the stand part of the globe on my page in the end and decided I would use the globe part as a template (seeing as it was only half-cut!) for hand stitching. I drew in the squares on the globe using pencil and used a pointy tool to poke holes, before hand stitching across the squares in a random pattern using gold metallic thread. The white background paper was Paper 02 and I'd added a little 'Shaded Lilac' Distress Ink by Tim Holtz, which adds a little more colour on the globe. 

I decided to create two clusters opposite each other on the globe and so began positioning fussy cut flowers around my photo on the lower left. The fussy cut flowers were from Paper 07, Paper 01 and some of the purple foliage came from Paper 05. I used a frame from Paper 05 to back my photo (which was printed in black and white and contrasted against the rest of the colours on the page) and a banner from the paper die-cut garland pack, to give some more depth behind the photo. I finished this large cluster with some small pieces of chipboard which came from my stash, but P13 released some chipboard embellishments as part of the Time to Relax collection (including these leaves here) which are ideal! I tucked in a few brassy toned charms and a small purple cutfile (again from Paige Taylor Evans, cut in the pile Bazzill Bouquet cardstock) behind the whole cluster for some added interest. 

For the smaller cluster opposite, I used some more fussy cut flowers, some fussy cut pillows from Paper 07, a purple scooter sticker from the pack of Stickers 03 and I created my title using white alphas for the 'My' and a banner from the paper die-cut garland pack cut apart for the 'World'. 

Finally I added some journaling around the edge of the globe. 

I'm really pleased with how this turned out and I just loved fussy cutting those florals - they really are a big bang for your buck! They create such soft and pretty page and I can't wait to make something else with them! 

I hope you enjoyed my page today and thank you ever so much for reading. Take care and I'll be back again soon, 

Meg x

Saturday, 29 May 2021

Disney Inspired Collections - Magic at Chef Mickey's

Welcome back to the Papermaze Blog! ScrappyAdam with you today with another layout using a mix of Echo Park and Simple Stories. For this layout, I have used an exclusive sketch from Dotty About Flair as my initial inspiration as it just grabbed me and I wanted to use that blue background!


I started off with the Happy Magic Memories paper from Say Cheese Main Street which was this fab ledger paper in blue with some red lines. The sketch basically called for a strip of patterned paper across the middle and then lots of little strips from the middle to the bottom. I used a variety of papers from the Say Cheese 6x8" Paper Pad and the Echo Park A Magical Place 6x6" Mega Pad. For the strips across the middle I used a strip of Smile Words, white cardstock, B Side of Balloons and B Side of Here We Go.


I have used two 4x4" photos which I have matted on Full of Smiles and then a longer strip of Here We Go, the red side once again and for this second mat, I have torn the top and bottom - I do really like the texture and look of torn paper on layouts!

The base of my layout done, it was then a case of embellishing!


I have used a combination of embellishments from both collections. I have used the Brads, Sticker Book, Ephemera and Elements Sticker from Echo Park as well as a Chipboard from an older Echo Park collection and then some stickers, foam stickers and ephemera from Simple Stories. I have also added two flair from Dotty About Flair and a puffy sticker!

I added my title with alpha's from the Echo Park sticker book and "Magic" was from the 12x12" Stickers from Simple Stories. 

Finally, I felt like the top right was missing something and so I layered five banner pieces from the collections with a scrap of patterned paper and two phrase stickers which pulled the layout together and finished it off!


This layout is part of an album/section all about our character dining at Chef Mickey's and so there isn't any journaling on this page as there is/will be on other pages. 

I am going to carry on with this Disney combo kit into June as I have so much left and I am working on a smaller album to share with you through June!

Thank you all so much for taking the time to have a read of the blog today! Take care, stay safe and see you all back here soon! Happy Scrapping!


Adam x


Friday, 19 March 2021

Havin' a Blast at EPCOT - ScrappyAdam - Say Cheese Main Street

Happy Friday!

ScrappyAdam back with you today with my second project using Simple Stories 'Say Cheese Main Street' and it's another double page layout from me today!

I started off with inspiration from a sketch and made the sketch work for me - and work for a double page as the sketch was a single layout. 


I started with two sheets from the basics paper pack which have different colour in large and small spots. They're fab to give extra cardstock to a collection! 

I used various papers from the 6x8" pad to create banners in 1", 1.5" and 2" widths. I then took two strips of each of the Happy Magic Memories and Magical papers - I have used the black and red sides. I layered these in the middle, inwards on the left page and right across the page of the second one. I layered my banners in four blocks of three behind these strips. 


I backed my photos with the B side of the 4x6" Elements paper. I also used one of the 4x4" Elements in my row of photos. I placed the photos on top of the central strips of paper. 

It was then a case of embellishing with the embellishments in this collection. The foam stickers have got to be one of my favourite - they're amazing! I also used the stickers and ephemera as well as some enamel dots and some items from my stash (such as Dotty About Flair flair and border pieces). Of course, I had to use some of the cute puffy stickers!


I did use some washi tape on this one (forgetting the washi tape from the collection and instead using some from my stash - doh!). I tucked in some strips in and amongst the banners and layered some word stickers from the 12x12" Elements and Sticker Book. 

I hope you're all having a great March so far and I will see you back here soon! Thanks so much for reading. Stay safe and take care.

Adam x


Thursday, 4 February 2021

Hello Today from Simple Stories by Adam

Hello! ScrappyAdam here again! I'm sharing another layout with Hello Today from Simple Stories which I am loving! 

This is a layout that has less than usual for me - but I love it all the same!


For this layout, I started with a sheet of red Bazzill cardstock from the Hello Today Matchmaker pack, I don't use coloured cardstock as a background enough! 

I added a strip of the July paper and then a strip of the September paper to the right of the page and punched small notches at the top and bottom and added a piece of twine for some interest. 

I tried something different for me and to add some extra texture and interest, I added four strips of varying lengths of patterned paper to the lower part of the red area and then used my scissors to 'fringe' these strips - I love the way it looks and will definitely do this again!

Next I turned my attention to the photos for the page and used one of the fab chipboard frames to use two 3x4" photos. I popped this on top of the "shelf of fringed paper" ever so slightly over lapping the amazing rainbow paper. I layered some of the cut outs behind and to the left of the frame including one of the cards showing the month and a spot for journaling to the left. I tucked another card behind the 'documented' card and partially cut out the heart to make a tab, popped a paperclip from my stash and had some hidden journaling too! I added some word stickers and a butterfly sticker from the sticker book.  


I used a word from the chipboard stickers and 'Happy' from the foam stickers to create my title to the top right of my photos. I added a couple of label stickers and another word from the sticker book. In the top right corner of the page I added a chipboard banner sticker, brad from the adhesive brads and some washi style sticker from the book

Finally, I took out the trusty enamel dots! I placed three dots, in different colours in three places - the top right of the page, right of the photo and bottom left of the photo - creating a kind of triangle around the page. I also added a couple of hearts from the foam stickers and another adhesive brad

That's the page done - minimal for me but love the result nonetheless and you'll definitely see fringed paper from me again!

I'll be back soon with another Hello Today layout. Until then, stay safe, take care and happy scrapping!

Adam x