Monday, 9 September 2024

Splendid - 49 and Market - Vintage Orchard Collection

Hi everyone, it's Rebecca with you today sharing my first layout created with 49 and Market's 'Vintage Orchard' collection. The weather has certainly changed and Autumn is on the way. As sad as I am to say goodbye to Summer (although did it ever really arrive this year?!), Autumn is my favourite season to scrap so this collection was right up my street! You can find it in the store here.


I started with the 'Nestled' patterned paper - one of my favourites - and cut a 3 inch wide strip. I trimmed down either end and cut fish tails to make it more like a banner. I placed this in the centre of a sheet of Premium White Cardstock with some torn sections of the 'Painted Foliage' above and below it for contrast. At this point I hadn't stuck anything to the white cardstock - I was just sticking everything together and working on layers.


Behind the fishtail banner, I positioned one of the larger cards from the Ephemera Bits pack. This pack is amazing and includes 96 different elements so it will last a long time! 

On top of these layers, I added my photos, housed in two of the Stacked Frames. I've raised both photos up using foam to add in some dimension between the layers. I was then able to add in some smaller layers, including some striped frames from the Ephemera Bits and some filmstrips from the Acetate Assortment Set. I love how these little layers make all the difference.


I've used one of the Chipboard Words for my title, picking not only a phrase which works for the photos I'm documenting, but also a colour which matched my photos and the other elements on the page.
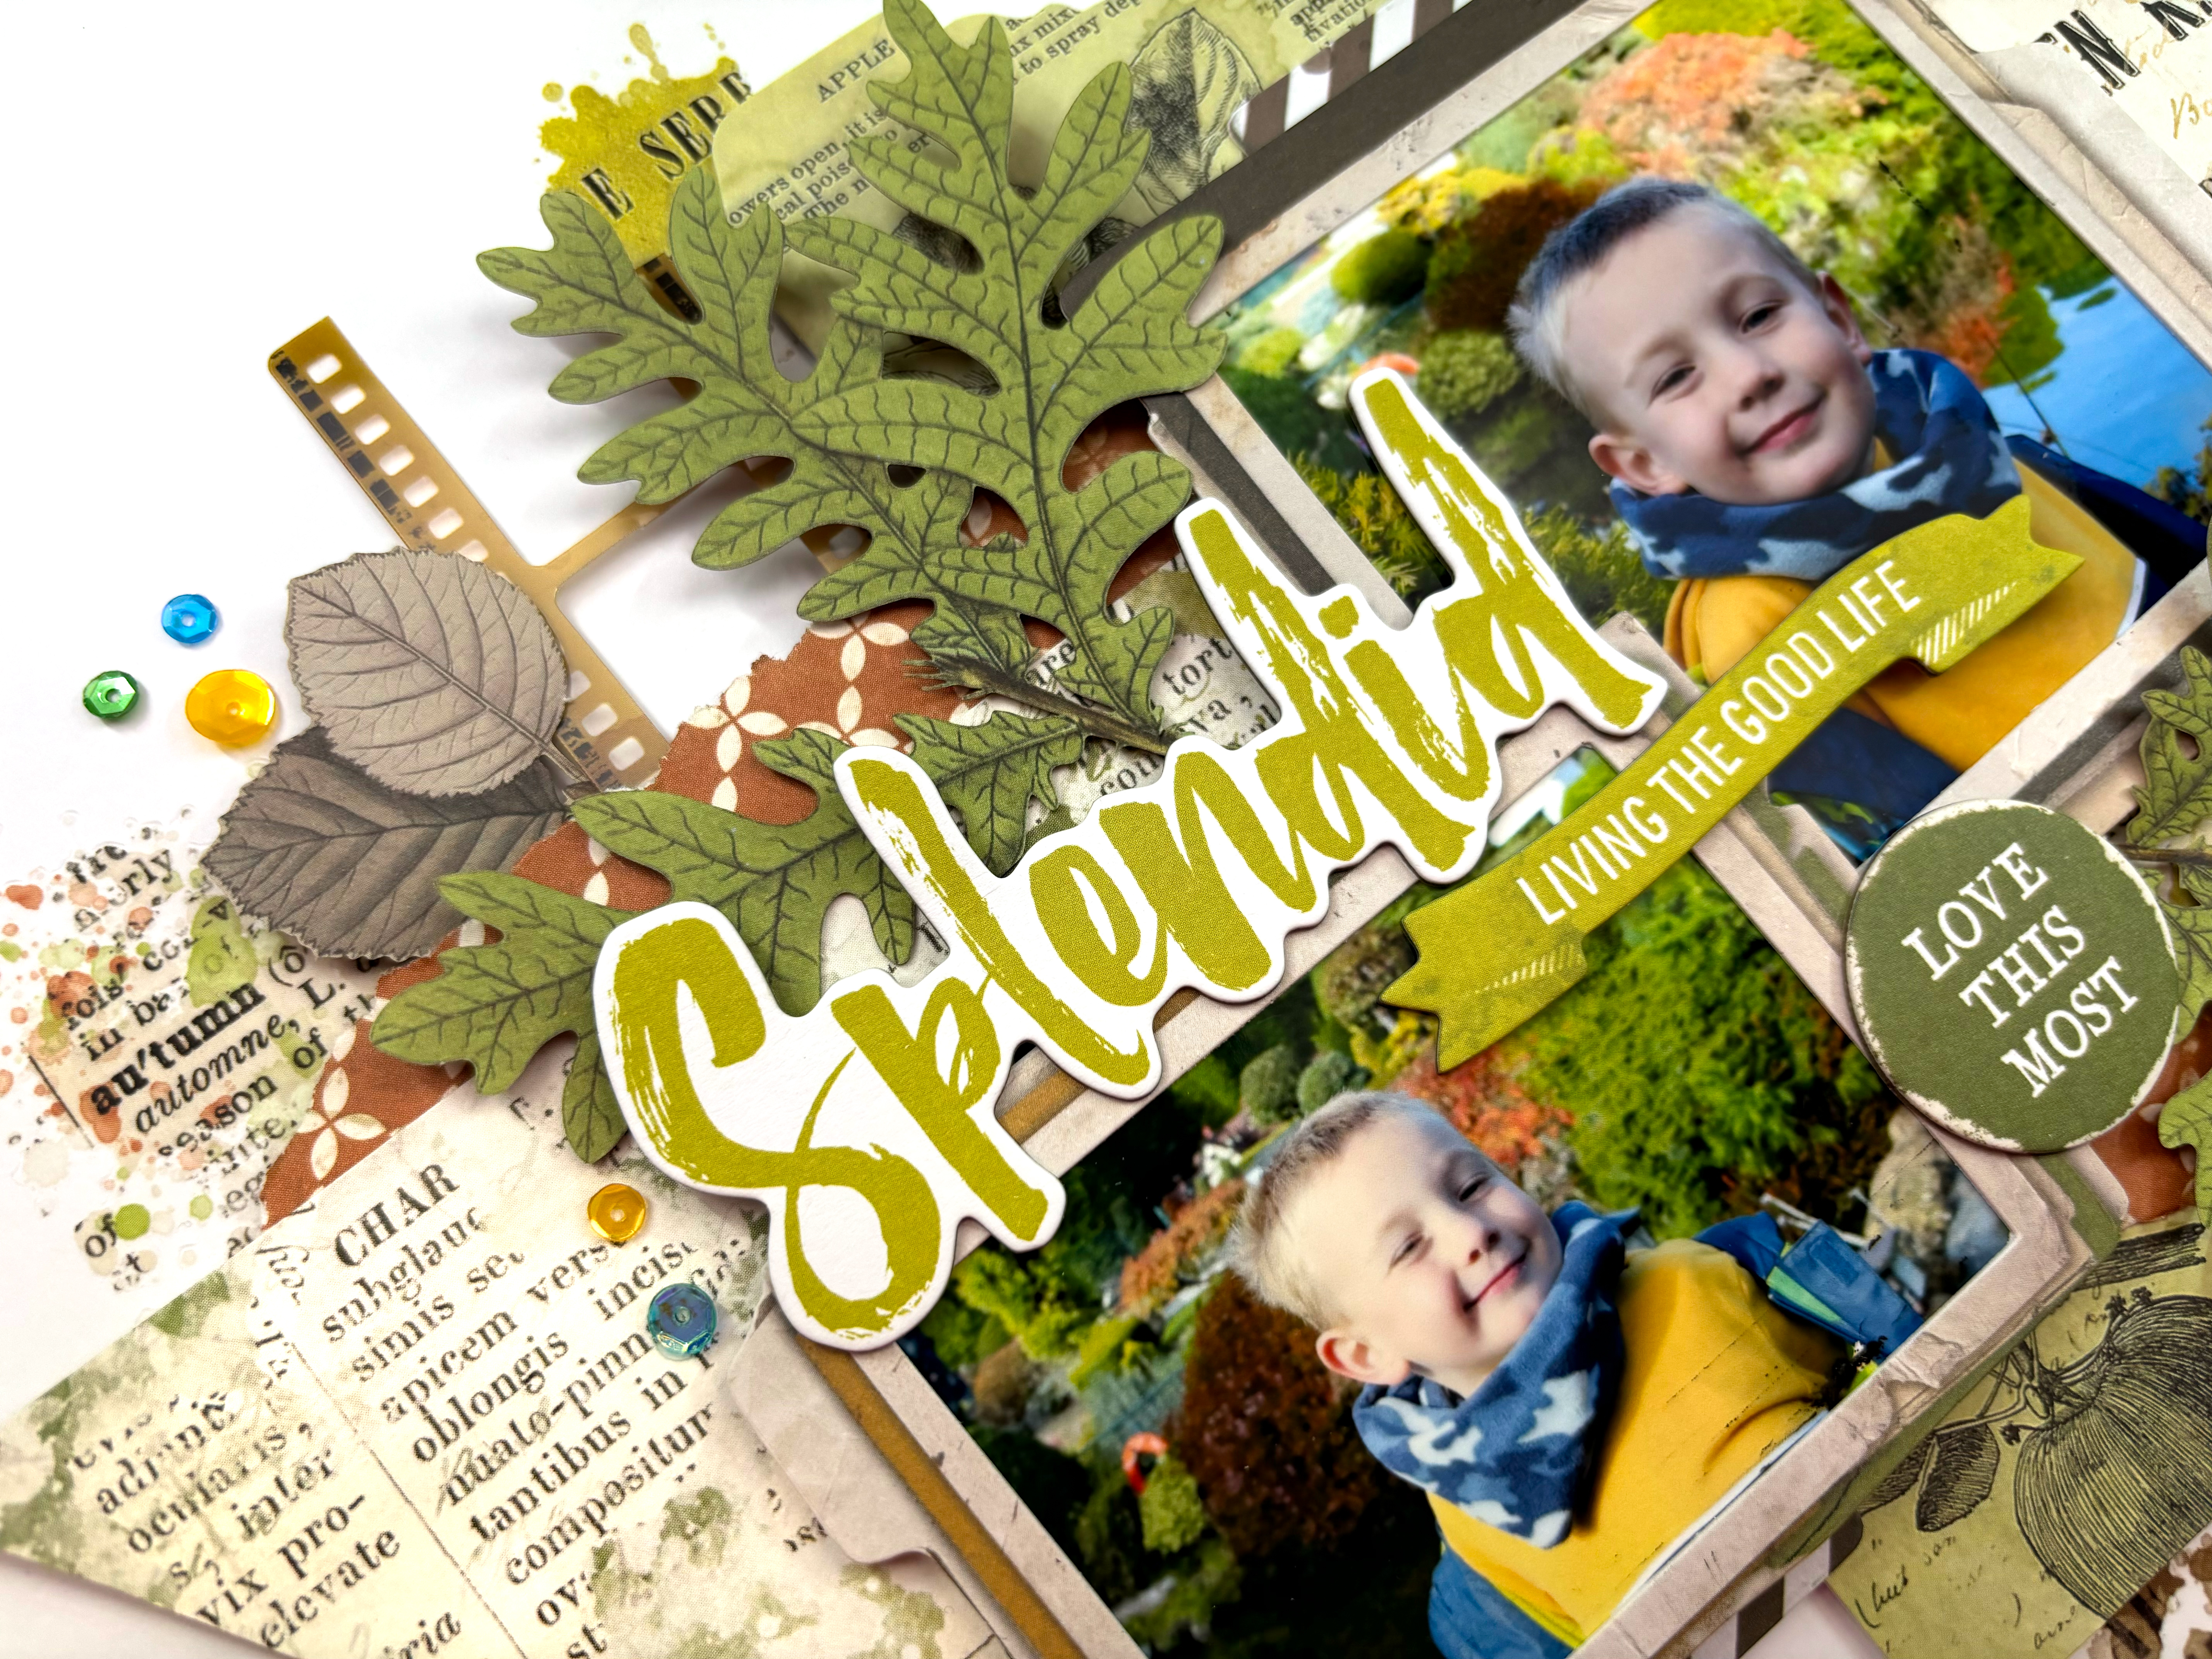

With these larger elements in place, I turned my attention to embellishing, which for me is the fun part and where the layout really comes together. I selected some gorgeous green leaves from the Laser Cut Wildflowers. This is another amazing pack which includes 92 pieces so is really good value for money. 


Once I'd gone through and adhered all these pieces together, I was able to see how much of the white cardstock my layout was covering. This makes it so easy to add details to the background because I can move everything on and off the page in one piece. The Vintage Orchard collection includes 3 sets of rub-on transfers. I selected some from the Blendable Rub-Ons and the Essentials Rub-Ons and applied them to my background. I love how easily they apply, and they don't really leave an 'outline' as such, so they really do look like stamping and mixed media (just without all the effort and mess!).


I finished off with a couple of laser cut butterflies and some sequins for a little bit of sparkle!

Thanks so much for reading! I hope you've enjoyed this layout and it offers you some inspiration. Vintage Orchard is a stunning collection and is available in the shop now.


Take care

Rebecca x 

@preciouspagespapercraft


Friday, 6 September 2024

Vicki Boutin's Bold & Bright for American Crafts - Take the Pictures

Hello, Karen here. I'm back today with another layout using Vicki Boutin's gorgeous Bold & Bright collection which is perfect for scrapbooking sunny, summer photos. The weather in the UK this summer has been a bit up and down but on the days when it's been sunny, I hope you've managed to get out and create lots of memories and take lots of photos. The title on today's layout is a Foam Phrase Thickers from the collection which says 'Take the Pictures to Capture the Memories', and that is so true. 

I started my layout with a sheet of smooth white 12x12 cardstock and in the middle I smooshed some aqua blue acrylic paint. I then trimmed the cardstock down slightly, distressed the edges and matted it onto a sheet of Ocean blue Bazzill cardstock.


I  cut random sized rectangles from the Light of Day, Mixed Tags, Spinning Wheels and Picnic Blanket papers distressed the edges and layered them in the centre of the layout. I used the B sides which have smaller all over designs on them.

Using black thread I machine stitched a straight stitch round the edges of all the papers and the layout.

Onto the paper layers I placed my 6x4 photo which I matted with white cardstock.

I fussy cut some of the blue and green wheels from the Spinning Wheels paper, distressed the edges and tucked these under the paper layers.

One of the Foam Phrase Thickers overlaps the corner of the photo.

The branding strip from the Smile Bright paper has black arrows on it. I cut the branding strip into pieces and used this to embellish the top and bottom of the layout.

My journalling was printed as word strips and stuck below the photo.

Finally I scattered some sequins and enamel dots around the layout.

I hope you find some inspiration from this layout and the Bright and Bold collection can be found here in the the shop.

Take Care

Karen x x

Wednesday, 4 September 2024

Pretty Little Studio - You are my Sunshine - If Mums Were Flowers...

Hello there and welcome back to the Papermaze blog,

It's Claire here today and I'm sharing another layout with the You are my Sunshine collection from Pretty Little Studio. This collection is one of two halves - It has bold bright colours and patters on the one hand, and on the other, it offers softer, more subtle patters and beautifully drawn florals. It also has some pet elements in the collection - What's not to love!!

Given my first layout was bold and bright, today, I'm showcasing the other half of this collection and hope it demonstrates its versatility. 


The layout is mostly made with die cut embellishments showing you only need a few pieces to create an impactful page.

I started with a piece of Premium White Cardstock and applied a thin coat of gesso because I knew I wanted to create a mixed media background.

Once the gesso was dry, I added splotches of watercolour in blue and green tones to match the shades in the collection as closely as I could.  I left this to dry overnight and continued with the design the following morning.

I pulled out the Apple Blossom Floral Die Cuts which contain several large die cut floral clusters that make a real statement. Using 4 of these, I positioned these across the page on top of my mixed media, layering and raising on foam to create a bit of dimension.

On top of the florals, I added some smaller butterfly and bee embellishments, providing additional detail to draw your eye into the design.


In laying my florals across the page, there was a natural gap in the middle to house my photograph.  To draw in all the colours of the collection, I layered up three frames from the Frisbee Frame Die Cuts. I really love this effect and enjoyed using the frames as layering pieces rather than as frames directly.


Creating a little more interest, I adhered a small 'love' sticker to the photo, taken from the Per Lovers Word Stickers.

For that little bit of extra movement, I selected some extra foliage from the Fresh Bloom Stems Die Cuts adding one at each end of the large cluster and one in the middle.


To help ground the design, I added two small strips of the Summer Garden paper, adding a decorate edge with a border punch.  


To create my title, I created a small cluster to sit alongside the paper strip, mounted on top of some mixed media, one of the frames and some smaller florals. The alphas are from my stash (Happy Heart collection by Pinkfresh Studio) but the colours matched so well.


And with that, the page was finished. I hope you've enjoyed reading this blog and seeing how the page came together.

This really is a beautiful collection and I can't put it down - In fact, I will have a third layout to share with you later this month, but until then, happy scrapping!

Claire xx
@scrappysoulmate

Monday, 2 September 2024

August Papermaze Kit - Part 2

Lynn here, and I'm back with the second pair of layouts I have made using the August Papermaze Kit. Such a warm, bright, bold collection of papers, card and embellishments, ideal for those August pages.


Here are the details of what you will find in the kit:


Patterned Papers:
Vicki Boutin - Bold + Bright collection - Light of Day & Spinning Wheels
Paige Evans - Adventurous collection - #21
Echo Park - Sunny Days Ahead collection - Shine on Sunshine
Pebbles - Fun in the Sun collection - Picnic Plaid & Get Away

This photo shows both sides of the papers:


Embellishments:  Sheet of P13 alphas, selection of Pebbles puffy thickers, 5 Rosie's Studio puffy stickers, 6 Simple Stories ephemera, 5 
AALL & Create labels, 6 water droplets and a strip of enamel hearts.


Bazzill Basics Cardstock: Avalanche and Granny Smith (included in main kit).
Evening Light, Princess Pink, Mexican Poppy and Sea Water (in extra Bazzill pack).


Sweet Summer Days - The children playing in a pub garden after a visit to Upnor Castle.


This layout started with the sheet of Sea Water Bazzill, then I cut an additional sheet of Light of Day to measure 12" wide by 7" including the manufacturers strip. I glued this to the bottom half of the Bazzill, with the stars at the top.

With a Tim Holtz Layering Stencil Rays 003, and some Distress Ink, I created some sun rays over the cardstock area radiating from the patterned paper.


I printed four small photos and arranged them over the join between the paper and card.


Using my Cricut, I cut a Peartree Cutfile in Black Bazzill, and backed the open letters with paper from the other side of the Light of Day paper. This was arranged under the photos.


I cut two tags from the 
Adventurous #21 paper, I punched holes in the tops and threaded some twine through them. I tied the tags to the cutfile, then added my journalling, and some Doodlebug Designs Alphabet Soup - Swimming Pool - puffy stickers for the date.


I embellished the page with the
ephemera and the enamel hearts from the kit.


Supercalifragilisticexpialidocious - My great niece dressed up as Mary Poppins for World Book day earlier this year.


For this layout I used the
Shine on Sunshine paper for the background. I drew a faint pencil line around a plate as a guide for the title. I printed out my two photos and arranged them at the bottom right of the circle.


With Doodlebug Designs Alphabet Soup puffy stickers (Blue Jean, Ladybug and Limeade)   I spelt out the title following my pencil line. Then I added the date at the bottom left of the circle and 'World Book Day' at the bottom right.


Picking out the image of pinwheels printed on the scrapbook paper, I made three pinwheels, using cardstock from my stash to match the colour of the pinwheels on the paper. I secured these with glittery white brads from my stash.


The pinwheels were arranged along the bottom right of the page under the photos.


That's all from the August Kit, back with a new kit for September soon.
Thanks for looking.
Lynn x

Friday, 30 August 2024

Help!!! No Time To Scrap!!!


 Do you also find this time of year so difficult to create?

Everyone is busy and when the weathers good you just want to get outside.

But as we are all busy making memories and doing fun stuff, it's tricky to find the time to create.


Lisa here by the way and today I'm sharing some quick tips on how to create quick fun pages when you are struggling to find the time.


I do also have a video here if you want to watch this one come together.

I decided to go with 3 photos that I already had printed (that saves time already, just pick photos that you already have to hand rather than choosing what to go and print off).


I also went with photos that didn't have a mega story to go with them.

Originally when I thought that I was going to grab 15mins at my desk, I took a bunch of photos from our travel day to Orlando, but then quickly realised that I had so many stories to tell, so many photos to work with and then memorabilia to go and find, that would NOT be a quick page.

This one is simple.

My FAVOURITE DISNEY SNACK, and that's it!


And the other tip is to grab for a collection of something.

I took the Simple Stories 'Pack Your Bags' collection here.

When you have something that completely coordinates, it takes out al that procrastination time. No picking and choosing of what to use and what goes with what. It all works.

This saves so much time.


I made the most basic of pockets today, no time for anything fancy during this 15 min journal session LOL
And this 12x12 here helps you create the quickest journal cards.


The bits and pieces are fun to use too.

I even stapled a flag here as a tab top for my journal card. 

And then I used them to add some quick fun touches to this spread.


And the favourite piece of mine out of this collection is the wordy 12x12 here.


I wasn't that fussed with the images so much as I LOVE the words. This is one of those pieces I wish I'd grabbed 2 pieces. Maybe I need to grab another piece next time I order LOL.


I love using a long ruler to trim these words down to use as a title.

So fun!


I really hope you can squeeze in 15/20mins here and there over the Summer to get your scrappy time in.

Don't forget the video I have here if you'd like to watch this page being created.


Enjoy the rest of your Summer.

Hugs

Lisa xx

Wednesday, 28 August 2024

Summer - Simple Stories - Summer Snapshots Collection

Hi everyone, it's Rebecca with you today, back from the gorgeous Isle of Wight and sharing my second layout of August with you. This month I've been working with the cheerful Summer Snapshots collection by Simple Stories. It's a fabulous summer-themed offering, perfect for all your beach and holiday layouts. You can find the full collection in the shop here.  


I started with a 9 x 6 inch strip of the 'Keep it Sunny' patterned paper and a 10 x 4 inch strip of the 'Take the Shot' paper (both B sides). I tore the top and bottom edges of both pieces, and positioned them, layered, in the centre of a sheet of Premium White Cardstock. I love tearing the edges of papers as it helps to introduce some texture to the page. 

In the centre of the layout, I added my 3 x 4 inch photo and one of the tags from the 'Tag Elements' paper. I usually use the tags as layers behind my photos, or like on my previous layout, sticking out behind layers, however I really liked the image on this particular tag so placed it square on the page, with a metal eyelet through the top.


Underneath my photo and tag, I added my title. I've gone for a large title from the Bits & Pieces to make a statement. I liked the way the shadowing matched the colours in my photo. Just underneath this, I added a small Foam Sticker to extend my title.


With all of these larger elements in place, I focused on embellishing with the smaller elements in the collection. I've used elements from the Sticker Book (which is amazing value for money and includes 469 stickers!), the Layered Chipboard, the Bits & Pieces, the Journal Bits and Pieces and the Cardstock Stickers


I then finished the layout off with some of the Glossy Enamel Dots.


Thanks so much for reading. I hope you've enjoyed the layouts I've created with this collection. I've got a whole heap of fresh holiday photos to scrap so you'll definitely be seeing more of this collection!

Take care

Rebecca x

@preciouspagespapercraft