Showing posts with label Autumn. Show all posts

Monday, 8 September 2025

Fabulous Fall Vibes - Simple Stories - Simple Vintage Autumn Breeze Collection

Hi everyone,

It’s Rebecca here on the blog today! I’m feeling a bit torn about September… On one hand, I’m excited for autumn and all its beautiful colours. But on the other, I’m really sad to see summer go! One thing that always helps ease the transition is seeing the gorgeous new autumn collections arriving in the shop—and this month, I’ve been working with Simple Stories “Simple Vintage Autumn Breeze.” You can find the full collection in the shop here. I always look forward to the Simple Vintage lines as we head into autumn, and this one definitely didn’t disappoint!


To start my layout, I tore strips from two different patterned papers. I chose a subtle, neutral paper for the top layer, backed with a more colourful one for contrast. Down the left-hand side of the page, I arranged a cascade of Polaroid-style frames, which I fussy-cut from the Crisp Days patterned paper.

I hollowed out the centre of one frame and backed it with my photo, adding foam behind it for dimension. Placing it centrally among the other frames helped it stand out. I also tucked a larger piece of ephemera from the Ephemera pack behind the framed photo to add some extra detail.


For my title, I chose the word ‘Fabulous’ from the Foam Stickers, and placed it to the right of my photo—raised up on foam pads for added depth. Underneath, I added a smaller foam sticker to extend the title. I love combining fonts like this—it adds visual interest and a playful feel to the page.


With the larger elements in place, I started embellishing. I fussy-cut some tags from the Tag Elements paper, punched metal eyelets through each, and arranged them around the layout for extra texture and charm.


Next, I turned to the Floral Bits & Pieces. I selected a few floral clusters and layered them around the layout, including a sticker from the Elements Stickers to complete the cluster in the top-right corner.


At this point, I needed to decide on a background. I’d been building everything on Premium White Cardstock, but it felt a bit too stark—it just wasn’t making the elements pop. The great thing about adhering your layout pieces together first is that you can lift them off and try different backgrounds underneath!

After testing several patterned papers, I fell in love with the bold orange Journal Elements paper (B side). It really brought out all the other colours on the page. It was a bit of a daring choice for me, but I’m so glad I went for it!

To finish off the layout, I added a couple of tabs from the Bits & Pieces and some mini heart foam stickers. I love how these tiny, last-minute touches pull everything together without overwhelming the page.


Thanks so much for reading—I hope you’ve enjoyed seeing how this layout came together. I’ll be back later this month to share my second layout using this stunning collection.

Take care, 
Rebecca xx

@preciouspagespapercraft

Monday, 9 September 2024

Splendid - 49 and Market - Vintage Orchard Collection

Hi everyone, it's Rebecca with you today sharing my first layout created with 49 and Market's 'Vintage Orchard' collection. The weather has certainly changed and Autumn is on the way. As sad as I am to say goodbye to Summer (although did it ever really arrive this year?!), Autumn is my favourite season to scrap so this collection was right up my street! You can find it in the store here.


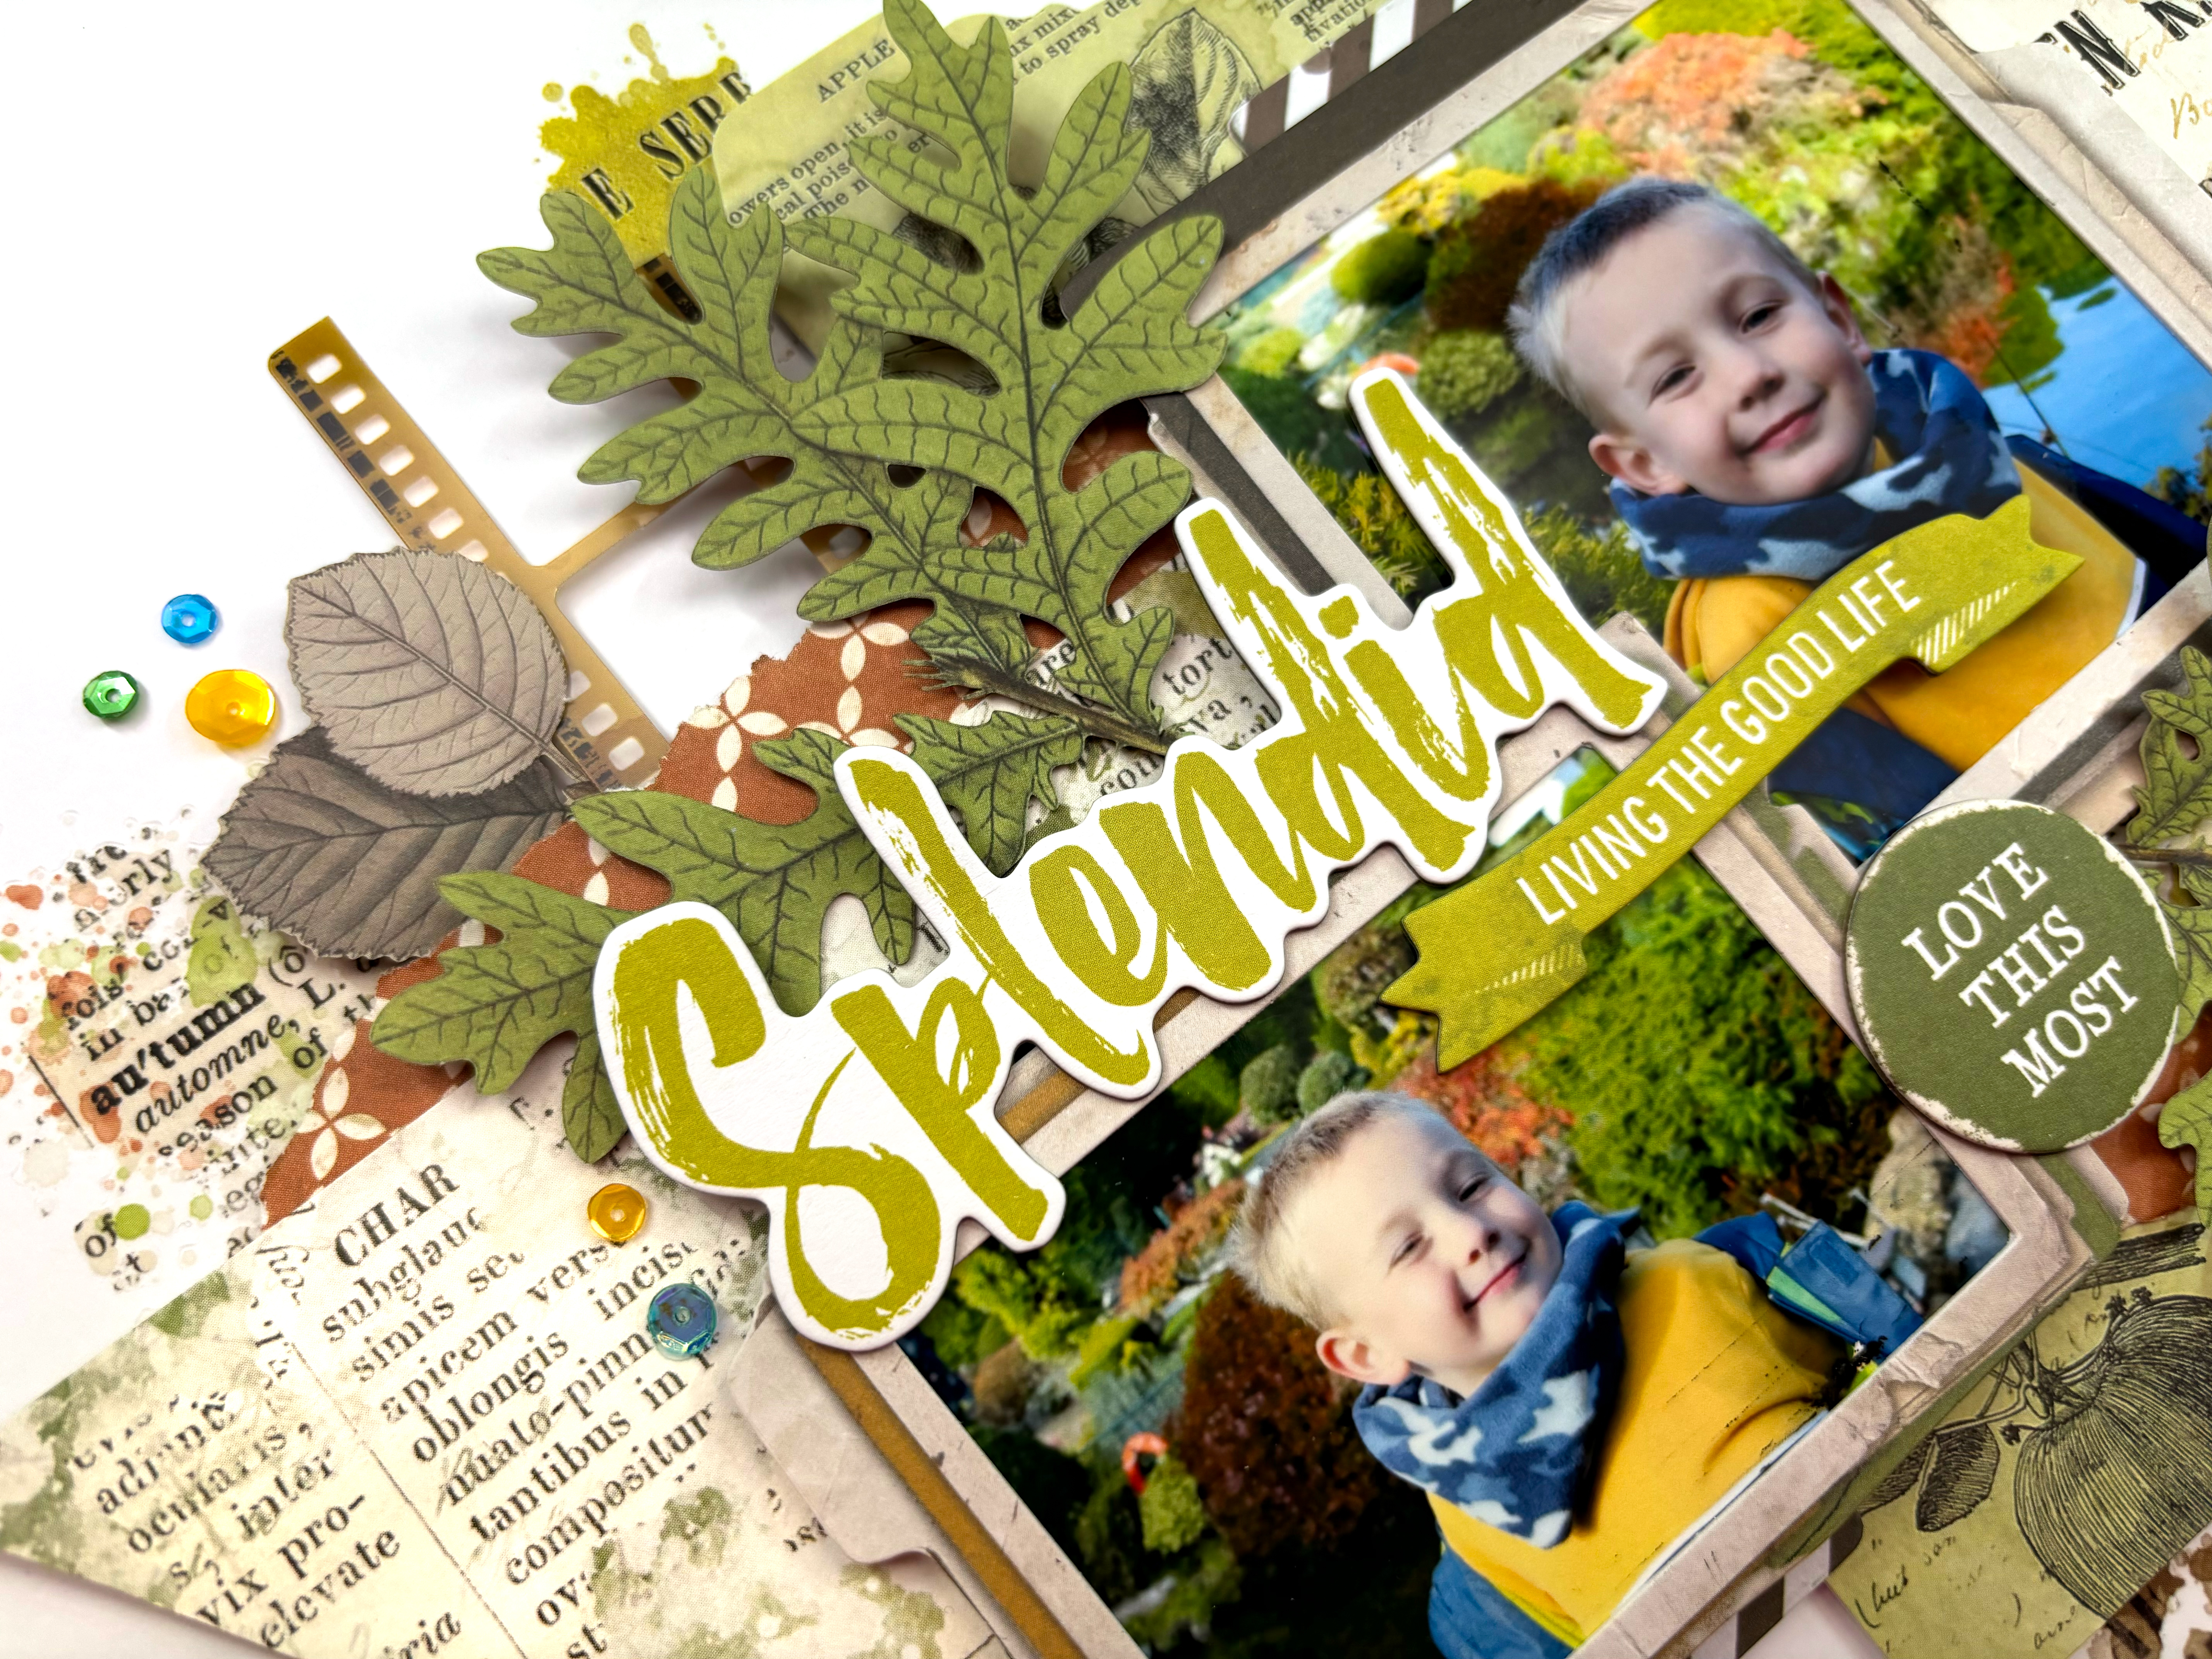
I started with the 'Nestled' patterned paper - one of my favourites - and cut a 3 inch wide strip. I trimmed down either end and cut fish tails to make it more like a banner. I placed this in the centre of a sheet of Premium White Cardstock with some torn sections of the 'Painted Foliage' above and below it for contrast. At this point I hadn't stuck anything to the white cardstock - I was just sticking everything together and working on layers.


Behind the fishtail banner, I positioned one of the larger cards from the Ephemera Bits pack. This pack is amazing and includes 96 different elements so it will last a long time! 

On top of these layers, I added my photos, housed in two of the Stacked Frames. I've raised both photos up using foam to add in some dimension between the layers. I was then able to add in some smaller layers, including some striped frames from the Ephemera Bits and some filmstrips from the Acetate Assortment Set. I love how these little layers make all the difference.


I've used one of the Chipboard Words for my title, picking not only a phrase which works for the photos I'm documenting, but also a colour which matched my photos and the other elements on the page.


With these larger elements in place, I turned my attention to embellishing, which for me is the fun part and where the layout really comes together. I selected some gorgeous green leaves from the Laser Cut Wildflowers. This is another amazing pack which includes 92 pieces so is really good value for money. 


Once I'd gone through and adhered all these pieces together, I was able to see how much of the white cardstock my layout was covering. This makes it so easy to add details to the background because I can move everything on and off the page in one piece. The Vintage Orchard collection includes 3 sets of rub-on transfers. I selected some from the Blendable Rub-Ons and the Essentials Rub-Ons and applied them to my background. I love how easily they apply, and they don't really leave an 'outline' as such, so they really do look like stamping and mixed media (just without all the effort and mess!).


I finished off with a couple of laser cut butterflies and some sequins for a little bit of sparkle!

Thanks so much for reading! I hope you've enjoyed this layout and it offers you some inspiration. Vintage Orchard is a stunning collection and is available in the shop now.


Take care

Rebecca x 

@preciouspagespapercraft


Monday, 6 November 2023

49 & Market - ART Options Spice - Gather

Hi everyone and Happy November!

How did we get here so quickly?! I must confess though, I love this time of the year. I love the colours of the season, those last few warm days and the crisp, clean air.

To document my stories this month, I'm using the Art Options Spice collection from 49 & Market. For me, it combines the best of everything autumnal - the rich colours, textures, florals and of course Pumpkins.

For this layout however, I've chosen not to follow a traditional pumpkin layout, but instead, I've focused on gratitude and given it an autumnal, harvest feel. I hope you like it.


Every year, one of my best friends and I get together to visit the pumpkin farm, explore the forest and find a nice country pub to enjoy a good lunch, and this is the story i'm capturing here.

Of course, I started with a piece of Premium White cardstock. I cut two strips of patterned paper from the Foundations Collection Pack. It's the Coloured Foundations #1 sheet.

I distressed the edges and lay the larger piece flat, layering the shorter piece on top, raised on foam. This would form the anchor for my design. Once they were added, the top section of each strip looked a bit white as the paper has a mixed media/ombre design. To balance this, I transferred some of the orange rub on from the Color Wash Rub Ons pack to the top and this brought the pop of colour I was looking for.

To create a central focus, I positioned my photograph in the middle of the paper strips, and added a green lace trim down the outer edge, taken from the Laser cut out elements pack.


To add interest, I layered up some ephemera; 
 - a large ticket, fussy cut from the reverse cover sheet of the Collection Pack
 - a long green ticket from the Ephemera bits pack
 - a postage stamp from the Laser Cut Outs
 - a small tab, again from the Ephemera bits pack.


I double mounted the photograph using the Spun Gold and Ginger Kiss papers which I had from the Collection Pack. They're also available as single sheets in the store. For extra texture I tore the bottom edge of each paper.


I wanted to create a large statement floral cluster, so opted to fussy cut a floral cluster form the left hand side of the Ginger Kiss paper.

I cut a small line in the paper before I stuck it down, that would allow me to add in an extra leaf spring from the laser cut outs elements pack. This helped add extra movement and dimension to the cluster.


To build the cluster further, I added some flowers from the laser pack and a pumpkin from the chipboard pack, before creating my title.


For my title, I took the word 'Gather' which seemed fitting for my story, and added a 'friends forever' phrase underneath, These were taken from the Chipboard Word Set. The 'Fall Favorites' phrase is flatter cardboard and is from the Laser Cut Out Elements. I also layered a leaf and small purple ticket from the Ephemera bits and Laser cut out elements packs.


To balance the design, I wanted to create a smaller cluster in the top left of the photo. I used a floral cluster from the Laser Cut Out Elements pack along with a smaller purple flower.


For extra depth, I also added some leafy run ons from the 6x8 Rub Ons pack, and used some of the other rub ons from this pack to add a little extra interest.


I love how this looked, so wanted to add a few more rub ons under the floral clusters. I took the green run on from the Color Wash Rub ons set and added them underneath each of the two main floral clusters, Although this was a bit tricky to do once the clusters were in place, it was definitely worth it.

As a final touch, I added a splash of gold spray and the page was complete!

You can find the 49 & Market Art Options Spice collection in the shop here - it's selling out fast so grab it whilst you can!

See you soon with another layout!

Happy scrapping!

Claire xx
@scrappysoulmate

Friday, 3 November 2023

Echo Park ~ I Love Fall #2 🍂

Hi all, 
It’s Anna back with you today. I have a second layout to share using Echo Park’s I Love Fall collection. 
You can find it in the shop here


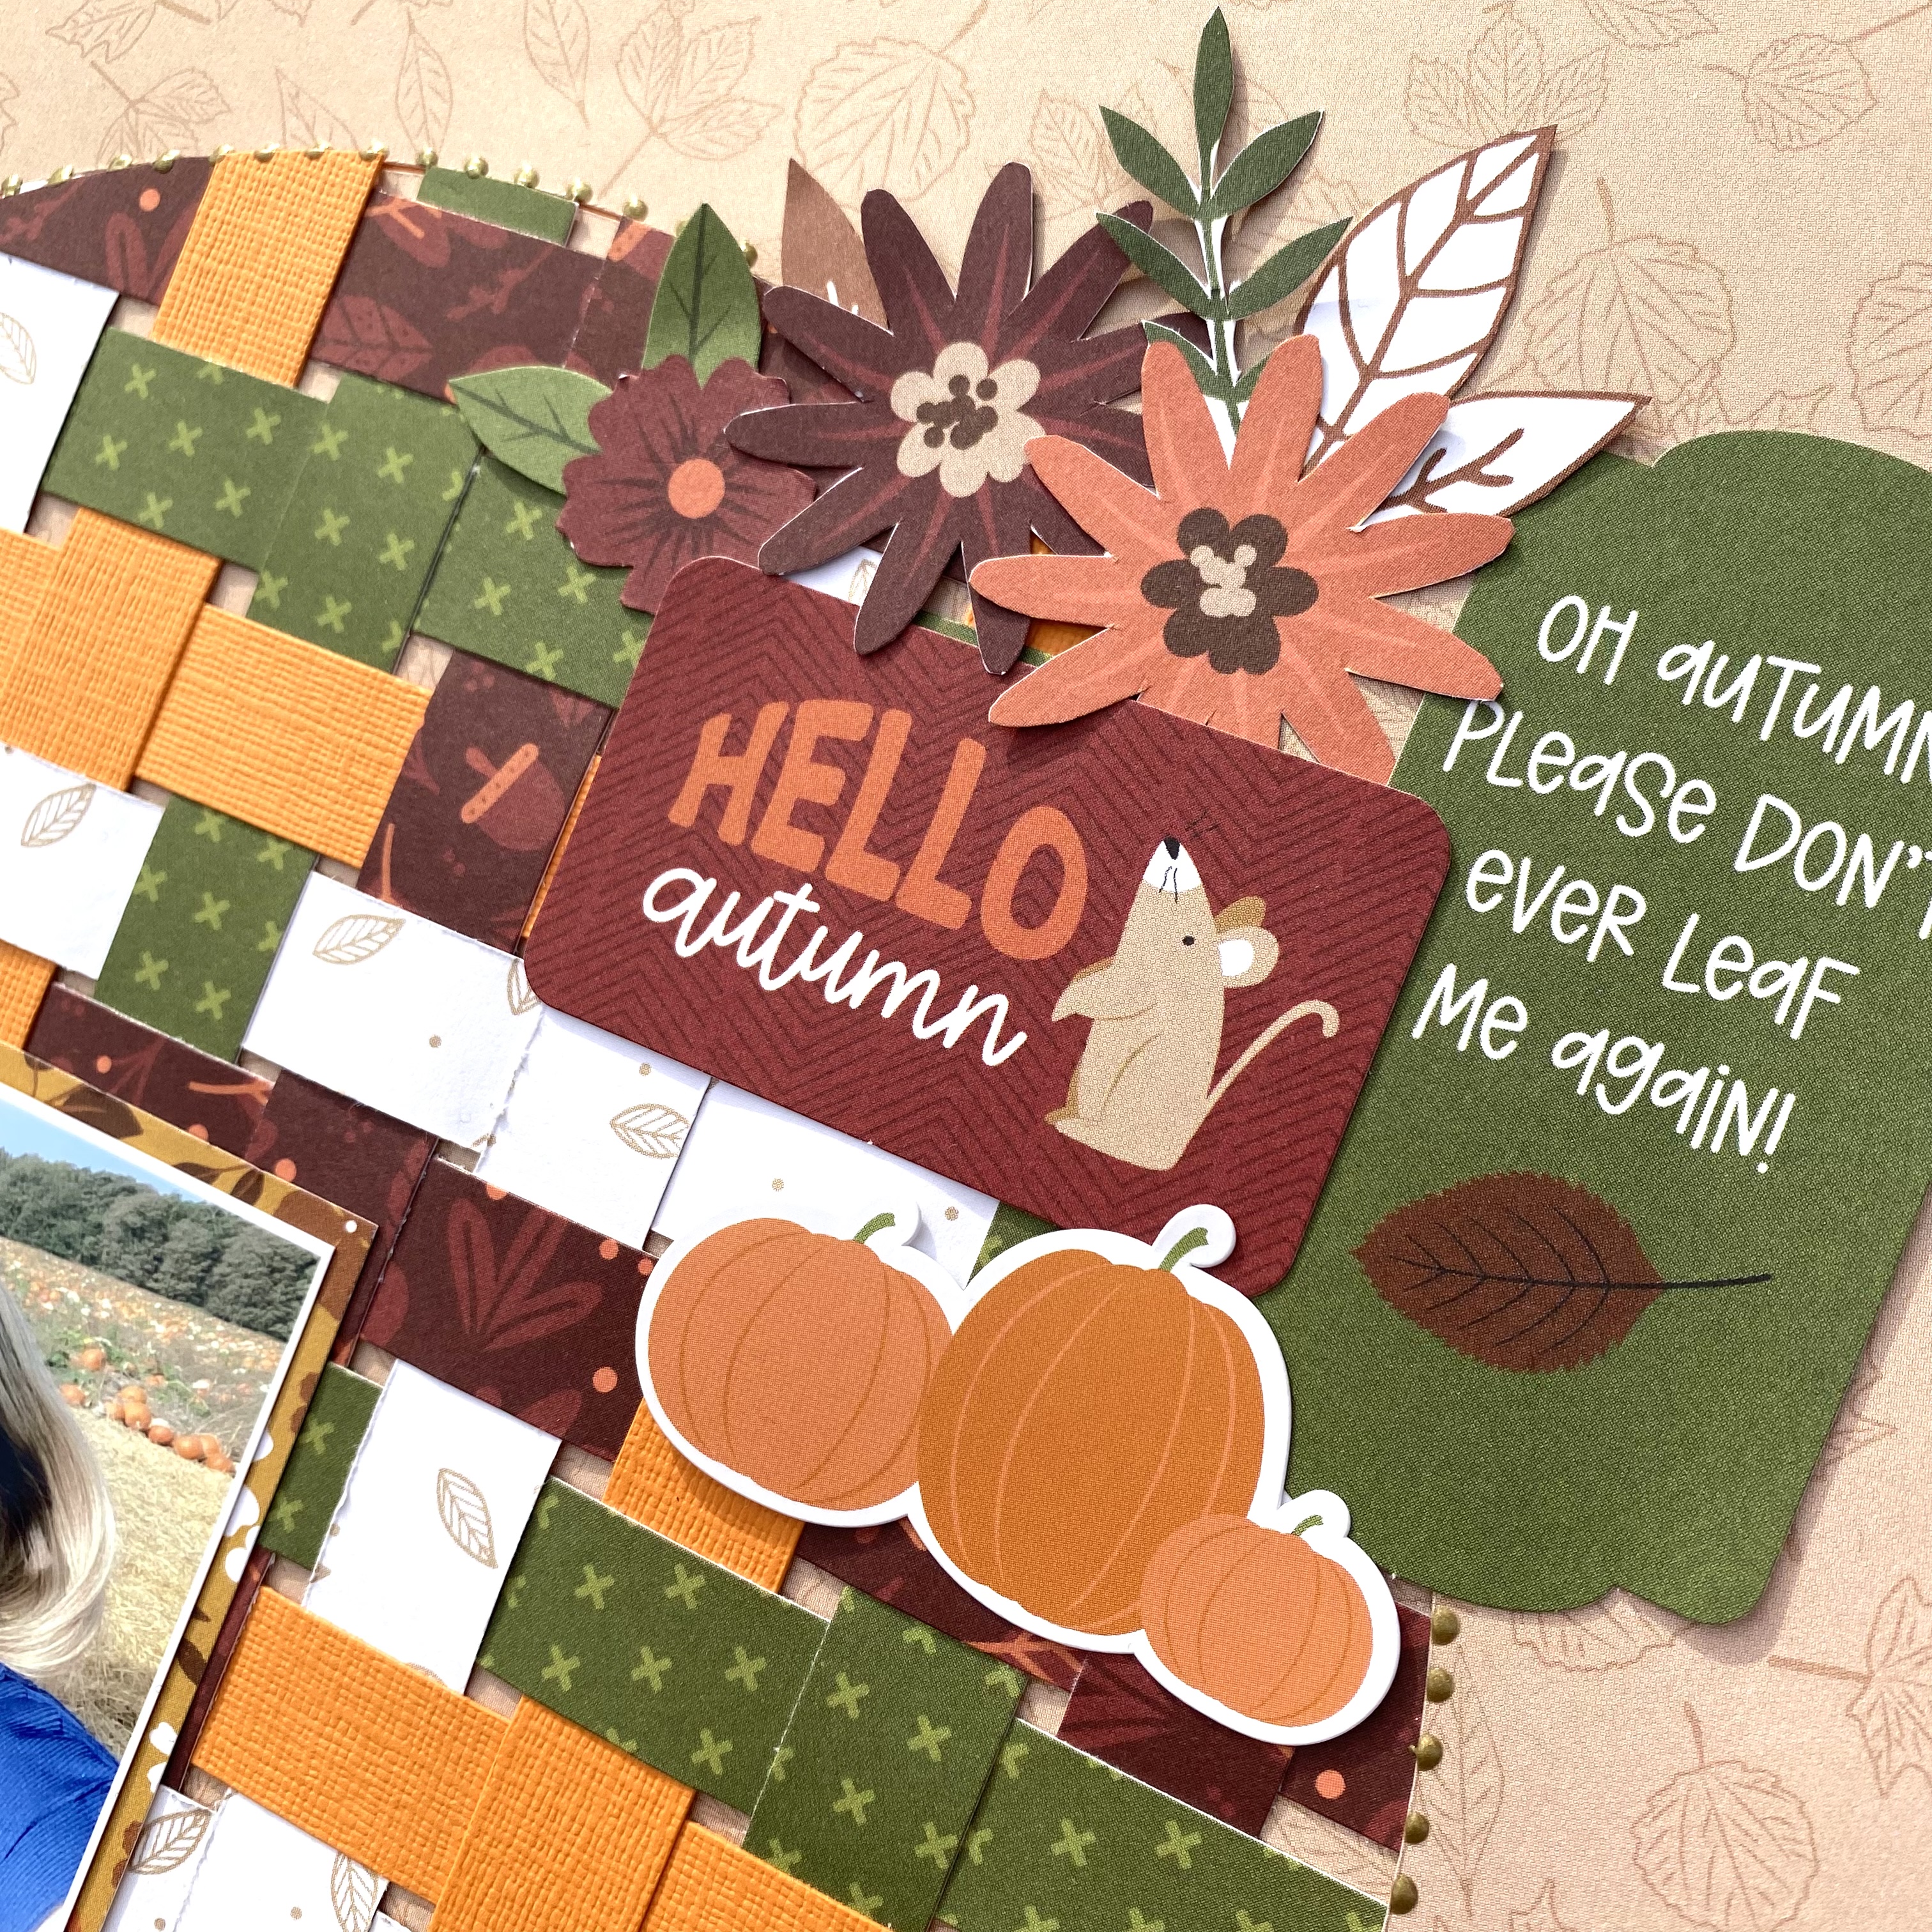
To create this layout I began by cutting a circle out of Autumn Woods. I kept the inner circle and then selected various patterned papers from the collection as well as coordinating cardstock and cut 1.5inch strips. 


I used the paper strips to do some paper weaving and then stuck it all down on the inner circle. Keeping the lengths of paper, I adhered these strips to the back of Autumn Woods. 


I mounted my photo onto the b side of 4x4 journaling cards and adhered to the lower left side of the circle. 


I fussy cut some flowers from Fall Flowers and created two clusters. Adding to my clusters, I selected some ephemera icons and some element stickers to place alongside. 


To finish, I added some Nuvo Vintage Drops around the edge of the circle. 


Thanks so much for looking! See you next time with something Christmassy!

Anna 

@acraftylifewithanna

Friday, 27 October 2023

Carta Bella Fall Fun - 'tis the Season for Giving Thanks

Hello, Karen here. It is certainly feeling very autumnal where I live and as I like to scrap with the seasons, I was really pleased when Vanessa sent me some of the new Fall Fun collection from Carta Bella to play with. 

This collection uses a colour palette which fans of Carta Bella will be familiar with and features images of pumpkins, leaves, sunflowers, plaids, wreaths and lots more. As the colour palette is an old favourite for Carta Bella, you can also easily easily mix and match old and new Carta Bella collections. My layout uses a harvest photo taken at a National Trust property.


I started this layout by spraying some Mango Blaze Cosmic Shimmer mist onto a sheet of smooth white cardstock. The mist contains mica so has a lovely shimmer. Once the mist had dried, 5mm was trimmed from each edge of the cardstock and layered onto a gutted sheet of the Flannel Warmth paper leaving a narrow frame around the outside. The mist did warp the cardstock a little but once the layout is in album I don't think it will be noticeable. Using brown thread I machine stitched round the edges of the white cardstock.


In the Silhouette Store I found an autumnal wreath cut file and cut this from some dark brown cardstock. The cut file was then backed with papers from the collection and some scraps of cardstock.

The backed cut file was placed in the centre of the layout and the 5x7 photo which had been matted with dark brown card was added.


On the sheet of Chipboard Phrases I found an appropriate plaque and placed this beneath the photo.


In my stash I found some extremely old paper sunflowers and paper leaves and added these to the cut file.


Finally I added a journalling strip printed on the computer at the bottom of the page and dotted some enamel dots and some sequins from Picket Fence around the layout.

I hope you like this layout. Autumn scrapbook layouts are always some of my favourite to create and in the shop there are sooooo many georgeous seasonal papers and embelishments to use. 

Until next time, take care.
Karen x x

Wednesday, 18 October 2023

Echo Park ~ I Love Fall #1 🎃

Hi everyone, it’s Anna back with you today. 
Well the weather has finally turned colder and now seems like the perfect time to start scrapping Autumn! So with that said, for my next two posts I’ll be working with Echo Park’s latest autumnal collection - I Love Fall. You can find it in the shop here


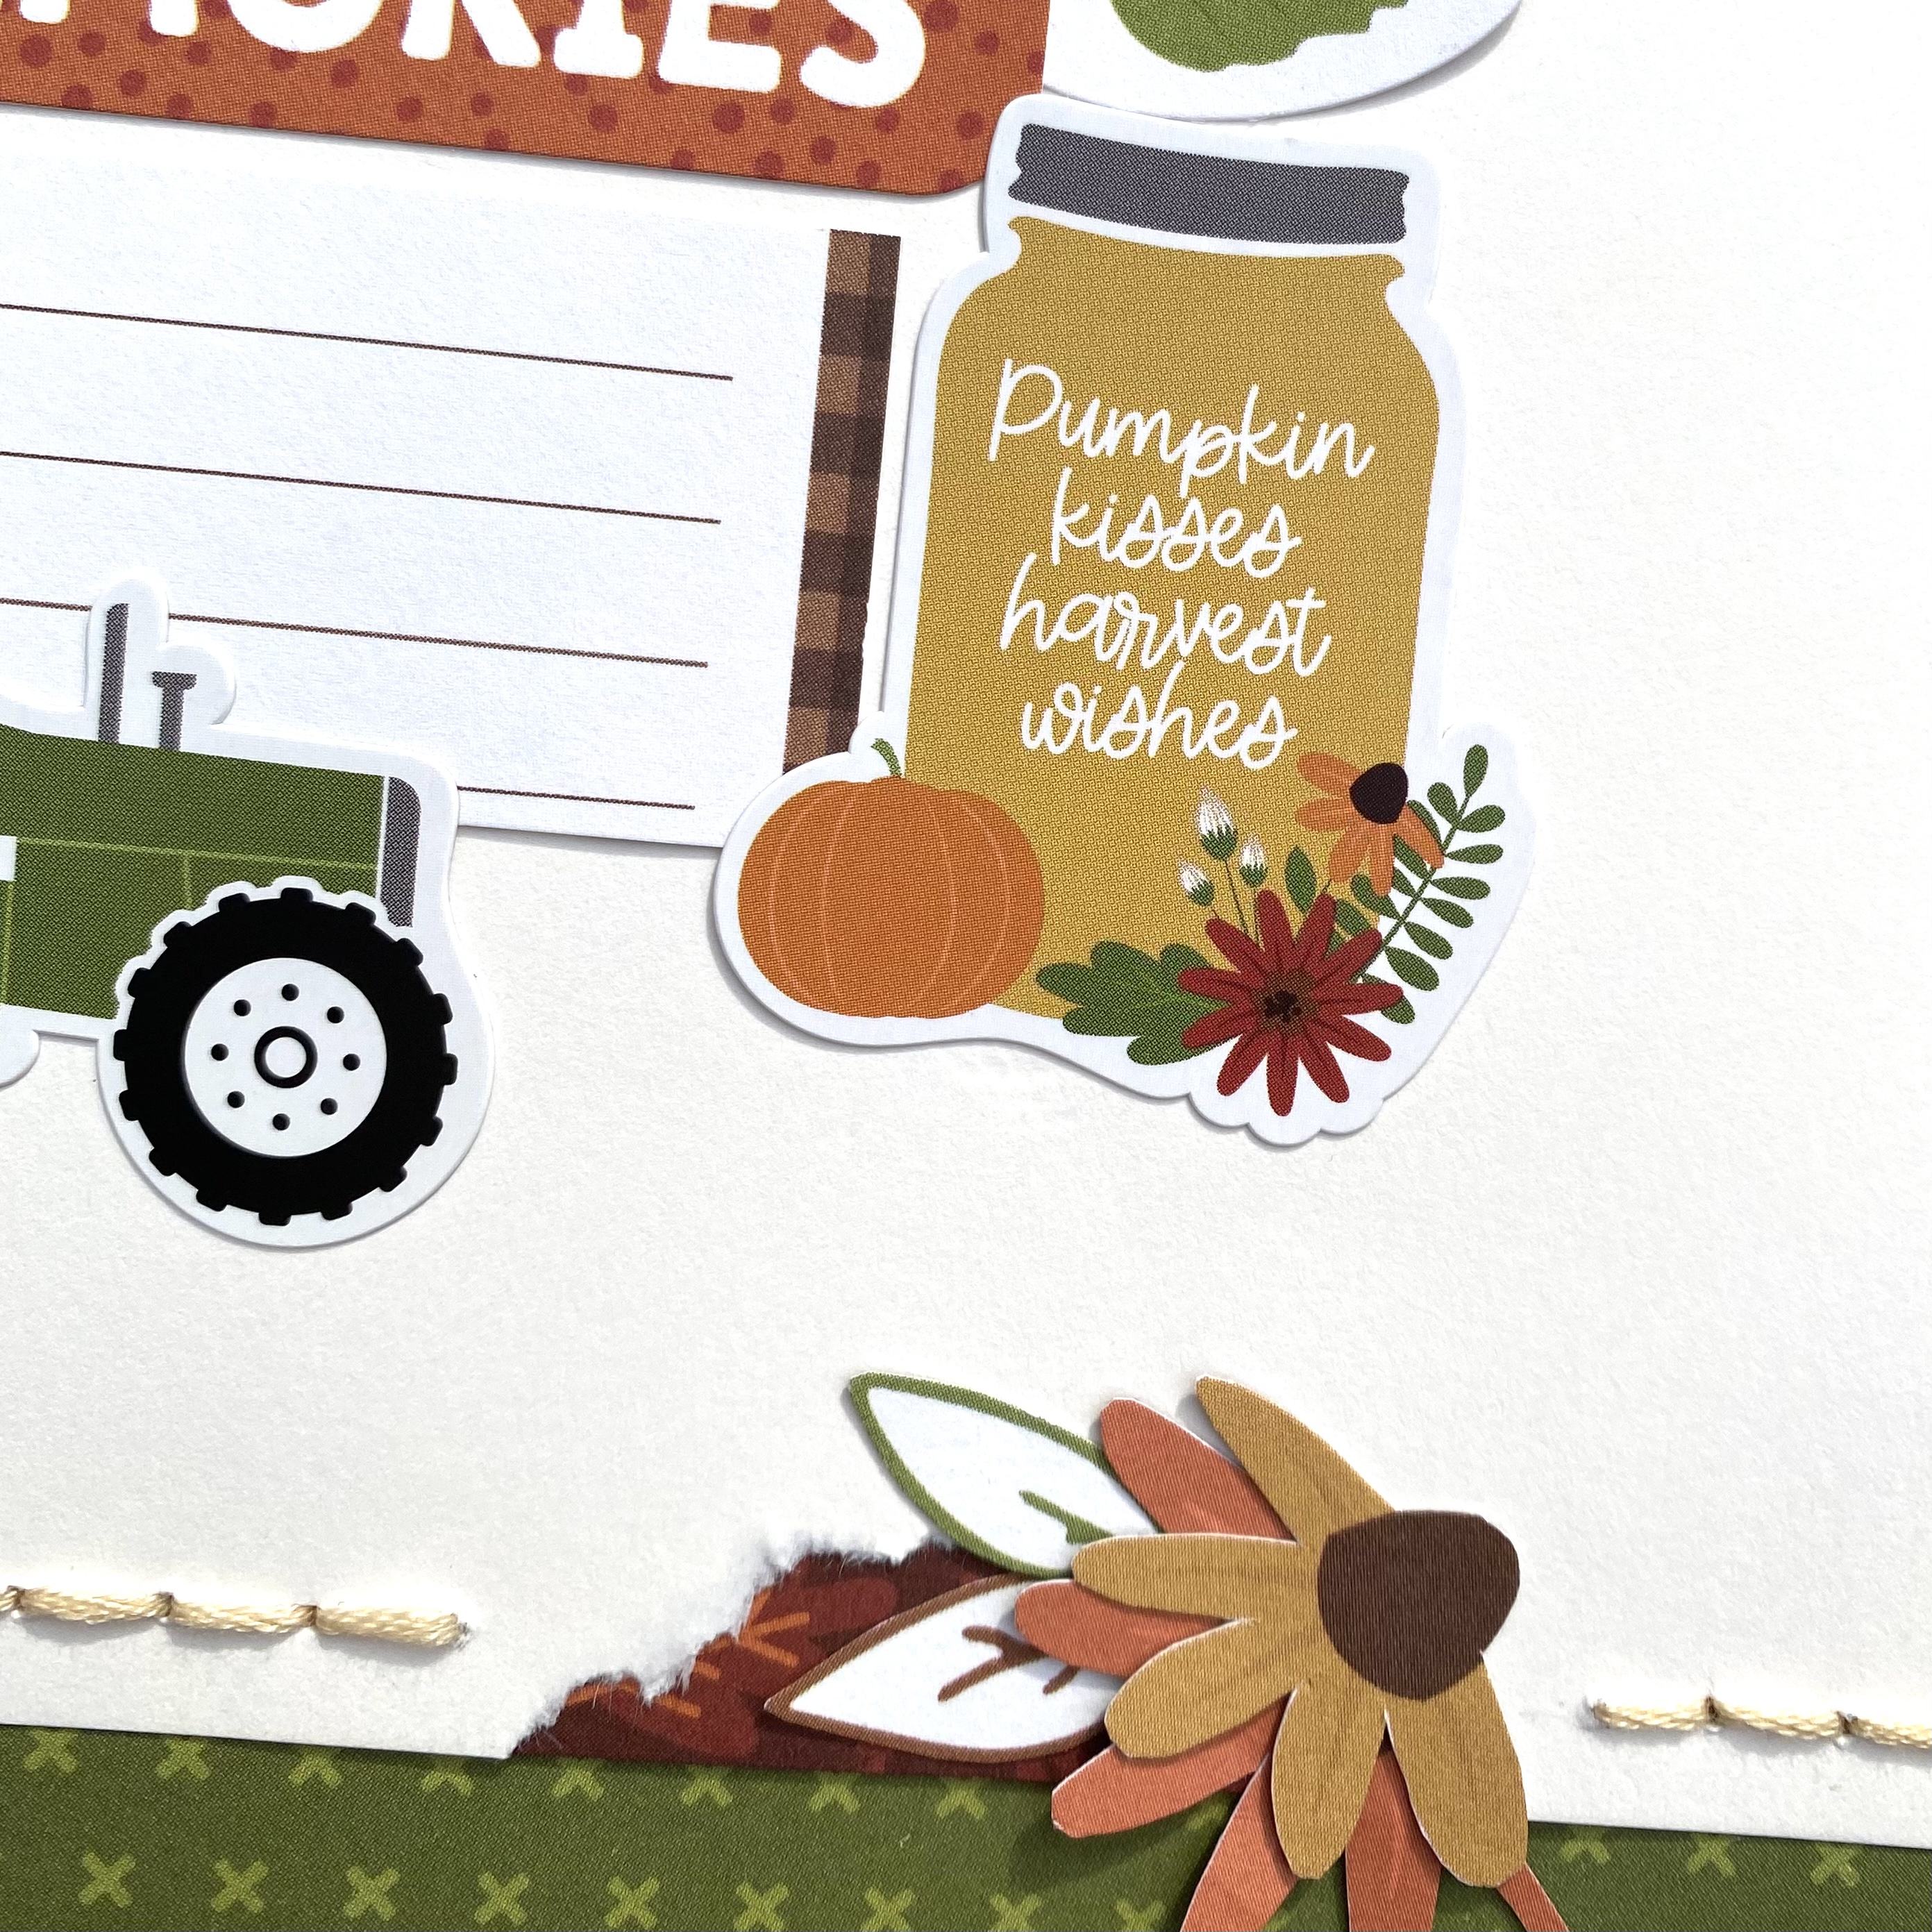
I used the b side of plump pumpkins as my base, which I gutted as I knew I’d just be using it for a boarder. I then trimmed down a sheet of white bazzill cardstock by roughly an inch each side. I adhered the cardstock to ‘plump pumpkins’ and then made some sewing holes ready for stitching later. 


I wanted to create a multi photo layout to use lots of pictures from a recent trip to a pumpkin patch. I had so many to use, I wanted to be able to include lots of my favourite ones. 
I mounted them with various patterned papers from the collection as well as some orange bazzill from the matchmaker pack. I also selected a frame from the ephemera icons to mount one of my photos. 


I tore an area out of my cardstock at the top left and the bottom right side. I then filled in the gap using ‘crisp fall air’ and added some fussy cut florals from ‘fall flowers


When I was happy with how my photos were laid out, I added a few stickers from the element stickers filling in gaps and tucking them in and around my photos. I also added a few elements from the ephemera icons pack


I cut out a journaling box from the 4x4 journaling cards and trimmed it down to make a box to do some journaling. 


Finally, I added my stitching around the edge of the cardstock. 


Thanks so much for looking! 
See you next time with another layout using this collection. 

Anna
x

@acraftylifewithanna
 

Monday, 11 September 2023

Pumpkins Please! Echo Park I Love Fall

Hello there I am back with an autumn project, even though summer is still hanging on here!  I have been using the beautiful autumnal Echo Park I Love Fall alongside some mini distress ink pads and a golden shimmer spray.


Firstly I had a chipboard cutout of a pumpkin in my stash that I covered with Coconut Swirl Bazzill paper to have a completely blank canvas.  I am sure you could use a cutting machine to cut out a large pumpkin shape and use several layers to create the same shape that I used.


I then used Mowed Lawn combined with Cracked Pistachio, Fesive Berries, Spiced Marmalade mixed with Mustard Seed and Dusty Concord Distress ink colours to create a blended background.  I didn't have any particular order in mind, I just wanted to create an autumnal colour pallette.  I then put droplets of the Shimmer Spray Vanilla Custard onto the background and sprinkled large droplets of water onto the distress inks.


I used two small leaf dies to cut out various leaves from Plump Pumpkins, Crisp Fall Air, Fall Is Here and Elements of Fall and layered them on top of each other to create two clusters either side of my photograph.  I felt it needed some glitter, I always need glitter, so I added a little dash of glue here and there to the leaves and sprinkled some larger glitter onto the leaves.  I finished the piece with a sticker from the Element Sticker sheet.


I am so pleased how this piece turned out and will be using it as some autumn decor in my house.  I hope you join me later this month for a 3d autumn project!

Sunday, 18 September 2022

Thankful Tiered Tray Decor ...Photoplay Thankful Collection

t

 Hello again, it's Anita here with you today.


We are now at the start of my absolute favourite time of year....Autumn! And there are some beautiful, vibrant paper collections out there to create with! I am lucky enough to have some of the Photoplay Thankful Collection to work with for my post today.


For the last couple of years I have been enjoying looking at Pinterest and other sites seeing the gorgeous tiered trays that seem to be all the rage in the USA. There are several variations of tray available and people decorate them to match the seasons changing and for other themes and celebrations....and I have completely fallen in love with the idea. 

They can however work out quite expensive and as I rarely have spare money to buy *non essentials* I thought I would try and see what I could create myself for a fraction of the price!

Have a look and see what you think!


 I started off with 2 different sized lightwood trays that I bought from Hobbycraft and a plain pine candle stick that I painted to match the trays. I dry brushed the trays and candle stick with white acrylic paint to give it a more rustic effect and used wood glue to fix the trays to the candlestick and create the 2 tiers.

Here is a list of products used to create all the following items that I have made for my 1st ever tiered tray attempt.

Thankful and Blessed

Warm and Cozy

Pumpkin Spice

Element stickers

Lengths of 90mm x 20mm wood 

Lengths of 68mm x 15mm wood

Lengths of 90mm x 90mm wooden posts

Childrens Alphabet wooden blocks

wooden beads

ribbons, raffia and twine

mini wooden rolling pin

pine drawer knob

Various colour acrylic paints

MDF blank square photo frame

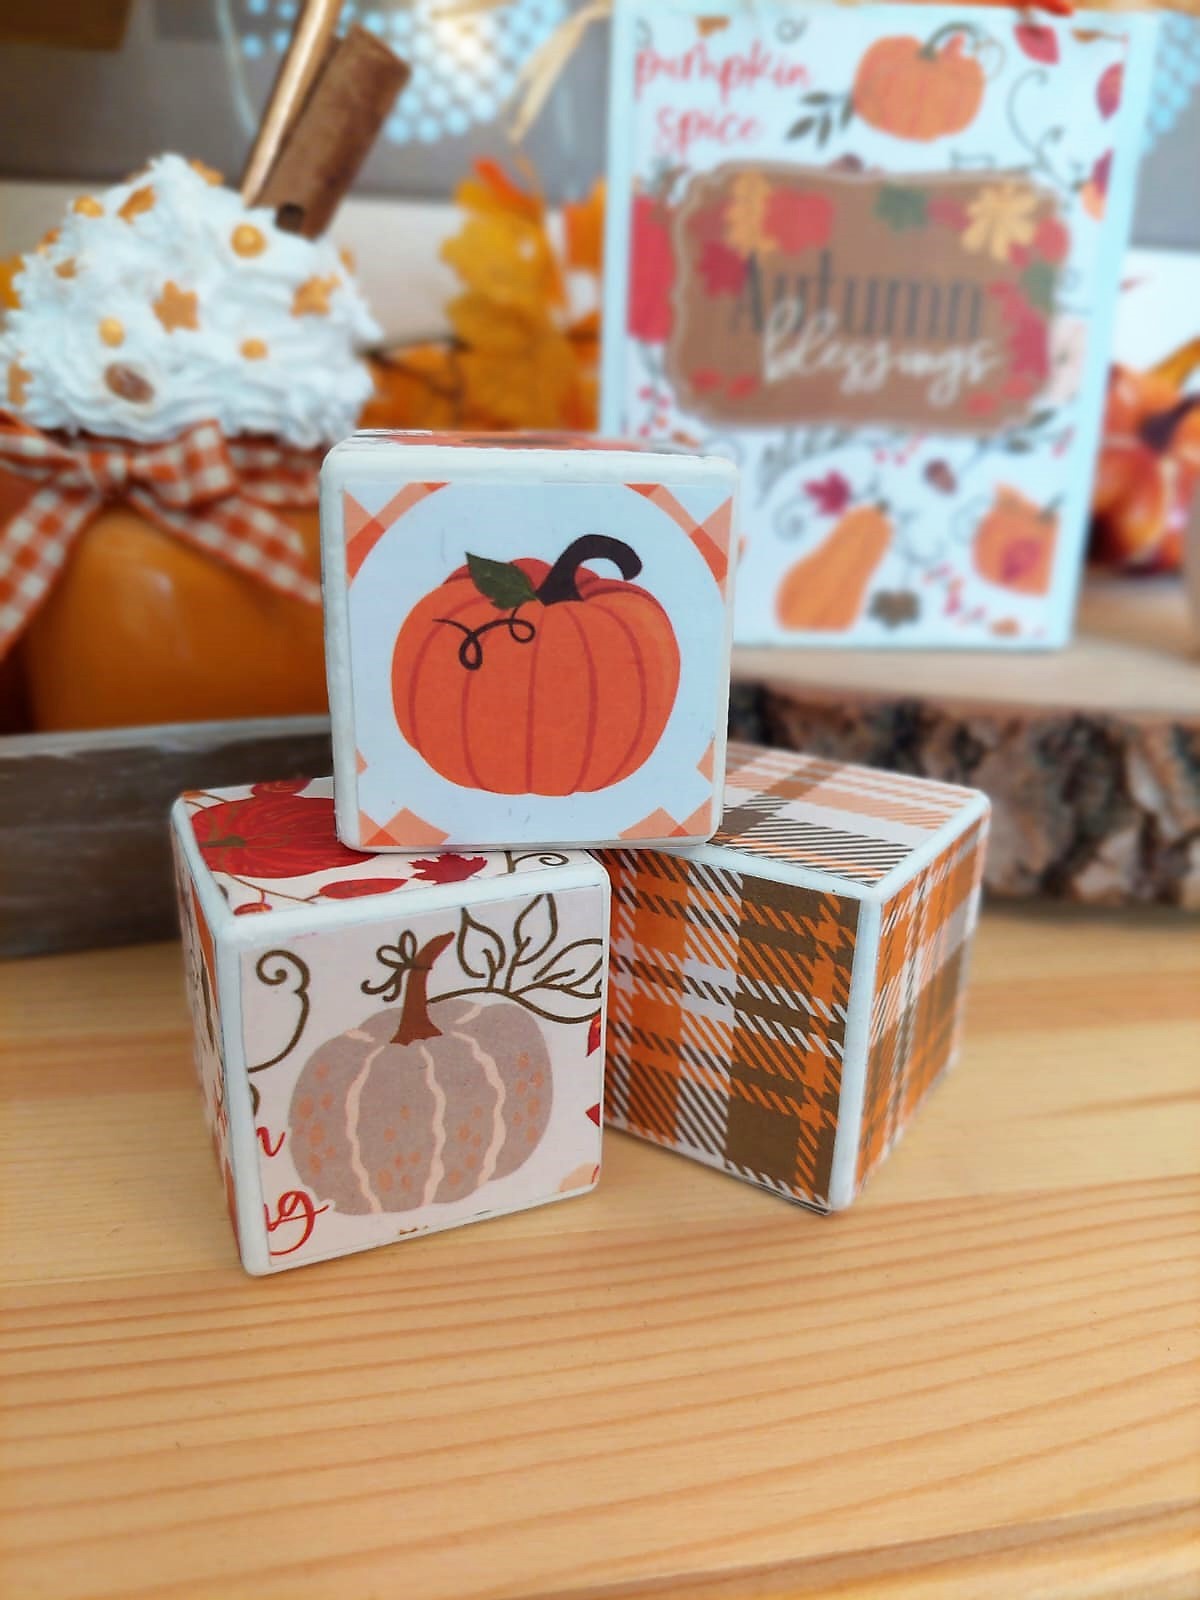
So, all of the wood pieces, blocks and bricks were painted with white, pumpkin orange or sage paint and then gently sanded the edges to slightly distress them and soften the edges. I added stickers from the element sheet and panels from the paper sheets, then raffia, twine and ribbons where needed.


The chunky wood block had a painted pine handle added to the top and I wrapped twine, raffia and ribbon onto it.


The beads were all painted with the same paints and I made a tassel from the twine and gingham check ribbon.

The MDF picture frame was painted white, backed with the reverse side of the paper and a rather lovely quote added.
 

the mini rolling pin was covered in paper and the raffa and ribbons tied on the ends. Super cute!

I made the pumpkin latte from a mini mason jar and added cinnamon, a straw and some sprinkles to the topping, finishing off with a gingham bow.


The childrens little alphabet blocks make a delightful little addition to the trays and you can make as many or as few as you like.

I added a few little shop bought bits...ceramic and plastic pumpkins, wooden mushrooms, greenery and autumns leaves.


I have to say that I am so very pleased with this for my first attempt and I am looking forward to decorating for Christmas in a short while....maybe even Halloween first!!

I hope you have enjoyed my post today, thank you for looking.


Warmest wishes

Anita xx