Showing posts with label Tattered Angels. Show all posts

Saturday, 8 February 2014

Believe

I hope you enjoyed the first of the 'Masking' posts yesterday.
I am here with a second for you today.

Today we will be getting a little messy with out masks.
We are using this 6x6 Crafters Workshop Mask. Mini Vine.
Remember, we have 25% off all masks & stencils this weekend.

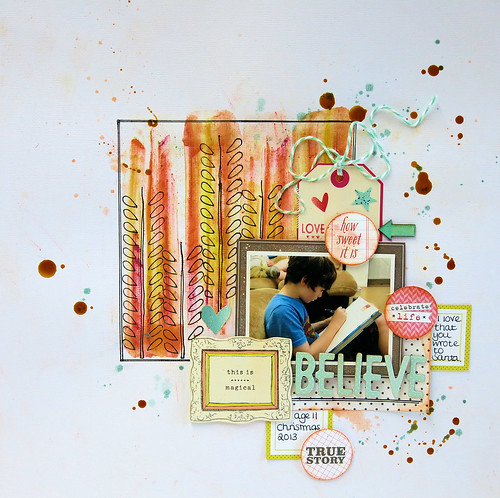
The LO I've made is this one here.

 
I started off in the same way as I did yesterday. I gathered and collected. I'd decided on my colour combo already and set off on my search to find things that matched. Again as yesterday I used the American Crafts - Dear Lizzy - Polka Dot Party paper, stickers and this time I did use the Thickers to match too. 
 
Back to the mask.
You need a base that can take a little water. Some paperstock is a little thin and you'll find that it ends up wharping, so make sure you use a good cardstock. I like Bazzill for this.
Lay your mask in place and rub over using Inktense blocks. These are my favourite for this but you could try watercolour pencils too.
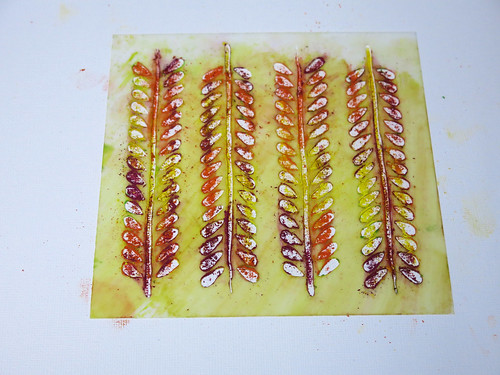

 
I warn you, it does get a little messy with the inktense blocks. They are like chalks and you end up with dust and powder everywhere. Once you remove your mask you are left with this.
 
 
At this point I like to give my hands a good wash otherwise you end up getting the coloured dust everywhere. I also like to have a clean rubber to hand to rub away an excess marks that I don't want on my cardstock.
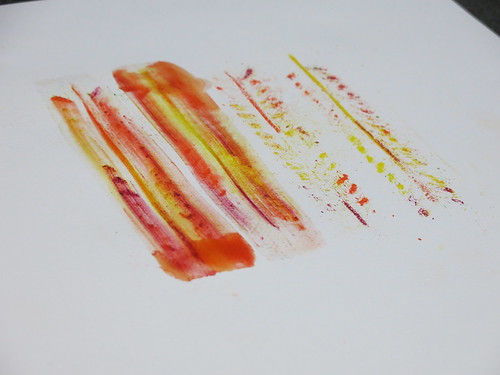
 
 
Now taking a decent sized wide and flat paint brush, I load it up with water and brush down the pattern. I stop at the end of each line. Load up with clean water and brush up in the other direction, stopping at the top again. The water will form a small puddle at the end of the line where you stop, that's good. Don't try to dry it up. You can now see why you need decent cardstock to work on.
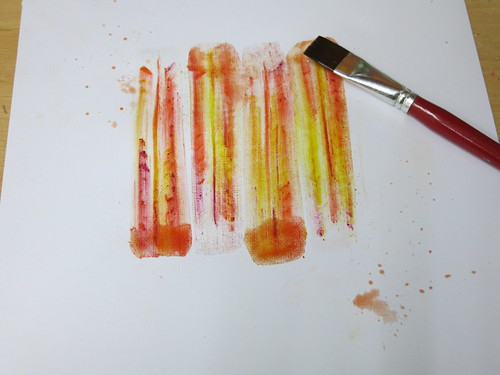
 
 
Once I finished, as my paint brush was wet, I flicked it and let it drip down on to my page. I now leave it to dry.
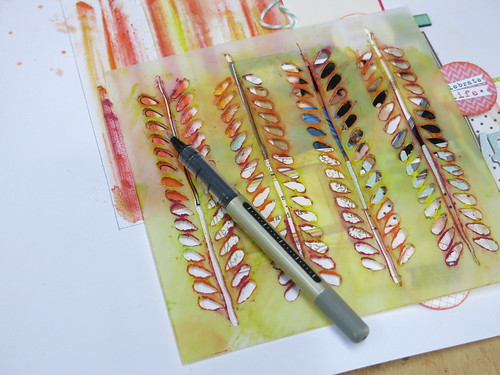
 
 
I've started to work on the photo and the layers. It's now time to work on the next part with the mask. As the card is dry, I lay the same mask back on the page and take a black journal pen and use the mask as a stencil for doodling. As the mask is chalky from before, either clean it off before doing this or like me, just wipe the photo after and use the rubber to rub out any unwanted smears.
 
 
The LO can now be finished.

 
 
I added some of the Elle's Studio Tidbits to the LO. I inked around the edges of these.
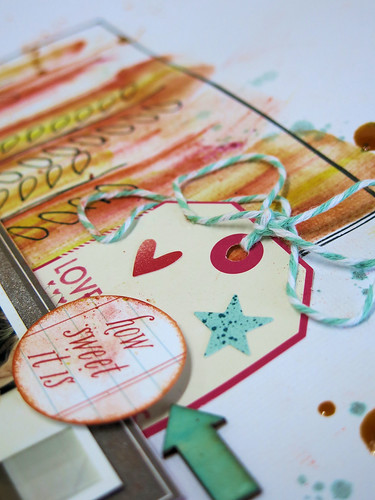
 
 
The orange drops are Tattered Angels Glimmer Glam.
I've dipped a long, thin paint brush in to the pot and let it drop. You get nice big drops by doing this and not the little splatters you get from flicking. It feels slightly more controlled too. It looks wet on the photo, that's how it looks when it dries.
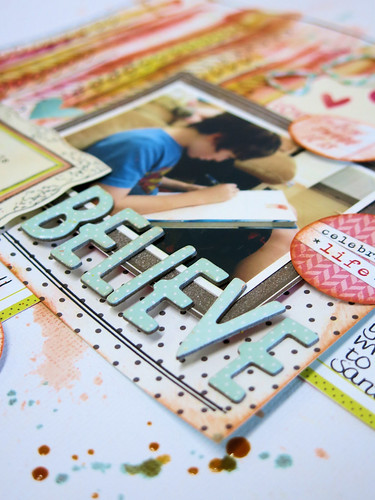
 
 
And lastly a close up of the mask work.


Thanks for joining me today. I hope you have enjoyed these techniques. Please come back and visit me here tomorrow where I will have a third LO to share with you and more mask & stencil techniques.
 
 
Lisa xx


Friday, 6 May 2011

Play Misty For Me

Hello, everyone - this is my first post as part of the Papermaze Design Team and I am very excited to share my tips and tricks with you on misting.

There are a number of companies who offer you a variety of coloured mists, I have two favourites Tattered Angels and Cosmic Shimmer. Tattered Angels' Glimmer Mist dried incredibly fast, while Cosmic Shimmer offers more vibrant colours at a very economical price.

So, what exactly is Glimmer Mist/Cosmic Shimmer?
Just water mixed with coloured pigments - that is pretty much all there is to it, but if can give your projects just that little bit of extra "oompfh".

Can it be used on any surface?
Paper, cardstock, cardboard, fabric, canvas, wood and chipboard will receive the best results but I have used Cosmic Shimmer successfully on metal as well - even though the coverage is not that intense.

How do you store the bottles?
I store mine upright but I know some like to store theirs lying on the side. Either way works fine but for me the upright storage gives me quicker access to the different colours - I store them by colour group

How do you shake the bottle to mix the colour and water?
When you first get your bottle you will notice that there is a lot of substance at the bottom and the water looks kind of flat.

You will need to shake the bottle to allow the pigments and the water to mix. See how different the colour looks now?

NEVER shake it up and down, that can result in the spray nozzle being "clogged up" after a few uses with pigments and you won't be able to spray at all. I roll the bottles between my hands until the pigment residue has completely mixed with the water.
You cannot roll the Tattered Angels bottles in your hands so the best way to mix them is to shake the bottle from left to right.

What to do when the spray nozzle is clogged up?
There are some pigments that will clogg up the nozzle no matter how careful you are, but you can easily get this cleaned up. You will need to remove the nozzle from the bottle (be sure to store the now open bottle out of reach) and submerge it into very warm soapy water. Leave it in there for about 30 - 40 minutes and then start spraying (leaving the end of the tube submerged in the water). 90% of the time you will find that your nozzle is working perfectly again, but sometimes it may need up to 2 hours in the water to completely unblock.

How do I use the mists on my projects?
It really depends on the level of coverage you would like - the closer you spray onto your base the more intense the colour will be, but it will also restrict the coverage. The further away from your project you spray, the finer the mist will settle on the base and coverage is much wider. I also found that if I press the nozzle only tentatively the colour will come out in splatters ( which I love), whilst if you press it down firmly it will spray more evenly.

How do I make sure the mist only settles on my projects?
I have my own "misting studio", i.e. an old pizza box in which I place all my projects when misting. The 12 x 12 boxes will catch the fine mist and your other surfaces will be protected.

Now, let me show you a project which uses subtle misting - I like to make use of this method when I have a piece of cardstock or patterned paper, which is too bright and would stand out too much on a layout or other project. I will first look at the overall colour scheme of my project and choose the misting colours accordingly.

Can you see where I used the mists in the below layout? It is the mat underneath the photo - this used to be white cardstock and I needed to tone the brightness down to work with overall design of the page. Mission accomplished, would you agree?

** click on image to enlarge **

If you would like to try your hand at misting, you can purchase the products used for the above project directly from Papermaze.

Cardstock: Bazzill Basics
Papers: Crate Paper - Emma's Shoppe "Sweets"; Girls Paperie - Vintage Whimsy "Birds of a Feather"
Mists: Cosmic Shimmer - Aqua Lagoon, Ancient Copper; Tattered Angels - Olive Vine
Stickers: Jenni Bowlin - Black Tiny Dot, Circle Reverse Brown
Beads/Pearls: Prima - Pearls & Crystals; Dew Drops - Clear;
Pens: Zig - Writer Pen
Pins: Maya Road - Antique Gem
Journaling Spots: My Minds Eye - Little Miss Muffet, Life Stories
Punches: Woodware, Fiskars - Effervesence