Friday, 19 February 2021

Echo Park Coffee & Friends - Dream Big

Hello again. Karen C here. I'm back today with another layout using Echo Park's Coffee & Friends collection and today I've scrapbooked some photos of my daughter with a giant cup of tea.


I started by cutting a huge tea cup cut file from some smooth white cardstock and backed this with papers from the collection (B side of the Coffee Shop Wall and B side of the 3x4 Journaling Cards papers) and also some olive green cardstock scraps. I also used a piece of kraft cardstock for the 'tea' in the cup.


A piece of white cotton lace was glued to the cut file too for some extra texture.


I then worked out where I was going to place the cut file and my photos on my layout and lightly drew round the outside of these using a pencil on a sheet of 12x12 white Bazzill cardstock.


Using a brickwork stencil (similar to this one) from my stash and some Tattered Rose Distress Oxide Ink, I stencilled around the area where the cut file and photos would be placed. The Tattered Rose ink was the perfect colour to match the Coffee & Friends collection and created a subtle background.

The pencil marks were then rubbed out and the cut file and photos were stuck to the layout with some 3D foam underneath.


A 'tea bag on a tag' was created using one of the Journalling Cards from the cut apart sheet on one end of a piece of bakers twine and a die cut from the Ephemera pack  on the other end. The tea bag was glued on top of the tea cup and the tag in the top left corner. I used a wet glue to secure the bakers twine in place.


The words printed on the die cut weren't suitable for this layout so I glued a flower fussy cut from the Coffee Shop Wall paper on top to hide this. Two heart pins were added behind the flower.


Tiny pink foam alphabet stickers were used to add a quote at the bottom of the layout.


In my stash I found a label sticker in coordinating colours and tucked this behind one of the photos.

The layout was completed with a scattering of sequins and a doodled border.

I hope this layout inspires you to think about using the Coffee & Friends collection, and this and other collections from Echo Park are available in the shop.

I'll be back soon with another project and in the meantime, Take Care.
Karen x x


Wednesday, 17 February 2021

Hello Today from Simple Stories by Adam


Hello! Adam here again sharing another layout using the fab 'Hello Today' from Simple Stories.


For this one, I decided I wanted to maximise the photos on my page which was documenting a trip to the Concorde Experience at Manchester Airport. 

I started off by gutting the inside of the 'August' paper and used the B side. I trimmed half a cm off all sides of the 'October' paper and then popped this on top of the other sheet. 

Using the 'February', 'September', 'November' and 'May' papers, I made four pockets roughly 4" x 5.25" and adhered these to the page as four 'sections'. I made two additional pockets from the 'December' and 'April' papers - smaller this time, at 2.25" x 3" and popped these in the corners of two of the bigger pockets. 


I created four tags for the larger pockets - one made with a teared piece of the 'May' paper, two made with eyelets directly on the photos (with some stickers from the sticker book on the photos) and one is just the boarding pass style tickets from the day with an eyelet and twine.


I used some of the journal spots from the bits and pieces and some more photos for the two smaller pockets and some more twine and eyelets.


I decided I wanted something in between the pockets so popped two lengths of twine from top to bottom and half punched a hole at each end for the twine to sit in. 

I loved the chipboard frames that come with this collection - another great addition to the Simple Stories range - I do love frames and love some of the ones in the shop!n So I used two of the frames on the front of two pockets - popping a photo in one and using the other two emphasise the logo from where we were (cut from a photo!). I used some clips from my stash to add interest the page (you can find a good selection of clips in the shop). 


I used an array of embellishments from the bits and pieces, adhesive brads, foam stickers, element stickers, sticker book and puffy stickers to embellish the page... in my usual 'more is more' kinda way! 

I used some of the numbers from the journal bits and pieces to add the month and year of the photos on two pockets. I used 'Hello' from the foam stickers for my title and added a gold puffy sticker from my stash - similar to these. 


I finished up with some enamel dots and word stickers here and there - and it was done!

I've still got some more to share from this awesome collection so I'll see you all before the end of February but till then, take care and stay safe! 😀

Adam x


Monday, 15 February 2021

February Papermaze Kit

Hello!  Lynn here today with the new Papermaze kit for February. Another kit full of inspiration with it's patterned papers, Bazzill cardstock and a selection of embellishments. A wide mix of colours in this months selection. There is, as always, a pack of four colour matched sheets of Bazzill available.


Before looking at how the layouts were made, this is what you will find in Februarys kit:


Patterned papers:
American Crafts - Vicki Boutin - Storyteller collection - Bohemian, Fresh Cut & Narrative
Simple Stories - Apron Strings collection - Live Love Eat & What's For Dinner
Echo Park Coffee and Friends collection - Letterboard
Bazzill - Vanilla & Blackberry Swirl

Reverse side of papers:


Embelliehments:

Exclusive 'Beautiful' cut file, 12" lace, 2 chipboard buttons, 4 pearl brads, prima flower, Webster's Pages tiny alpha sticker sheet, strip of gems, 8 dew drops.

Extra Bazzill pack - Sunflower, Lava, Capers & Blue Oasis


Twirling Carousel - For this page I used photos of my sister and me on the fairground carousel horses, back in the 1960's.


I started with the 'Live, Love, Eat' paper and made a border 4cm deep. Over this I mounted a piece of Sunflower Bazzill cut to 25 x 25cm and inked with Candied Apple Distress Ink (all other papers were edged with the same ink). I splattered some black ink over this card.

I cut two panels with 'What's for Dinner' paper, one 21 x 12cm floral side up and the other 7 x 22.5 cm dotty side up. Both were mounted onto Lava Bazzill, making very fine red borders. These were placed on the page one over the other as seen in the photo.

From the Blue Oasis Bazzill I cut a trim with a Martha Stewart Daisy Border Punch. this was attached under the dotty panel.


Also from the Blue Oasis Bazzill I punched a scalloped circle for the journalling spot, and the word 'Carousel' created and cut on the Cricut. I stamped the lines for my journalling and cut them to fit within the scalloped circle. 

Once all was cut, inked and placed into position, I added the word 'twirling' to the title with Doodlebug Designs alphabet stickers. I decorated the trim with some multifacited self-adhesive dots from my stash.

I scattered some flower shaped sequins over the page and added a dot of Nuvo Crystal Drops to the centre of each one. I used more Nuvo drops around my journalling circle.


Crafty Girl - My niece, Jess saved her Christmas and birthday money to buy this sewing machine last month.

Using the Capers Bazzill as a base, I cut a piece from under where the patterned paper will go later, this is to use for the title and photo mount.

I painted the two chipboard buttons from the kit with acrylic paint to match the Bazzill, I then coated them with Glossy Accents and tied some cream ribbon through the holes and finished them off with a small bow.


I cut the 'Fresh Cut' paper to represent a garment being buttoned together. I then machine stitched and distressed all around these pieces. I mixed some gold paint into texture paste and worked it through the Vicki Boutin Wild Soul stencil to add some texture to the background paper.


To build the page, I used some wide lace from my stash, tucked under where the two patterened paper pieces join. Then I added the buttons and some tape measure ribbon were all added to the page. I attached a couple of decorative pins through the lower button.


I cut a title using the Cricut from the Capers Bazzill to add to the top of the layout. 

I finished off with some typed journalling wrapped with thin twine and a charm.

This completes part one of the February kit, back with part two soon.
Thanks for looking
Lynn x

Sunday, 14 February 2021

Hello Today Stash Busting by Adam

Happy Sunday! Adam back with another layout using Hello Today from Simple Stories.

This isn't my last share of the month, theres a few more to come but this was the last layout I actually did with the collection and I went for a full on stash busting to use up stickers and ephemera! I didn't take much notice of what the bits were and just went a bit crazy!

So I used a scrappy tip from a Shimelle Facebook Live video to cut a shape from cardstock and fill it with stickers! I love this idea and will definitely be giving it another ago. You could do this in so many different ways, shapes and collections!

I started with precision cardstock and cut a large circle then used a sheet of yellow cardstock from my stash to back the circle. I took a 4x4" photo and backed with some red Bazzill. There are a few word/phrase stickers around my photo from my stash. I doodled around the photo - not sure I am completely happy with that but you can't like everything! 


Then I went sticker crazy! These are all from the element sticker sheet, foam stickers, adhesive brads, chipboard stickers, enamel dots, sticker book and puffy stickers. I've also used two fabric/puffy hearts from Cocoa Vanilla Studio's Daydream collection. 


This was definitely a layout to stash bust the rest of the stickers and so I wasn't paying too much attention to what the stickers were and instead just going for it! 

Its a great way to use up ephemera, stickers and embellishments. You can quite easily adapt it to different shapes - square, triangle, hexagon and so on. You could also back the circle with a photo and then go sticker crazy round the outside! So many options. I'll definitely be giving it another go!

That's it from me for today. Thank you so much for reading - I really appreciate it! Go check out all the other posts from the design team - there are some incredible layouts from everyone else right now!

You can find all the new scrappy goodies in the shop! Take care, stay safe and happy scrapping!

Adam x


Friday, 12 February 2021

Celebrate - Carta Bella - Let's Celebrate Collection

Hello, it's Rebecca with you today and I'm sharing my first layout using Carta Bella's ‘Let’s Celebrate’ collection. This collection is full of bright colours and perfect for documenting birthday photos so I'm using the collection to scrap photos from my son's 4th birthday last month.

I was really drawn to the ‘Bunches of Balloons’ patterned paper - it's definitely my favourite from the collection. I wanted to use it in it's entirety but it was a little too 'busy' for me to use as a background paper so I needed to create some white space to work with. I decided to trim 1 inch from one edge of a sheet of Premium White Cardstock. This would allow me to have the balloon paper showing as a border around the edge of my page. I then tore two sections from the cardstock to place on the top and bottom of my background. This meant I ended up with a section of the patterned paper showing in the centre of my layout, and around the edge. 


I selected three photos for this layout, of my little one stood with his birthday balloons, and decided to display them in a small film strip style on the left of my page. I then used a hand drawn template to cut three balloons from the patterned papers. I've used the B side of ‘Party Palooza’ and both sides of the ‘One Year Older’ Paper. I made sure to centre my balloon over a number '4' on the 'One Year Older' paper so that I had a green number 4 on the balloon.


I doodled around the edge of the balloons with a black pen, and also drew on some strings to ground my balloons so they weren't just randomly floating. I've used foam pads behind the balloons to bring some dimension to the page. I've also doodled a border around the outside edge of the white cardstock to bring the layout all together and to match the black strings in the 'Bunches of Balloons' patterned paper. I've also used the red and green papers to add some layers behind my photos - of course with distressed edges!

I then worked on the opposite corner of my layout to balance out the page. I've used two of the larger stickers from the Element Stickers sheet - the 'celebrate' sticker will act as the title for this layout. 


I've used my star punch to create some embellishments for my layout - I've punched 5 stars in total (3 from the 'One Year Older' patterned paper and one from the ‘Hip Hip Hooray’ paper, to bring some navy blue into the layout). These also have a doodled black border on them for consistency. I also used a tiny star punch to add a sprinkling of smaller stars around the page. 


I further embellished my layout with some of the smaller stickers from the 'Element Stickers' sheet, and added some green ink splatters. 

This left the top right hand corner of my layout free to add my journalling. I wanted to say quite a bit, so I typed my journalling and printed it in small strips. I backed the strips onto the B side of the 'Party Paloozer' paper to help them stand out a bit better, and raised them up with foam.


I finished my layout with a few Matte Sprinkles by Doodlebug. I've never used these before but I love the texture of them so will definitely be featuring them on future layouts!

If you'd like to watch how the layout came together, I have a process video up on my YouTube channel which you can find here.

I'll be back a bit later in the month with my second layout with this collection, but in the meantime you can shop this collection and lots more goodies here.

Take care,

Rebecca x


Thursday, 11 February 2021

Hello Today from Simple Stories by Adam - Back Again!

Hi! ScrappyAdam back again with another Hello Today layout! I am loving this collection and still have some left so you'll see yet more soon!


For this layout I really wanted to use a couple of the chipboard frames and faffed for a ridiculous amount of time trying to decide what to do! In the end, I place one to the top left and one to the bottom right. I decided on papers and went with the 'March' paper as my main background and a strip of 'July' paper to the left. I also teared a little strip in the top right corner and pulled the corners back, stapling each side down and popping a scrap of rainbow paper behind to give a pop of colour and some added interest and texture! I matted the photo on a sheet of the paper and added a tab and label sticker and word sticker. 


I really wanted to get an extra photo on the page so the frame to the bottom right is attached with a traditional style brad (rather than an adhesive brad) from Simple Stories 'Going Places' collection. This frame then twists and turns to reveal a second 6x4" photo underneath! I'd originally planned a shaker pocket so the frame does have a sheet of acetate on the front!


Then it was a case of diving into the stickers and ephemera! I used the 'Hello' foam sticker and placed this on the photo to the right, inside the frame. I popped some of the bits and pieces above this photo too along with a foam heart and enamel dots and a little adhesive brad. 


On the photo to the left, I popped a couple of adhesive brads on the flowers that are part of the chipboard frame, some bits and pieces and a sticker from the 12x12 sticker sheet. 


Finally, below the left photo, I used various bits and pieces, journal bits and pieces, enamel dots, puffy stickers and adhesive brads and layered various embellishments.  I finished it off with one of the lovely hearts from Cocoa Vanilla's Daydream collection!


That was me done for this layout! Thank you so much for having a read, I really appreciate it! Please do take a look at the Papermaze store - so many scrappy goodies with new stuff arriving all the time, especially all the fab new collections on their way!

Take care, stay safe and I'll see you back here soon!

Adam x


Wednesday, 10 February 2021

Simple Stories ~ Hello Today #2

 Hi! It’s Anna back with you today sharing my second layout using the Simple Stories Hello Today collection. 

You can find the collection over in the shop here . 


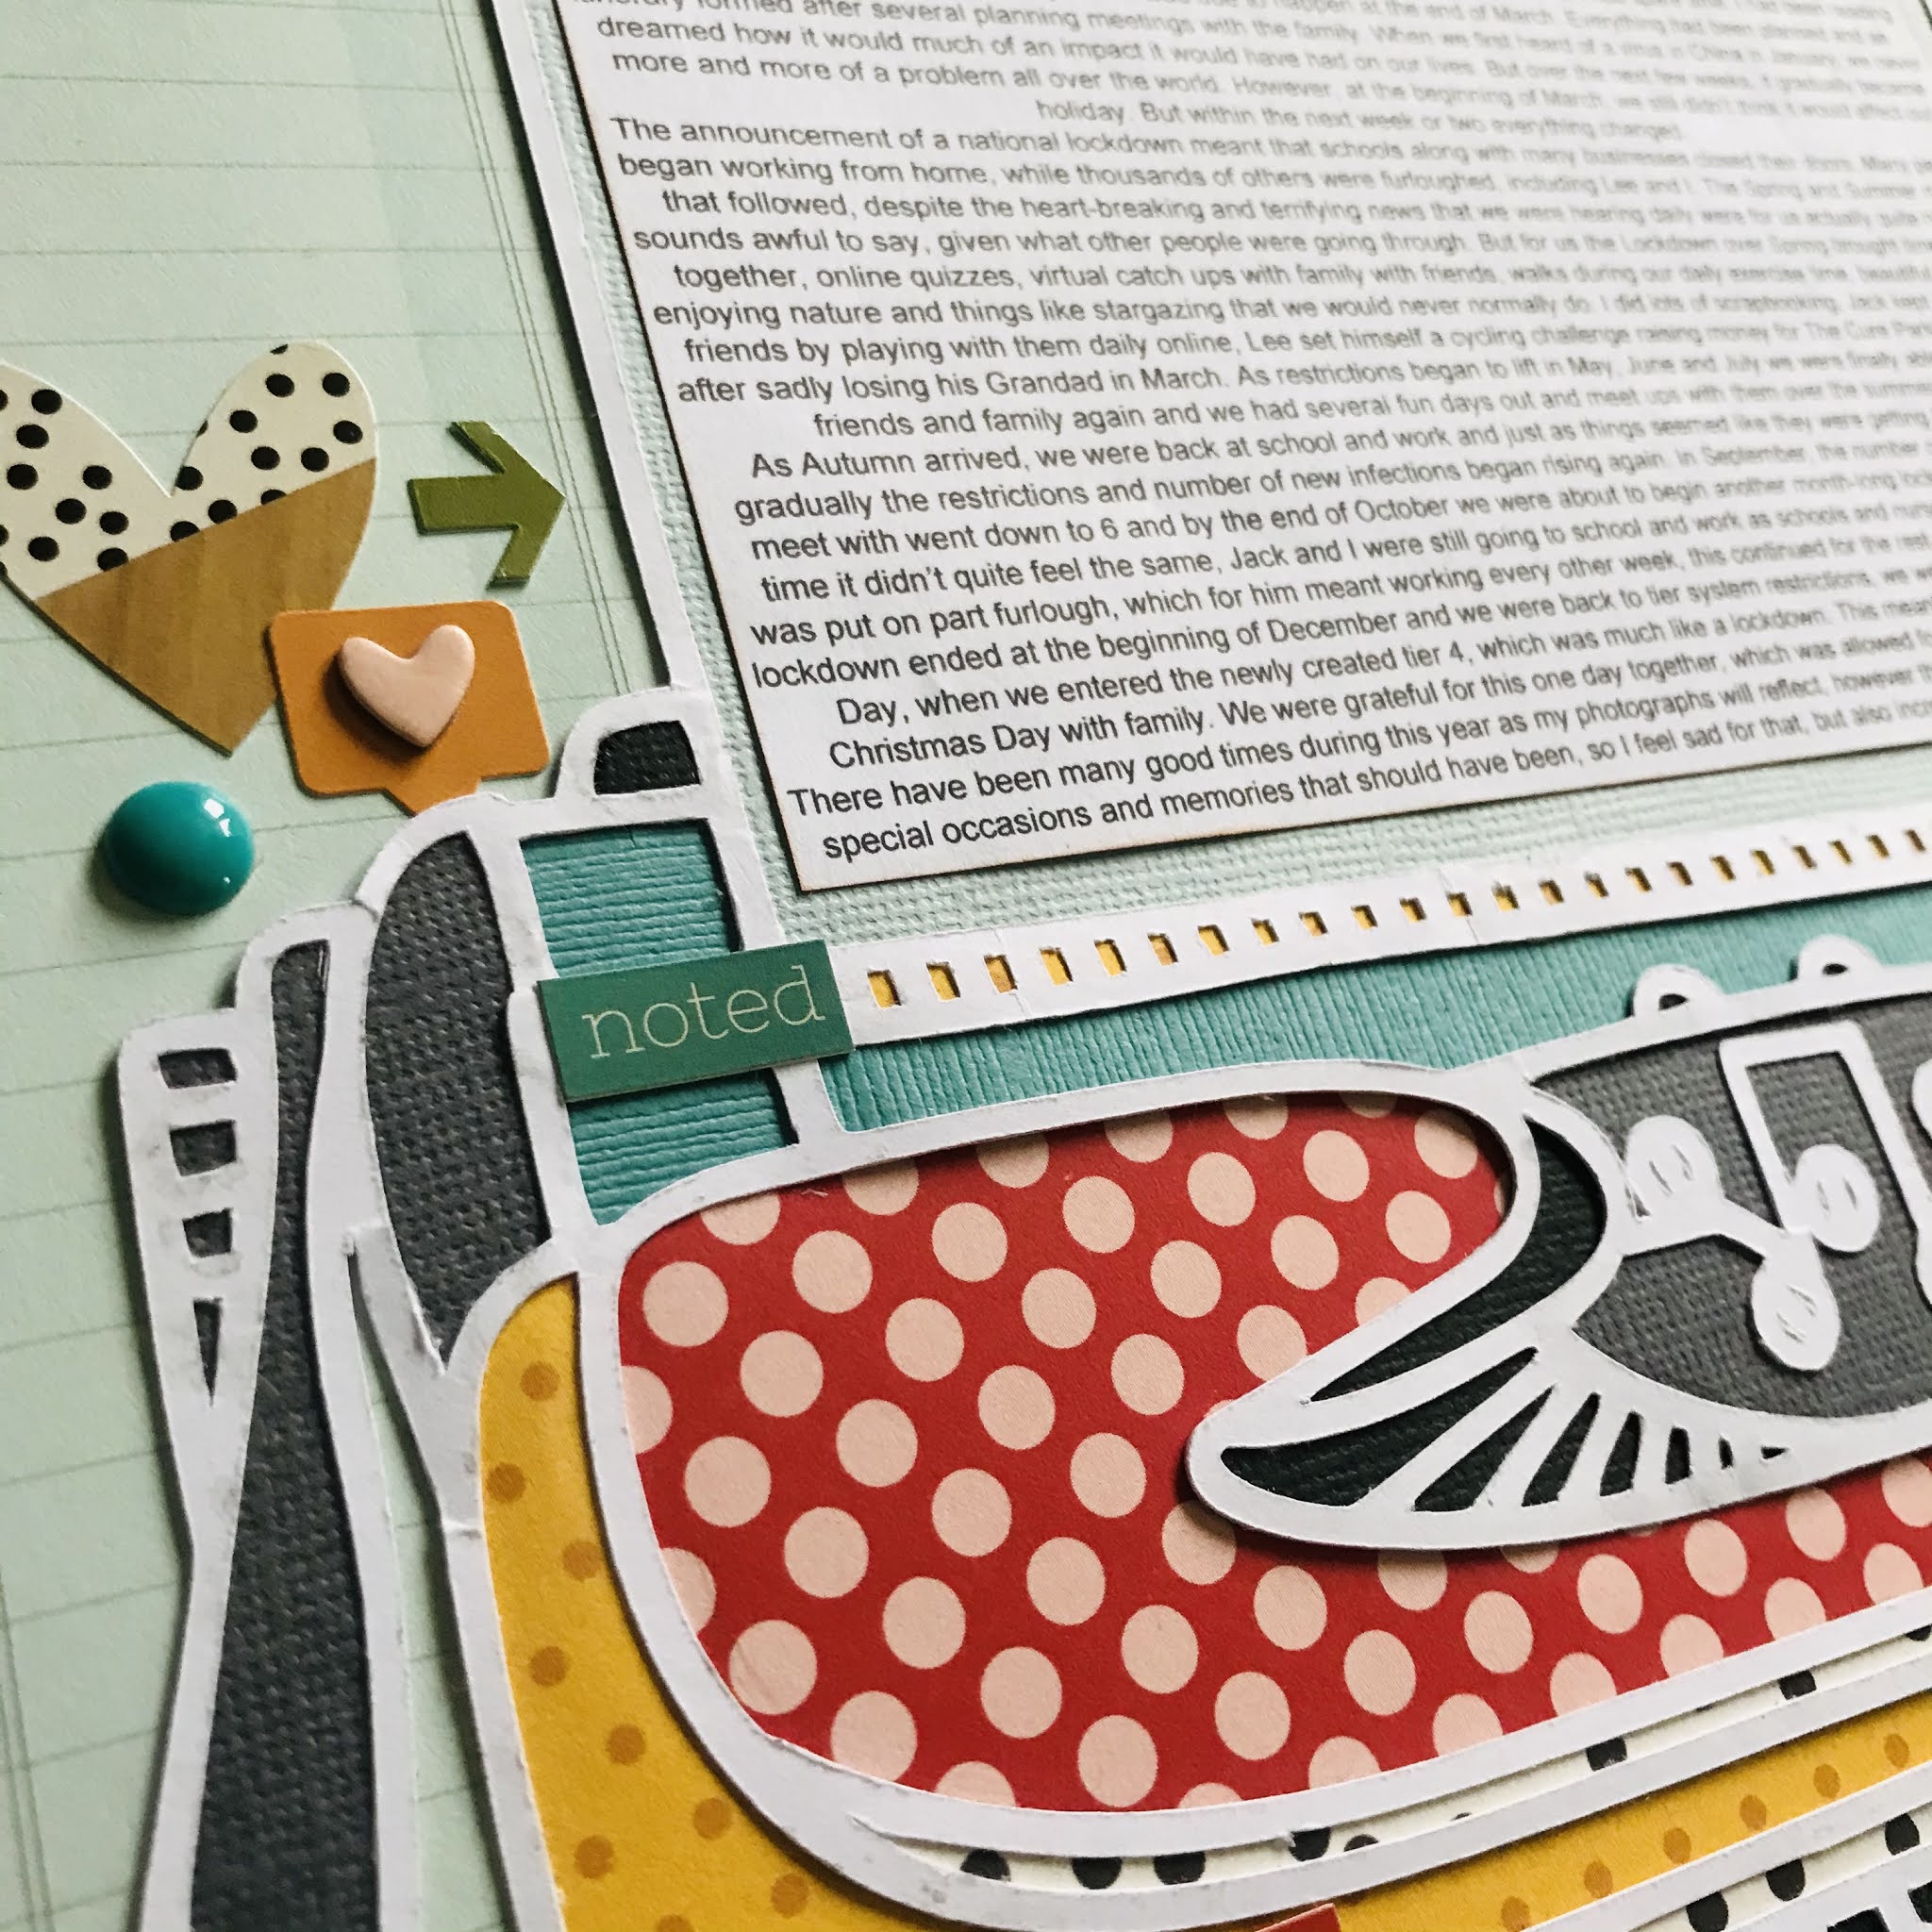
This layout documents 2020 and is what I would call a ‘review the year’ page. I used a typewriter cut file by Paige Evans, which I backed with a variety of the patterned papers from the collection as well as some coordinating cardstock. I also printed out some type writer font and added each letter/number into each section for the keyboard. This was very time consuming, but worth it. I also did some journaling in a word document and printed it out to go in the cut file too. I just talk about the year in this text and what it meant for us. 


I made some photo collages to incorporate several pictures from throughout the year. I backed these with patterned paper and coordinating cardstock and adhered them to the right of my cut file. 
For my title, I used these  American Crafts Thickers  and also used some enamel dots either side. 


I added several of the stickers from the Combo Stickers and some chipboard stickers  too.

Thanks so much for looking! See you soon! 
Anna 
X