Showing posts with label Doily. Show all posts

Monday, 1 September 2025

August Papermaze Kit - Part 2

Lynn here today with the bright, summery August kit, which has been great fun to work with. Here are the first two layouts I have created with this kit. The kit is now available in store and online. Two more layouts featuring my granddaughter, one with all four generations and the other from a few weeks ago, washing her favourite soft toy. 

Before looking at how the layouts were made, this is what you will find inside the kit:


Patterned Papers:
Doodlebug Designs - Butterfly Kisses collection - Happy Thoughts & Garden Party
Echo Park - Have a Great Summer collection - Best Life Butterflies
Lawn Fawn - Bitsy Blooms collection - Begonia
Photoplay - This Happy Life collection - Sweet Hello
Simple Stories - Crafty Babe collection - Live. Love,.Scrap


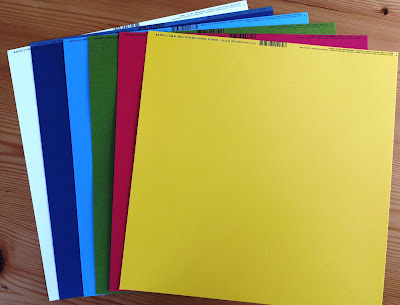
The photo above shows both sides of the papers.


2 Doodlebug Designs cupcake doilies, Pretty Little Studio Berry Sweet Word Stickers, flair button, strip of jewels, 6 SS Simple Vintage Flower Shoppe Sentiment Bits & Pieces, Pretty Little Studio Word Cut Aparts You Are My Sunshine, Rosie's Studio 2 chipboard pieces Born to Bloom and 6 Doodlebug Designs All Aflutter stickers


Bazzill Basics Cardstock - Fussy, Aqua (included in kit), Granny Smith, Tangelo, Pollen and Coconut Swirl (in extra pack).

It's a Girl Thing! - This layout is for my sister's album and shows her with Florence, with all four generations. 


I started this layout with the Coconut Swirl Bazzill, then built up the design with several other papers from the kit.


The edges of all cut papers were inked with Distress Inks. I cut a 3" x 11" strip of Best Life Butterflies paper, and placed this to the left of the page. Then layered an 8.5" circle of Garden Party paper on top. 


I gutted the Begonia paper and saved the 1" frame for the next layout. The photos were then mounted onto the grid side of the remaining paper. I placed the photos onto the layout. One of the cupcake doilies from the kit was positioned under the left side photo. I cut a 2" white card circle to place over the centre of the doily, and wrote my journalling onto it. 


For the title I used a set of Doodlebug Designs Foam Stamps 'Simply Sweet' and some black acrylic paint to stamp the word 'Girl' onto the green side of the Garden Party paper. I cut these letters out and placed them onto the layout. Then with Doodlebug Designs Rub-ons 'All Mixed Up' Large Beetle Black, I added the rest of the title. 


Using more Doodlebug Designs Rub-ons 'All Mixed Up', this time small and Medium in Beetle Black, I spelt out the date and the subtitle. Also, from Doodlebug Designs I used some Sew-Easy Rub-on Stitches.


I created a large and small cluster of flowers to reflect the flowers on the papers. I used Bazzill cardstock from the kit and a few other shades from my own stash, and some old leaf and flower dies from my stash.


Bathing Bea Bee - My daughter decided Florence's soft toy bee needed a wash, so decided rather than take it away from her to do this, she involved her in the process of washing and drying the bee. She had a lovely time!


I made a frame for the layout using Begonia, before starting the first layout, and I'm using it here, daisy side up. I trimmed some Coconut Swirl Bazzill to 10.5" x 10.5" and heavily inked the edges with Distress Oxide Ink in Speckled Egg, as this is a great match for the paper.


I used the second doily from the kit over where my smaller photos will go on the right of the layout, and inked through and around it, to create a lacy pattern. With more ink mixed with a little water, I flicked more ink over the page.


Using various patterned paper scraps from the kit (
Live. Love,.ScrapGarden Party and Begonia), I cut some strips and placed them, overlapping one another to the left side of the page. My large photo was placed in the centre of the layout, with two smaller photos to each side.


The title was cut from Black and 
Pollen Bazzill, using the Spellbinders - Simple Stories - Say Cheese Classic Mouse Alphabet Die Set. These were mounted over one another, to create a shadow, and then arranged on the layout using 3D foam pads of alternate letters to add some texture.

I embellished the layout with items from the kit -  Pretty Little Studio Berry Sweet Word Stickers, flair button, strip of jewels, 6 SS Simple Vintage Flower Shoppe Sentiment Bits & Pieces and Rosie's Studio 2 chipboard pieces Born to Bloom.


This concludes the August kit, although there is still plenty of papers card and embellishments to create another layout.

I'll be back with the September kit very soon.
Thanks for looking.
Lynn x

Monday, 2 June 2025

May Papermaze Kit - Part 2

Lynn here, returning with the second post, sharing my layouts using the Papermaze Kit for May. Some lovely cheery bright colours in the papers, card and embellishments. Here are my last two layouts for this month.


In the kit you will find the following items:


Patterned Papers:
Echo Park - Born to Travel - See the Sights Plaid & Postcard
Echo Park - Little Things Mean a Lot - Bright Butterflies
Graphic 45 - Spring is in the Air - Choose Happy
Photo Play - Lucky Cat - Cherry Blossoms
Simple Stories - For the Record - Just the Details


The photo above shows both sides of each paper.

Embellishments:
2 Woodware junk Label Stamps, purple & pink Studio Light pearls, 10 Dress It Up red hearts, 2 doilies, P13 frames, Rosie's Studio Bayfair dragonfly, 12 Rosie's Studio Bayfair Sentiments Ephemera & 12" Doodlebug washi tape Airmail.


Bazzill Basics Cardstock - Bazzill White, Admiral (included in kit), Wildberry Pie, Mexican Poppy, Grenadine & Hillary (Extra Pack).


Geisha Girl - The photo in this layout is one of a series my father took while experimenting with a camera and colour photo processing back in the 1950's


The base for this layout is a sheet of Tutu Pink Bazzill cardstock. I cut a piece of Cherry Blossoms paper tearing the edges to end up with a piece 8" x 11", which I placed towards the bottom of the cardstock.


I cut the two doilies in half and used three piece to tuck into the top of the paper. More of a lacy effect was created with a 12" length of 1.25" white cotton lace.


I printed my photo, mounted it onto some white card and placed it to the right side of the layout. Using the Cricut I cut some cherry blossom flowers in several sizes, and the Bazzill White, Grenadine & Black Bazzill. I also cut an 8" ring and some large swirls, also in black.


My journalling was printed onto some white card, and tucked it into the top of the patterned paper.


My title was cut using some gold cardstock and the Cricut, and arranged long the outside of the black ring.


I placed the
Rosie's Studio Bayfair dragonfly at the top right of the layout. Finally, I added a touch of sparkle to the centre of each blossom, with some Gold Coast, Nuvo Glitter Drops.


I'm Gonna Learn How To Fly - These photos were taken when we celebrated my father's 70th birthday with a Tiger Moth flight. After the flight, the grandchildren were allowed to sit in the cockpit for a photo.


This layout started with the sheet of Postcard paper, I gutted the centre, making a frame of 0.75" including the airmail style border. I flipped the gutted centre over to show the blue world map side. I distressed and inked all the edges, and glued them to a spare sheet of 12" x 12" paper.


Using Admiral Bazzill I cut a title and arrows using the Tim Holtz, Thinlits, Sizzix die set - Vault World Travel. I also cut a globe with the Destination die set.


With the Vault Noteworthy die set, I cut a clipboard with silver Miri card and Kraft Bazzill. The note paper was cut from a scrap of lined paper. I added my journalling to the note paper.


My photos were mounted onto some of the Wildberry Pie Bazzill cardstock, They were arranged onto the centre of the layout and tied together with some red, white and blue twine.


Using the two Woodware junk Label Stamps from the kit, I stamped them onto some scrap card with black Archival Ink. I cut these out and inked the edges with Blueprint Sketch Distress Ink.


All the pieces were arranged around the photos, with the addition of a few of the Rosie's Studio Bayfair Sentiments Ephemera from the kit.


I used the manufacture's strip and cut both 'Born To Travel' labels from it, then arranged these under the clipboard.


Finally, I scattered the Dress It Up red hearts from the kit, over the page.

That's all for today, I will be back with the June kit soon.
Thanks for looking.
Lynn x


Wednesday, 29 May 2024

May Papermaze Kit - Part 2

Lynn here today, with the pretty spring Papermaze kit for the month of May. My second pair of layouts have been posted on the blog today and the kit is available in the store or on line.


Patterned Papers:
Simple Stories - Simple Vintage Spring Garden collection - Scatter Sunshine
Simple Stories - Simple Vintage Essentials Colour Palate - Yellow & Green Tags
P13 - Naturalist collection - #04
Mintay Papers - Spring is Here collection - #05
American Crafts - Cedar House collection - Headliners
Carta Belle - Here Comes Easter collection - Pretty Plaid


Embellishments:
Doily, Prima flower, Divine Twine, 3 postage washi stamps, 4 simple Stories Floral Bits & Pieces, Vicki Boutin Layered paper clip, 1 strip Prima Say it in Crystals, selection of Pinkfresh Studio Chipboard Frame Stickers and 2 Pretty Little Studios Die cut labels


Bazzill Basics Cardstock:
Yukon Gold & CS White (in kit). Lily Pond, Blossom, Rosewood & Coffee Roast (extra Bazzill pack).


Water Fun - My three children enjoyed playing with the hose, water and brushes on the patio one sunny day. One fun way of getting the patio cleaned!


I cut the Lily Pond Bazzill to measure 11.5" x 11.5", then stencilled a hexagon pattern onto the card in a circular shape, so it shows around the tag circle when finished. I used Distress Oxide Inks in Fossilized Amber and Mowed Lawn. The stencil I chose is a Tim Holtz Layering Stencil - THS 166 Brush Hex.


I cut a gingham trim for two sides of the layout, from a sheet of Simple Stories Vintage Essentials Colour Palate - Yellow Collage from my stash. This was attached to make the finished page 12" x 12".


With the
Yellow & Green Tags from the kit, I cut apart all the tags. I cut the tags down to 3" deep, and saved the off cuts for later.  I punched holes in the top of each tag, then threaded a large brad through each one. I inked the edges of the tags.


Then I arranged the tags into a circle around and under the doily. I placed a white card circle between the doily and the tags, to prevent the print showing through the doily. 


My photo was arranged just below the centre of the doily, leaving space for the title. I created my title and date using Thickers - Cecily glitter letter stickers from my stash.


Using some of the tag offcuts, I trimmed them and added them to the layout, one top left with a butterfly and other details. The second tag was made from an offcut of green gingham for the bottom right, I added my journalling to this piece.


Welly Weather - I think it's fair to say April 2024 was extremely wet! This layout shows a family outing to Sharnfold Farm. Scarlett certainly needed those wellies to see the ducks - mud everywhere!


I gutted the Pretty Plaid paper to create a 2" frame, then I trimmed the White Bazzill, to measure 9.5" x 9.5". I mounted this onto romance Bazzill, just 0.5" bigger than the white (I also gutted this cardstock).


Before sticking the white card in place, I used Distress Watercolour Pencils to draw some raindrops over the page, then I flicked coloured water created with the pencils, over the page. 


I cut the 'Welly Weather' Peartree Cutfile from the B side of the Pretty Plaid paper; I backed the letters with more of the Romance Bazzill. The wellies were backed with white car, which I had coloured with the watercolour pencils and blended with water, to match Scarlett's wellies in the photo. I placed the photos onto the centre of the layout and the finished cutfile over lapping the bottom of the photos. I added journalling under the title.


Finally, I placed some pearls and gems over the background.

That's all from the May Kit, I'll be back with a new kit for June later in the month.
Thanks for looking
Lynn x