Showing posts with label clear stamps. Show all posts

Monday, 2 June 2025

May Papermaze Kit - Part 2

Lynn here, returning with the second post, sharing my layouts using the Papermaze Kit for May. Some lovely cheery bright colours in the papers, card and embellishments. Here are my last two layouts for this month.


In the kit you will find the following items:


Patterned Papers:
Echo Park - Born to Travel - See the Sights Plaid & Postcard
Echo Park - Little Things Mean a Lot - Bright Butterflies
Graphic 45 - Spring is in the Air - Choose Happy
Photo Play - Lucky Cat - Cherry Blossoms
Simple Stories - For the Record - Just the Details


The photo above shows both sides of each paper.

Embellishments:
2 Woodware junk Label Stamps, purple & pink Studio Light pearls, 10 Dress It Up red hearts, 2 doilies, P13 frames, Rosie's Studio Bayfair dragonfly, 12 Rosie's Studio Bayfair Sentiments Ephemera & 12" Doodlebug washi tape Airmail.


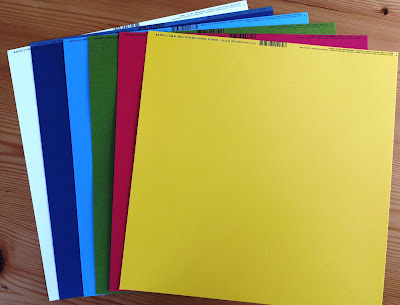
Bazzill Basics Cardstock - Bazzill White, Admiral (included in kit), Wildberry Pie, Mexican Poppy, Grenadine & Hillary (Extra Pack).


Geisha Girl - The photo in this layout is one of a series my father took while experimenting with a camera and colour photo processing back in the 1950's


The base for this layout is a sheet of Tutu Pink Bazzill cardstock. I cut a piece of Cherry Blossoms paper tearing the edges to end up with a piece 8" x 11", which I placed towards the bottom of the cardstock.


I cut the two doilies in half and used three piece to tuck into the top of the paper. More of a lacy effect was created with a 12" length of 1.25" white cotton lace.


I printed my photo, mounted it onto some white card and placed it to the right side of the layout. Using the Cricut I cut some cherry blossom flowers in several sizes, and the Bazzill White, Grenadine & Black Bazzill. I also cut an 8" ring and some large swirls, also in black.


My journalling was printed onto some white card, and tucked it into the top of the patterned paper.


My title was cut using some gold cardstock and the Cricut, and arranged long the outside of the black ring.


I placed the
Rosie's Studio Bayfair dragonfly at the top right of the layout. Finally, I added a touch of sparkle to the centre of each blossom, with some Gold Coast, Nuvo Glitter Drops.


I'm Gonna Learn How To Fly - These photos were taken when we celebrated my father's 70th birthday with a Tiger Moth flight. After the flight, the grandchildren were allowed to sit in the cockpit for a photo.


This layout started with the sheet of Postcard paper, I gutted the centre, making a frame of 0.75" including the airmail style border. I flipped the gutted centre over to show the blue world map side. I distressed and inked all the edges, and glued them to a spare sheet of 12" x 12" paper.


Using Admiral Bazzill I cut a title and arrows using the Tim Holtz, Thinlits, Sizzix die set - Vault World Travel. I also cut a globe with the Destination die set.


With the Vault Noteworthy die set, I cut a clipboard with silver Miri card and Kraft Bazzill. The note paper was cut from a scrap of lined paper. I added my journalling to the note paper.


My photos were mounted onto some of the Wildberry Pie Bazzill cardstock, They were arranged onto the centre of the layout and tied together with some red, white and blue twine.


Using the two Woodware junk Label Stamps from the kit, I stamped them onto some scrap card with black Archival Ink. I cut these out and inked the edges with Blueprint Sketch Distress Ink.


All the pieces were arranged around the photos, with the addition of a few of the Rosie's Studio Bayfair Sentiments Ephemera from the kit.


I used the manufacture's strip and cut both 'Born To Travel' labels from it, then arranged these under the clipboard.


Finally, I scattered the Dress It Up red hearts from the kit, over the page.

That's all for today, I will be back with the June kit soon.
Thanks for looking.
Lynn x


Monday, 23 May 2022

Heidi Swapp - Sun Chaser - So Happy

Hi everyone,

Claire back with you today sharing my second layout using Heidi Swapp Sun Chaser.

If you've taken a look at this collection in the store already, you'll know there are some absolutely stunning papers to choose from, and this week, I have decided to focus on making the paper the star of the show.


It's called Chillax and it is absolutely gorgeous!

Because the paper is so colourful, I have reverted to my standard Premium White Cardstock, and have cut the paper to fill a cutfile (Peartree Cutfiles, Pinwheel Mandala).

I considered placing the design centrally, but thought it would be more fun to cut the design into two unequal pieces. I've positioned these off centre on either edge of my page, leaving space for my photograph in between the two sections.


Where the photograph would be placed, I created a mixed media backdrop for it to sit on.  Having prepped the paper first with Gesso, I added Distress Oxide Sprays in:

 - Abandoned Coral

 - Fossilized Amber

 - Squeezed Lemonade

And also some Shimmerz Vibez in Love Ocean #9.

Although I've had Distress Oxides for many years, I am new to Distress Oxides Sprays - I LOVE them!! I find them so much easier to work with as they swish around the page much easier once a few splashes of water have been added. I'm definitely hooked!

Once the ink was all dry, I took the Sun Chaser Clear Stamp Set and selected the phrase "so happy". It's the perfect sentiment for how we always feel when we manage to get away from it all.

I repeated the stamping across the whole section, ignoring any gaps which would be covered by my picture.


The stamp set also contains a small heart - perfect for filling smaller spaces in between stamping.

Once all the mixed media elements were dry, I placed my cutfile on ether side, raising on foam pads for dimension.


Next, the photo and the clusters.


I mounted my photo on a piece of Be Bold black scripty paper, along with some polka dot tissue paper from my stash. I layered it on top of a tag from the Ephemera Pack and a small sun sticker from the Sticker Book.


Next, I created a small pull out that sits under the photo, using another piece form the Ephemera Pack. This holds some hidden journaling.


A small cluster to the bottom left of my photo created balance. Using black ephemera pieces helped tie in with the stamping and bring some grounding to this very colourful page. 

I used a circular tag, again from the Ephemera Pack, alongside some hearts from the Mini Puffy Stickers which feature in each cluster.


I decided, that with my repeated stamping, I didn't want a separate title, so ran with 'So Happy' as the title for my page. I used the remaining paper, left over from the cutfile, to cut some small 1" hearts, which I folded and scattered across the page along with some Pinkfresh Studio Jewels in Stargazer and Glacier.

As a final finishing touch, I felt like the page needed a little bit of foliage - in the photograph, we are in the Dominican Republic - so I cut a few leaves from the Juicy paper and added underneath my tag.


I really love how this page turned out.  These statement papers really do a lot of the work for you and need only minimal embellishing - especially with a splash of mixed media in the background.

I hope you've enjoyed these pages with Heidi Swapp Sun Chaser - It really is a beautiful collection to create with, and I hope it's inspired you to get your stories documented.


See you next month!

Claire xx

@Scrappysoulmate


Friday, 11 December 2020

December Papermaze Kit

Hello, Lynn here today with the Christmasy December Kit. Although the papers are all from winter or Christmas collections, at least one side of most of them can be used to create non-Christmas layouts.

Here are the first two layouts I have made with a Christmas flavour.


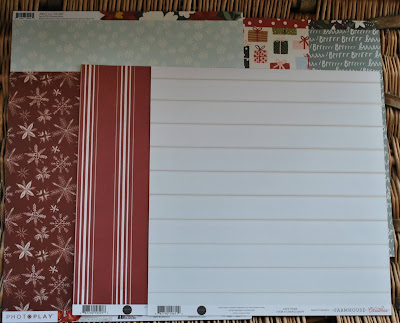
 This is what you will find in the kit.

Patterned Papers:
Carta Bella - Farmhouse Christmas collection - Gift Tags & Poinsettia Floral
Simple Stories - Winter Cottage collection - Season of Wonder & Let it Snow
Simple Stories - Jingle All The Way collection  - December Details
Photo Play - Christmas Cheer collection - Silent Night
Bazzill - White OP & Ruby Slipper

Reverse sides of papers

Embellishments
12" Washi tape, wooden star, 3 heart heart brads, Prima holly, tree stamp, 2 paper roses,
exclusive acrylic shape & Crate paper pine branches.


Extra Bazzill Cardstock Pack - Aspen, Fig Swirl, Jetstream & Walnut


Merry & Bright - I found this colour slide picture of my sister by the Christmas tree with new Pinky and Perky toys - Christmas 1964. Brought back memories of our childhood home and Christmases.


I chose the Ruby Slipper Bazzill as a border for the layout and gutted it making a frame of 2.5cm. Then I trimmed the 'Silent Night Paper to measure 28cm x 28cm (I cut the two edges away from the baubles). I hand stitched over the bauble strings with some silver embroidery thread. Then I inked the edges of the paper before mounting it over the red frame.

The washi tape was applied across the page, about 7cm up from the bottom. I mounted my photo onto some of the Ruby Slipper Bazzill.

I found an MDF bauble and with some acrylic paints, I made it look like the baubles on the paper. Then added a coat of Glossy Accents. Once dry I attached a length of silver ric-rac, a silver ribbon bow and two tiny silver bells. This was stuck into position with 3D foam tape, the ric-rac is taken to the top and it held in place on the back with some tape.


I wanted to use the Fig Swirl Bazzill for my title and journalling, but I needed most of this for the next layout so I cut a piece 23cm x 23cm and set this aside for later. I also used scraps of Ruby Slipper for title and journalling. I cut the Words 'Merry & Bright' using Sizzix Thinlits - Shadow Script Christmas die set. The date was cut using my Cricut and the journalling strips were hand written.

Before cutting three tiny parcels from the 'Season of Wonder' paper, I gutted it to make a frame 4cm deep, and set this aside for the next layout too. Then I fussy cut the parcels and added them to the bottom right of the photo. 


Nutcracker Lego - Last year we purchased and made this Christmas Lego to add to our collection. 


For this page I have already trimmed the Fig Swirl Bazzill and the wide, red and white spotty border form the 'Season of Wonder' paper. Next I trimmed the Aspen Bazzill to 24cm x 24cm, and gutted this to make a 2cm frame. Then all three were mounted onto one another.

My photo was mounted onto some Walnut Bazzill, but again most of this was required for another layout, so first I gutted the whole sheet to give me a 2cm frame, then with a piece trimmed to 26cm x 26cm I gutted it to make another 2cm frame. I set both these frames aside for later.

I cut two fir trees using the Sizzix Thinlits Woodlands die set, and set these to the left of the photo.

By placing all the embellishments onto the papers and re-arranging them until I was happy, I added a few light pencil marks where they would be glued in place later. Then I removed them and using the tree stamp from the kit (upside down) I stamped fronds in green so they would hang down from under the embellishments. 

To embellish I used a some bits from the kit - the wooden star, and the two paper flowers. I added a few more red and white flowers, some fabric holly leaves and a twig wreath from my own stash. I fussy cut two poinsettia blooms from the 'December Details' paper and added a few dots of Nuvo Crystal Drops (Dandelion Yellow) to the flower centres.

I wanted to use some of the tags from the 'Gift Tags' paper, but again needed the wooden plank side for another layout, so I cut a 25cm x 25cm piece and set this aside. From what was left I cut four tags and punched holes in the top of each one. These were threaded onto narrow red ribbon and placed along the layout weaving them in among the other embellishments.


Finally I used some of my Basic Grey letter stickers to create the title and the year. 

That's all for part one. I will be back with two more layouts in a few weeks.
Have a good Christmas
Thanks for looking
Lynn x

Monday, 13 July 2020

Tans will fade ........ Kaisercraft Sunkissed

Hi There

 It's Anita here today with my 2nd layout using some Sunkissed papers from Kaisercraft
   I am not normally a scrapper who works on cardstock for a background ( too intimidated by all that white space! ) But I love how the vibrant colours in this tropical collection are really intense against the starkness of the white. Plus I only had a few little scraps to play with so white space just had to happen!


I started by stamping the rows of stitches on the top left and bottom right corners using 49 and Market Clear Stamps - Gabi's Line Stitch 
I really like this set of stamps, it contains 7 different sets of stitches and is very effective. I do try using the actual sewing machine but I normally end up with it chewing my layout up LOL!

And then set about some fussy cutting!


All of the gorgeous flowers, leaves, butterfly and that lovely toucan were cut from the sheet of Pineapple Sour
I cut the square frame apart to make it work around my photo. The colours in the original photo were lovely, however I had it printed in black and white so that it would contrast nicely against the vibrancy around it.
The 'Escape to Paradise' was cut from the reverse side of the sheet of Martini ( this is actually covered from top to bottom in quotes in all colours, very usable!)


Confession time now....... The sparkly bling was not on my original plan for this layout ( even though I normally use it on EVERYTHING I scrap) I was really trying to keep this page as clean and simple as possible. However....somehow I got a dirty mark on it :( and when I tried to wipe it..yep made it worse!
  So I needed something to cover it..... out came the bling...but then I had to sprinkle a bit here and a bit there. Only then I felt the flowers looked a bit plain...so out came the Stickles!!
At this point I knew I was then in danger of hitting the spray mist and paint and then the next thing would be NO WHITE SPACE! So I had to step back and sit on my hands! That was hard!


I really wanted to use some ink or paint though, so in the end decided maybe a title would be a good idea.


I had made a bit of a mess with my sprays and didn't like how it was going and was cleaning up using wet wipes. Have you noticed how nicely they smudge things? Actually I should probably say blend I guess.....sounds more artistic!!


I took a strip of white smooth cardstock and squirted 5 different Dylusions colours on the end, then took a wet wipe and dragged it across the strip....so pretty!! Well I thought so anyway.
I used the following colours
Squeezed Orange
Funky Fushia
Polished Jade
Lemon Zest
Fresh Lime


After it had fully dried I used an old metal alphabet template I have in my stash, to draw round and cut out. There are so many different colours available in ink sprays now that I think you should be able to match up with literally any papers you are using from any collection.
I will certainly be using this technique again ( especially as I have never been any good at blending inks when using sponges and pads etc)


I hope you have enjoyed my post. Why not pop over to the SHOP and have a look about. Lots of new things arriving all the time, but also there are some real treasures in the older collections too....something for everyone!
 I will be back later in the month to share with you again.

Happy Crafting Everyone!

Anita xx