Showing posts with label Petaloo. Show all posts

Monday, 20 July 2026

July Papermaze Kit - Part 1

Lynn here today, with the pretty pastel July Papermaze Kit. Such a lovely kit with double-sided papers, Bazzill cardstock and a selection of embellishments. I have created my first two layouts using the 49 and Market - 'From The Garden' papers included in the kit. 


Before looking at how the layouts were made - here is a peek at what you will find in the kit.


49 and Market - From The Garden collection - Wildflower & Foxglove
49 and Market - Travel Diaries collection - Sheet 1
Graphic 45 - Always & Forever collection - Regency Blue Pattern & Solid Sheet
Uniquely Creative - Tea & Tranquillity collection - Quiet Daydreams & Garden Sanctuary

This photo shows both side of the papers:


Embellishments:
2 Petaloo Flowers
1 Craft Consortium Dragonflies
1 Dovecraft Frame
3 Rosie’s Studio Jubilee Wax Seals
3 Uniquely Creative Ticket Washi Tape Stickers
50cm Twine
1 Mintay Chipboard Clock


Bazzill Basics Cardstock
Lagoon, Twig (included in kit), Avalanche, Smoky, Petunia & Nixon (extra Bazzill pack)


Polly - Mary who was always known as 'Polly', her maiden name was Edwards, and her married name was Pond (Polly Pond). This is one of my husband's relatives, an interesting photo for the detail including her rather large wrist watch. 


The base of this layout is the 
Twig Bazzill with torn strips of both sides of Wildflower paper, to both sides of the page. I mounted the photo onto another piece cut from the scraps of the Wildflower paper.  

With the title letters cut from some chipboard and the Mintay clock face from the kit, 
(cut in two pieces), I set about dry embossing everything with copper embossing powder. I also cut the title letters from Nixon Bazzill. The letters were cut using a Tim Holtz - Sizzix Bigz XL Die - Wonderland.  


I created three different sized tags using the Tim Holtz, Sizzix Thinlits - Tag collection die set. I cut these from more of the Wildflower paper. 


I selected some Laser Cut Elements from the 
49 and Market - From The Garden collection. This included a wooden hanging sign, which I made into a date plaque - cutting the numbers on my Cricut using Petunia & Nixon Bazzill.


I inked the edges of my cut shapes and elements, using Gathered Twigs Distress ink. I used some green seam binding ribbon to tie at the tops of the tags.


I selected the 
Uniquely Creative Ticket Washi Tape Stickers from the kit. All the elements, papers photo, tags etc were arranged on the page then help in place with either glue or 3D foam pads. 


Journalling was added to the larger tag. Finally, I placed the 
Petaloo Flowers and leaf to the top left of the photo. 


Feeding the Ducks - This cute picture of the triplets, was an ideal match for the pretty colours in these papers. The layout is a scrap lift of my own work - a page I made a few weeks ago. (included at the bottom of this post). 


This time, I used the smooth side of the 
Avalanche Bazzill for the base. I chose the Tim Holtz Layering Stencil THS077, and a selection of Distress Oxide Inks. With brushes I applied colour through the stencil, then lightly spritzed the page with water to allow the ink to wick slightly. I also splattered some of the wet ink over the page. 


I tore pieces from the 
Foxglove paper, selecting areas from the paper I wanted to feature. I layered these up on the page (see photos), together with pieces cut from the Nixon Bazzill.


The photo was mounted on more of the Foxglove paper. The above was all arranged on the dry background card. I added two doilies, left over from a previous Papermaze kit. 


I created a title on the Cricut, and cut it twice - with Nixon Bazzill and Foxglove paper scraps. These were mounted over one another to create a shadow, and arranged down the centre of the layout. 

The little dragonfly charm was tied to the paper beneath the photo using twine (both from the kit). My journalling was added to a tag, also made from the Foxglove paper. 


I selected the three flag banners from the 49 and Market 'From The Garden' Laser Cut Elements pack, and strung them along the top of the layout. To the right side of the layout, I added one of the 
Rosie’s Studio Jubilee Wax Seals from the kit and another laser cut element. 


Three clusters of paper flowers were created using blossoms from my stash. Finally, I dotted some Raspberry Pink Nuvo Crystals Drops over the layout.


Here is my original layout, showing my daughter as St Valentine at a flower festival (LARP event). The papers are from my stash and the Simple Stories - Simple Vintage Sand and Sea - Rest & Relax paper.


That's all for today, back with more from this kit soon.
Thanks for looking.
Lynn x

Monday, 2 December 2019

November Papermaze Kit - Part 2

It's Lynn back with the second set of layouts created with the November Papermaze Kit.
This kit contains a wonderful selection of colours and designs all put together by Vanessa making yet another great value for money collection. As always the kit is just £10 with the additional Bazzill pack for £1.75.


What is in the kit this month?:


Patterned Paper:
American Crafts, Vicki Boutin - Wildflower and Honey collection - Blossom, Field of Dreams & Queen Bee
Pink Paislee - Indigo & Ivy - #12
Simple Stories - Happy Trails - I Love You S'more
Simple Stories - Winter Farmhouse - Warm & Cozy
Bazzill - Cream Puff & Ruby Slipper

The flip side of the papers:


Extra matching Bazzill pack:


Jade, Carob, Festive and Rain.


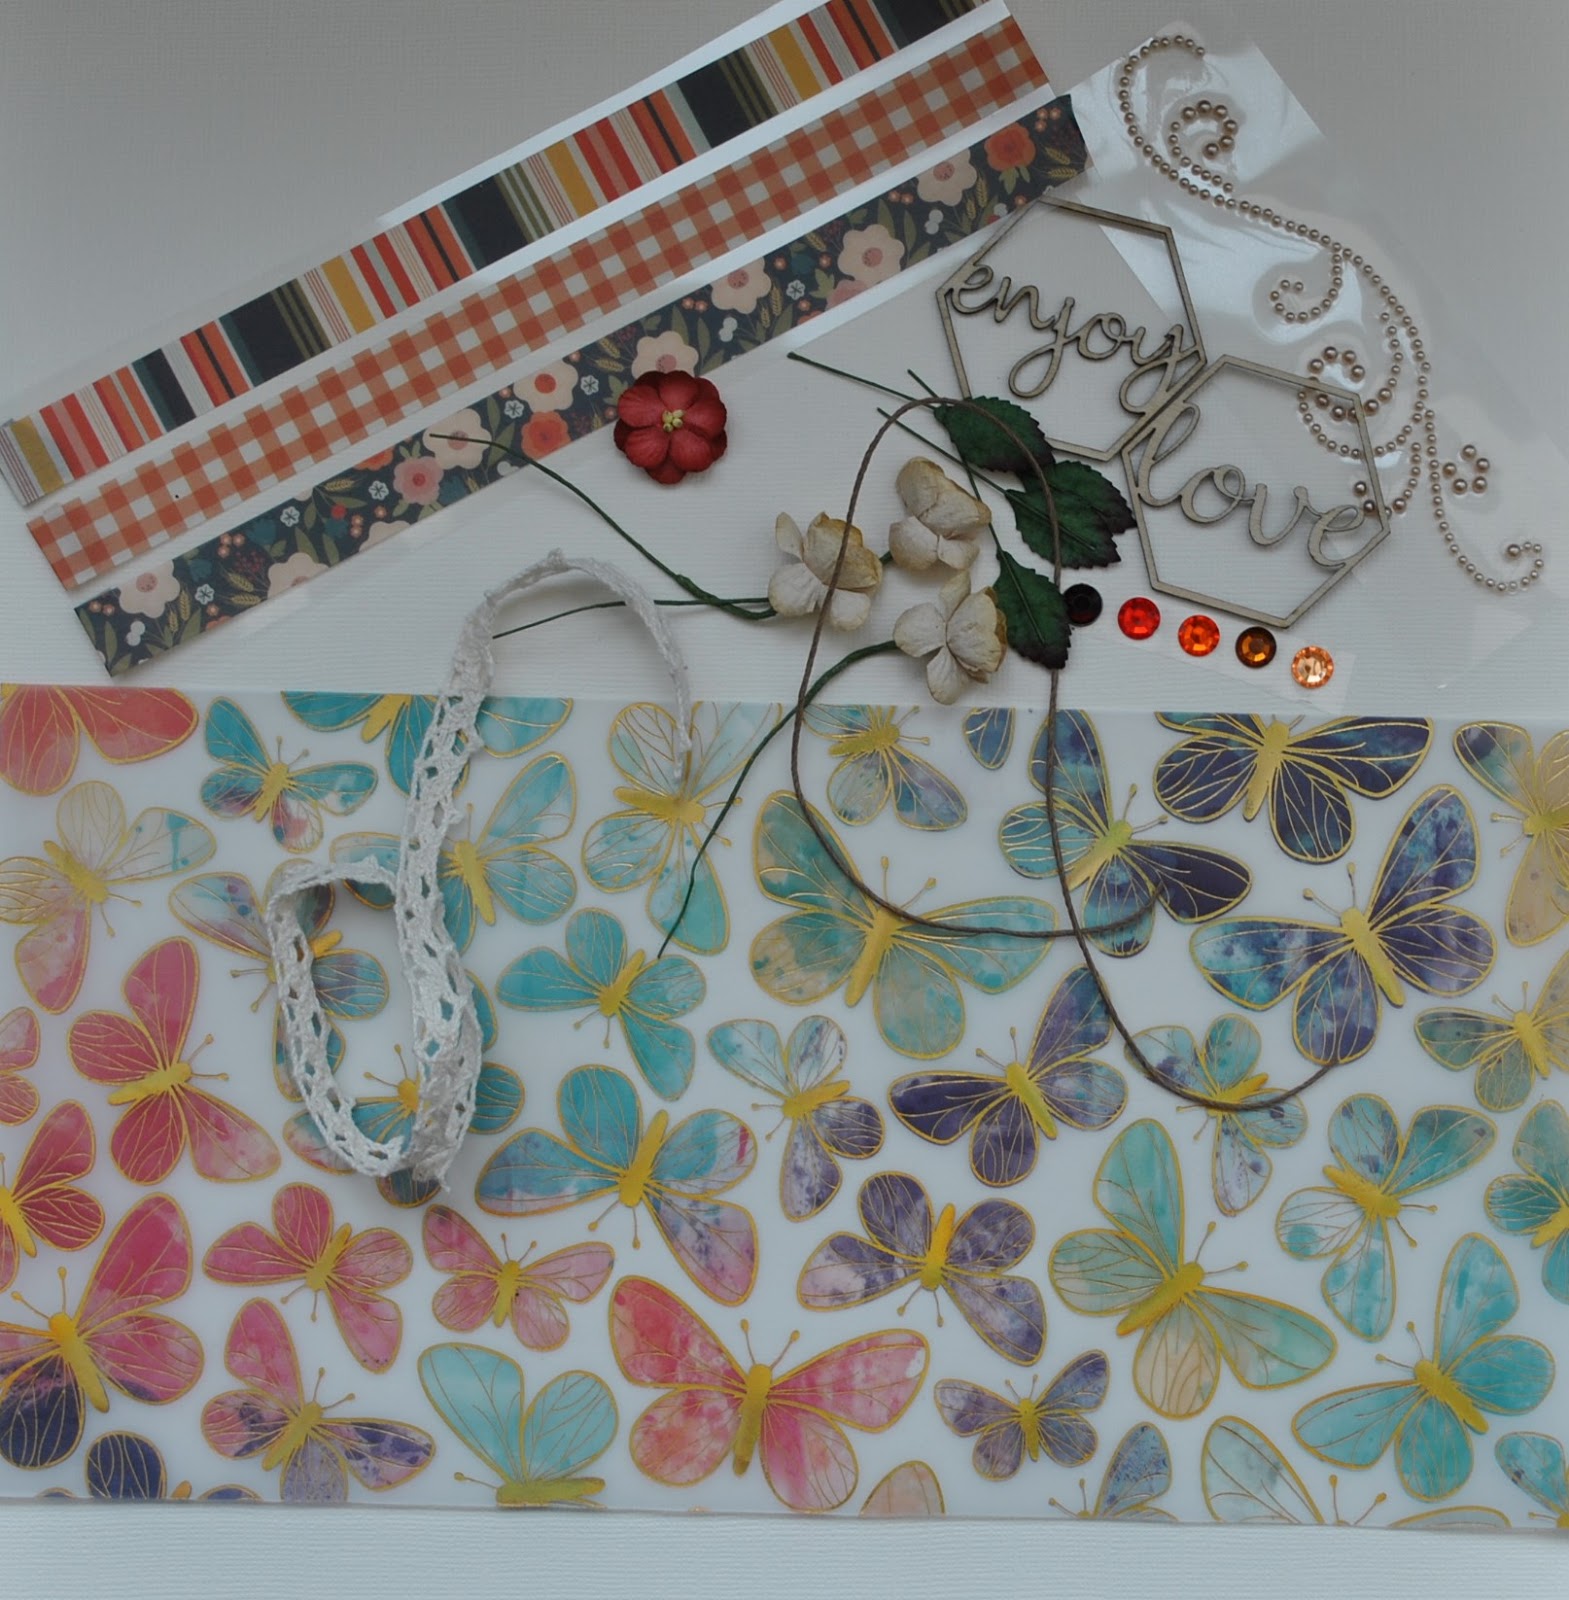
Embellishments - 12" x 6" Butterflies Printed Vellum, 3 strips of washi tape, 30cm twine, 30cm cotton lace, strip of 5 gems, 3 brown flowers, 1 Petaloo blossom, pearl swirl, 2 exclusive lazer cut wooden hexagon words.


Wellies and A Tutu ... all a girl needs! This layout features photos of Jasmine having a great time in the New Forest.


I liked both sides of the Warm & Cosy paper and they both worked with these pictures, so I gutted the paper leaving a 3cm frame (large print up), and trimmed the rest to measure 20cm x 20cm (small print up). I cut the Carob Bazzill to 28cm x 28cm. All the edges were distressed and inked. I mounted my photos onto some of the Festive Bazzill, and treated them in the same way. The pieces were all arranged onto the layout and stuck in place.

Then with some left over Jade, Carob and Festive Bazzill I die cut the title with Bigz Sizzix Handmade die. I placed the letters where I wanted them to go and added some Glossy Accents to 'Wellies and A', and for the word 'Tutu' I used Stickles because this word just needs to sparkle!

Using scraps of the Bazzill from the kit and my stash, I die cut lots of leaves, fronds, berries, acorns, fir cones, flowers and toadstools. I used two Sizzix Thinlits die sets by Tim Holtz for these - Funky Festive and Funky Foliage.


I inked the pieces and layered them up where needed, some were glued to the layout and others raised with 3D foam pads for dimension. 


I made a journalling tag with a piece of paper cut from the sheet called Blossom, the tie is twine from the kit. The remaining twine was used to tie the bow placed under the photo on the right.

Finally I scattered a few dots of Nuvo Crystal Drops - Metallic Caramel Cream among the die cuts.

Swiss Cottage This layout is an old picture I have wanted to scrap for years, and shows my girls on the Isle of Wight, autumn half term 1999, when we visited Osborne House.


I gutted the Ruby Slipper Bazzill to make a frame 2.5cm deep. The Cream Puff Bazzill was trimmed to 29cm x 29cm, and with the Crafter's Workshop Chicken Wire Reversed Stencil and a selection of Distress Oxide Ink Pads I created a light background pattern with a blending tool. Then I placed some ink from the pads onto a craft mat, spritzed them with a little water and flicked some onto the cardstock. This was set aside to dry.

I gutted the paper called Queen Bee to make a frame of 2.5cm and set the frame aside for another layout. Then with the Memory Box Hexagon Dies, I cut the shapes from the remaining paper. Inked the edges and arranged them on the paper with the photo, which I had mounted onto some Ruby Slipper Bazzill. 

I coloured the two exclusive wooden hexagon words with some Distress Oxide Ink. These were then made shiny with some Glossy Accents and set aside to dry, then added to the arrangement on the layout. 


I took three of the pink vellum butterflies left over from the earlier layouts, and applied them to the layout with a small dot of Glossy Accents. 


From the paper called Blossom, I cut a small journalling block, and inked the edges, wrote out my information and glued it to the page.


I used the Petaloo flower from the kit and placed it between photo and journalling block. Then I added fronds punched from the Blossom paper with a Martha Stewart Punch.

Lastly, I used some old letter stickers from my stash to add the title.

I have created four layouts with this kit so far, and still have plenty of paper, card and embellishments left to make another layout or some cards. In fact as you can see I have already started work on my next layout!


That's all for today, I'll be back with the December kit soon.
Thanks for looking
Lynn x