Showing posts with label acrylic paint. Show all posts

Tuesday, 20 December 2022

Our Snow Babies..... Mintay Merry Little Christmas


Hello, it's Anita here today.


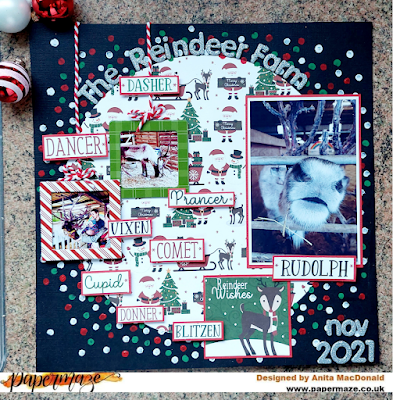
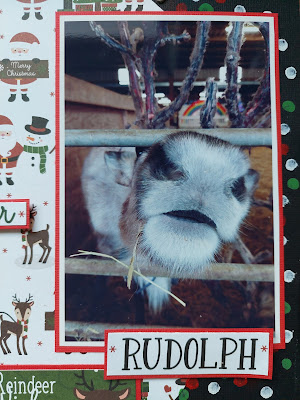
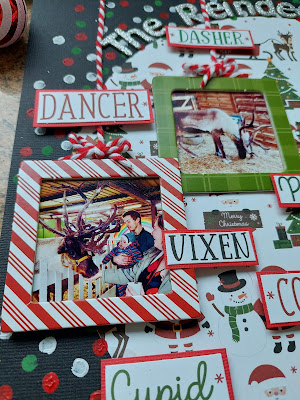
I have made this wreath based layout using papers from the gorgeous Mintay Merry Little Christmas Collection and combined it with a black and white photo of our girls and dear little Grandson, taken when we visited Father Christmas at our local animal park earlier this month.


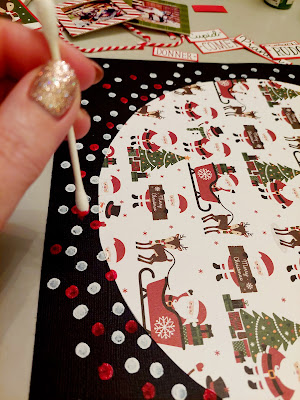
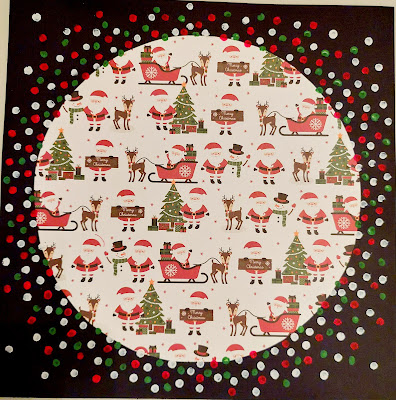
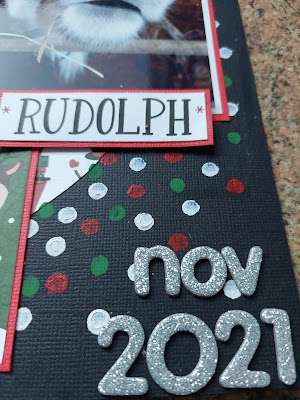
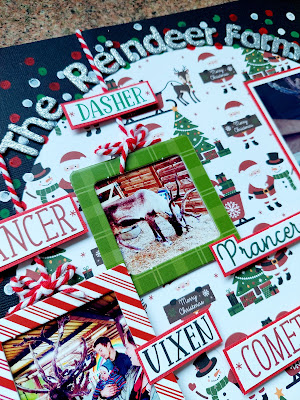
The layout is based on a sheet of Hibiscus cardstock and I have splattered it liberally with some white acrylic paint. I used 2 identical sheets ( 04) for the wreath so that I could fussy cut the whole wreath out and then also cut out elements from the 2nd sheet to layer up on the wreath

I cut several little items from the 2nd sheet and then layered them up on little foam pads to add some dimension to the page, without making it too lumpy.

The little deer was cut from the sheet (09) and i popped it down to the bottom right hand corner.


In my kit I also had some Sprinkled with Cheer stickers from Rosie's Studio. These are lovely and come in a variety of collections. They are puffy and easy to peel off and use, so I picked the ones I wanted for the title and added a few others randomly around the wreath with sayings on.


I love a bit of sparkle on most things and this page was no different, so I let loose with a tube of Icicle Stickes and added sparkle to most of the wreath. I love how this particular colour catches the light and can really glow


So that's my page....I have to say this collection is absolutely beautiful and has such gorgeous details on it. There are lots of collections from Mintay if you pop over to the shop and have a look about.


I would like to take this opportunity to wish you all a Very Merry Christmas and a Happy and Healthy New Year.


Warmest wishes

Anita x

Sunday, 18 September 2022

Thankful Tiered Tray Decor ...Photoplay Thankful Collection

t

 Hello again, it's Anita here with you today.


We are now at the start of my absolute favourite time of year....Autumn! And there are some beautiful, vibrant paper collections out there to create with! I am lucky enough to have some of the Photoplay Thankful Collection to work with for my post today.


For the last couple of years I have been enjoying looking at Pinterest and other sites seeing the gorgeous tiered trays that seem to be all the rage in the USA. There are several variations of tray available and people decorate them to match the seasons changing and for other themes and celebrations....and I have completely fallen in love with the idea. 

They can however work out quite expensive and as I rarely have spare money to buy *non essentials* I thought I would try and see what I could create myself for a fraction of the price!

Have a look and see what you think!


 I started off with 2 different sized lightwood trays that I bought from Hobbycraft and a plain pine candle stick that I painted to match the trays. I dry brushed the trays and candle stick with white acrylic paint to give it a more rustic effect and used wood glue to fix the trays to the candlestick and create the 2 tiers.


Here is a list of products used to create all the following items that I have made for my 1st ever tiered tray attempt.

Thankful and Blessed

Warm and Cozy

Pumpkin Spice

Element stickers

Lengths of 90mm x 20mm wood 

Lengths of 68mm x 15mm wood

Lengths of 90mm x 90mm wooden posts

Childrens Alphabet wooden blocks

wooden beads

ribbons, raffia and twine

mini wooden rolling pin

pine drawer knob

Various colour acrylic paints

MDF blank square photo frame

So, all of the wood pieces, blocks and bricks were painted with white, pumpkin orange or sage paint and then gently sanded the edges to slightly distress them and soften the edges. I added stickers from the element sheet and panels from the paper sheets, then raffia, twine and ribbons where needed.


The chunky wood block had a painted pine handle added to the top and I wrapped twine, raffia and ribbon onto it.


The beads were all painted with the same paints and I made a tassel from the twine and gingham check ribbon.

The MDF picture frame was painted white, backed with the reverse side of the paper and a rather lovely quote added.
 

the mini rolling pin was covered in paper and the raffa and ribbons tied on the ends. Super cute!

I made the pumpkin latte from a mini mason jar and added cinnamon, a straw and some sprinkles to the topping, finishing off with a gingham bow.


The childrens little alphabet blocks make a delightful little addition to the trays and you can make as many or as few as you like.

I added a few little shop bought bits...ceramic and plastic pumpkins, wooden mushrooms, greenery and autumns leaves.


I have to say that I am so very pleased with this for my first attempt and I am looking forward to decorating for Christmas in a short while....maybe even Halloween first!!

I hope you have enjoyed my post today, thank you for looking.


Warmest wishes

Anita xx

Friday, 12 August 2022

Family Gallery...... Mintay Joy of Life Collection

Hi Everyone

Anita here today and I have completely fallen in love with this delightful collection from Mintay...... Joy of Life. Such beautiful soft colours, distressed frames and wood fence panels plus an array of beautiful elements to fussy cut and embellish your pages with


I absolutely the sheet of 06 which is crammed full of beautiful frames in different styles. I chose the 4 I wanted to use and cut them out. On the reverse side of the frames there are lots of very pretty designs that can also be fussy cut and added to the page.


These frames are perfect for chopping into your normal 6x4 photos that are maybe quite busy and you want to try and make use of certain parts of them and also great if the people aren't quite so close and filling the photo


Prior to adding anything to the page I sprayed and splattered with some Tim Holtz Distress Oxide Spray

This is great for adding a little gentle extra to your page without being bright, solid colours like the normal spray mists would do.

Various items were fussy cut from sheet 09 This is full of pretty elements including birds, floral displays, bicycles, houses etc and they were layered and/scattered about the page. Some were added to the frames, along with mesh bows and the frames had some white twine added to hang them from the top of the layout, to create a gallery effect.


I had a rummage through my old stash cupboard and found some boxes of old Making Memories Foam stamps ( I used to love using these and haven't touched them for such a long time) it made such a nice change to break out old stash and use and I think I shall be using these more often now again!

I used a fancy patterned one and stamped using ivory acrylic paint on the top left and right corners and then used an alphabet set of their stamps to create the title FAMILY.

When this was dry I used a black gel pen to add a fine line around the outer edge of each letter to just make them stand out a bit.


The page was finished with my favourite embellishments....some bling and sparkle .....flat backed pearls and some irridescent sequins scattered about.


I hope you have enjoyed seeing my page, thank you for looking and I will be back later in the month with my 2nd layout using this pretty collection.

If you pop over to the shop you will be able to see all the gorgeous different Mintay papers in stock....they really are fabulous and such great quality.


Warmest Wishes

Anita xx


Friday, 25 March 2022

Back to Nature ..... G45 Woodland Friends

Hello,

 It's Anita here with you today and I would like to share a project I have just made after my scrapping mojo left the building once again!

I have some lovely G45 Woodland Friends papers and bits left in my DT kit from last month and this photo of myself, my Mum and Sister on a recent visit to our local reservoir was looking to be used, so I paired them together.


 I was having a sort out of cupboards and drawers at home and found a broken clock that I should have thrown away ages ago really. I am glad I didn't now as it's made quite a nice photo frame instead and with a nice cream base made it easy to work on straight away.


I started by dabbing on some alcohol inks using a small piece of felt and an old wooden rubber stamp handle with a bit of velcro on to grip the felt. The ink was a colour called Expresso and it was actually really nice to use some old stash that has been rattling round in my craft room for ages. After the ink I also dabbed some ivory acrylic paint randomly to help blend the ink. 


The clock face has been covered with a circle cut from a sheet of Woodland Friends on the lovely reverse side, which had a very nice plaid pattern and I then matted the photo on a piece of Dark Green cardstock. Using a Martha Stewart punch and some more Dark Green card I also punched out some little leaf sprays to scatter about later on.


This range of papers have some fabulous images of various woodland animals across them and I decided to theme this project with the various squirrels.

So using a sheet of  Be Curious I set about fussy cutting lots of squirrels, branches, a bird and a bird with its nest to decorate around the clock face ( this felt like it took forever!!)

Once I had cut several out I placed them round the clock face and stuck them down when I was happy with the positioning. A good old rummage in my flower basket turned up some mulberry paper leaves and tiny brown roses, so I scattered these randomly around the edges.... inbetween the branches and the squirrels.

A couple of stickers from the Woodland Friends Sticker sheet were added to just finish the project up and that was it! It was actually really nice trying something different for a change and the amazing papers that G45 produce have so much detail on them, they are really versatile.

You can see a great selection of them HERE


That's it for me today, I hope you have enjoyed seeing my project. When you are having a sort out, before throwing things in the bin, have a look and see if you could alter them to re-cycle and re love.

Warmest wishes 

Anita xxx


Thursday, 30 December 2021

Christmas Magic

Hi Everyone

 It's Anita here today with my last layout for December.....where HAS this year gone? So much time spent in Lockdown/restrictions or isolation I suppose....here is to hoping for 2022 being much kinder to us all!

Once again I am using Christmas Magic by Echo Park, such a fun collection with lots of cute characters and co-ordinating embellishments and stencils to compliment the papers.


Starting with a sheet of Raven Cardstock, I took a sheet of North Pole Nights and drew round a dinner plate to create the size circle I wanted for the centre.
I am not very good at all at leaving white space on a page ( I am a chuck it all on kinda girl!!) and the more I looked at the empty black around the edges the more I wanted to do something to it!!


So using a cotton bud and some white, red and green acrylic paint I dabbed dots randomly all around the outside of the circle, with some just over lapping the circle. I was pleased with the result as it was almost like confetti sprinkled on


When we visited the reindeer farm we found the reindeer to be very friendly....and VERY nosey!! I think the fact that we had bags of food for them had a lot to do with it!! Even though the antlers look really tatty they were lovely and soft and this particular fella was very friendly...and hungry!


I used a couple more of the chipboard frames from the pack and popped them on a couple of small photos. Using some red and white Bakers Twine I turned them into hanging decorations and placed at different heights.
From a sheet of 3 x 4 journalling cards and a sheet of 6 x 4 Journalling cards I cut out some panels, one was the little reindeer panel and the other included all the reindeer names which I cut up into singles. 


I matted them all and the main photograph with some Lava cardstock and raised each of the names up on foam pads to add a little dimension.


A good rummage in my craft room through my packs of various alphabets turned out some silver glittery chipboard letters, perfect for my title and this finished the page.


I hope you have liked seeing what I created with this collection. I am sure that lots of you have some super new Christmas photos to scrap now, so why not pop along to the SHOP and have a look at the amazing variety of Christmas Ranges that are available.
Happy New Year to you all....see you on the other side!
Warmest Wishes Anita xx


Tuesday, 14 December 2021

Christmas is in the Air....... Echo Park Christmas Magic

 Hello Again Everyone

Anita back with you today and here is my first Christmas offering using the fab Christmas Magic Collection from Echo Park.

I thought this was perfect for scrapping some photos from our recent trip to a reindeer park and Oakley's first time meeting Santa. We wondered what he would make of the big guy in red....and he loved him!


A sheet of Capers Bazzill Cardstock backed the layout and I trimmed 1cm of the top and side of a sheet of Stuffing Stockings This left a nice frame of the cardstock showing around the edge of the layout.

The stockings were really lovely, but I just felt they over powered the page a little. 

So I used some white acrylic to brush across a large area of the layout and whilst it was still drying, sprinkled a coupe of different colours of ultra fine glitter across it....afterall, if you can't have sparkles at Christmas then when can you??

I rummaged through my alphabet sticker stash and found some really old stickers that I liked for the title.....Its nice to mix the fonts up sometimes.


I cut a few elements out of the sheets of Journalling Cards  and  3 x 4 journalling cards and these were used around the page in various places. I raised some of them up on foam pads to give some definition.


The Chipboard Frames were fab and I used the 2 largest ones to frame a photo and also to make a shaker box. The back of the box was a panel cut from the sheet of 6 x 4 Journalling Cards


Some of the little panels on the sheet of 3 x 4 Journalling Cards were perfect for my page. One was used for journalling a teeny bit and was tucked partially under the shaker box, the other one made a cute little frame for a small photo I printed out and popped on it.

I purchased some Christmas Lights Trim last year with the intention of using on a page, then took a break from scrapping, but i knew it would be great for this page. So I wrapped some round the large photograph and frame and also strung them across the top of the page ( I have ALWAYS loved lumpy embellishments!

In the chipboard frame pack, there are also a few little sayings and pictures ....so I picked out the Ho Ho Ho and the little present pile to finish the page off.

So that's my first page using this lovely collection...I hope you have enjoyed seeing it and maybe it's made you feel you might like some of the papers yourself to scrap your new photos from this years Festive Season. See you again Soon.

Have a fabulous lead up to Chrsitmas xx

Warmest wishes

Anita xx


Tuesday, 23 November 2021

Hello Pumpkin! ...... Using Prima's Hello Pink Autumn

Hello, it's Anita 

 I am back with you today with my 2nd layout using Prima's Hello Pink Autumn ....my 1st layout using this can be found HERE The Nearlyweds Day

Very recently we went for a visit to our local National Trust Garden, Sheffield Park. Absolutely beautiful, full of rich colours in the trees, all shapes and sizes. We took along a few pumpkins in the hope we could maybe have a little photo shoot with my baby Grandson.

Because the Autumn colours were so vibrant in the photos it just wouldn't work with this paper range, so I printed it off in black and white instead. I shall have a look at other collections I think so I can do it in its full colour too....sooo many lovely Autumn ranges in the SHOP


 I took a sheet of Give Thanks which, like several of the other sheets in the range, has beautiful foiling details and I cut out 7 of the circles for making the wreath background. I kept the left over sheet to base the next layer on and leave a slim dark frame around the edge of the page. 

The checked background paper is the reverse side of a sheet called Hello Pink Autumn, the front side is beautiful with a gorgeous mix of pumpkins, lots of flowers and lovely foiling details, however for this photo I needed a less feminine design. I trimmed off 1 cm from the top and one side of the sheet and splattered some white, gold and copper paint across the page

I decided it needed a little bit more texture and used some Frantage Embossing enamel in a couple of colours. Sprinkled across the page and then heated til it melted from underneath the layout.

The circles were laid in the shape of a wreath and the matted photo popped, overlapping 2 of the circles. Initially I tried it in the centre of the wreath but didn't like that placement.

I had a few of the Chipboard Stickers in my DT kit and used some in various places. These are really lovely and some have the same beautiful foiling details on them to compliment the papers.

The Hello, Pumpkin and toadstool elements were cut from the sheets of Sweater Weather and Fall Hugs


I finished the layout off with a raffia bow and a little cluster poking out from under the photo ( then I made myself stop... as I do have a bad habit of literally splattering embellishments, ink, paint etc ALL over the page LOL!)

This has been such a lovely range of papers to work with and is actually quite versatile on what themes you can scrap because of the reverse side patterns.

Happy Crafting.....and don't forget the Autumn Sale is still on at the moment, so why not pop over and grab a bargain!!

Til next time....Anita xx


Friday, 20 August 2021

Echo Park - Farmers Market - Moo-ve Over!

Hi there!

Claire back with you today sharing my second layout with the fun Echo Park Farmers Market collection.

This is another one that came together really quickly and, another one without any white cardstock!  There's just too many gorgeous papers in this collection!

For this one, I'm back at the New Forest & Hampshire County Show - and this time, I'm with a REAL cow! Isn't she gorgeous!


I started with a piece of the Blessed Floral paper, using this gorgeous woodgrain pattern from the b side.

To anchor my page, I used a piece of that beautiful black and white gingham paper from the b side of the paper called Multi Journaling Cards. I distressed the edges and rolled the bottom to create a bit of extra dimension.

Underneath, I slid a strip of the Farmer Floral paper, again rolling the edge for dimension.


I double mounted my photograph on a piece of the blue/teal paper from the Matchmaker Pack and a red piece from the Garden Seeds paper.

Around the photo, I added some fussy cut flowers from the Gather Floral paper, curling the petals for additional depth and texture.

Underneath the photo I added this cute tractor from the Element Sticker sheet which I mounted onto plain card and foam for a bit of extra height.


Along the top of the paper strip, I added two really cute stickers, also from the Elements Sticker sheet. I really love these - they were the perfect addition to the page.


Now you may have noticed that with this collection, I'm really loving creating fun titles - and this page is no exception!!  As the cow looked like she was muscling in to see what was happening, I opted for a fun bold title using the Simple Stories Color Vibe Foam Alpha stickers in Red. These are really awesome and help you create real statement titles for your projects.

I loved how the page was looking, but the top seemed bare, with all the drama happening at the bottom.  To address this, I created an embellishment cluster in the top right hand corner.  It includes a tag, a phrase and a frame from the Frames and Tags pack, with a few Nuvo Drops in Moroccan Red.


As a final touch, I added some splatters of white acrylic paint and that was it - the page was complete.

Hope you've enjoyed this one. I certainly had fun creating it.


See you next time.
Claire

xx