Showing posts with label stamping. Show all posts

Monday, 12 January 2026

These are the Days - Simple Stories - Simple Vintage Junk Drawer Collection

Hi everyone, it’s Rebecca with you today.

Happy New Year! I hope you all had a wonderful Christmas and have started the new year filled with scrappy plans and lots of inspiration. I really enjoyed having some time off over Christmas and was able to sit at my desk and create a few layouts, which was just lovely — such a great way to start the year!

To kick off 2026, I’m working with the beautiful Simple Vintage Junk Drawer collection by Simple Stories. You can find the full collection in the shop here.


I began by selecting one of the papers from the Simple Basics Collection Kit for my background. I loved the subtle design — it adds interest without overpowering the page. In the centre of the sheet, I started building layers using a variety of patterned papers. I mixed cut-apart elements with torn patterns to create texture and visual interest. I also selected a couple of papers to use with my metal dies. From one paper, I cut a viewfinder, and from another, a filmstrip — two of my favourite elements to add to a layout!


Once the layers were in place, I added my photos on top. I printed the same photo three times and stacked them with white borders. I really love the effect this creates and have been using this technique a lot in my recent layouts. To ensure my photo remained the main focal point, I added a layer of foam behind it to give it some height and dimension. Behind the photos, I tucked in a couple of tags from the Tag Elements patterned paper. I punched holes in both tags and added metal eyelets using my Crop-A-Dile tool.

To embellish, I added some florals from the Floral Bits & Pieces, along with the viewfinder and filmstrip pieces I’d cut earlier. I also couldn’t resist adding a few butterflies, which I fussy cut from the Beauty in the Details paper.


To add more detail to the background, I reached for my stamps and Stazon Ink Pad in the shade 'Jet Black' . I used a mix of stamps and applied them around the edges of the design. I didn’t use a stamping block, as I wanted to avoid a ‘blocky’ look. Instead, I stamped freehand, slightly folding the edges of the stamps to soften any harsh lines.


Next, I trimmed my background paper down to 10 x 10 inches and distressed all the edges before adhering it to a sheet of Premium White Cardstock. I love the distressed effect this creates and feel it really helps frame the page nicely.

I finished the layout with my title, using a fishtail banner from the Journal Bits & Pieces. I positioned it just under the photo so it stood out while remaining central to the design.


Thanks so much for reading! I hope you’ve enjoyed this layout and that it gives you some inspiration to kickstart your 2026 scrappy journey.

Take care, 
Rebecca xx

@preciouspagespapercraft


Monday, 22 December 2025

Wonder - Simple Stories - Simple Vintage Believe Collection

 Hi everyone, it’s Rebecca here, sharing my final layout and blog post of 2025!

As we gear up for Christmas in our house, one of our favourite traditions is taking part in the school PTA photoshoot. That means I have some lovely family photos to scrapbook this month — and none of them are selfies, which is always a bonus!

For this layout, I’ve been working with the Simple Vintage Believe collection from Simple Stories. You can find the full collection in the shop here.


For the page design, I selected two landscape photos. This immediately reminded me of a layout I created some time ago that I absolutely loved. Once that idea popped into my head, I couldn’t let it go, so I decided to scraplift my own work. I do this often when I’m in the mood to create but unsure where to start — revisiting past layouts is a great way to spark inspiration.

I began by cutting a couple of strips from patterned papers to act as an anchor for the page. These were adhered vertically down the centre of a sheet of Premium White Cardstock, with the photos positioned centrally on either side of the strips. From there, I added cascading die-cut stars in varying sizes from top to bottom. Using metal dies to create shapes is a great way to showcase some of the busier papers in a collection. I mixed both patterned and more solid designs to keep the stars visually balanced.


Next came the embellishing — the fun part! (Although, let’s be honest, it’s all fun.) I especially love this stage, as adding those tiny details really brings the page together. I reached for the Floral Bits and Pieces and Element Stickers, arranging them into two main clusters in the centre of the page. A sweet little fawn takes pride of place in the centre, surrounded by florals and leaves that fill the natural gaps left by the photos.


For the title, I used another Element Sticker, placing it over the leafy sprigs and popping it up on foam pads to add a little dimension.


To finish the layout, I added some simple stamping. I used the Pine Holidays Stamps and Die set by 49 and Market, choosing one of the pine leaf designs and my favourite Jet Black StazOn Ink Pad. This helped subtly extend the floral and leafy clusters and added just a touch more detail.


Thank you so much for reading — this is me signing off for 2025.


Thank you for following along and supporting my creative journey for another year. I hope you all have a wonderful and restful Christmas, and I’ll see you for more scrappy adventures in 2026!

Merry Christmas and Happy New Year,


Rebecca xx
@preciouspagespapercraft

Monday, 8 December 2025

Very Merry - Simple Stories - Simple Vintage Believe Collection

Hi everyone, it’s Rebecca with you today. I can’t believe it’s December already—where has this year gone?! It felt only right to use a Christmas collection this month, so I’ve chosen to create with the wonderful Simple Vintage Believe collection by Simple Stories. I love a more traditional Christmas aesthetic, and out of the four Christmas lines Simple Stories released this year, this one appealed to me the most. You can find the collection in the shop here.


I started with the Journal Elements patterned paper and cut out several of the larger pieces. After distressing the edges, I arranged them in the centre of a sheet of Premium White Cardstock, adding foam between the layers to create dimension. I also tucked in a few pieces from the Ephemera pack for extra depth.


On top of these layers, I placed my photo, framing it with a piece from an older 49 and Market collection. On either side of the photo, I added icons from the Floral Bits & Pieces and Ephemera packs. To build up these clusters even more, I incorporated some Cardstock Stickers.


I felt the background needed a touch of mixed media, but because my design was quite “blocky,” I didn’t want to use coloured ink—it just doesn’t always suit this kind of structure! Instead, I decided on stamping. I pulled out a selection of stamps from my stash, including some by Arden Creative and 49 and Market, and stamped all around the edges of my design.


I loved the effect but felt the layout needed a darker paper to pull everything together. I considered framing the entire page with the All the Trimmings paper, but it didn’t look quite right. Instead, I tore two strips of the same patterned paper and added them above and below my layered design. This felt like the perfect finishing touch.

Thanks so much for reading. I hope you’re all enjoying the countdown to Christmas and finding some time to scrap your December memories. I’m hoping to be back with one final layout before the year is out—so until then, take care.

Rebecca xx

@preciouspagespapercraft


Wednesday, 18 December 2024

Photoplay Paper - Holly & Ivy - Ho Ho Ho

Hi everyone!

Claire here today with another fun festive layout using the Holly & Ivy collection from Photoplay.

I'm loving creating with this collection. The colours and patterns are so beautiful and the ephemera includes so many adorable pieces as you'll see in my layout. Let's jump in...! 

I started with a piece of Premium White cardstock and lightly applied a coat of Gesso to prime the surface as I knew I wanted to add mixed media. Whilst it was drying, I cut four large snowflakes from the Noel paper. This is one of my favourites in the collection - a gorgeous traditional red tartan - a pattern I really enjoy at Christmas. I cut my snowflakes on my cricut but you could replicate the design with any large shapes of your choosing, perhaps using dies or hand draw for that extra special hand crafted feel.

Once the gesso had dried, I grabbed some gold watercolour paint and applied it with a brayer, mostly in the centre of the page, but also created pols of colour top right and bottom left to act as an anchor for some clusters i'd be adding later. I also added some random background stamping using a stamp from my stash. You can find similar in the shop here.

I mounted my photo three times to pull in those pretty patterns and colours from the Holly (a and b sides) and the Santa Supply Co papers, and adhered the photo on foam to the centre of the page. Around the sides, I added my snowflakes, sticking just the centre to the page so I could lift the edges to create dimension.

Using some of the Element Stickers, I added fun centres to the middles of the two main snowflakes to help them stand out. Next, I just had to use that gorgeous Christmas lodge sticker and the fun Ho Ho Ho title, placing them around my photo corners to draw the eye into the picture.

With my final snowflake, I cut it in half, placing one top right and the other bottom left. To the top, I made a small banner from the 'This house believes' sticker and adding an eyelet and string.

To the bottom cluster, I  added some foliage, a candy cane and green snowflake sticker pulling in all the colours of the collection.

As a final touch, I added some tiny star stickers from the Element Sticker sheet across each cluster in both red ad black, and sprinkled some gold Pinkfresh Studio Gold Jewel Essentials.

I hope you've enjoyed my posts with this beautiful collection. Don't forget to check it out in the shop here.

All that leaves is for me to wish you a very merry Christmas and a happy new year!

Claire xx

@scrappysoulmate

Wednesday, 8 May 2024

Forever - 49 and Market - Krafty Garden Collection

Hi everyone, it's Rebecca with you and today I am sharing my first layout created using the beautiful Krafty Garden collection from 49 and Market. It's another stunning collection designed by Katie Pertiet, so it's full of the stunning florals and foliage I love so much! You can find the collection in the shop here.


I selected the Vintage Symphony patterned paper for my background - the 49 and Market papers are perfect for backgrounds because they have subtle details such as inking and faux stitching that help to elevate my layouts. To my background, I added some torn strips of patterned papers. I selected the gorgeous blue striped paper because the shade of blue matched my photo perfectly. I wanted my photo to be central on the page, and to help draw the eye to it, I've housed it in one of the Stacked Frames


Behind my photo, I've layered some of the Ephemera Bits, selecting larger pieces with some stamped text on them. I love to have lots of layers on my layouts as it helps to create depth and gives the eye so much to look at.


Either side of my photo, I've embellished using pieces from the Chipboard Set and Laser Cut Out Elements. I've built on these clusters using some tags and the gorgeous picket fence, which runs through the centre of my photo just like the fence in my photo. 


To add further detailing to my background, I've used the exciting new 49 and Market and Sizzix stamps. Using a Stazon Ink Pad in Dove Grey, I've stamped some leaves in two corners of my central design, and on the opposite outer corners of the background. On top of this, I've applied some of the Blendable Rub Ons


Thank you for reading. I hope my layout helps to inspire you. Don't forget to check out this beautiful collection in the shop, and also the full range of 49 and Market and Sizzix Dies and Stamps here.

Take care,

Rebecca x

@preciouspagespapercraft


Friday, 16 February 2024

February Papermaze Kit - Part 1

Lynn here today with a lovely, romantic new Papermaze Kit for February. I have created four layouts using this kit and here are the first two.


Patterned Papers:
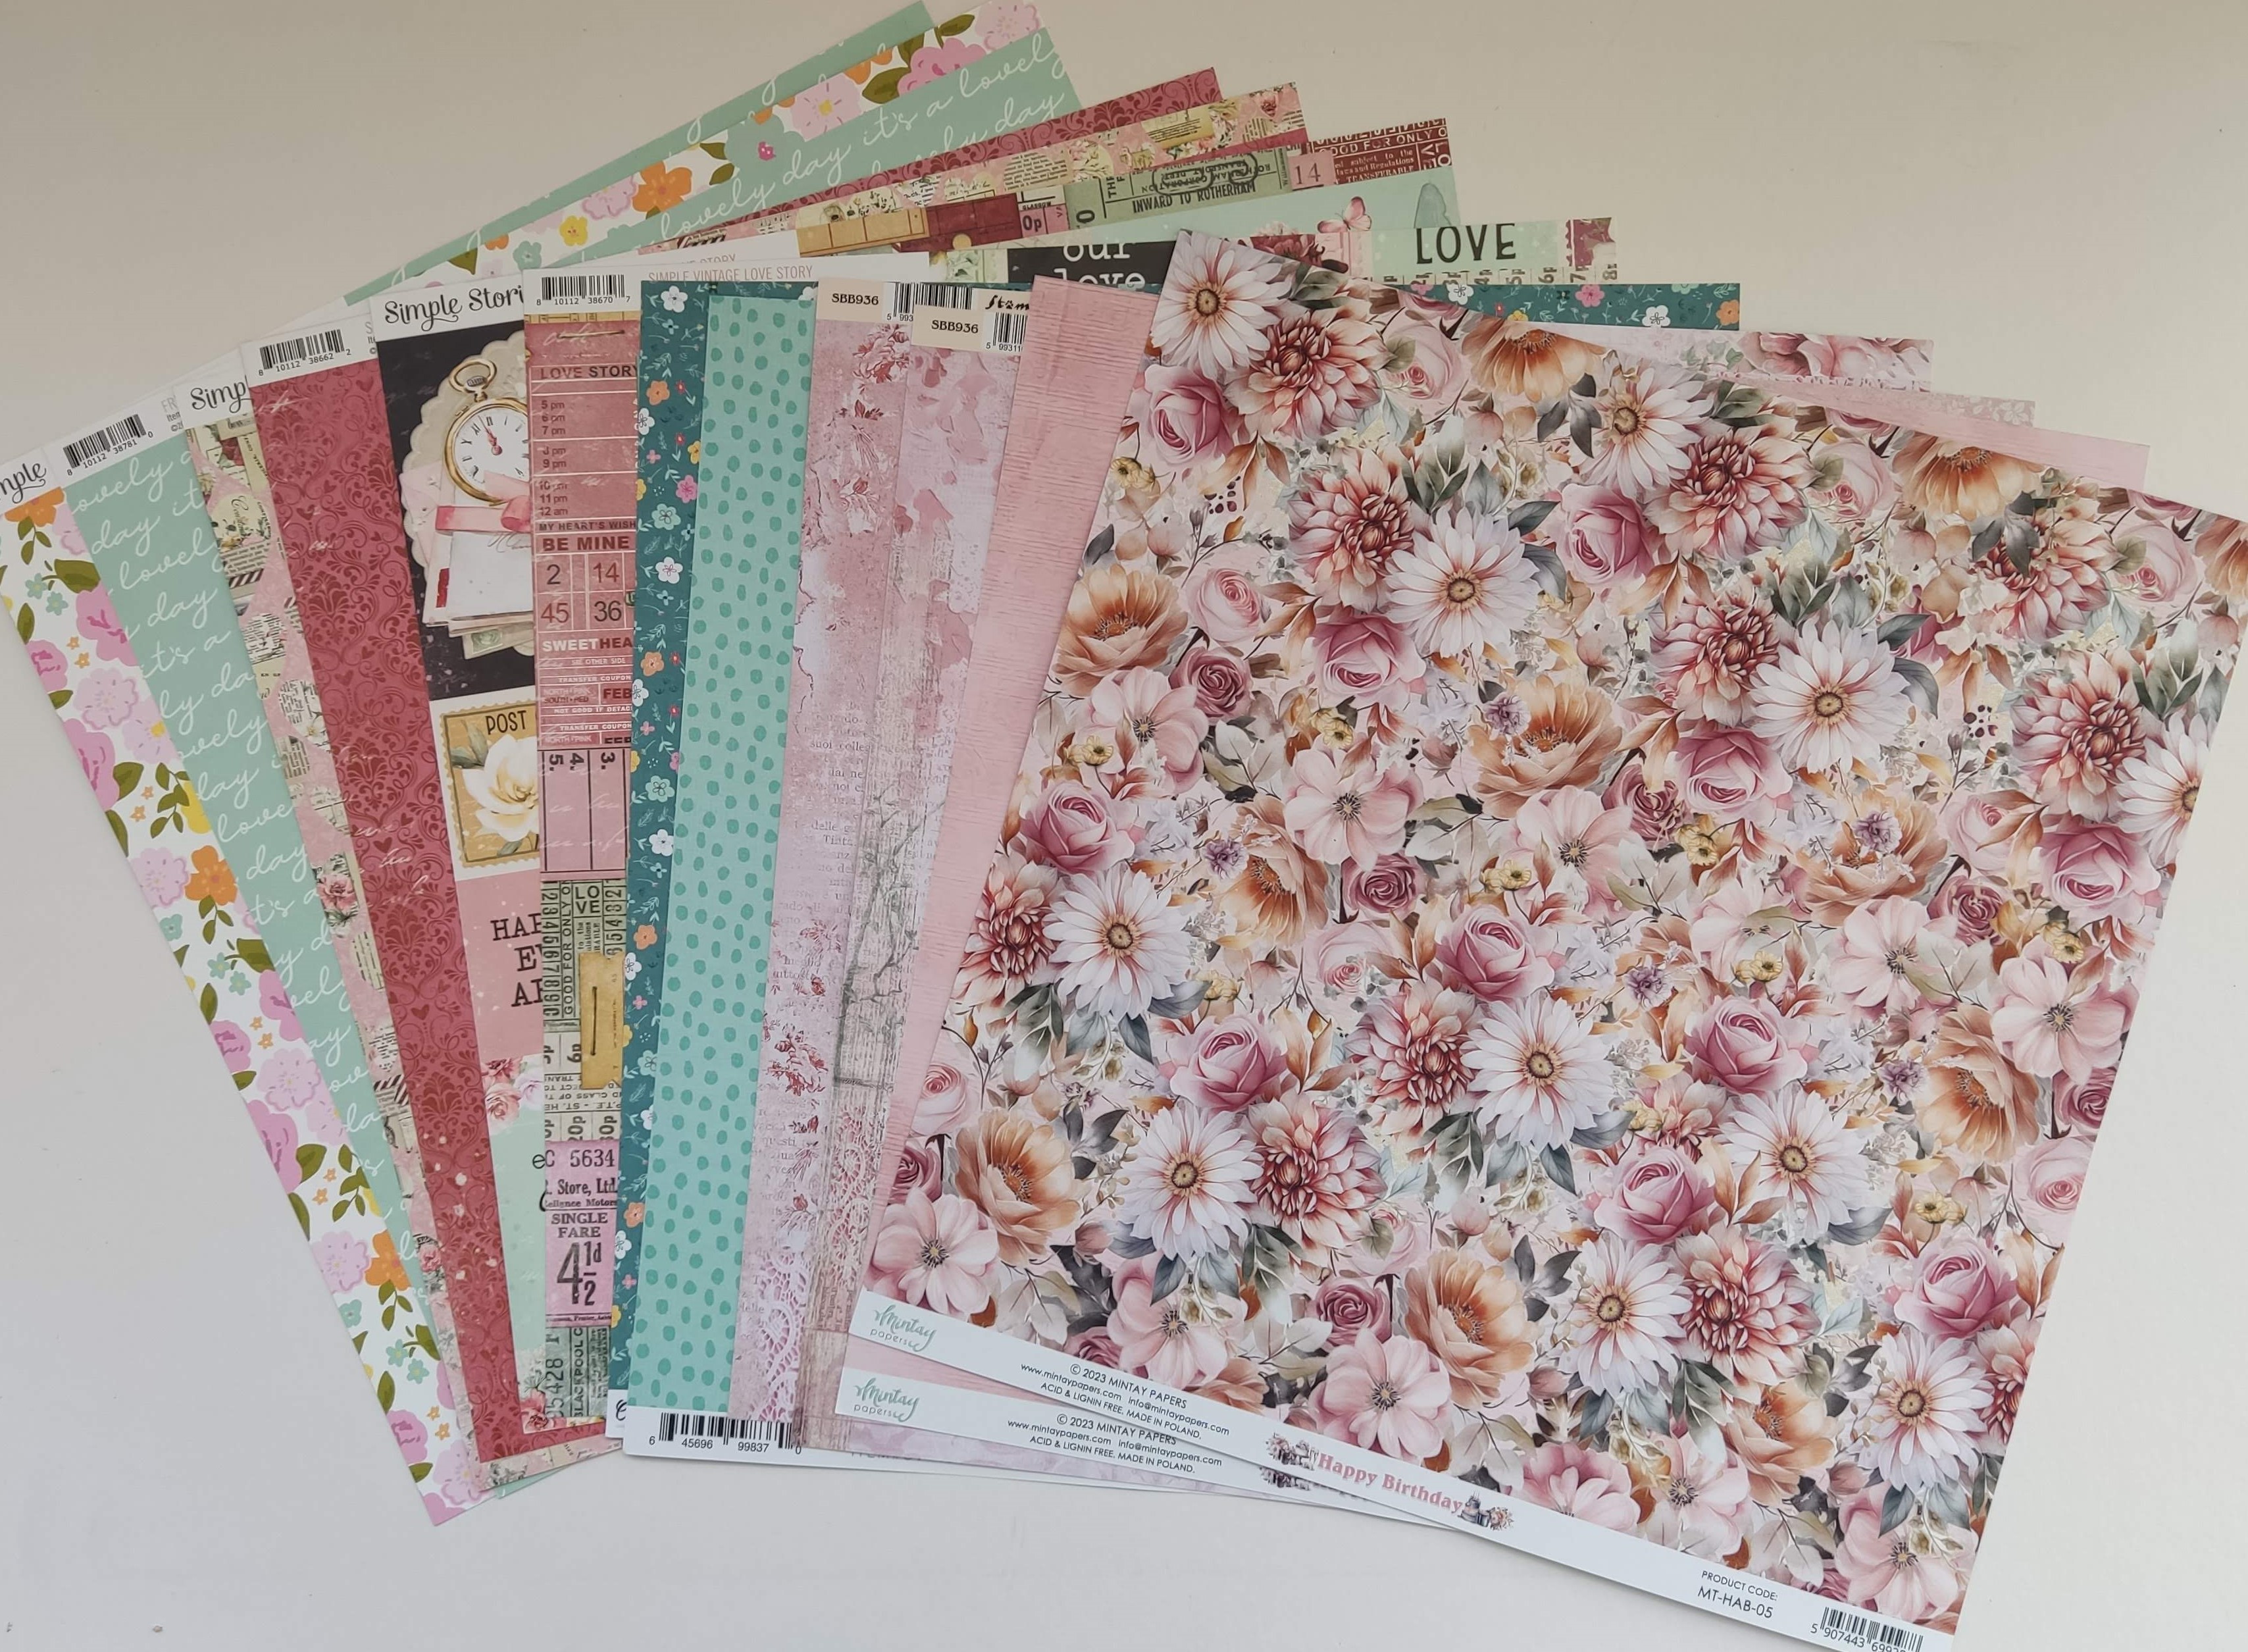
Mintay Papers - Happy Birthday collection - MT-HAB-05
Stamperia - Roseland collection - Flowers
Simple Stories - Simple Vintage Love Story collection - 2x2/4x4 Elements & My Heart
Simple Stories  - Fresh air collection - Fresh Start
Cocoa Vanilla Studio - Happy Days - Little Blossom


Bazzill Basics Cardstock - Cherry Splash and Walnut Cream (included in the kit). Yukon Gold, Blossom, Flintstone and Sea Glass (extra Bazzill pack).


Embellishments:
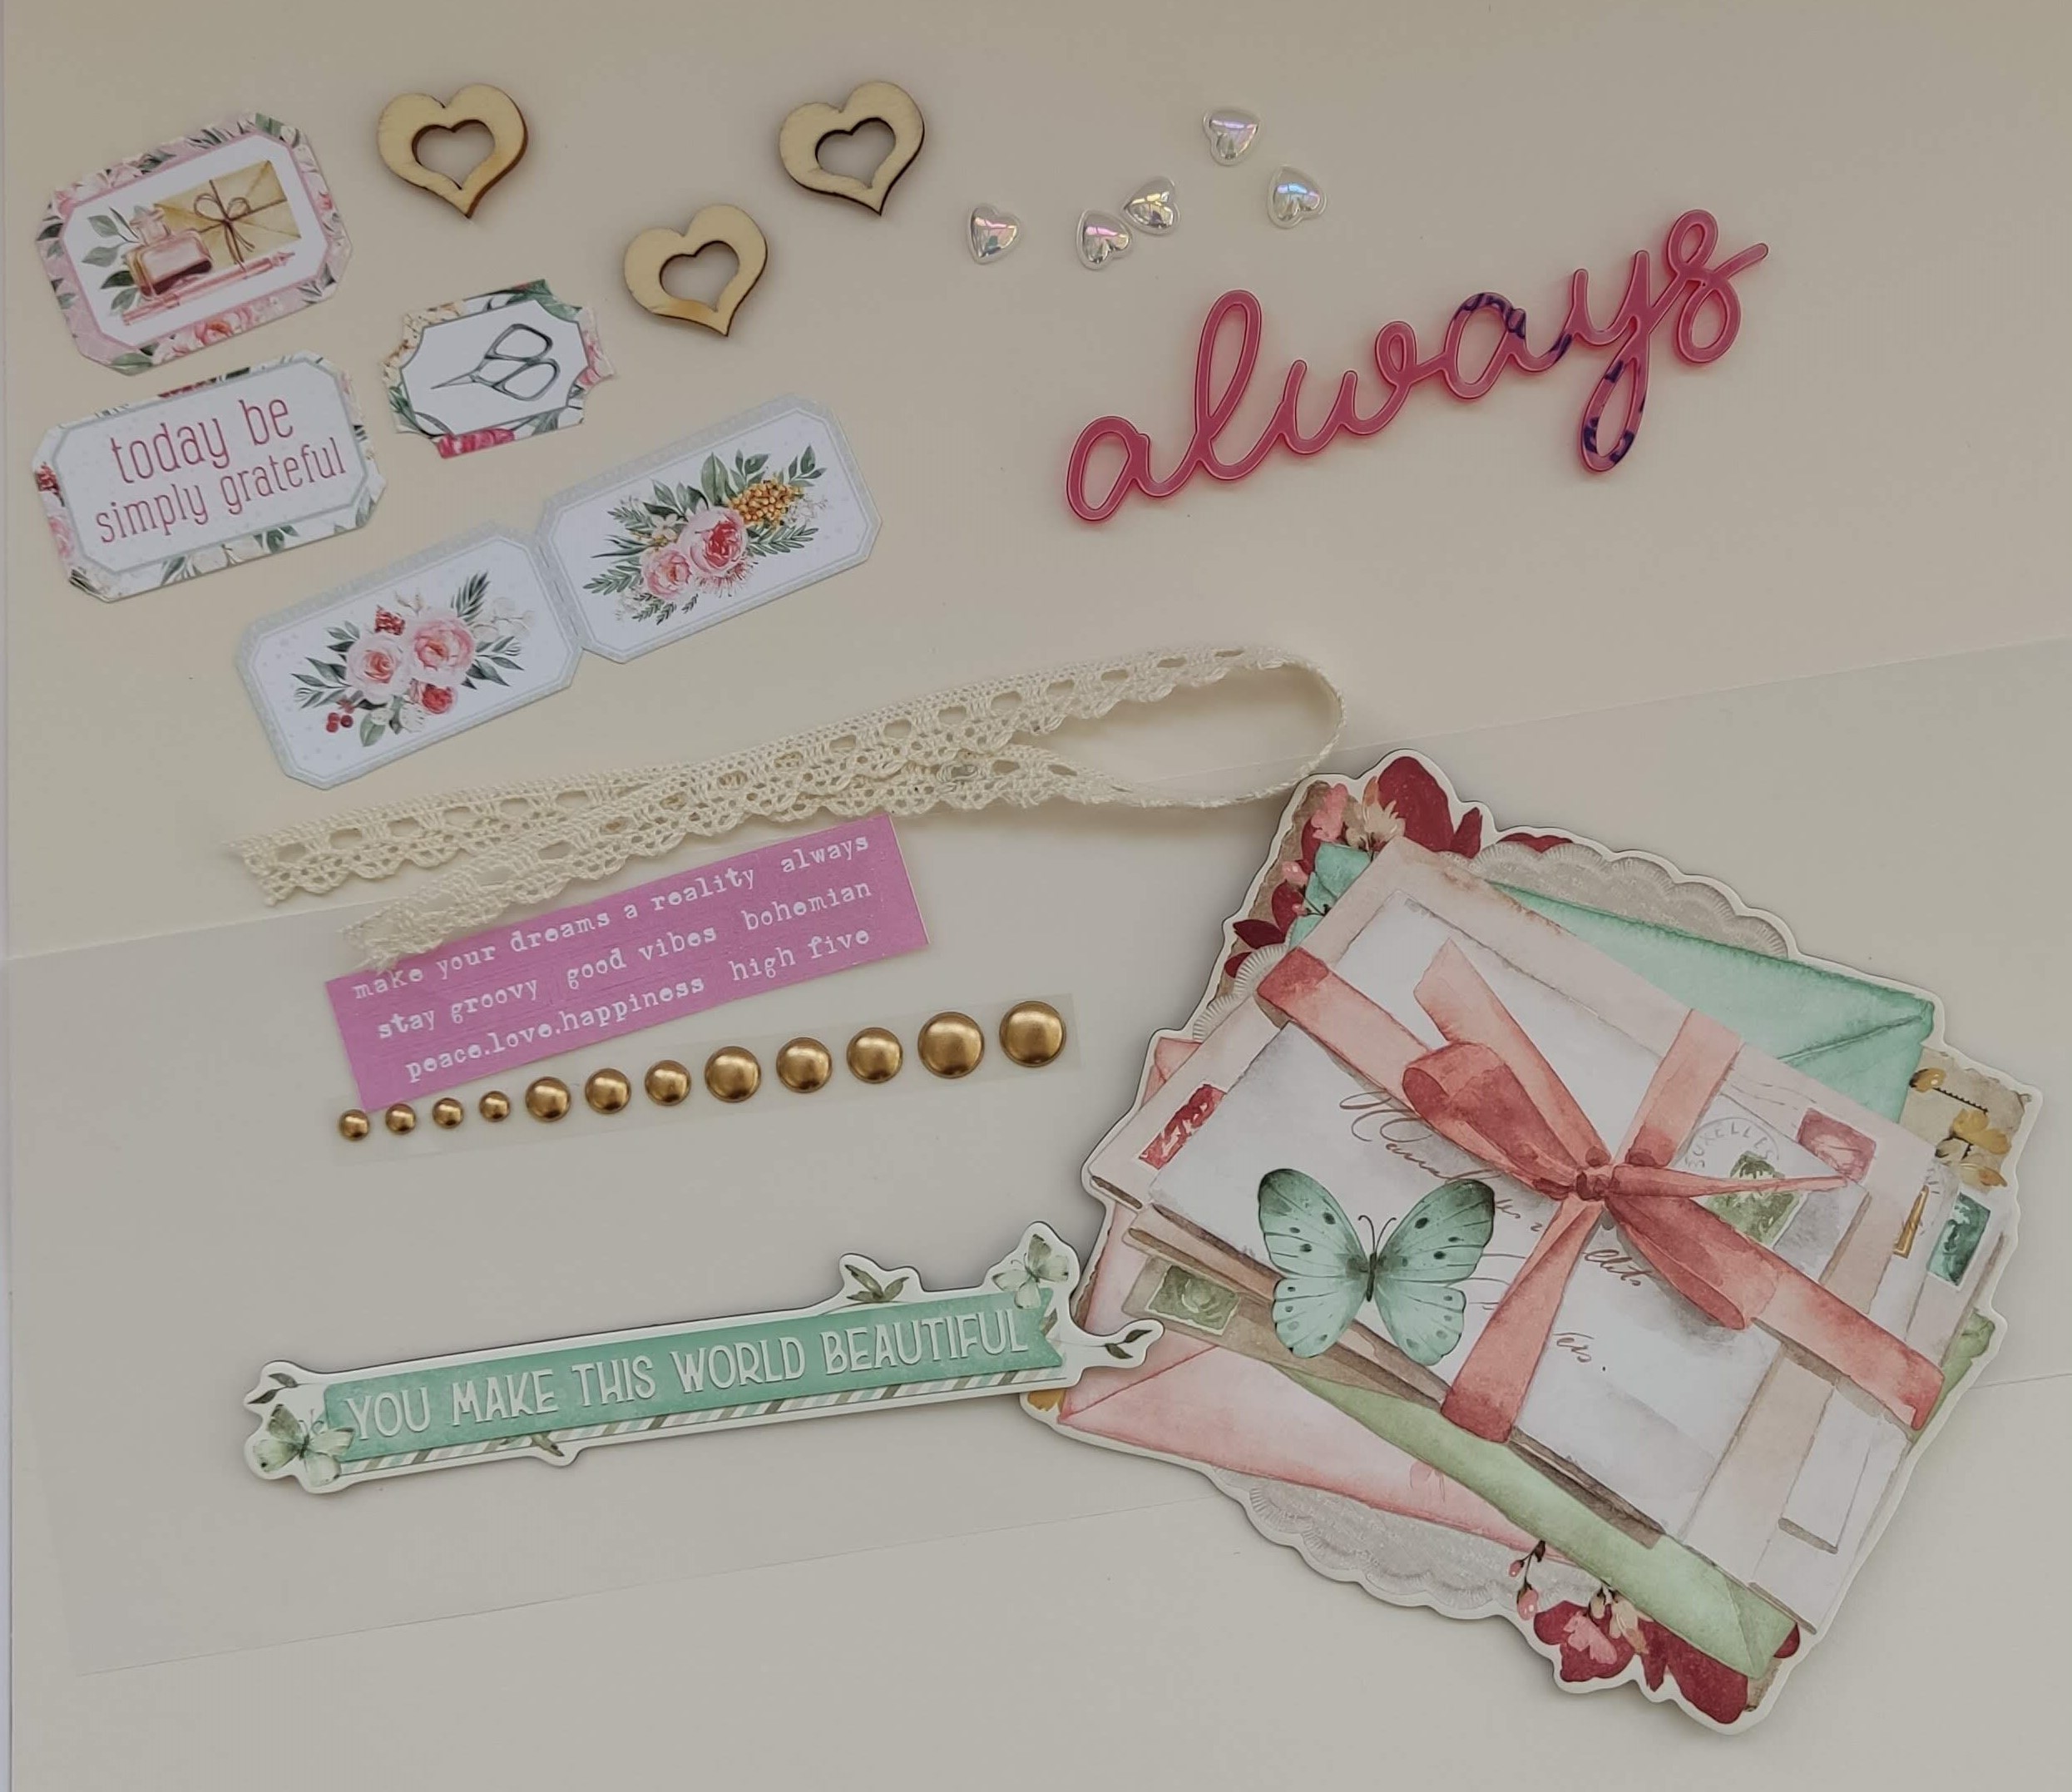
3 wooden hearts, 12" lace, 5 water droplet unicorn hearts, 1 exclusive acrylic word, vellum, 2 Simple Stories Chipboard Clusters, 1 strip of Pinkfresh enamel dots, 5 P13 tickets and a selection of word stickers.


Always - one of the official photos from my daughter's wedding.


I created the mixed media background on the Walnut Cream Bazzill using Distress Oxide Inks of several shades of red and pink, watered down on the craft mat, and transferring it to the card on a scrap of acetate. Once dry I stamped the word 'love' several times with Distress Oxide Ink and some old cling foam alphabet stamps from Tim Holtz (Idea-ology Type Lower). I spritzed the letters with water to allow them to oxidise further.


Once the ink was dry, I stamped with 49 and Market - Gabi's Stitches Clear Stamp Set, and Onyx Black Versafine ink (any water-resistant ink can be used).


I cut some of the images from the '2x2/4x4 Elements' paper and layered these with the photograph on top.


The Papermaze February Kit exclusive acrylic word was added as my title to the bottom right of the layout.


From the kit I added more embellishments, including the water droplet hearts, wooden hearts and mini word stickers.

Other gems and water droplets were added from my stash.


Happy Together - This layout shows my nephew and his girlfriend on holiday.


I started this layout (inspired by Paige Evans), by cutting a large heart from the centre of the Sea Glass Bazzill. With the cut out, I drew around the heart, onto a scrap sheet of 12" x 12". I used this to work out where the scalloped shapes would need to go, and a few lines helped me to line the up too.


I cut scalloped strips approx. 0.75 deep, in strips about 11" wide from the 'Little Blossom' and 'Fresh Start' papers. I used both sides of the papers to vary the patterns and stuck them sown in overlapping rows. Once the heart shape was covered I added the heart cut-out sheet over the top of the scrap sheet and glued this on place.


I glued the photo in place, then added a fine lace trim around the heart edge.


I made three clusters of flowers, using paper flowers from my stash to match the paper colours. I layered up the flowers, then used brads to hold the layers together and attach the flowers to the page.


From the Bazzill heart shape left over, I punched some leaf fronds, and inked them with some Distress Ink to make them a slightly darker shade. I added these to the flower clusters.


I added a title using Doodlebug Designs Loopy Lou cardstock stickers in Lily White. To make the letters stand out, I drew around the edges with a black marker pen.


That's all for today. back with more soon.
Thanks for looking.
Lynn x

Wednesday, 10 January 2024

Stay Wild - Mintay Papers - The Great Outdoors Collection

Hi everyone, and happy new year! Rebecca with you today sharing my first layout of 2024! This year I am determined to try new things and I'm kicking this off with a collection from Mintay Papers! It's a new brand to me having never created with it before and I have to say I'm pleasantly surprised. The quality of the papers is really impressive - nice and thick with good quality die cut ephemera to match. I chose to work with 'The Great Outdoors' as I was drawn to the outdoorsy feel and the neutral colours. You can find the collection in the shop here.


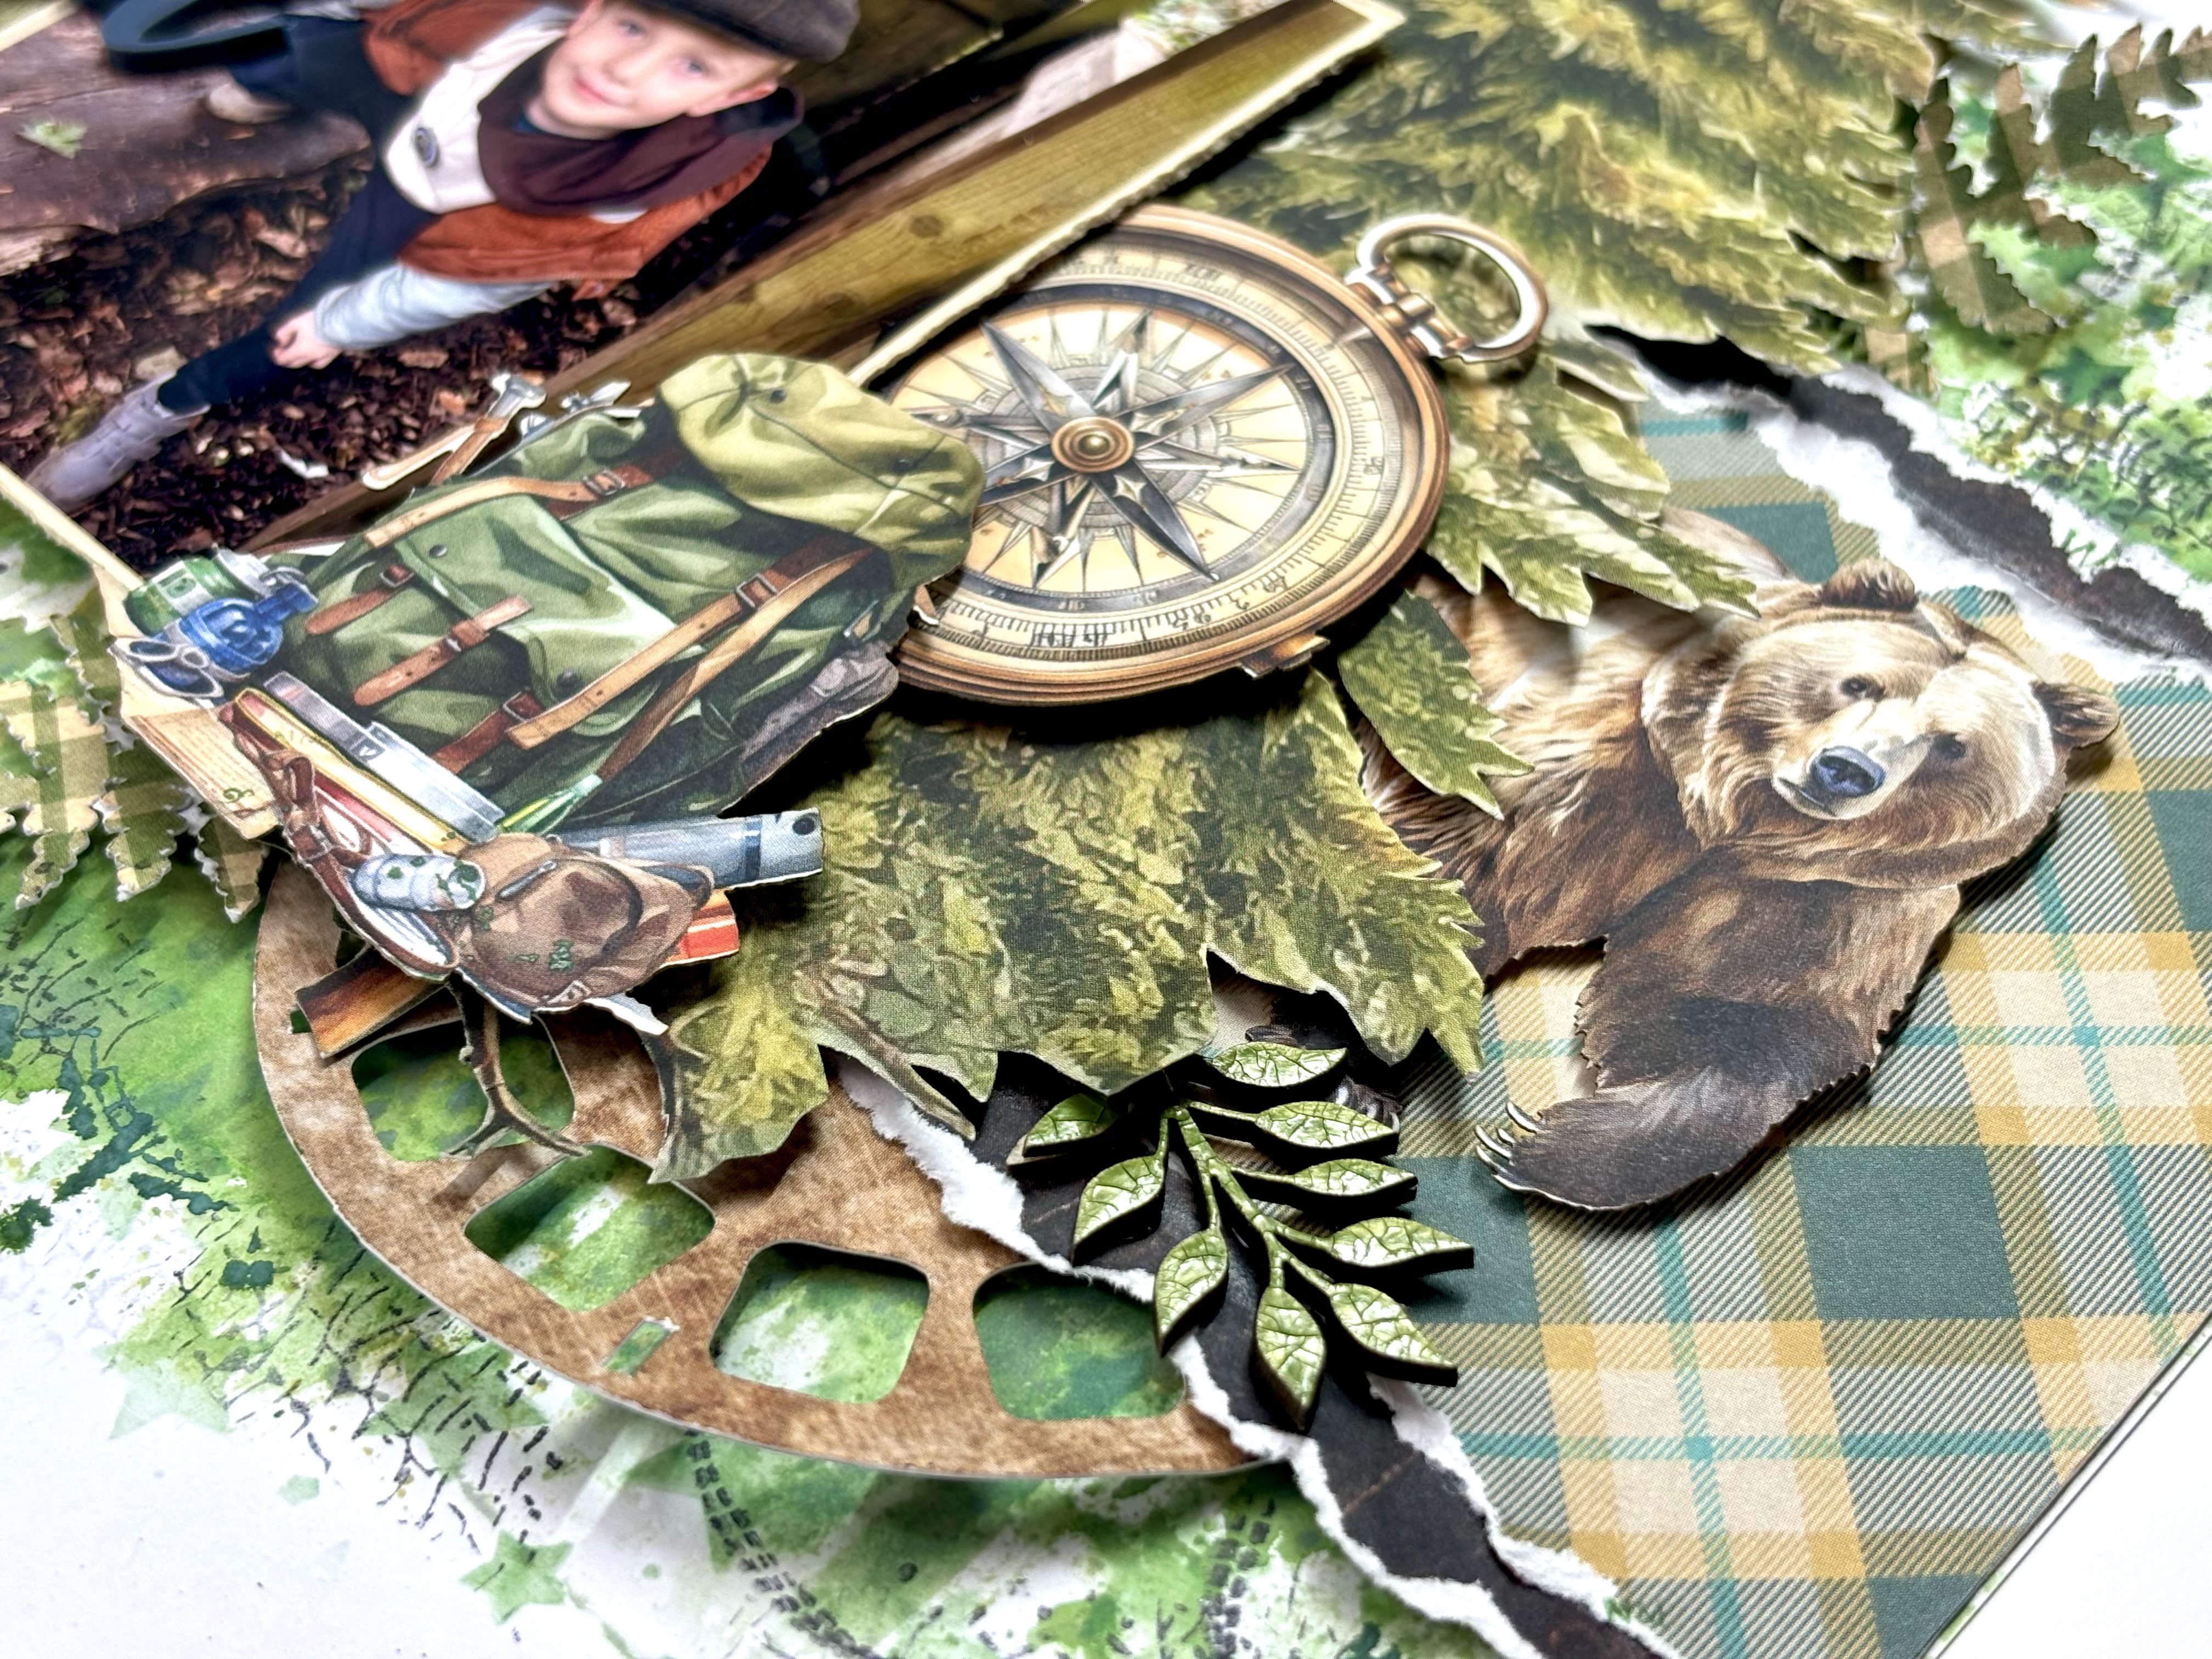
I begun with Paper 05, tearing a strip to sit horizontally across my layout. I then tore 2 thin strips of the reverse of this paper to sit above and below to provide some contrast. The photo I'm scrapping here is of my son in a wildllife hideout in the woods. We were trying to stay quiet so that he could see an elusive red squirrel! I wanted to translate this onto the layout, so selected Paper 01 and fussy-cut the trees from it, which I positioned either side of my photo.


Using the Paper Die Cuts, I built clusters either side of my photo. Sadly, there are no red squirrels in this collection, but I felt that the bear and stag worked well as we saw plenty of wildlife in the woods. 


With my Cameo 4, I cut a viewfinder from Paper 04, cut it in half and used it above and below my torn paper strips.


For my title, I added an acrylic perspextive from my stash. At this point, I was going to call the layout finished, but I felt like it needed something more. I decided on some mixed media. It's been a long time since I indulged in some messiness so I made the decision to go 'all out'.

I began with my brayer and Distress Oxides in the shades Rustic Wilderness, Iced Spruce and Forest Moss. After applying the inks to some packaging, I spritzed with water and then ran my brayer over the ink. I then rolled this over a sheet of Premium White Cardstock. On top of this, I added some stencilling using a star stencil. I wasn't too keen on how this looked, so ended up covering most of it up with more ink! To finish off, I added some stamping using various different stamps and my Staz On black ink pad.


Once the inks and stamping was all dry, I was able to move everything back onto the page. Luckily, I'd stuck everything together initially, but not to the page. This meant I could easily move everything off and back on again in one single piece. 

To finish off the layout, I added two raw chipboard leaf clusters from Dusty Attic. To elevate them, I covered them in Nuvo Crystal Drops in the shade Bottle Green. I love how this looks - it cracked slightly as it dried which gives it the same effect as crackle paste! 


And yes... eventually we did see a red squirrel!


I hope you've enjoyed this layout. I really enjoyed working with something different and trying a new brand. I'll be back later in the month with a second layout.

Take care,

Rebecca x

@preciouspagespapercraft