Already our June crop is here! This coming Saturday, the 17th, we'll be at Otley Village Hall for a day's scrapping and chatting! Our kit this month uses the Vicki Boutin Sweet Rush collection...
Thursday, 16 June 2022
June Crop
Monday, 13 June 2022
You Rock My World..... No Limits Cocoa Vanilla Studios
Hello,
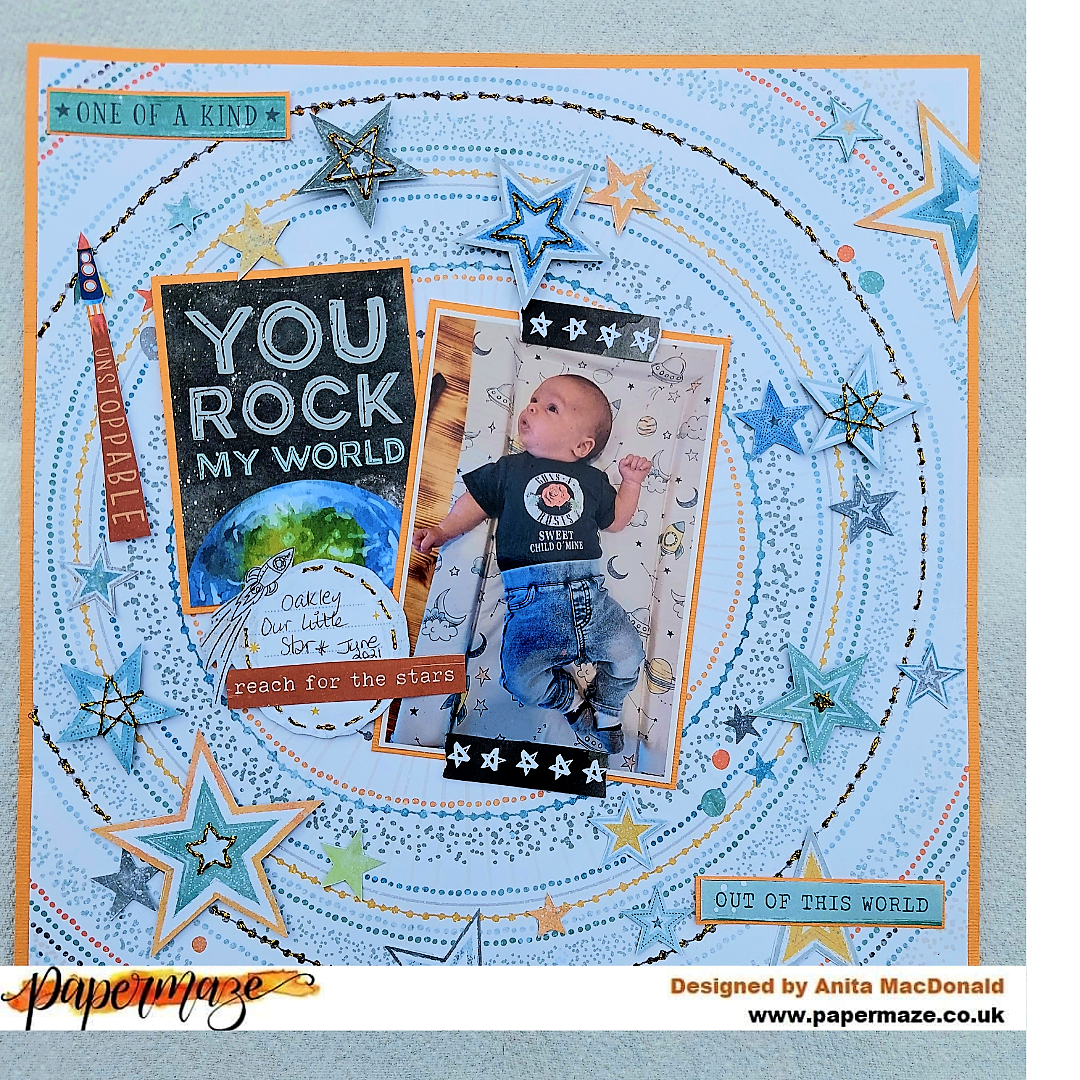
Anita here with you today....and I have a layout to share that I have created using the No Limits collection from Cocoa Vanilla Studio.
I had this adorable photo of our baby Grandson when he was just a few weeks old and wearing his heavy rock t shirt and jeans, bless him such a cutie ....and when I saw one of the elements on the sheet of Universal I knew this was the perfect chance to use it.
The layout was backed with a sheet of Marmalade Burst Cardstock and then a sheet of Orbit was trimmed down slightly to allow a border of the orange to frame the layout.
Using a paper pricker, I chose one of the large circles around the edge of the page and pricked the dots all around the circle to make it easier to sew. Using some thick, sparkly embroidery thread I then sewed all the way round....just to add a little sparkle, interest and slight dimension
Next I set about fussy cutting lots and lots of different sized stars from the sheet of Nebula...I often find a good session of fussy cutting is quite therapeutic ....but by the end of the sheet I was literally seeing stars!!
The larger stars were perfect to add a little bit of sparkle to, so on some I added a few sparkly stitches and then on a couple i used a wrapping method around them with the thread. Some were stuck direct onto the layout and others were raised on foam pads.
The photo and the panel were both matted on some Marmalade Blast cardstock, along with a couple of word strips. These were all cut from a sheet of Universal and so was the little circular panel that I added a little journalling to.
This was a lovely collection to work with and I will be using the rest of the stars that I had cut out on another layout for another post at a later date.
Cocoa Vanilla Studios have a super range of collections available at the shop covering various themes. Have you seen them? If not, why not grab a cuppa and have a mosey round the website and see all the other gorgeous goodies for sale.
Happy Crafting!
Warmest wishes
Anita x
Friday, 10 June 2022
Memorable - 49 and Market - ARToptions Viken Collection
Hello, Rebecca with you today sharing my first layout of June. This month I am really excited to be working with the new ARToptions Viken collection from 49 and Market. This is only the second 49 and Market collection I've ever created with (the first being Spectrum Sherbet) and I'm really loving it.
The colours in the collection lend themselves perfectly to scrapping bluebell photos so I've purposely been saving my photos until this collection was released!
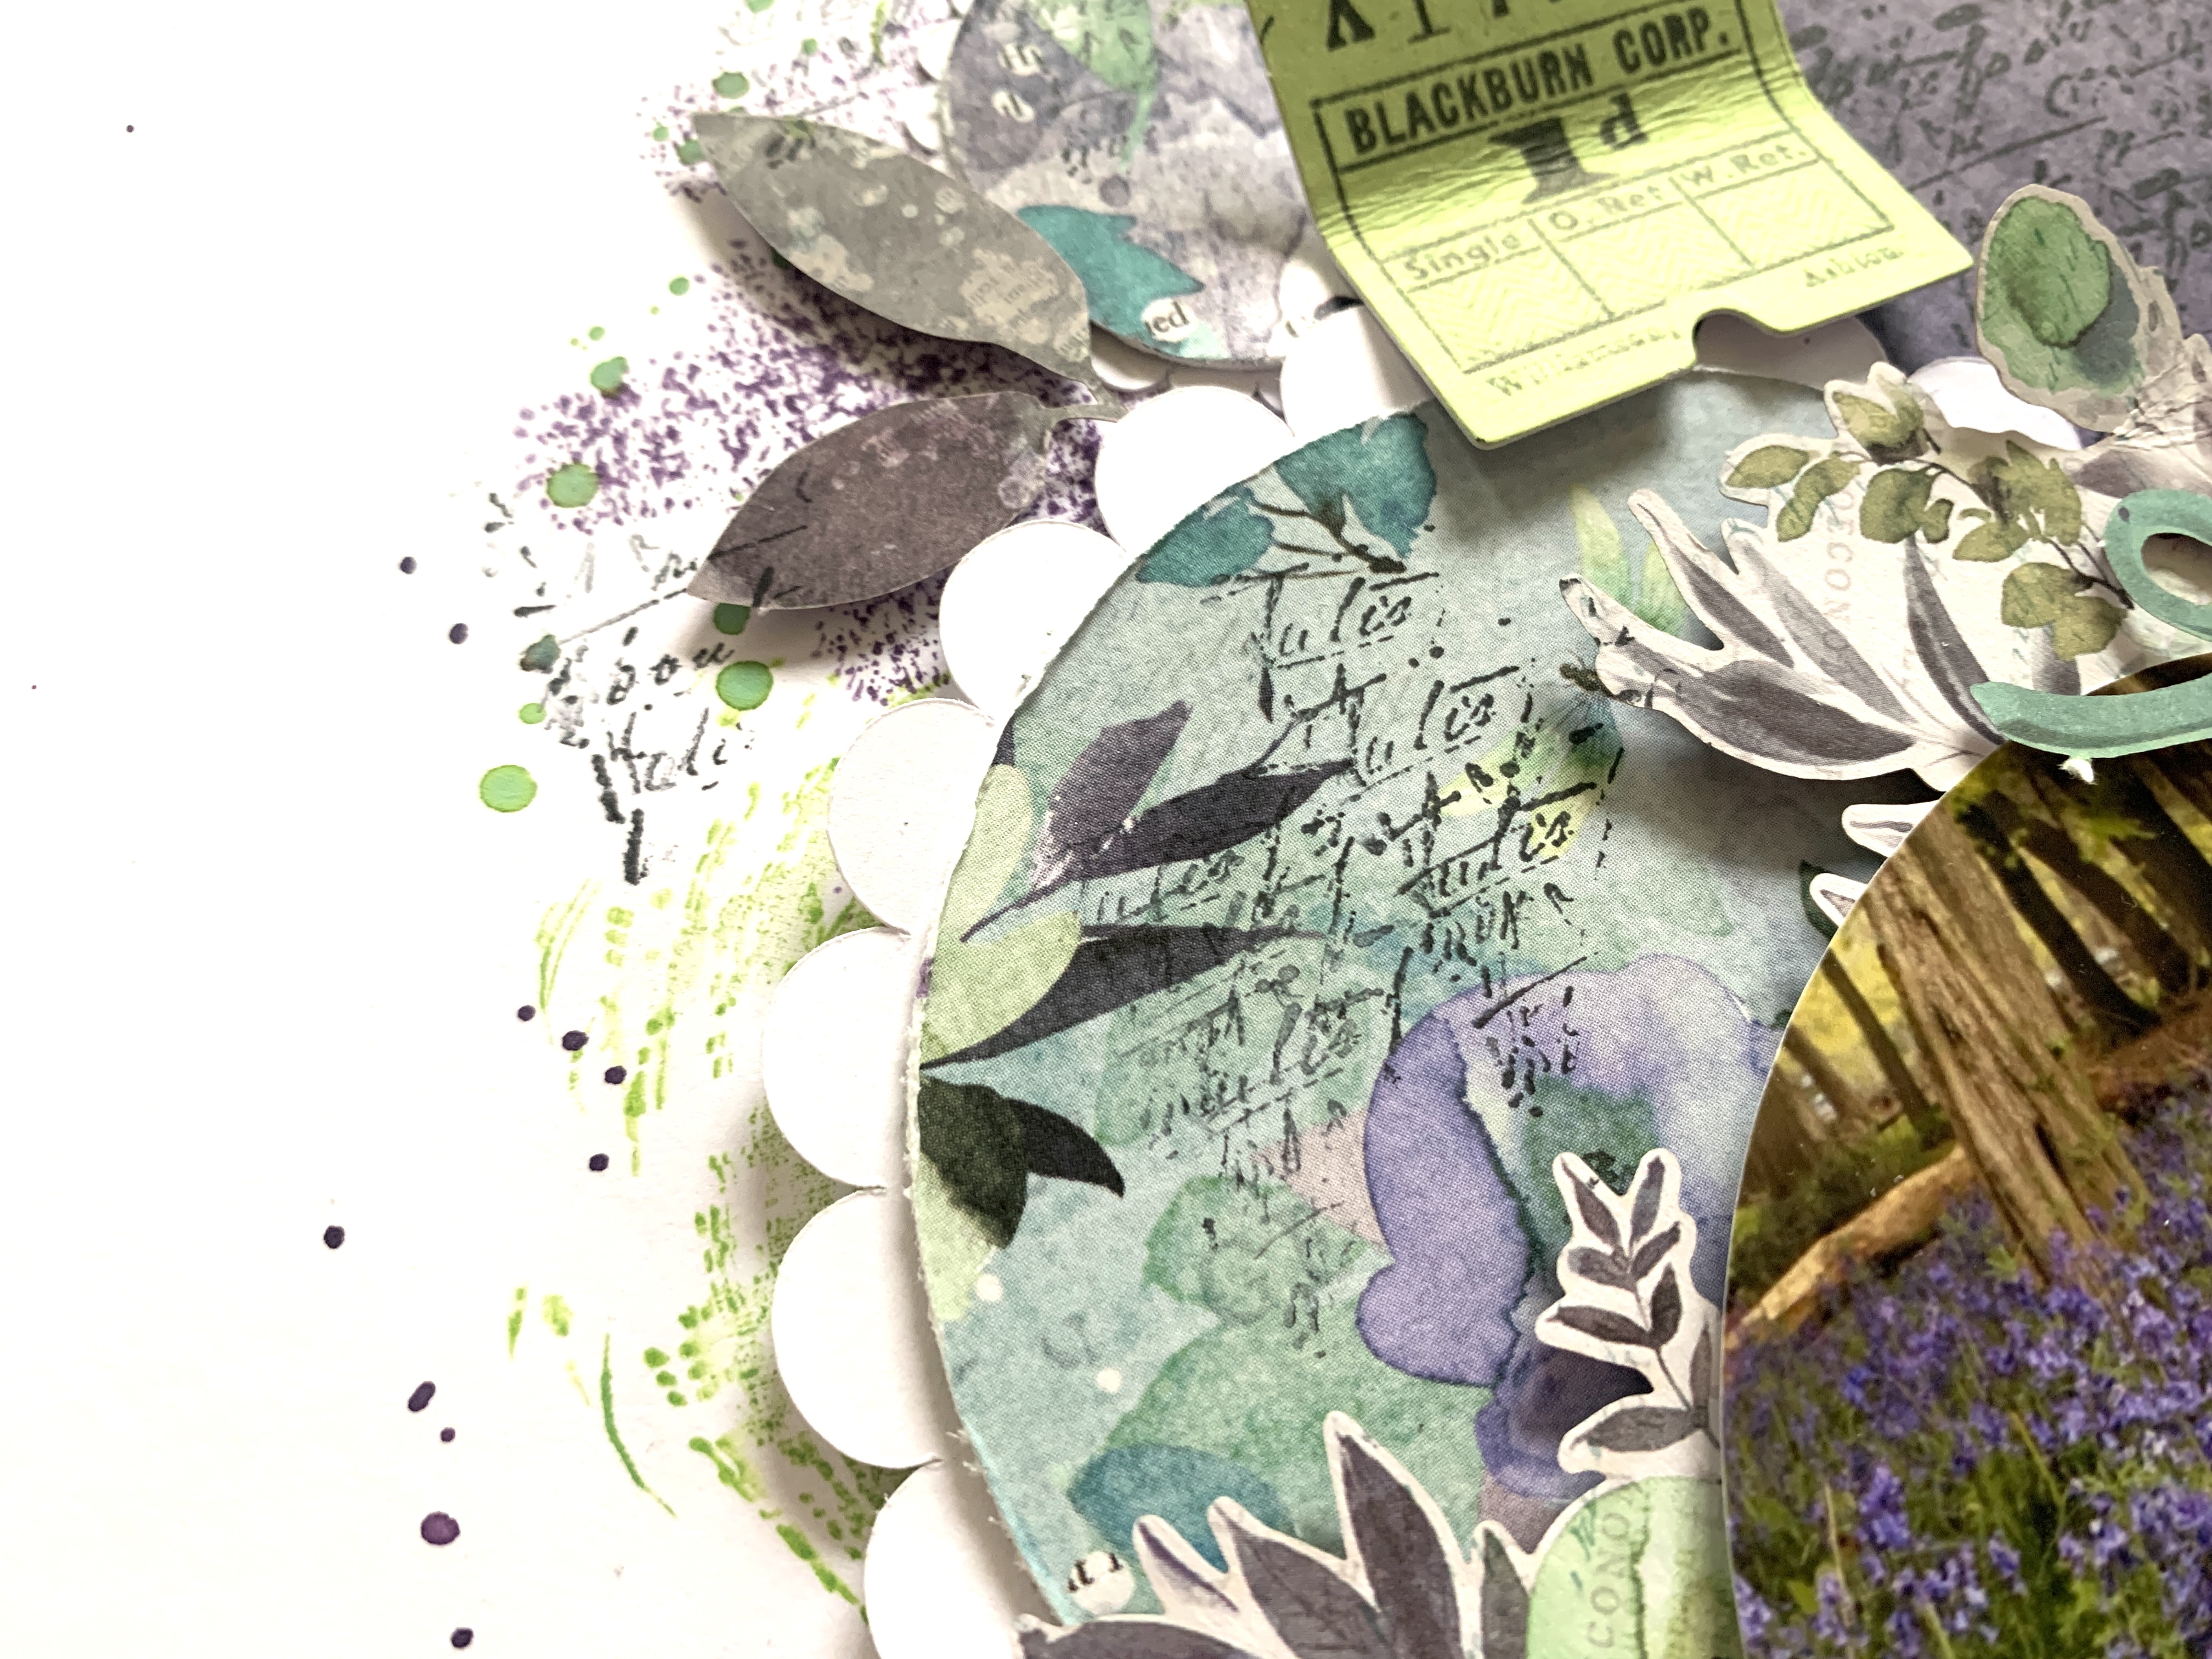
I cut some scalloped circles on my silhouette cameo from white cardstock, and then cut out circles from some of the patterned papers to fit within the scalloped edge. I've used both sides of 'Enchanted Fields', the A side of 'Floral Notes' and the B side of 'Endearing'. I selected these papers as I thought floral tones would work perfectly with my theme, and the purple and green papers added some solid blocks of colour - which match my photo perfectly. I adhered the patterned paper circles to the white scalloped edge and arranged them on the right hand side of my layout, overlapping slightly.
Once I was happy with my arrangement, I drew around the circles with a pencil and took them back off so that I could had some light mixed media. I've used a set of stamps by Tim Holtz (they are called 'Brushstrokes') and a Distress Ink Pad in the shade 'Dusty Concord' to add some colour around the edge of my design. I purposely left some gaps and filled them in with a different stamp from the same set, using a Distress Oxide Ink Pad in the shade 'Mowed Lawn'. I love the effect that stamping brings to a layout. It's not a complete colour-wash, but it adds so much texture and some subtle colour. I also added some scripty stamping using a black Staz On Ink Pad. I've added this to the background, and also to the green and purple circles as they were looking very 'clean'. I finished the background off with some purple and green splatters.
With my mixed media finished and dried, I adhered my circles to the background, using my pencil lines to help me get them in the right position. I then added a circular photo to the centre of the circles. I love the way that the colours in my photo continue out onto the page.
Embellishing this layout was so much fun - and really easy! I have the 'Laser Cut Elements' (which is jam-packed with beautiful pieces) and the 'Die Cut Pieces' (again - jam packed with no less than 73 pieces of ephemera!). I've selected small die cuts to embellish the page with as I didn't want to cover too much of my background or the patterned papers.
I started with two large floral clusters around my photo, and then added lots of small things - leaf sprigs, butterflies, a couple of postage stamps and bows and also a couple of tickets. I also used one of the die cuts for my title.
To help balance the page out, I also created a cluster over to the left of the page. I've used two of the lace trim die cuts from the 'Laser Cut Elements' and then to keep my embellishing consistent, I've added similar die cuts to those that I used on the right - a postage stamp, leaf sprigs, a bow and a butterfly. I also extended my mixed media over to the left hand side.
I really adore how this layout turned out and I'm so glad I saved my bluebell photos for this collection! I hope you've enjoyed it and it's given you some inspiration. If you'd like to watch along and see how the layout came together, there is a process video up on my YouTube channel which you can find here.
Keep an eye on the Papermaze website- this collection will be uploaded soon!
I'll be back later in the month with another Viken layout, so until then, take care.
Rebecca x
@preciouspagespapercraft
Thursday, 9 June 2022
Bella Blvd ~ Time to Travel 🚐 #2
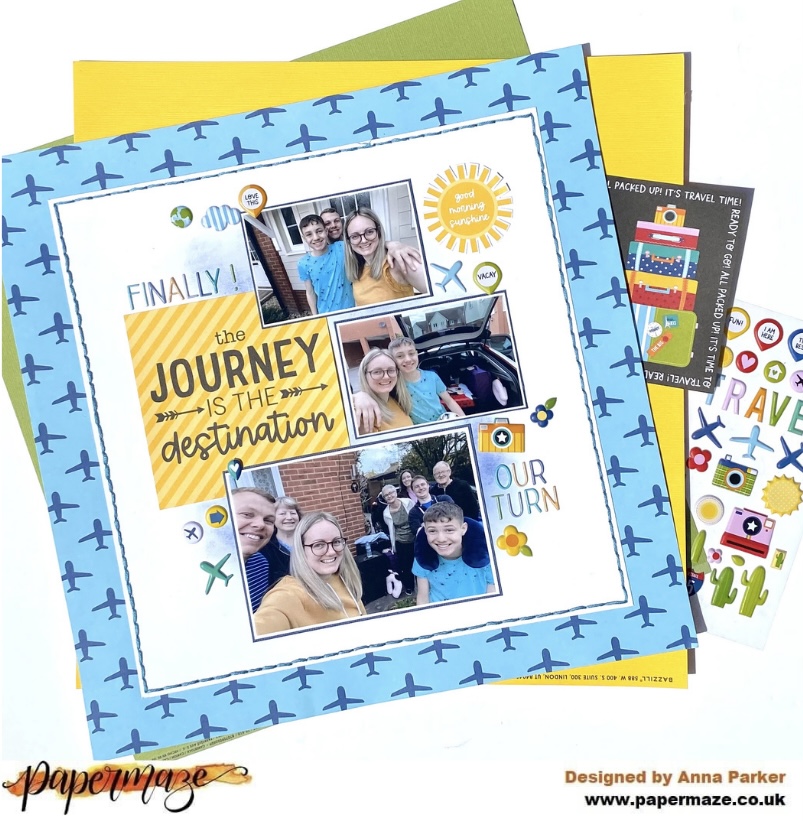
Hi, it’s Anna back on the blog today! I’m sharing my second layout using Bella Blvd Time to Travel. I’m documenting our recent holiday and travel day in particular! This page focuses on the first part of our journey and finally being able to go!
I began by adding some distress oxide (in the shade blueprint sketch) lightly to a sheet of white bazzill. I knew roughly where I wanted to place my photos, so I placed them on the cardstock to make sure the distress oxide would show.
I then gutted a sheet of ‘In the Clouds’ and trimmed down my cardstock by about 3cm each side and adhered it to the in the clouds paper. I also hand stitched around the edge of the white cardstock.
Monday, 6 June 2022
Simple Stories - Summer Lovin' - Fun!
Hi everyone!
Claire here. Hope you had an amazing Bank Holiday weekend celebrating the Queen's Platinum Jubilee! I was certainly glad of the long weekend and even managed to squeeze in some scrapping!
This month, I am creating with the Simple Stories Summer Lovin' collection and oh boy it's a beauty! The collection is full of vibrant colours, fun patterns, florals and ephemera to make documenting your summer stories a breeze. You can find it in the shop here.
For my first page, I was drawn to the Beatin' The Heat paper - a blue background paper design filled with hosepipes! It immediately made me think of these photos and I knew I wanted to scrap them.
I started with a mixed media background. I applied Distress Oxide Ink in Salty Ocean, Cracked Pistachio and Lucky Clover to my page using a dry stencil brush, adding wet splatters on top.
I created an offset mat as the anchor of my page, using a piece of Typhoon Bazzill Cardstock and Sweet Summertime paper, distressing the edges and layering each piece on foam for extra height.
Next, I positioned my photos into the Chipboard Frames - So colourful and perfect for making a relatively quick layout as it immediately provides a really striking central point of interest.
I couldn't resist using the Fun! Foam Sticker for my title, placing it on top of my frame.
I embellished with a small cluster of flowers, fussy cut from the Simply Paradise paper.
Friday, 3 June 2022
Echo Park Endless Summer - Catch a Wave
Hello, Karen here with my first layout using the fabulous Endless Summer collection from Echo Park. This collection is so bright and sunny and is perfect for scrapbooking photos of days spent on the beach or in the pool but would also work equally well with any bright sunny photos. For my layout I chose a few photos of my daughter Body-boarding at the beach.
Finally I printed some journalling onto some yellow cardstock and added this to the bottom left corner of the layout.
Wednesday, 1 June 2022
May Papermaze Kit - Part 2
Lynn
here today, with my second pair of layouts made using the May Papermaze Kit - A pretty mix of soft
colours with a variety of themes. Available from Vanessa both in the store or online.
Before details of how to make the layouts, here is a look at what is in the kit, but for full details please see Part 1.
Happy Birthday - Catherine's 30th birthday in March and a trip to Greenwich to celebrate with the family.
I started by gutting and measuring papers to make the double frame for this layout. For this I used both the 'No Limits' papers - I cut the 'Nebula' paper (dark green side up), to 27.5cm x 27.5 cm and gutted it to make a frame of 2.5cm deep. I placed this over the 'Latitude' paper at an angle and marked with pencil through the gutted frame. I removed the frame and gutted the centre of the striped paper, to take away the area which will be covered by the Bazzill later. This gave me plenty of both papers to use later.
I trimmed the White Bazzill to measure 23cm x 23cm, and decorated it with some stars. I used an Echo Park Birthday Stars Stencil and a selection of colours of Distress Inks to match the papers, and a stencil brush.
I printed my photo in a large format and mounted it onto some 'Latitude' paper (Mustard side up).
I cut stars in various sizes from the scraps of 'Nebula' paper, inked the edges and arranged them down the left side of the photo, with a few at the top right of the layout and a large star to the bottom right of the photo. Some of these were glued straight down, others were raised with 3D foam pads.
I wrote my journalling beneath the photo.
The title was made with a Tim Holtz Sizzix BIGZ XL alphabet die 'Handmade', cutting each letter twice - once in the stripe scraps and again in the dark green scraps. These were offset to create a shadow, and placed to the right of the photo.
Finally I added embellishment with the wooden star buttons and Sparkletz star gems from the kit. I added a touch of sparkle to the stars with Nuvo Glitter Drops in Silver Moondust.
Family Reunion - Our first family get together in 2020 after the second lockdown, little did we know we wouldn't be able to all be together again that year!
I
used a sheet of smooth White Bazzill for the base of this layout and
set about creating a background with some multi-media this time.
First I used a Tim Holtz Layering Stencil (Dot Fade THS006) and Distress Oxide Inks
(Iced Spruce and Dried Marigold). With more Distress Oxide inks (Broken
China and Spiced Marmalade), each mixed on the craft mat with a little
water and flicked over the page.
Once the page was dry I used some Stampers Anonymous Tim Holtz stamps from my collection and a Black Tuxedo Memento Ink Pad, to stamp the film strip and numbers top left of the layout.
I created lots of layers behind my photo and fanning out across the page. The edges of the papers were distressed. I used Mushroom Forest cutting two pieces - 15cm x 15cm (mushroom side), and 13cm x 13cm (stripe side). I cut a piece from 'Snailed It!' using the plaid side cut to 11.5cm x 9cm. Then I cut a smaller strip from this paper (snail side up) to add to the mix.
I cut two small tags using Tim Holtz Tag collection die set using scraps of 'Latitude' and 'Simply Spring' papers. I finished these off with some jute twine, tucking them among the papers and adding some journalling.
I used Tim Holtz Sizzix Thinlit die - Simple Plaid to cut the orange side of the 'Simply Spring' paper and placed the die cut piece to the top left of the arrangement.
I
created the word 'family' for the title with Tim Holtz Sizzix Thinlits -
Alphanumeric Tiny Type Upper and some black cardstock. The Word
'reunion' was stamped with Tim Holtz Cling Foam Alpha Stamps. With the
little banner stamp from the kit and the Memento ink I stamped the shape
in three places, writing the date in place later.
With Tim Holtz Sizzix Thinlits Funky Foliage die set, I created mushrooms and leaf fronds tucking these all around the photo. I cut another star from the 'Nebular' paper, and placed this near the top of the arrangement. I used the washi tape from the kit above and below the papers.
I
further embellished the layout with more items from the kit - the
exclusive acrylic leaf shapes, the strip of pearls and the puffy gold
sentiment stickers (which includes the hearts).
That's all from the May kit, I will be back soon with a new kit for the month of June.
Thanks for looking
Lynn x


.jpg)
.jpg)
.jpg)
.jpg)