Showing posts with label Paige Evans Cut File. Show all posts

Wednesday, 29 January 2025

Simple Stories ~ For the Record #2 💛

Hi everyone, it’s Anna back with you today. 
I’m here to share my second layout I’ve created using Simple Stories For the Record. 
You can find the collection in the shop - here

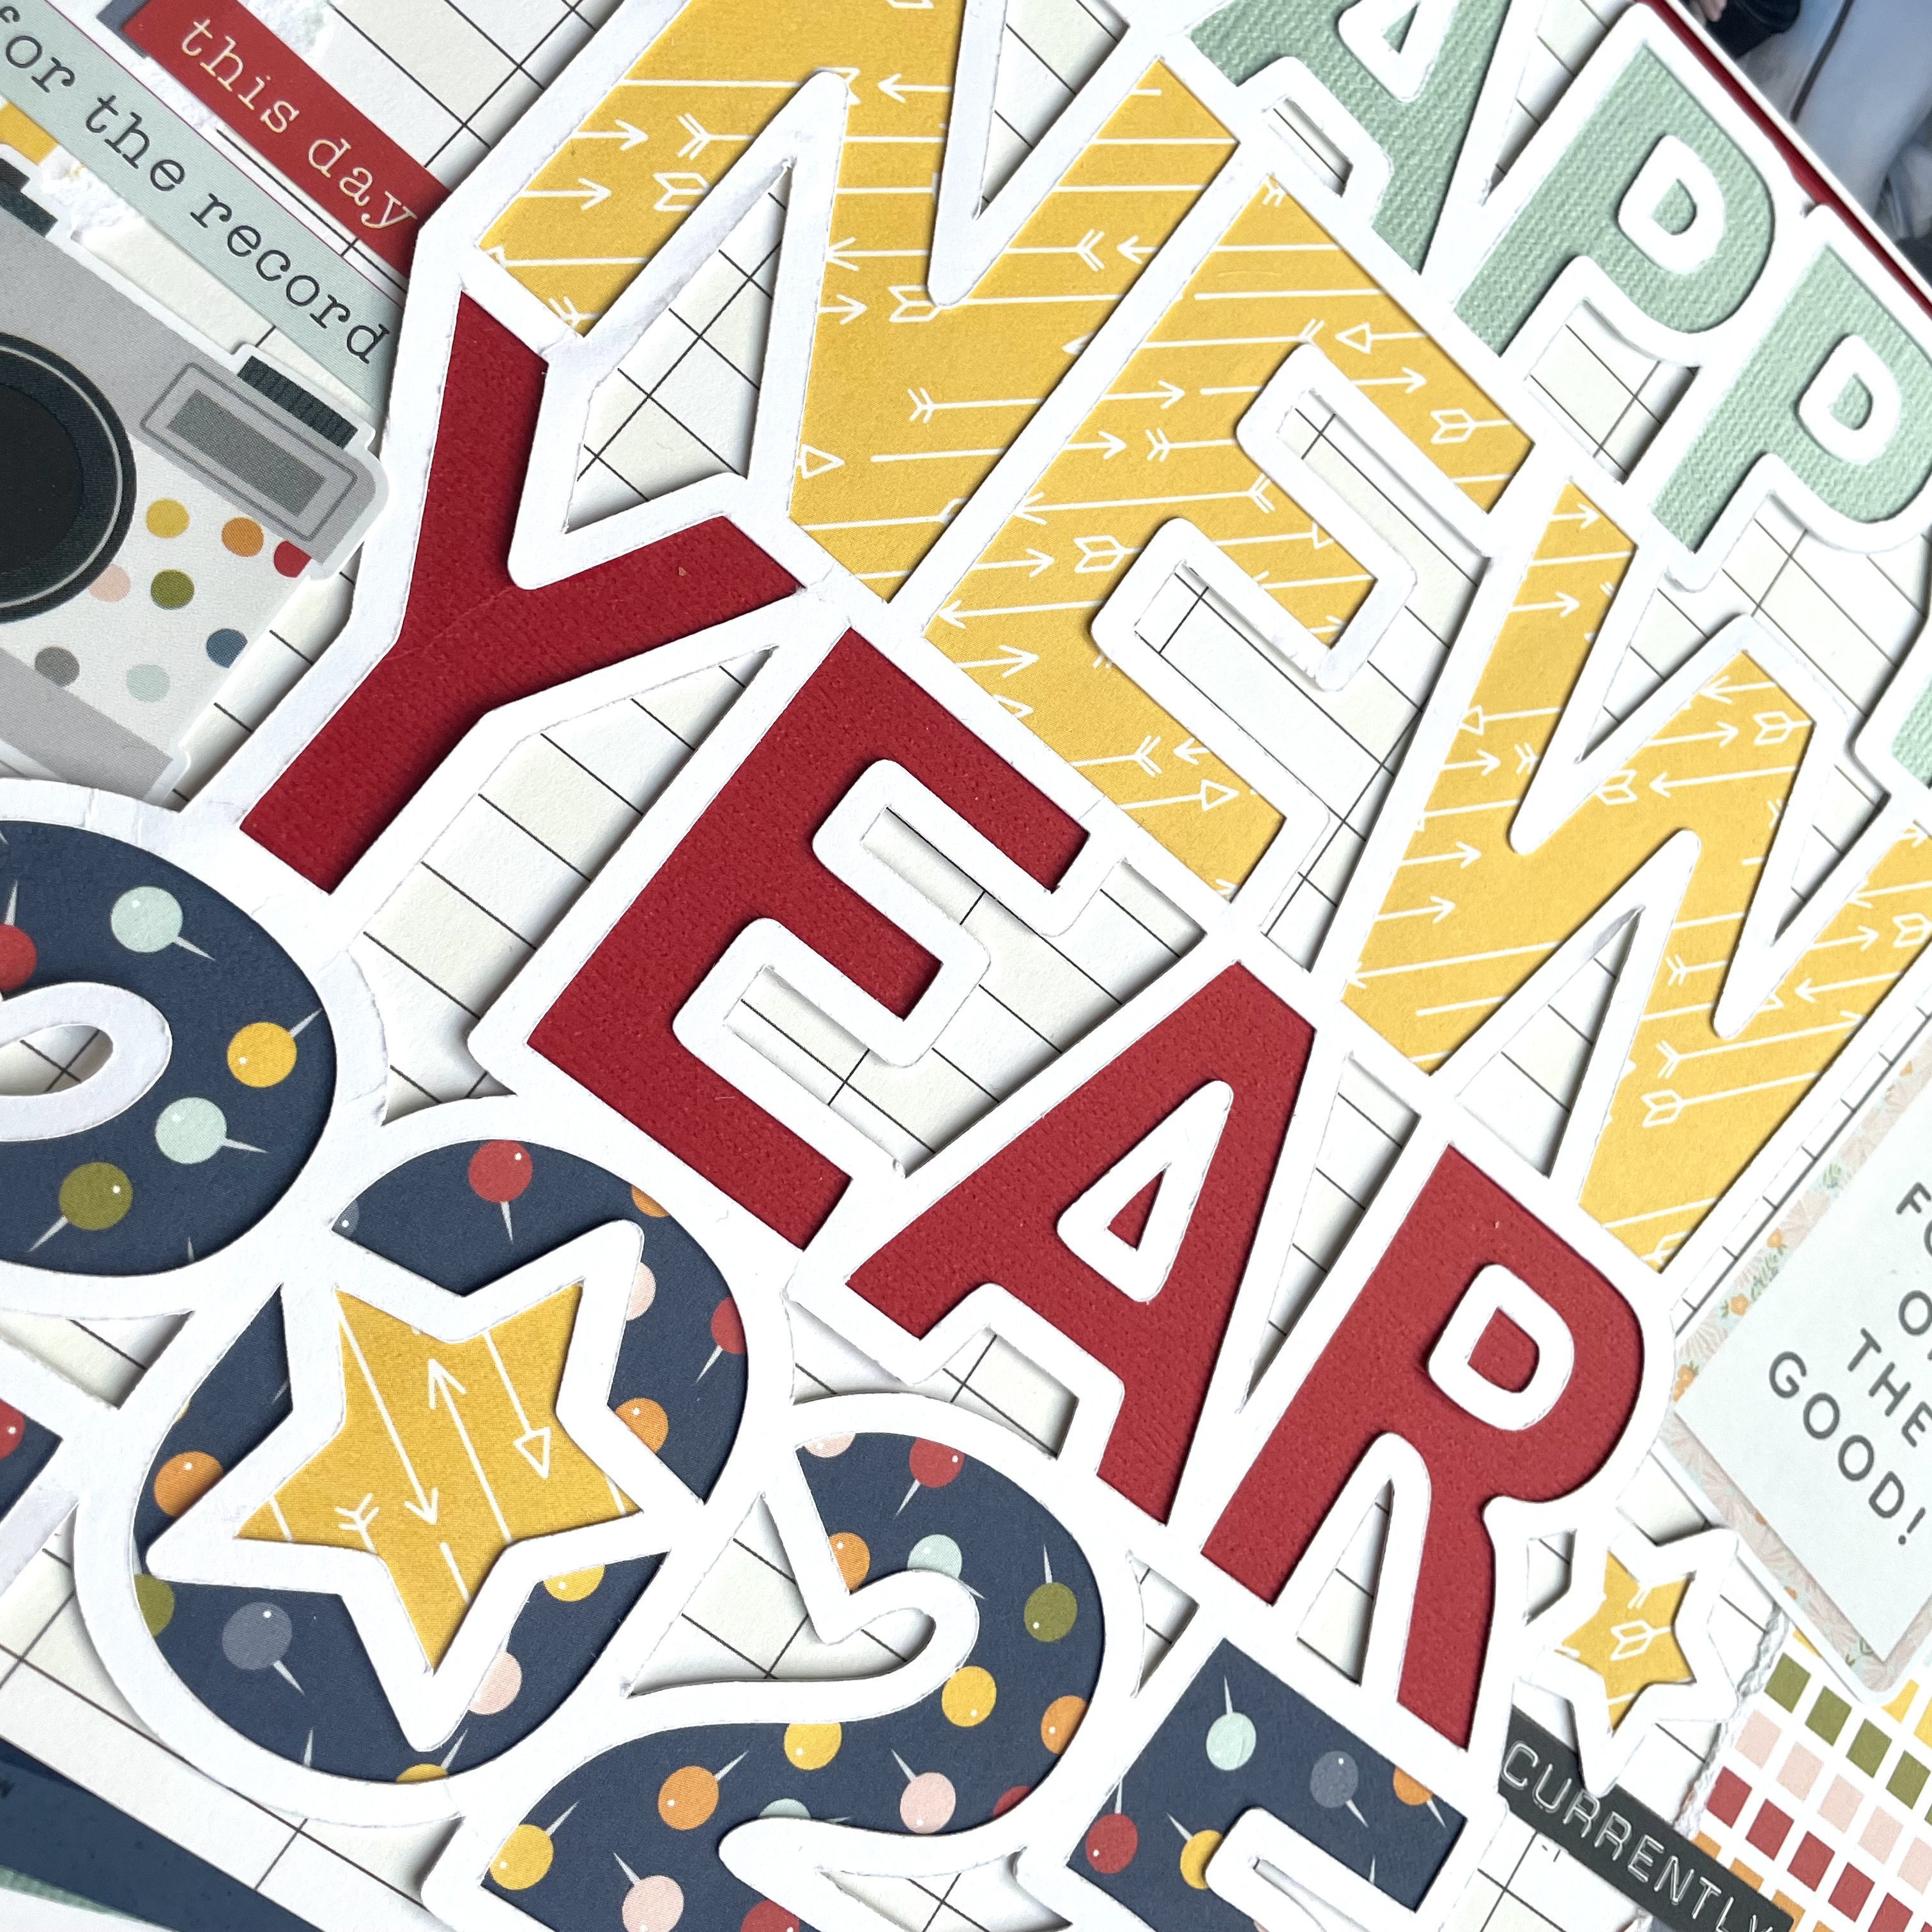
For my second layout I am creating a title page for my 2025 album. I like to use a photo from around the start of the year and create a page to have at the front of my album. There are lots of yearly themed cutfiles which will help you document this, alternatively you could create your own large title with alpha stickers


I used the b side of ‘Don’t forget this’ as my base. I then tore two pieces of ‘It’s all good’ and adhered a piece to each side of my layout. 


I used a cutfile ‘Happy New Year 2025’ by Paige Evans. I backed all of the letters using ‘the best part’ and ‘Just the Details’ as well as some coordinating cardstock


I adhered it to the centre of the page and mounted my photo in coordinating cardstock. 


I added cardstock stickers in three clusters to balance the layout. 


Thanks so much for looking. See you again next month!

Anna 

@acraftylifewithanna 

Friday, 3 May 2024

Simple Stories ~ Just Beachy #1 ☀️

Hi, it’s Anna back with you today! This month I’m working with the fabulous, bright and summery ‘Just Beachy’ collection by Simple Stories. 
You can find all of the lovely pieces in the collection here


For this layout I’ve used a grid cutfile by Paige Evans. I love to create grid layouts and a grid style cutfile is right up my street too!
The cutfile did have an additional two images on it, but I trimmed those off so that I could get in a couple more pictures! I have so many photos from our Florida holiday, I need to get in as many as I can on my layouts! 


I started by printing out the pictures I wanted to use in squares and mounting them to the empty square sections of the cutfile. I then backed the images in the cutfile using patterned paper from the collection as well as coordinating cardstock. 


Once my cutfile was complete I adhered it onto bazzill cardstock, which was also in the cardstock matchmaker pack. I am normally a white background kind of girl, but I fancied trying something bolder! 


I then added a few pieces from the Bits and Pieces pack dotted on the grid around the photos.


I added a journaling circle from the Pretty Little Studio Good Vibrations Die Cuts, which fitted in the middle of the sun perfectly. I will add my journaling to this space. 


Thanks so much for looking!
 See you later in the month with another layout using this collection.
 
 Anna 
X

@acraftylifewithanna

Monday, 18 March 2024

Simple Stories ~ Noteworthy #2 🖊️

Hi all! It’s Anna here, I’m back on the Papermaze blog this month sharing what I have been working on using Noteworthy by Simple Stories.

You can find it in the shop here.

This is my second layout using this collection. You can find my first layout here.


I wanted to create a title page for my 2024 album. So I went in search of a 2024 cutfile and I found this one by Paige Evans - ‘Happy New Year 2024’. 


I backed it using various patterned paper from the collection along with bazzill cardstock from the matchmaker pack. 


I trimmed the reverse side of ‘November’ in half and then in half again to create two equal strips. I made the edges a bit distressed by tearing and carefully rolling back the paper, I then adhered these to either side of the page. 


I mounted my photograph onto some coordinating cardstock from the matchmaker pack and adhered it along with the cutfile to a sheet of cream 12x12 bazzill. 

I used various stickers from the cardstock stickers as well as the journal bits and pieces to embellish my page. 


Thank you so much for looking! 
See you again next month! How is it nearly April!? 

Anna 
X

Monday, 4 March 2024

Simple Stories ~ Noteworthy #1 🗒️

Hello everyone and welcome back to the Papermaze blog! 

March is here and this month I’m working with Noteworthy by Simple Stories. It’s a gorgeous collection which features a sheet of patterned paper for each month of the year, with cut apart pieces. The reverse side is a patterned paper. So it makes the papers really versatile! I love to use the monthly cut apart pieces in my year albums. 

You can find the whole collection in the shop here


At the end of the year I like to create a year in review page, so for 2023’s page I have created a layout using lots of grid photos and a cutfile by Paige Evans. 

I backed the cutfile using the b sides of the various months of the year patterned papers. 


I used the b side of ‘February’ as my base.


I used an app on my phone to create grids of photographs from throughout 2023 and arranged them all together on my page. 


I then used the journal bits and pieces and cardstock stickers to embellish my layout. 


These style pages are a great way to reflect on the year and give opportunities for adding lots of photos that you might not of scrapbooked. 
Why not give it a try?


Thanks so much for looking. See you later on this month with a second layout using this collection. 

Anna
X

Friday, 1 March 2024

February Papermaze Kit - Part 2


Lynn here today with a second pair of layouts using the romantic Papermaze Kit for February.
I have used the red and pink papers this time, and created a bold and a delicate layout with embellishments from the kit and a few from my own stash.


Here are the details of what you will find in the kit:


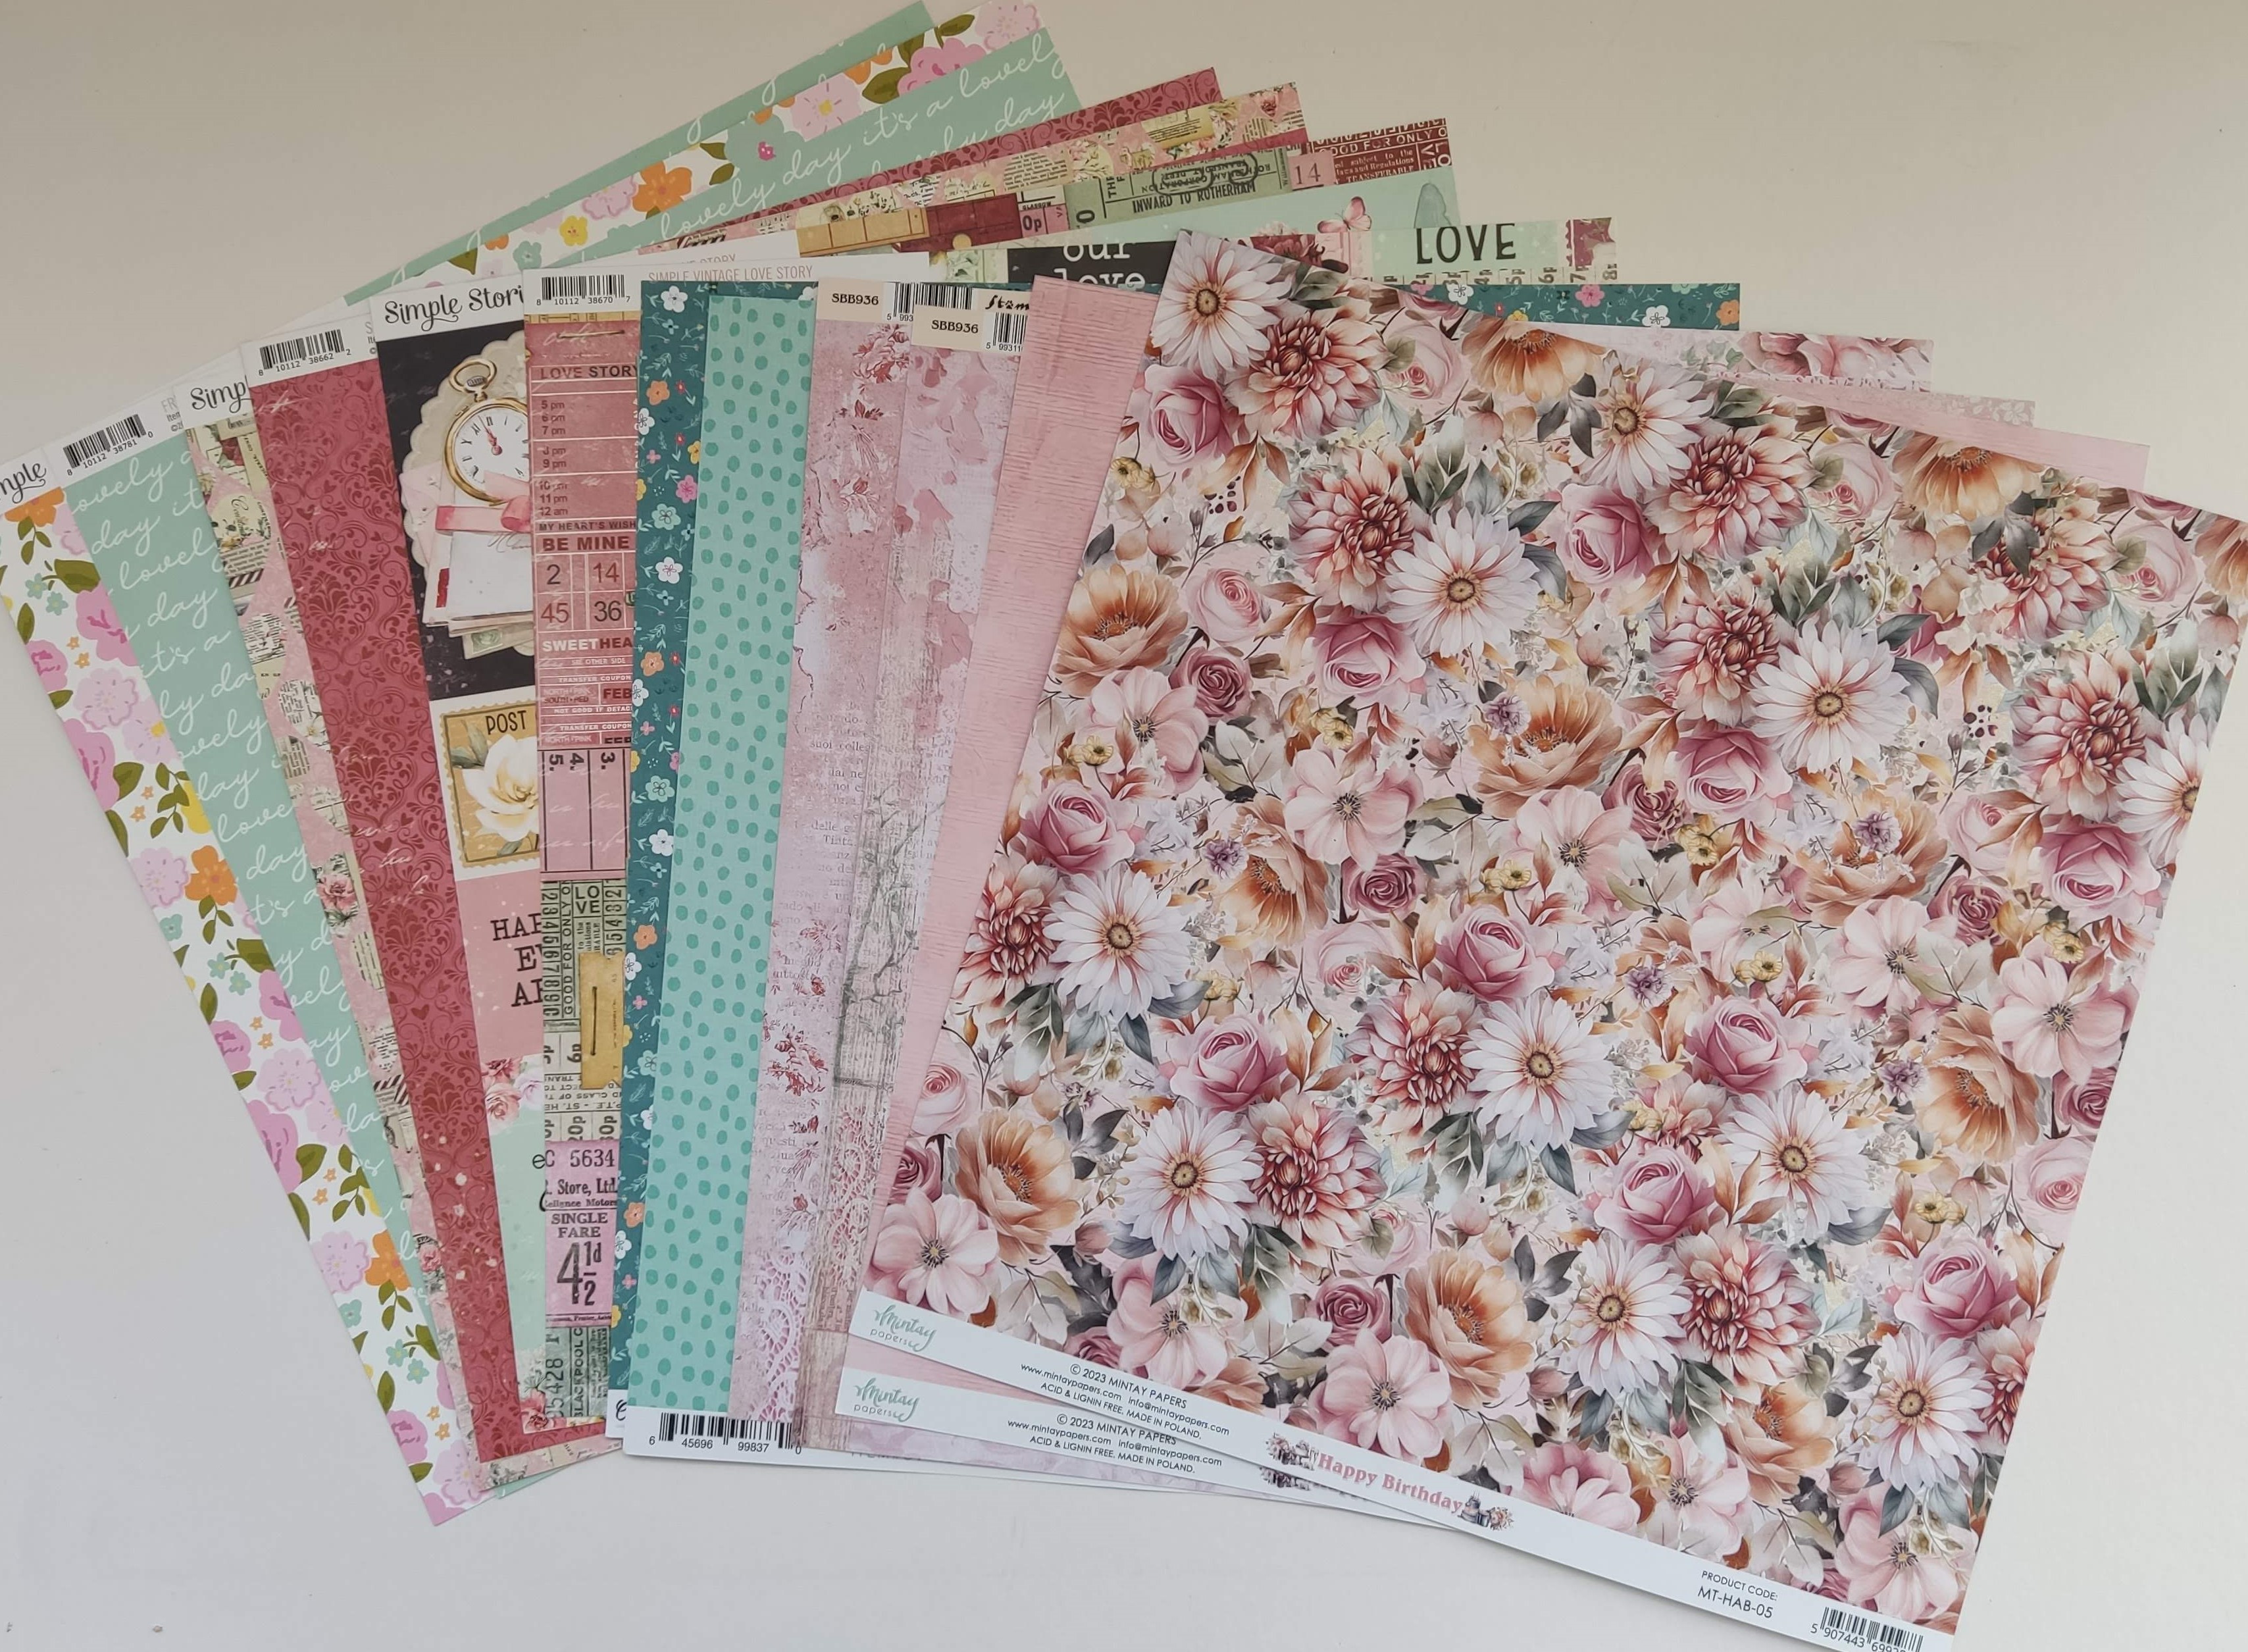
Patterned Papers: (The photo below shows both sides of the six papers)
Mintay Papers - Happy Birthday collection - MT-HAB-05
Stamperia - Roseland collection - Flowers
Simple Stories - Simple Vintage Love Story collection - 2x2/4x4 Elements & My Heart
Simple Stories  - Fresh air collection - Fresh Start
Cocoa Vanilla Studio - Happy Days - Little Blossom


Bazzill Basics Cardstock - Cherry Splash and Walnut Cream (included in the kit). Yukon Gold, Blossom, Flintstone and Sea Glass (extra Bazzill pack).


Embellishments:
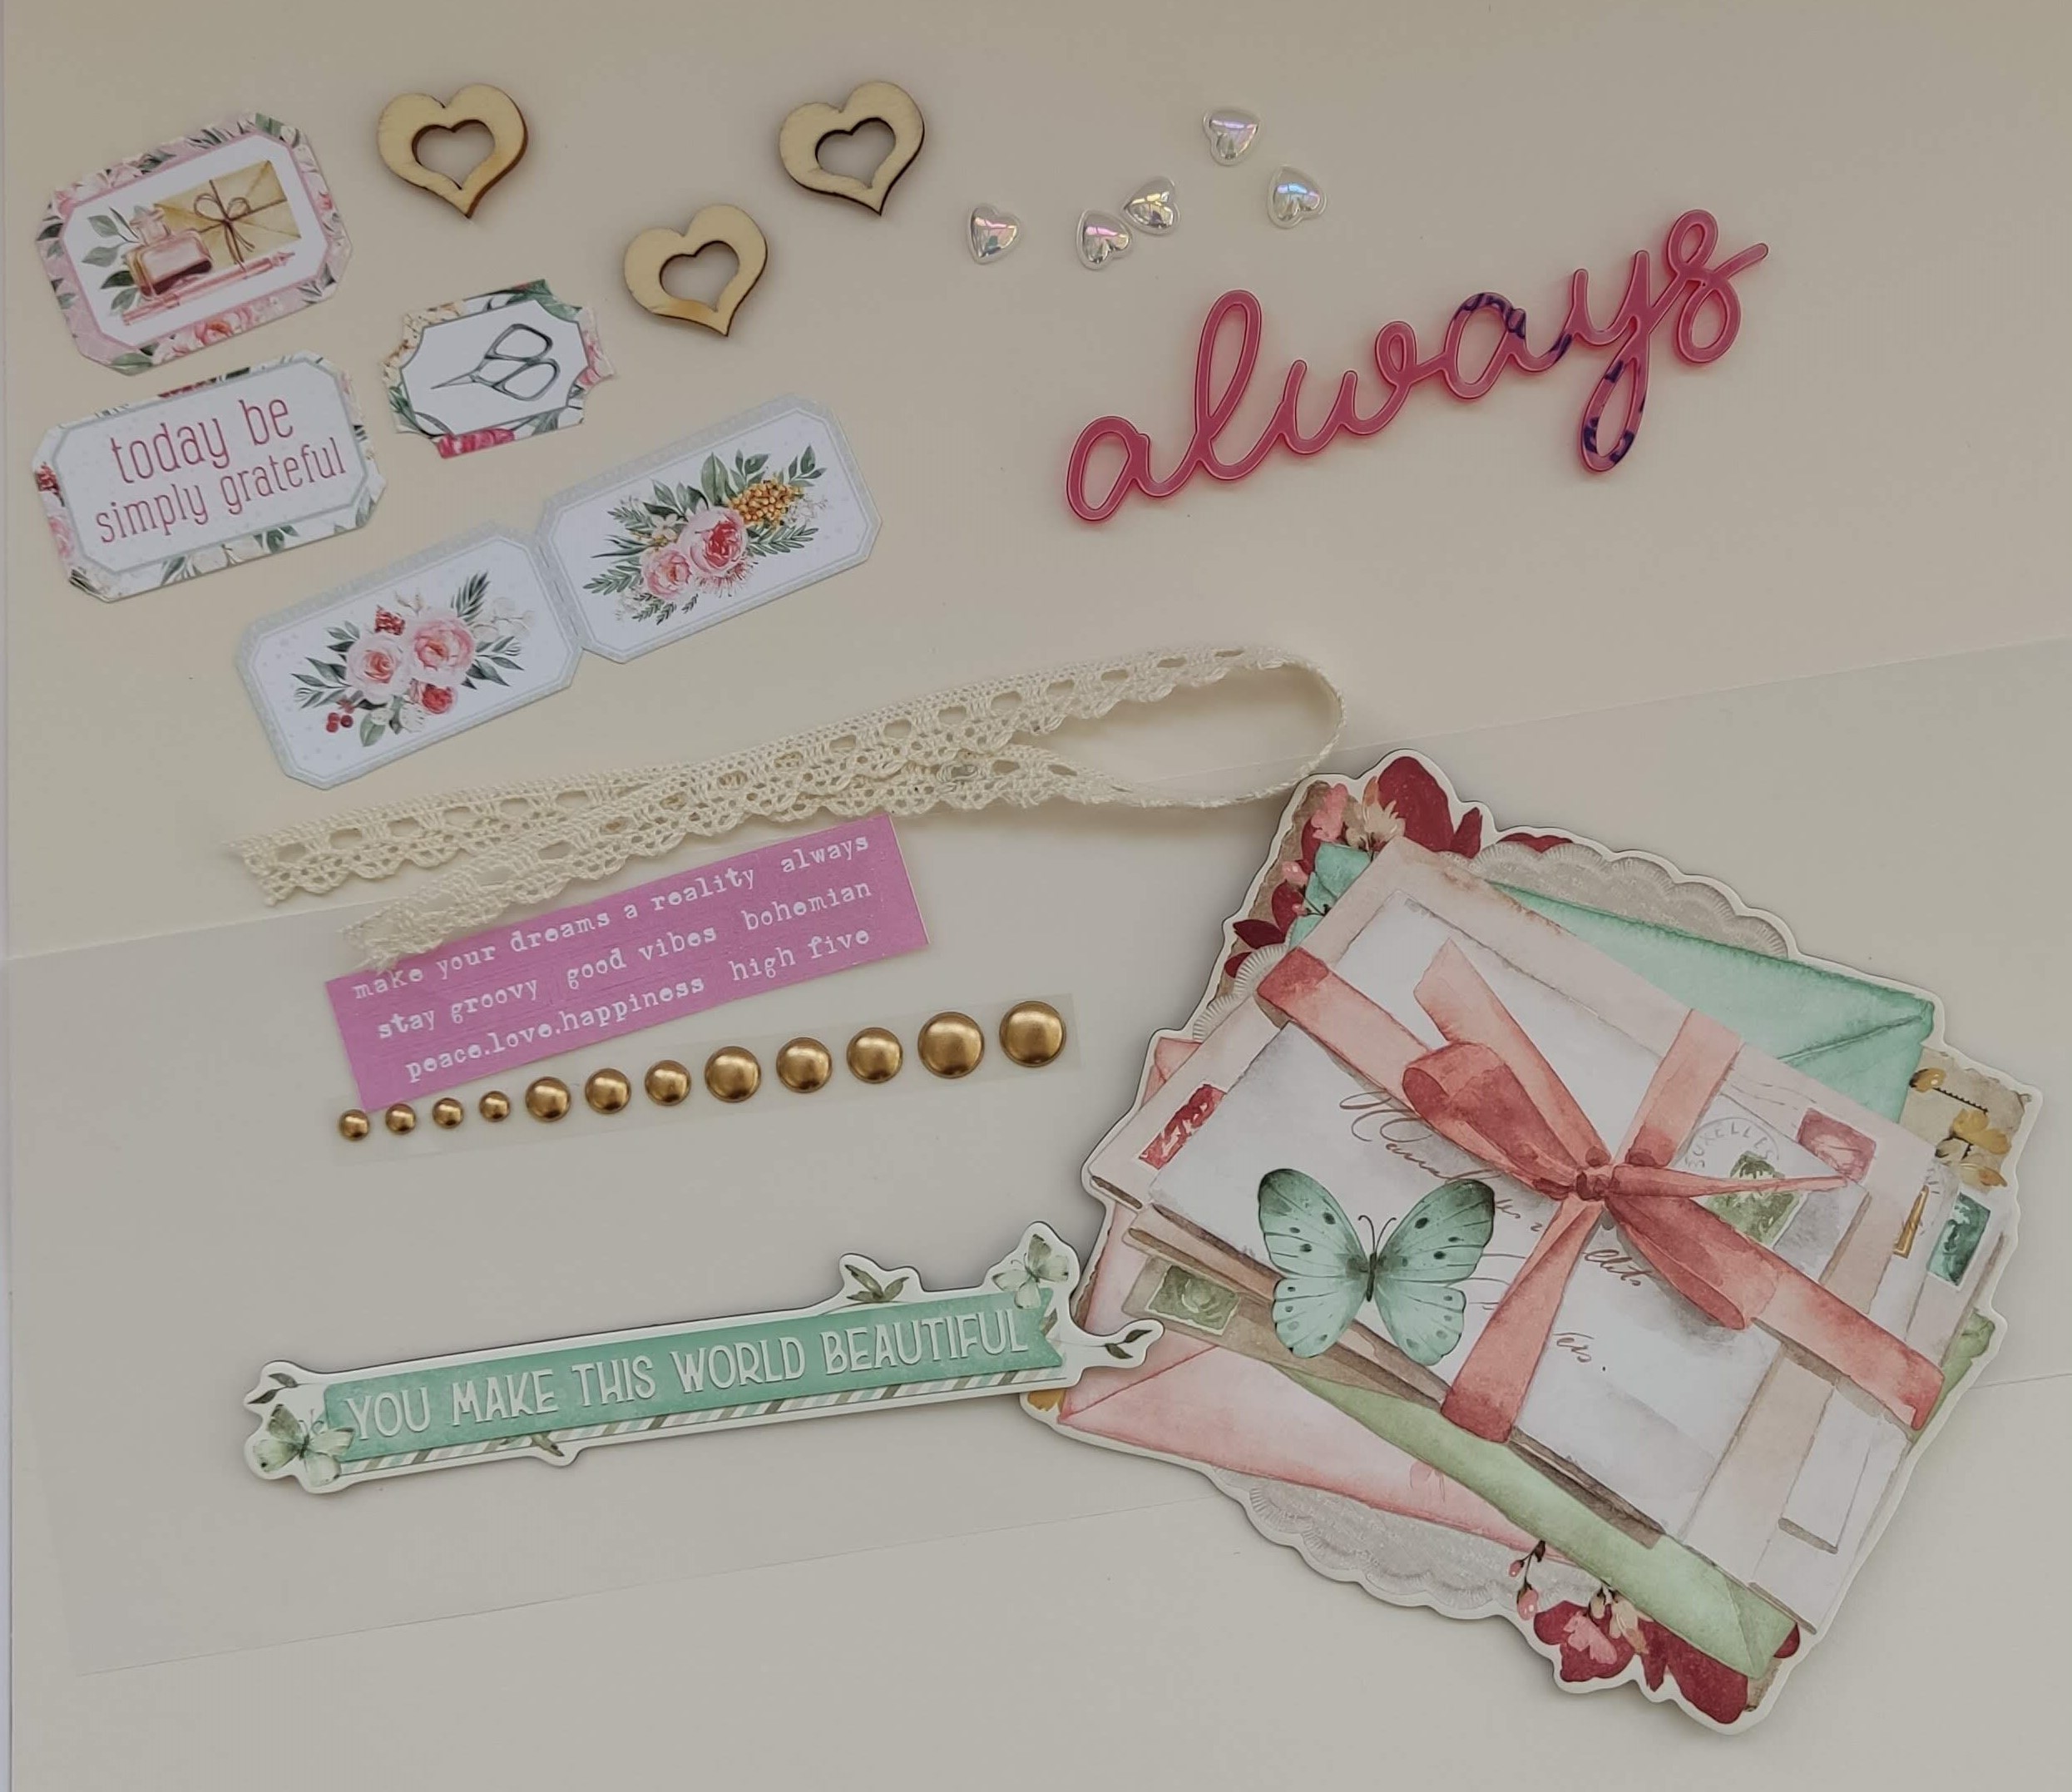
3 wooden hearts, 12" lace, 5 water droplet unicorn hearts, 1 exclusive acrylic word, vellum, 2 Simple Stories Chipboard Clusters, 1 strip of Pinkfresh enamel dots, 5 P13 tickets and a selection of word stickers.


Cutest Couple - My daughter and her boyfriend at the school prom, declared to be the 'Cutest Couple'.


This layout was made using a Paige Evans cutfile and her inspiration. I chose the bunch of balloons as I wanted to highlight the balloons in this rather poor quality photo (the only one we have of the event). I cut the cutfile from the Cherry Splash Bazzill.


I backed the cutfile with both sides of the 'My Heart' paper. Then I cut four extra balloons from the same paper, scored a fold down the centre of each one, then attached them over the cutfile by adding glue to the fold only. Then I tucked some 3D foam under each side to raise it up from the base layer. 


I placed the balloons onto the 'Happy Birthday' Mintay paper. I tied Divine Twine to each balloon then gathered them into a bunch and tied them with a ribbon. The bow was then glued to the page.


My photo was placed to the bottom left of the layout. My title was created with Thickers 'Be Kind' foam letter stickers. 


I cut images from the elements paper (butterflies and phrases) and attached them to the page and balloons.


I wrote my journalling on one of the balloons.


The Marriage - This layout shows a photo from my parents wedding in 1957.


Both sides of this Stamperia paper are really beautiful but I went for the less busy side, with all it's pretty lacy patterns. I placed the lace from the kit across the paper, about 3" up from the bottom.


I place the photo in the centre of the paper. Then set about fussy cutting, birds, letters and books from the 'Elements' paper. I inked around the edges, and layered them around the photo.


I cut two oval shapes from the vellum in the kit, I wrote the wedding details onto them with a dark pink pen. Then I placed these either side of the photo, above the cut-outs.


I added the P13 tickets, cascading down from the base of the cut-outs. Then I tied three bows in some delicate, pale pink, seam binding ribbon. These were arranged on the page, one to appear as if it was tied around the watch winder.


I found some heart shaped paper clips in my stash, and added these to the photo and the cut-outs.


Finally, I added the gold enamel dots in clusters of three about the page.


That's all from the February kit. Please see back in a few weeks for the first post using the March kit.
Thanks for looking.
Lynn x

Friday, 23 February 2024

Carta Bella ~ At Home #2 🏡

Good morning everyone and welcome back to the Papermaze blog. 
It’s Anna back with you today and I’m sharing my second project using Carta Bella’s At Home Collection. You can find it in the shop here


To create this layout, I used the following:
Carta Bella at Home - wonderfully beautiful 
Carta Bella at Home - 3x4 journalling cards
Carta Bella at Home - Good morning moths
Carta Bella at Home - Beautiful chaos flowers
Carta Bella at Home - Bursts of Love
Carta Bella at Home - Simple Things Signs
Carta Bella at Home - Bazzill Matchmaker Cardstock 
Carta Bella at Home - Element Stickers


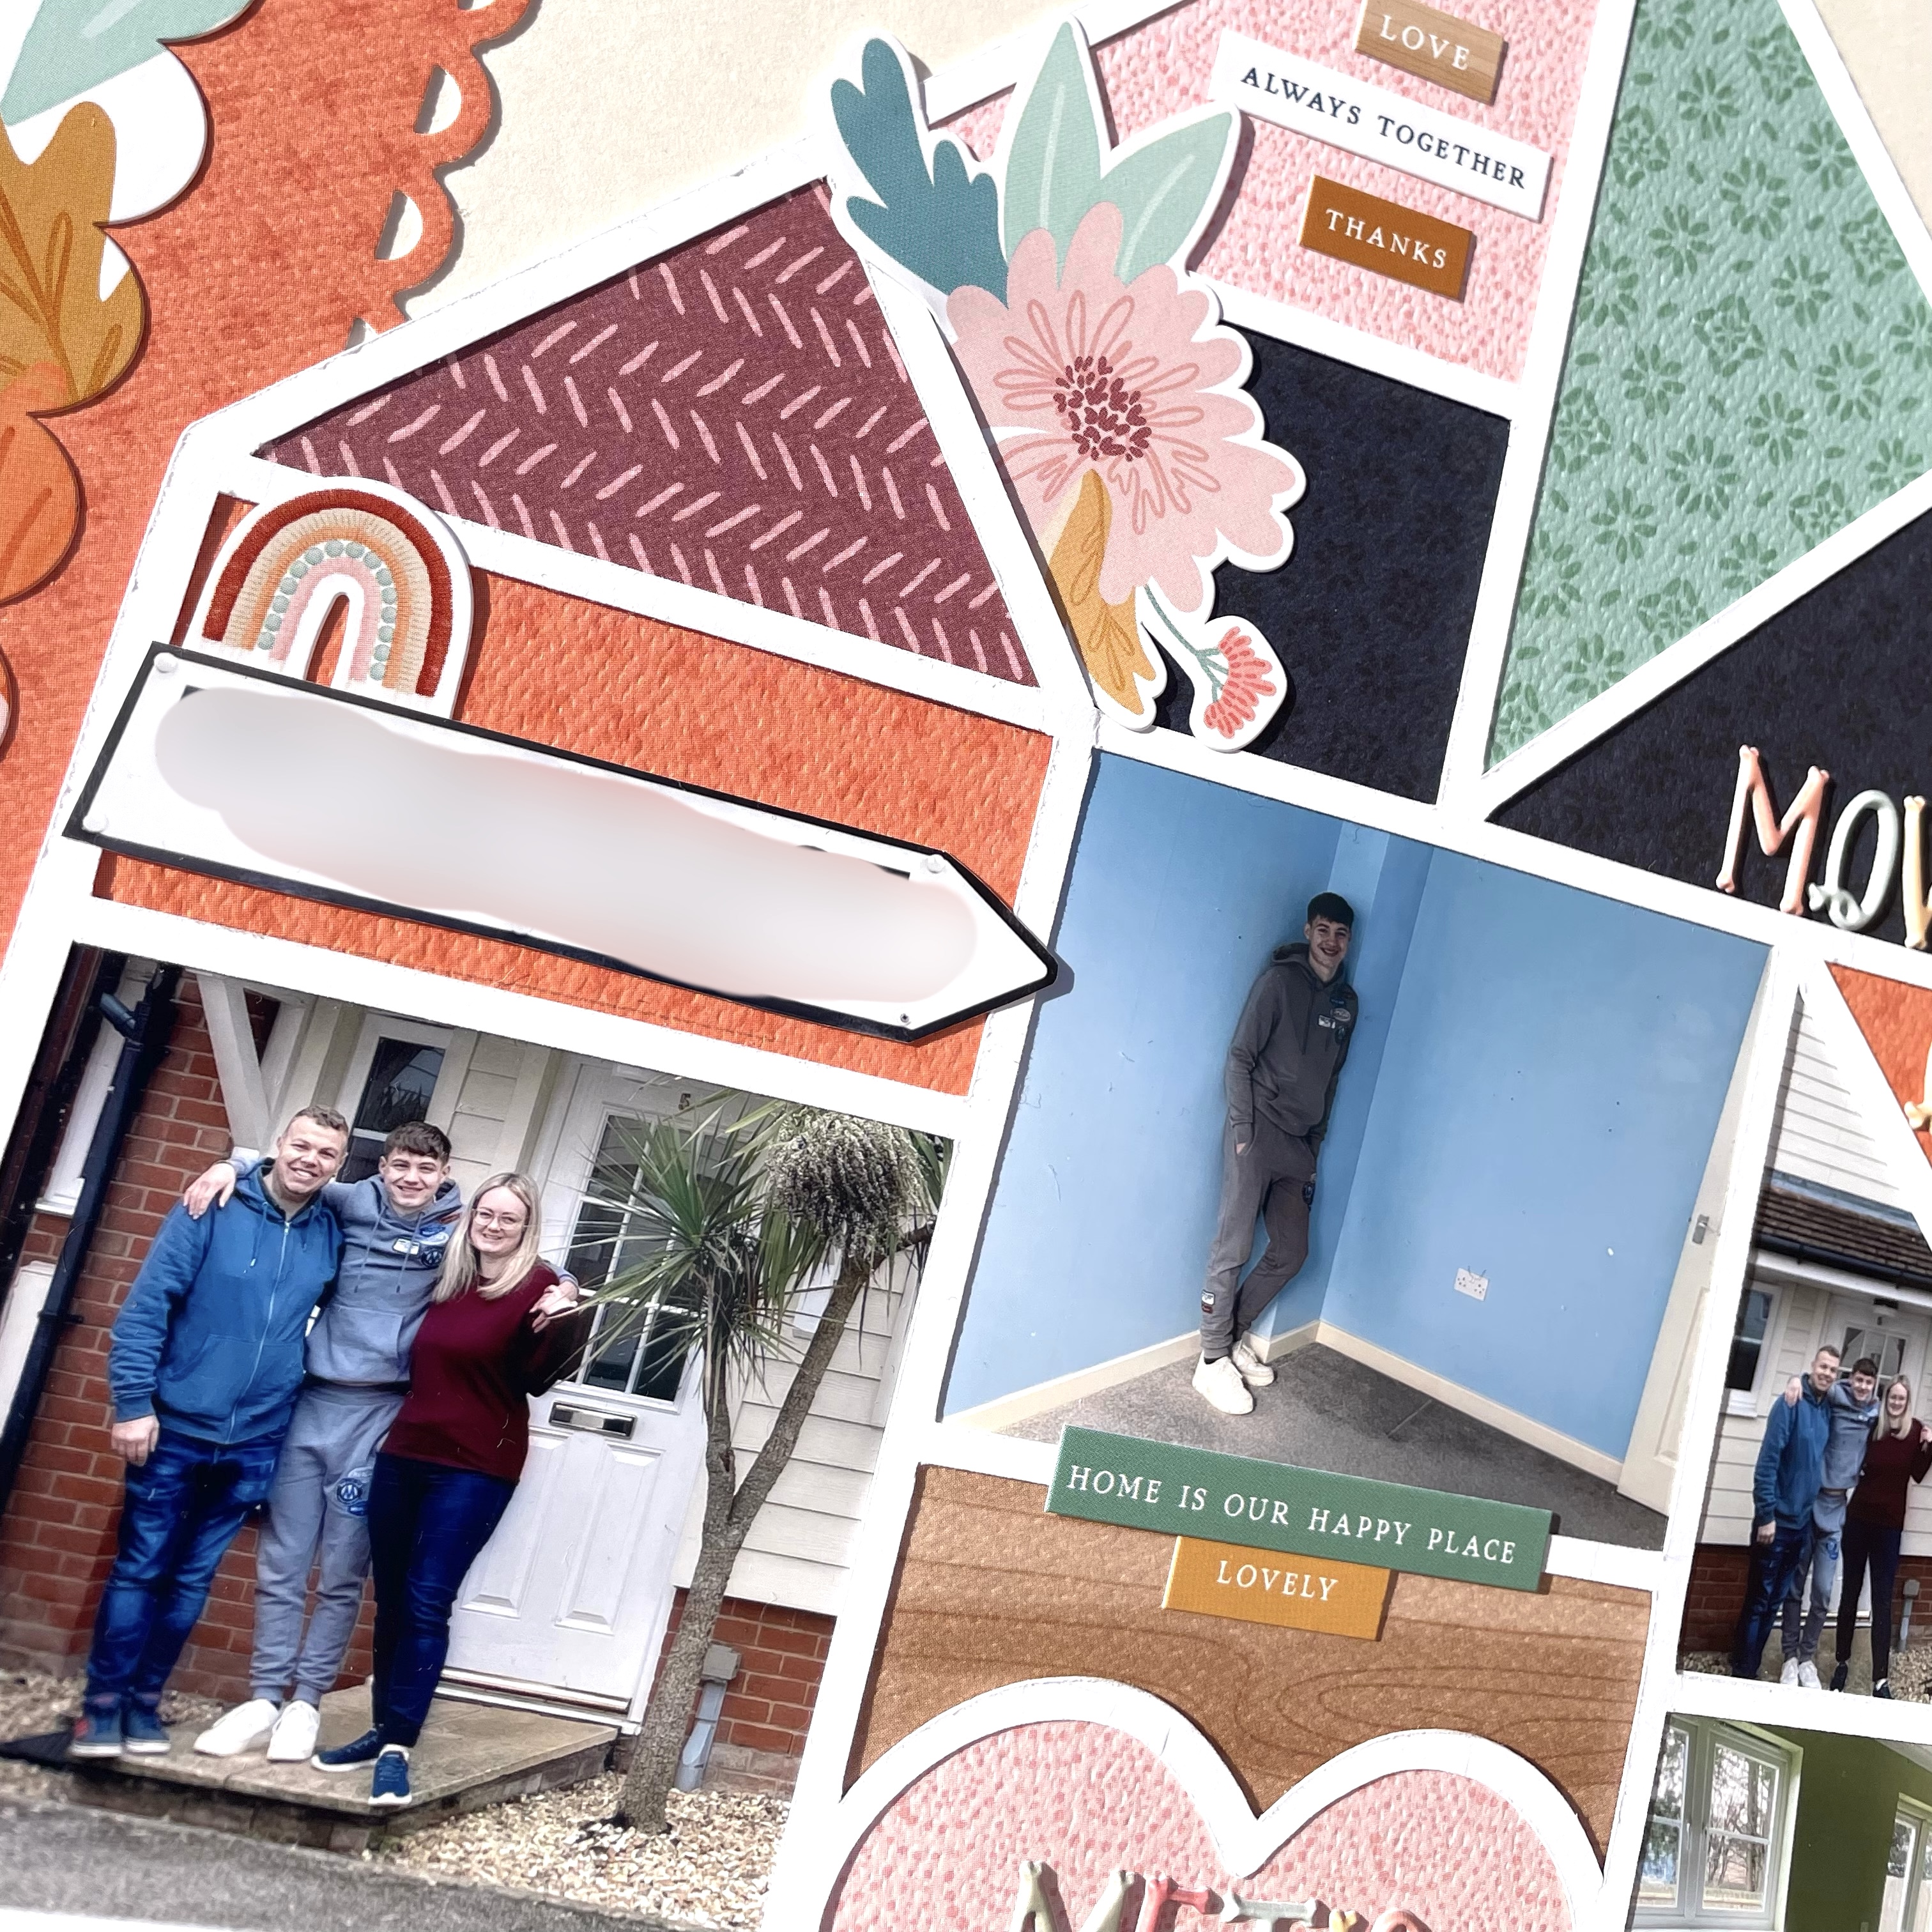
I began by cutting out a house cutfile by Paige Evans. I knew that I wanted to back each of the sections with photos and some of the patterned papers from the collection. So I worked out which pictures fit in where first before filing the rest with the patterned papers. 


I mounted my finished cutfile onto some bazzill cardstock which I had added some patterned papers to the left hand side as well as a boarder sticker. 


I used several stickers from the Element Stickers to embellish my page. These were tucked in and around my cutfile house. 
I added a title and subtitles with some mini alpha stickers by Cocoa Vanilla Studios.


Thanks so much for looking! 
See you next month when I’ll be working with Noteworthy by Simple Stories

Anna
X