Showing posts with label Gel Medium. Show all posts

Friday, 26 May 2017

Bo Bunny - Kiss The Cook (Mini Album)

Hello - Lynn here today - back with more of the Bo Bunny 'Kiss The Cook' papers. The collection inspired me to make a cookery book for all my tried and tested cake recipes. I have been looking at 'You Tube' videos for creating albums. I love the idea of paper engineering to make something that is practical and appealing.


I added a few sheets of 'Kiss The Cook' paper to those I had left over from the layouts I made earlier in the month, I also had some Combo Stickers left and added a pack of Noteworthy Die Cuts
The album required some mat board, Black Bazzill Cardstock, magnets, Golden Gel Medium (Matte), Creative Expression Cosmic Shimmer Acrylic Glue and Black Duck Tape.
For the tabs I used Sizzix Tim Holtz Alterations Bigz Die - Tiny Tags and Tabs.

I took much inspiration from the work of Zannerol and Katy Orta King on You Tube, before setting about making my version. Here is a bit of a pictorial step-by-step, including the measurements.


Cut Mat Board with a craft knife - 2 pieces for the back and front of the album (6.75" x 9.5") & 1 piece for the spine (1.5" x 9.5").
  

Using Duct Tape, this is strong and will also provide a water resistant finish - useful in a kitchen! For the inside of the album, butt the front and back to the spine and tape together.


Tape all around the edges to give a neat, protective finish. Cut notches where the folds show on the outside to give flexibility. Outside shown above and inside shown below.


Close the album so the spine is stretched before adding tape.


Tape the outer spine, you can see a book placed inside the album at this point to hold the spine & covers in position.


Depending on the number of pages you want in you book cut the cardstock - To make 9 pages (total of 18 pockets). Cut 9 file pieces 8" x 6" and score at 0.5" and 4.5". Cut 1 end piece 4.5" x 6" and score at 0.5".


Stick the 0.5" tabs to the next file until they are all joined and add the end piece, concertina style - see above and below.


Mark positions for the tiny magnets and stick into place inside each file. These will be covered by the decorative papers later.


With the Sizzix die cut tabs from scraps of black cardstock left over from files. Add small pieces of white card inside and glue into place at the top of each file. Front shown above and reverse shown below.


This last flap will be used to secure the files into place at the bottom of the inside cover, The back pocket will cover this join and help keep it secure.


To decorate, cut papers to fit the back, front and spine and arrange pieces from the pack of die cuts, stickers and also images cut from the papers. Stick images in place with Gel Medium, and seal by painting this over the images. Again this will help make the album water resistant for use when cooking. Allow time for this to dry before attaching to album.
  
Front Cover

Back Cover

Add some detail with a black and white waterproof markers.


Decorate the inside by making pockets using more cardstock and decorative papers. Each file can be flipped down to reveal the recipe you need. The magnets hold the others out of the way. 


Cut smaller pieces of patterned papers to cover the files. These can then be decorated with photos, images and recipes.


Print or write out general information sheets like this to store in the pockets.
The photo above shows the reverse side of the files - yet to be decorated. The whole file system is held in place with more magnets.


This is a work in progress, and I will add to the album as I discover new favorite cake recipes. I have already cut enough pieces of paper to cover the rest of the files. and I have an envelope of die cuts, stickers, items I have cut out, photos and recipes ready to continue.


I hope this has inspired you to have a go at making your own album, for photos, recipes, journalling or another purpose.

Thanks for looking.
Lynn x

Wednesday, 22 March 2017

More Fun With PaperArtsy (JOFY) Stamps

Hi, Lynn back with another post for March, still using the same PaperArtsy stamps and technique as before, but decorating a different IKEA product this time.


I had a few old KNUFF magazine folders left empty when I sorted out some craft magazines. These were looking a bit tatty so I decided to treat them to the same technique as the bead chest I decorated at the beginning of the month. I made a start by allocating one to each colour of my stash of A4 coloured papers and cardstock.


I gave each box a light rub down with sand paper and then treated it to a quick coat of off-white acrylic paint. I kept the base plain this time as I wanted to dedicate each box to the colour of the papers it would store - I intended to display the colour in the images rather than the background.


The next step was to stencil (PaperArtsy) some images with Distress Paint. Then once this was dry I added stamped images and letters onto the box and the cartridge paper. 


The images on the paper were painted using Distress Inks and Markers, with a brush and water. I cut them out and used Gel Medium to stick them to the boxes. The finished boxes were treated to a covering of the Matt Gel Medium to protect them.

The boxes were finished off with a little sparkle from Stickles and texture and shimmer from Liquid Pearls.


This will be an ongoing project, I have completed some and others are in the process of being completed - but you get the idea. I will add photos to this post as I go - so pop back later to see what I did with the rest.


Thanks for looking
Lynn x

Friday, 3 March 2017

Fun With PaperArtsy (JOFY) Stamps

Hi Lynn with you today - I have been having fun with my JOFY PaperArtsy Stamps. There are plenty of these in the Papermaze shop. I had all my beads and jewellery making materials in a huge under-bed storage box and it always took time to find what I wanted. I had a sort out and once I had organised the content and thrown out the rubbish I was able to fit what was left into an IKEA - MOPPE mini chest of drawers. Mine was old and in need of attention but they are still available - just follow the link.

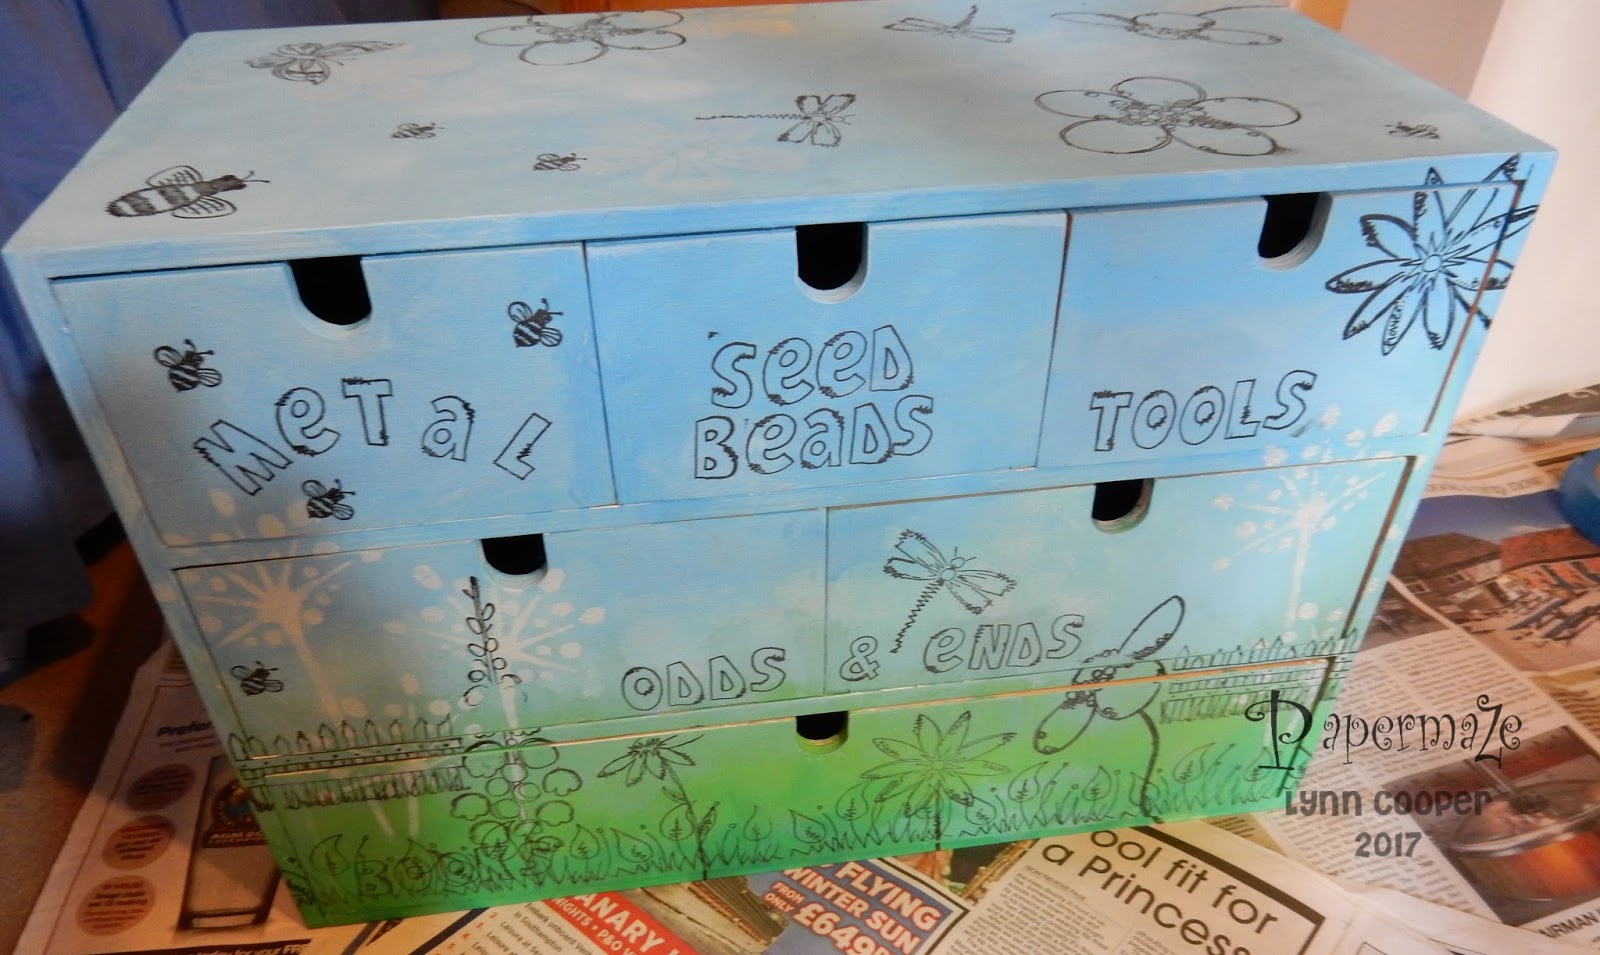
Here is my finished box - I will show you the main stages to create something like it.


Front


Right end

Left End
Top
The box needed cleaning out - it had had other craft materials and some ink had spilled and some drawers were a little glittery, so a light rub down and vacuum out. 

Then I primed the whole box with a white chalk furniture paint left over from another project. When this was dry, I mixed acrylic paint (Ranger's Tim Holtz Distress Paints) so that I could work in an Ombré effect working from green for the grass through to blue for the sky - I didn't want a defining line between the two.  This has to be done quickly as the paints dry fast. I sponged in a little white to suggest clouds. Using PaperArtsy JOFY stencils I added some wild grasses with the white paint.


Once this was dry I stamped the images I wanted onto the box -  this was tricky over the draws but I didn't worry too much as I was planning to cover the images with paper ones. I wanted to stamp the images on so I had the tiny details that are almost impossible to cut from paper, such as thin stems, insect legs and antenna


As I used each stamp I re-inked it and stamped it onto a good quality cartridge paper, nothing too thick as I needed it to be easy to cut, and flexible when sticking to the box. 


Next I coloured my images using Ranger's Tim Holtz Distress Inks and Markers. I applied the ink to the messy mat and used a water mister to mix and a paint brush to colour the images. Once dry the images were cut out and pasted over the same image on the box. Where necessary I cut them where they overlapped the edges of the box or over two drawers. (Note to self: - not a great idea to stamp the very detailed fence over two drawers and a support - this was very tricky to cut out let alone paste into position!). 

I used Regular Gel (Matte) Medium, this is an clear medium which glues the paper in place and can be painted over the images to give a translucent water resistant finish. I extended this to the whole box when finished to make it more durable.

For finishing touches I added some dots with Liquid Pearls for flower centres and to create the tiny flowers in the grass. I glazed the wings and other bits with Stickles for a little shimmer.


Thanks for looking
Lynn