Showing posts with label Liquid Pearls. Show all posts

Friday, 11 September 2020

Full of Sass ..... Kate and Ash # 4

Hello again,


Anita here with you today to end the week off. This is my 4th layout using Kate and Ash papers from Simple Stories and I thought I would veer away from the bright, funky colours and patterns in the collection this time and go for a monochrome page ( with a tiny little sprinkle of colour).


So I used just one sheet of Vanilla cardstock , one sheet of Girl Power patterned paper, a left over scrap strip from another sheet ( 3 x 4 elements )   and one single cut out panel from a sheet of  4 x 6 elements

......oh yes and half a sheet of black cardstock to mat the photo and also to cut a strip for making one of the rosettes.


I am not very good at keeping plain cardstock plain..... white space scares me if I am honest....so I have to splatter, distress or grubbify as much of it as I can normally.

After cutting the cardstock down to 11" x 11" I  used an old text stamp a couple of times, splattered some black acrylic paint all across the page and stamped all around the edge creating a stitched effect frame using 49andMarket Gabi's Line Stitches set


I matted the photo using black cardstock and cut a panel from 6 x 4 Elements  which I then matted using scraps of  3 x 4 Elements 

and inked the edges. 

Using some black Nuvo Drops and some Oyster Liquid Pearls I made spotted circles randomly about the page using cups and lids etc as templates. I accidently knocked the lid and smudged several dots on the left of the page hence adding a random rosette to cover the huge smudge!! most annoying, but savable thankfully!


I really love rosettes for embellishing a page, I know they are quite lumpy but I don't mind a bump or 2 here and there. I always just used to make them from scratch by hand, but these days there are a few different die strips you can get for making them....soooo much easier!!

So I made 4 die cut rosettes for the layout using strips of each of the papers and some black cardstock and my Tim Holtz rosette strip die. After adding a sprinking of sequins on the page I also added some coloured gems to the centres of the rosettes too.


Whilst I was rummaging through my old stash for stamps and dies, I also came across some REALLY old rub on books of alphabets by a company called Making Memories. To be honest I thought they might of dried out and broken apart, however they actually still applied really well and were great for the finishing touches to the page. Quite satisfying to use stash that was 17 years old!! Maybe they will become fashionable again....after all..... fashion does go round in a circle doesn't it apparently!


I hope you have enjoyed seeing my last layout from this versatile collection...I have enjoyed making it and its been really good fun breaking out very old stash to use with very new products.


If you pop over to the SHOP there are lots of new goodies coming in all the time and great selection of older products too with some real hidden gems scattered here and there in the stock. Its always nice to grab a cuppa and have a good look round to see whats about! Have a great weekend!

Warmest wishes

Anita xxx

Friday, 29 May 2020

Furlough Fun......Stamperia Face art

Hello again!

It's Anita here to finish off the month and see May out! This year is passing ridiculously fast already isn't it!
My layout today is about our eldest daughter and the fact that whilst being furloughed from work she wanted something to do and became a Consultant for Body Shop at Home. Initially it was just for something to keep her occupied and help fill her time. I don't think she expected to love it so much, fall in love with the products and enjoy promoting them and selling to others. She has made a whole network of new friends at the same time and is having an absolute ball. She has also introduced our younger daughter to it and she has also become a Consultant too ( I can see another layout in the pipeline!)


I based the layout on a sheet of Stamperia called Face Art and I used the reverse side as I liked the repetitive lacy pattern. Before anything else, I gently sponged around the edge of the photographs with some ivory paint to soften the edges.


I like the texture of corrugated card and thought it would work well on this page, so I tore a strip to lay across the page and dabbed some ivory paint in patches and also some random dribbles of Cosmic Shimmer mists that I dragged across it.


From a sheet of Dream Writings I cut a few panels and words to scatter about the page, some
                             tucked in and others were raised on foam pads to add dimension.


I printed out some journaling strips on the printer and swiped the edges with some Antique copper mist to highlight.

Below shows the mix of Cosmic Shimmer Mists, Stickles and Liquid Pearls I used across the layout.


Aswell as dropping blobs of Shimmer mists in various places, I also used it to drag along the edges of the photos, around some of the sayings panels and also on the 2 Prima Capri Amalfi flowers. When it dried the mica glistened beautifully and really highlighted the edges.


I used the Liquid Pearls and Stickles to create circles of dots, using various lids and glasses as stencils to dot round. I like how the Liquid Pearls stay like raised little domes and once again add a little dimension, whereas the Stickles dries flatter.

I finished by adding lots of bi-colour pearls in various sizes in clusters about the page. Amazingly these arrived through the post on the very morning I was making this layout...and the colour match was perfect!


So there it is, my last page for May. I wonder what June will bring for us all. Hopefully some safer days and we will see a bit more of a return to some sort of normality. Thank goodness as crafters we all have plenty to keep us occupied and gives us a means of escape from everything else eh!

If you feel the need to treat yourself to some new goodies there are always lots and lots of lovely new products arriving in the SHOP, along with a vast selection of great products and monthly kits that are always popular......I believe the popular saying at the moment is Be Kind..... that's a great policy to have.... so why not start by being kind to yourself, you deserve a treat!!

Happy Crafting!

Warmest wishes
Anita xx

Wednesday, 12 June 2019

Grateful moments .... Stamperia Spring Botanic pt 3

Hello Crafters

It's Anita here with you today and I have my last layout for the DT using Stamperia's Spring Botanic range.

I umm'ed and ahhh'ed about what photo to use for this page,but eventually settled on this one of us with our youngest daughter on her Christening Day back in August 2000.


Based on a sheet of Spring Botanic with English Roses, I trimmed 2cms off the top and the left hand side and then inked around the edges with an old dark brown ink pad, just to define the edges.
I then placed it onto a sheet of Herbarium. I also used a stencil with some script on it and gently sponged some white acrylic through it to just add a little more texture to the background.


Using a circle cutter I took my 7 x 5 photo and cut a circle with a 5" diameter and framed it using some pretty trim that was in my DT kit. It didn't quite fit all the way round so I added some large blossoms from my stash to cover the gap.

I used the leftover part of the sheet of  Yellow Alpine Poppy and cut out the poppies and the bird on a branch and added to the bottom left and upper right of the page and a couple of the post card panels behind the photo.


I finished the page off by adding small letter stickers, Prima Planner Flowers, Prima Crystals and some chipboard word peices. I also picked a bottle of Stickles and Liquid Pearls from my stash and added large dotted circles in various places round the page.


It's been lovely working with Stamperia papers for my last few posts on here and you can find a lovely selection of them in the shop HERE along with lots and lots of other gorgeous goodies.


Happy Crafting everyone.

Waarmest wishes
Anita xx


Friday, 24 May 2019

Imagination ....... Stamperia Voyages Fantastiques

Hello again, its Anita with you today.

For this post I have worked with some more Stamperia papers, this time from the Voyages Fantastiques range. A beautiful steampunk collection combining vintage aqua, creams and browns.
I chose a photo taken back in 2006 of the four of us, we were actually taking an autumn walk on a local beach.


I based the layout on a sheet of Wallpaper 
and then took a sheet of Air Balloon . I tore the left hand side off at approx 5.5 inches and inked all around the edges, then stuck it too the left hand side of the backing sheet.
From the remainder of the sheet I cut out the balloons, wings and the adventure quote.


I love using Cosmic Shimmer Sprays and I had a good old squirt all across the page, pooling the ink in some areas and then letting them run down the page. When this dries it gives a beautiful metallic shine.

I cut various bits and pieces of paper and inked the edges, then layered them behind the photo. Some cream cotton lace was laid across the bottom of the photo.


I had a rummage through my collection of Stickles and Liquid Pearls and chose 3 colours, Dark Chocolate, Rose Gold and Platinum. Using a selection of pots and lids of different sizes to work round I added dots of each of the colours and created decorative circles in random places about the page.

In my DT kit I had a few bits and pieces of chipboard shapes, so I picked some out and then sprayed and dabbed them with Cosmic Shimmer Mists too as I felt that on this page they didn't really work staying plain.

As you can see, by adding some colour to the chipboard really makes it co ordinate with the papers.


Stamperia produce a stunning range of papers, many of which are in stock in the shop and would be great for scrapping various photos or creating beautiful cards.....why not pop along and have a look and treat yourself.

Have a great Bank Holiday Weekend..
Hapy Crafting
Anita xx

Saturday, 16 December 2017

Bo Bunny - Christmas Carousel - Part 2 - Cards

Lynn here today to share some last minute Christmas card ideas. I have used images from the Bo Bunny Christmas Carousel collection. These were left over from making the Advent Calendar last month. I still have more, which I'm saving for a layout.


I cut all the images from the sheet called 'Wonder' - (A great bit of fussy cutting while watching TV!) Then using leftover pieces from other sheets and items from my stash, I created nine cards. All the edges were inked with Distress Inks.
All the cards are made with Bazzill Cardstock, and double-sided sticky foam pads. The die cut greetings are made from gold or silver Miri card and cut with Crafter's Companion dies.

 Christmas Cookies 
Doily, Ribbon, Liquid Pearls, Crystal Stickles, 'Wonder' and 'Magic' papers.

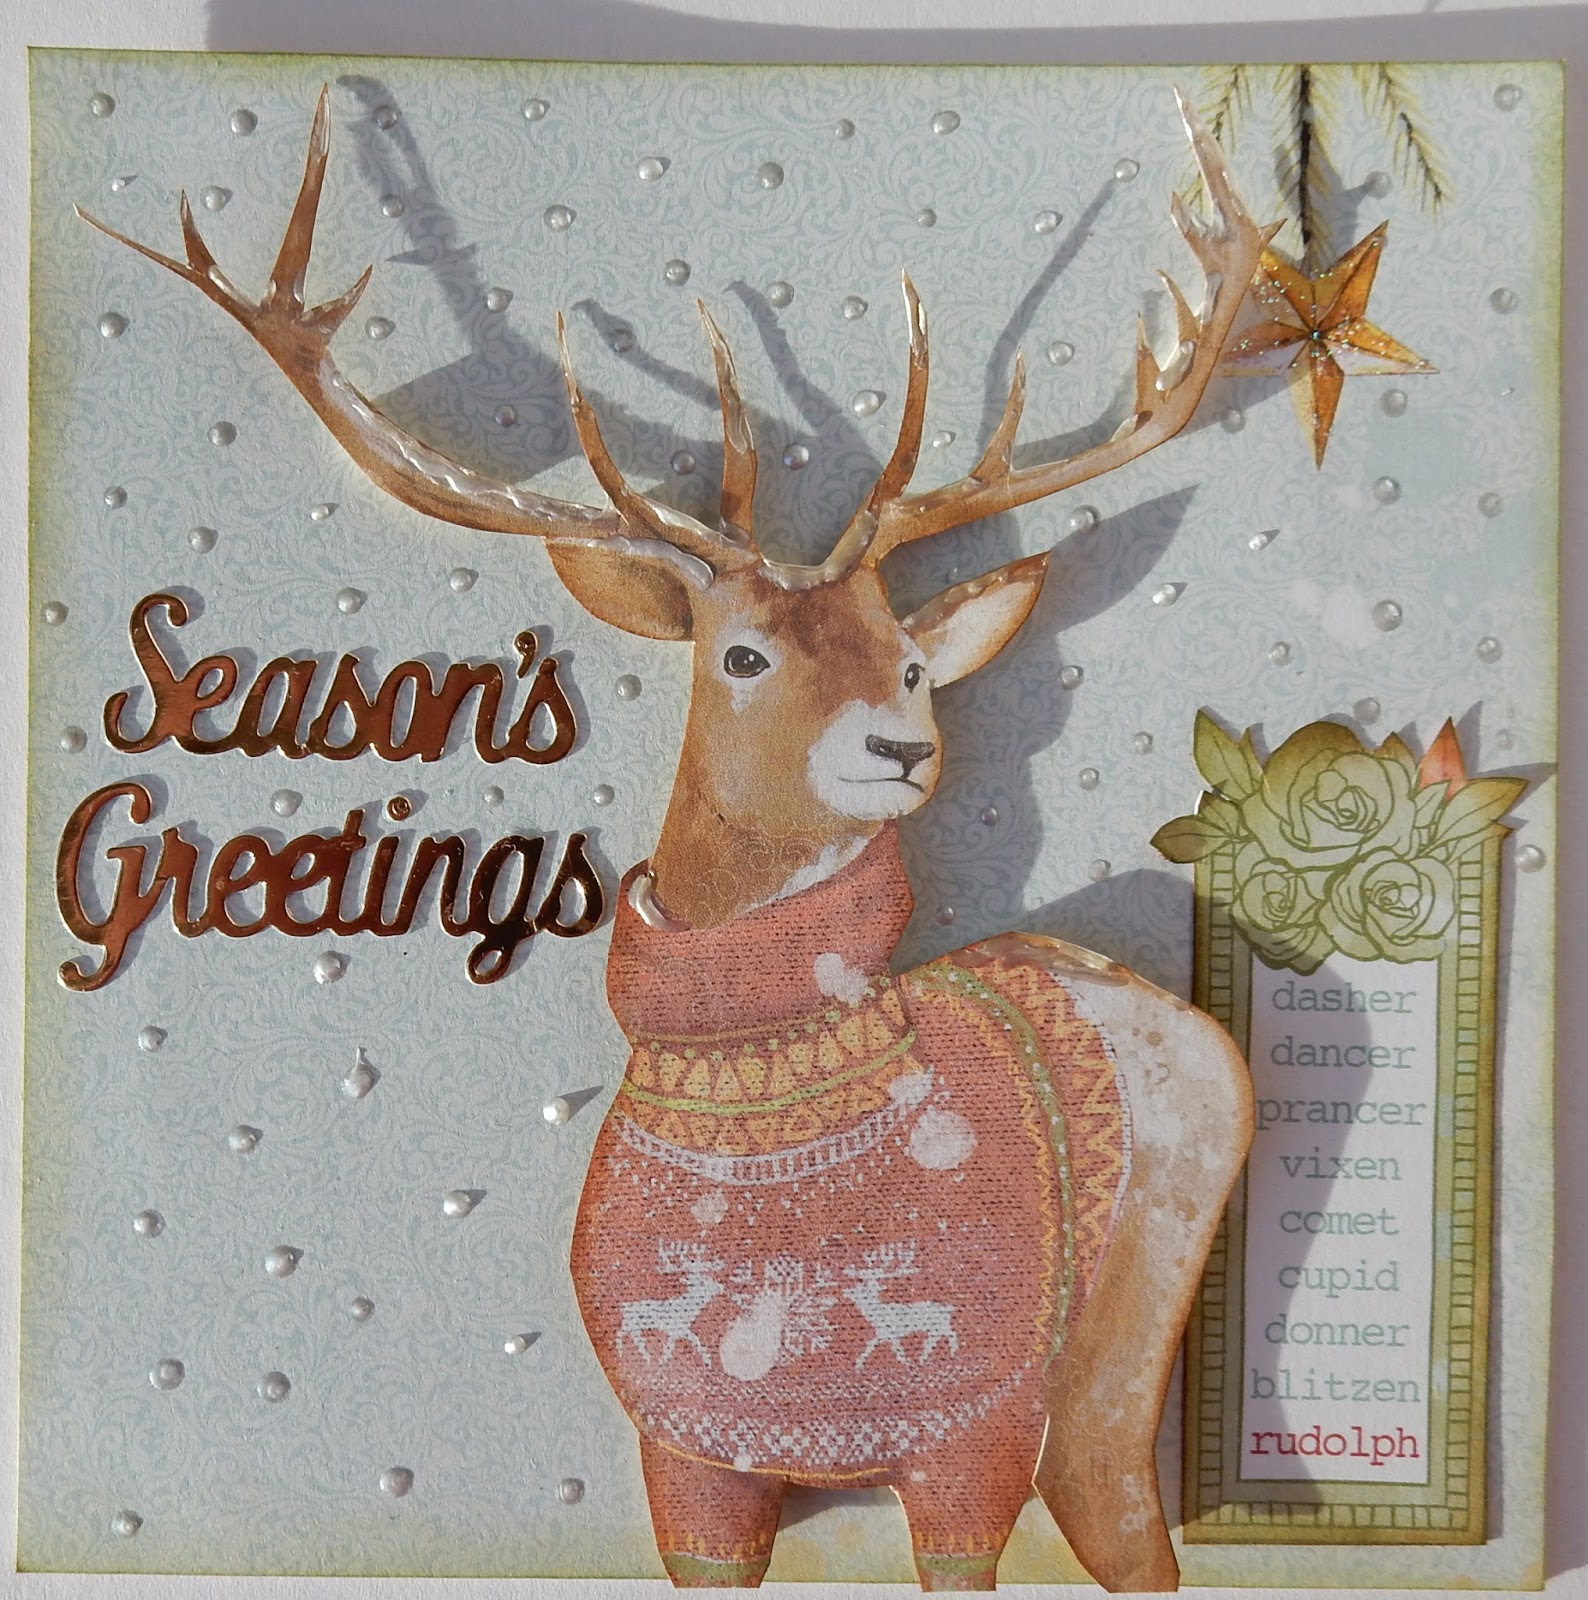
Stag
I had already cut the tree from this papers leaving the star at the top, so I turned it on it's head so the star is hanging.
'Jubilee', 'Magic' and 'Wonder' papers & Liquid Pearls.

Poinsettia and Cinnamon
Doily, Ribbon, Baker's Twine, Distress Stickles for flower centre, Icicle Stickles, 'Wonder' and 'Jubilee' papers.

Bells & Baubles
Martha Stewart punch, Baker's Twine, Embossilicious Embossing Folder, Crystal Stickles, 'Wonder' and 'Floral' papers.

  
Joy
Martha Stewart Punch, Baker's Twine, American Craft Thickers Alphabet Stickers, 'Wonder' paper.
 
 Gifts
'Floral' and 'Wonder' papers, Sizzix Die, ribbon, and Stickles.
 
 Warm Winter Mittens
Sequins, gems, Stickles, Baker's Twine, eyelets, pearls, bells, 'Wonder' and 'Jubilee' papers.

 Birdhouse
Ribbon, Stickles, 'Floral' and 'Carousel' papers.

 Jingle Bells
'Holly' and 'Wonder' papers, glittery twine, and eyelets.

Thanks for looking and wishing you all a very merry Christmas
Lynn x

Friday, 17 November 2017

Bo Bunny - Christmas Carousel

Hello, Lynn here today - to show you the fun I have been having with the Bo Bunny - Christmas Carousel collection, and an idea for counting down to the big day. The delightful papers have some lovely images in soft shades of pink, yellow, green and blue. For my first Christmas project this year, I have created an Advent Calendar, each day revealing memories from previous years in the form a tiny photograph.


For the background I used a sheet of  'Ocean Blue' Bazzill cardstock. Then I cut 0.5" off the bottom and one side of 'Magic' paper, to maintain the images at the top of the paper. I inked the edges with Victorian Velvet Distress Ink and mounted it onto the centre of the cardstock. Then I set about fussy cutting baubles and other details from the 'Believe' paper. 

I cut out all the numbered baubles from 1 to 25, then several more bows from other baubles.  Then I cut more images from the 'Wonder' paper. The images were inked with Distress Inks using the following shades -Victorian Velvet, Peeled Paint, Fossilized Amber and Weathered Wood.

Having printed some small photos, I cut circular images from them, each one about 1.25" in diameter. Once I had arranged everything on the background I took a photo on my mobile phone for reference, and drew a tiny pencil mark behind the hanger on each bauble. Then with a piercing tool I made a hole in the centre of each hanger and through the corresponding pencil mark. I attached each bauble to the background using a small gold brad. 


A photo was then glued in place under each paper bauble, making sure it could not be seen when the bauble was in place. With the intention that one bauble be swung aside each day to reveal the photo underneath. 

The next job was to embellish the images. Paper bows were added to the top of the baubles, and Stickles & Liquid Pearls were added to give sparkle and dimension. A coat of Glossy Accents gave a glassy effect to the snow globe and the panes of the lantern. I used Baker's Twine to add tiny bells here and there, and to string the mitts together. 

Strings were drawn in place with some glitter gel pens. Then I cut a title (greeting) from glitter card using the Crafter's Companion 'Merry Christmas' die and added this to the top of the layout. 


Finally I stiffened the whole page by glueing it to a sheet of 12" x 12" cardboard, from the back of a pad of papers, which made it sturdy enough to display on this small easel.

Thanks for looking
Enjoy the countdown to Christmas.
Lynn x

Wednesday, 10 May 2017

Bo Bunny - Kiss The Cook (Black & White v Colour)

Hi, Lynn here today with a couple of layouts featuring the versatile Bo Bunny collection - Kiss the Cook. I love the contrast of Black and white with bright colours in this collection.

For my first page I had a very colourful photo to scrap so I selected the black and white papers from the collection.


I trimmed the paper 'Menu', black and white checkered design by 0.5" on two sides and decorated it with two different Tim Holtz Layering Stencils (Nordic and Burlap), together with Black Soot Distress Ink.  With Distress Stain I added a few splats of Black Soot too. I then mounted this on a pale yellow (Chiffon) sheet of Bazzill cardstock. The cardstock was gutted first so I could use some to mat my photos.


With chipboard I selected letters and cut some triangles to make flags for bunting. These were painted with Picket Fence Distress Paint, then coloured with Distress Inks. They were all glazed with Glossy Accents. This really made them pop off the page. The bunting was completed with some black twine.


As you can see, I also added a few pieces of Idea-ology film strip ribbon, and a doily. The red tab sticker is from the Kiss The Cook Combo Stickers Sheet.

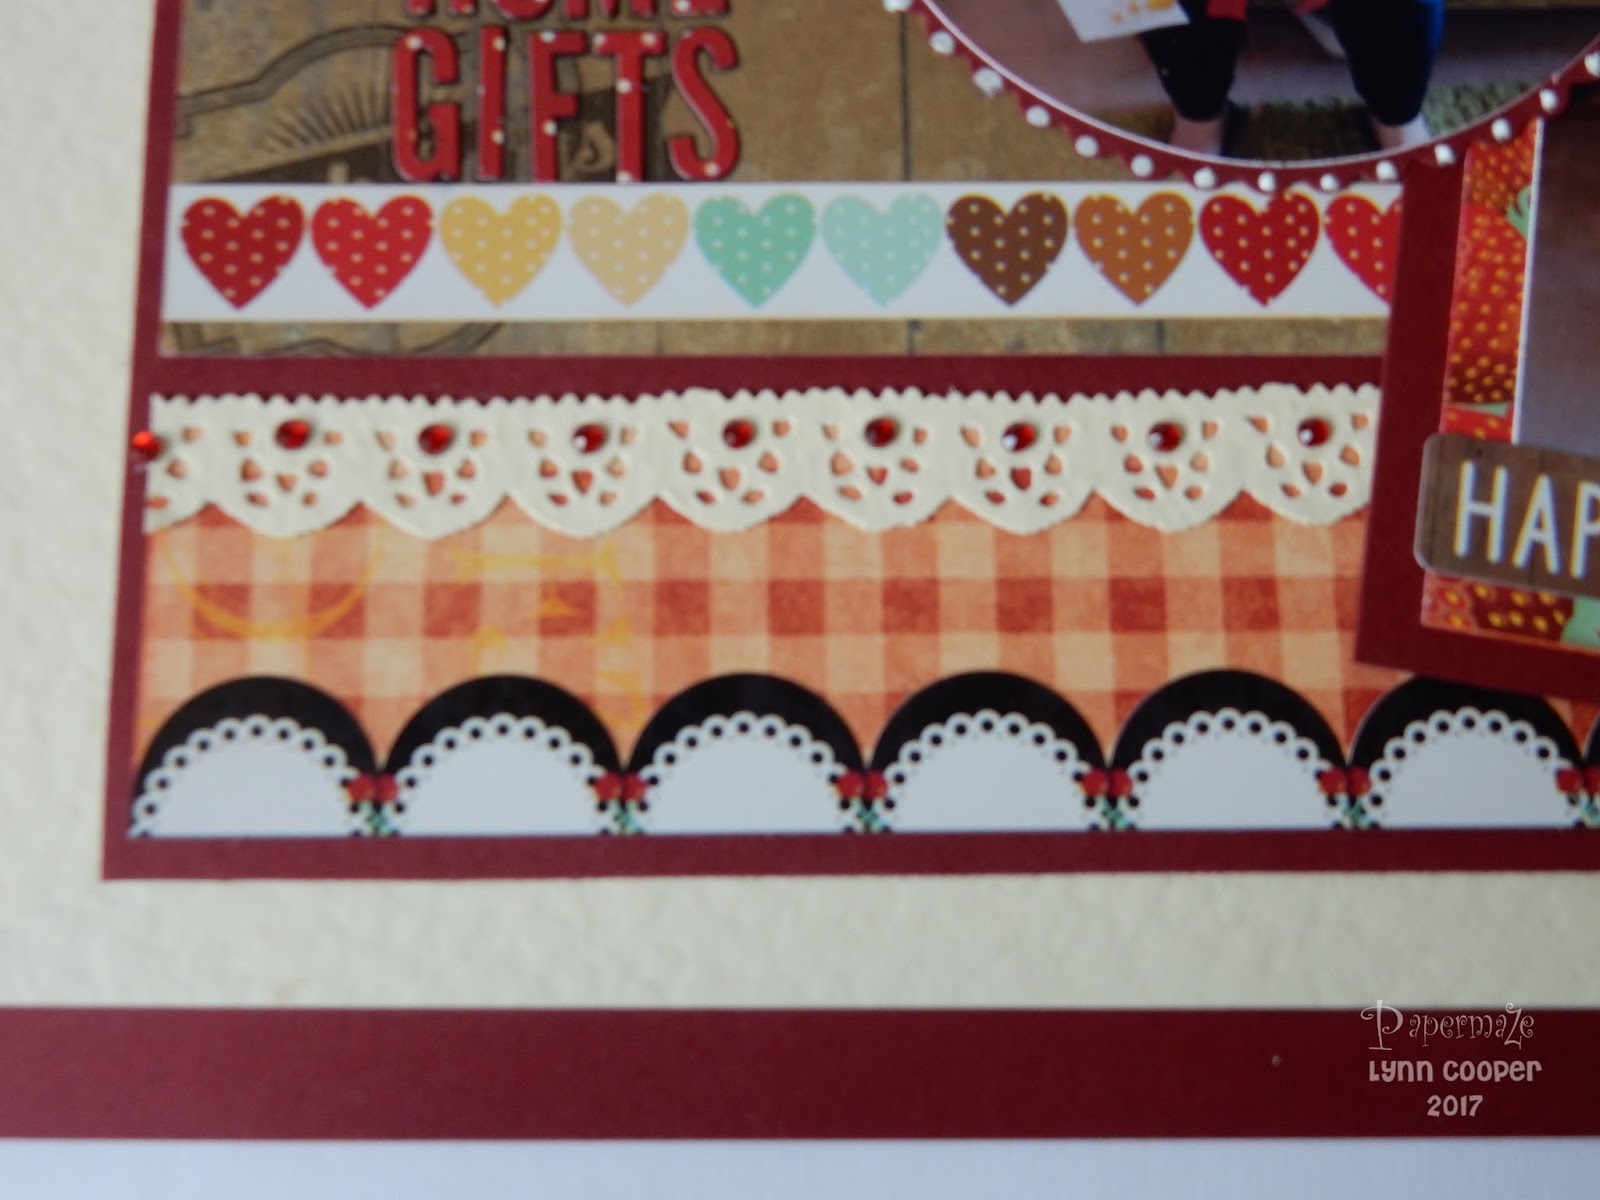
For my second page I used the brightly coloured papers to record the strawberry 'New Home' gift I made last summer for my daughter.  On this page I have matted everything including the whole layout. I used more  Chiffon and some Pomegranate Bazzill. The two circles were matted on the red card and then trimmed with scalloped scissors. each scallop had a dot of Liquid Pearls added to it.


I used many of the stickers from the Kiss The Cook Combo Stickers Sheet, including the borders (hearts and lace). I made another lacy border using cream Bazzill and the Sizzix Tim Holtz Sizzlets Decorative Strip -Vintage Lace Die

I mounted my main photo onto a strawberry element from the 'Kiss The Cook' paper, then the rest was made up using pieces from this sheet together with 'A La Mode', Baked Fresh' and 'Delicious'.

To finish I added a few buttons, twine and gems.
Thanks for looking
Lynn x

Wednesday, 22 March 2017

More Fun With PaperArtsy (JOFY) Stamps

Hi, Lynn back with another post for March, still using the same PaperArtsy stamps and technique as before, but decorating a different IKEA product this time.


I had a few old KNUFF magazine folders left empty when I sorted out some craft magazines. These were looking a bit tatty so I decided to treat them to the same technique as the bead chest I decorated at the beginning of the month. I made a start by allocating one to each colour of my stash of A4 coloured papers and cardstock.


I gave each box a light rub down with sand paper and then treated it to a quick coat of off-white acrylic paint. I kept the base plain this time as I wanted to dedicate each box to the colour of the papers it would store - I intended to display the colour in the images rather than the background.


The next step was to stencil (PaperArtsy) some images with Distress Paint. Then once this was dry I added stamped images and letters onto the box and the cartridge paper. 


The images on the paper were painted using Distress Inks and Markers, with a brush and water. I cut them out and used Gel Medium to stick them to the boxes. The finished boxes were treated to a covering of the Matt Gel Medium to protect them.

The boxes were finished off with a little sparkle from Stickles and texture and shimmer from Liquid Pearls.


This will be an ongoing project, I have completed some and others are in the process of being completed - but you get the idea. I will add photos to this post as I go - so pop back later to see what I did with the rest.


Thanks for looking
Lynn x